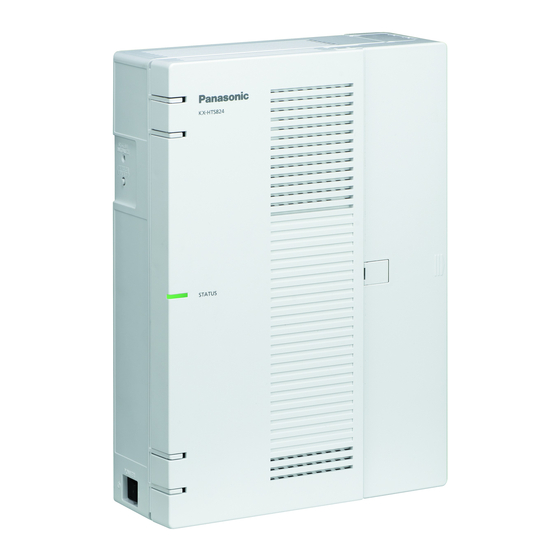
Panasonic KX-HTS824 Getting Started
Hybrid ip-pbx
Hide thumbs
Also See for KX-HTS824:
- Feature manual (80 pages) ,
- Getting started (107 pages) ,
- Manual (91 pages)
Table of Contents
Advertisement
Quick Links
Thank you for purchasing this Panasonic product.
Please read this manual carefully before using this product and save this manual for future use.
In particular, be sure to read "1.1 For Your Safety" in Important Information Guide before using this product.
KX-HTS Series: PJMPR Software File Version 001.10000 or later
Manuals and supporting information are provided on the Panasonic Web site at:
http://www.panasonic.net/pcc/support/pbx/
Getting Started
Hybrid IP-PBX
KX-HTS824
Model No.
KX-HTS32
Advertisement
Table of Contents
Troubleshooting

Related Manuals for Panasonic KX-HTS824


Summary of Contents for Panasonic KX-HTS824
- Page 1 In particular, be sure to read "1.1 For Your Safety" in Important Information Guide before using this product. KX-HTS Series: PJMPR Software File Version 001.10000 or later Manuals and supporting information are provided on the Panasonic Web site at: http://www.panasonic.net/pcc/support/pbx/...
- Page 2 SIP Phones: Compatible with the Video communication with the KX-NTV series. Refer to the Panasonic Web site for information on Compatible Terminal List as below, Click Compatible Terminal List at http://panasonic.net/pcc/support/pbx/index.html KX-HDV series terminals work as general SIP phone (except KX-HDV230).
- Page 3 System Components List of Abbreviations • SIP Extension -> Extensions of the PBX which use Session Initiation Protocol for communication. • SLT -> Single Line Telephone • Web-MC -> Web Maintenance Console Getting Started...
- Page 4 Introduction Introduction This Manual is designed to serve as an overall technical reference for the Panasonic Hybrid IP-PBX. It provides instructions for installing the hardware, and programing the PBX using Web Based programing. The Structure of this Manual This manual contains the following sections: Section 1 Safety Precautions Provides important information intended to prevent personal injury and property damage.
-
Page 5: Table Of Contents
Table of Contents Table of Contents 1 Safety Precautions ................. 7 For Your Safety ........................ 8 Important Safety Instructions ..................14 Precautions ........................15 Data Security ......................... 18 2 System Outline ..................19 Basic System Construction ..................20 2.1.1 System Configurations ....................20 2.1.2 System Connection Diagram .................. - Page 6 Table of Contents 3.9.2 PC Connection ......................87 3.9.3 Starting Web Maintenance Console ................88 3.9.4 Programming the PBX ....................90 3.9.4.1 Easy Setup Wizard ....................90 3.9.4.2 Login Management ....................90 3.10 Date and Time setting ....................92 3.11 Network and Router Function ..................
-
Page 7: Safety Precautions
Section 1 Safety Precautions This section provides important information intended to prevent personal injury and property damage. Getting Started... -
Page 8: For Your Safety
This symbol is used to alert users to a specific operating procedure that must be followed in order to operate the unit safely. Notice Panasonic assumes no responsibility for injuries or property damage resulting from failures arising out of improper installation or operation inconsistent with this documentation. Getting Started... - Page 9 1.1 For Your Safety WARNING For All Telephone Equipment • Do not install the product in any other way than described in relevant manuals. • Do not install the product in a place exposed to rain or moisture, or a place where water, oil, or other liquids can drip or splash onto on the product.
- Page 10 • Do not attempt to repair the power cord or plug. If the power cord or plug is damaged or frayed, contact an authorized Panasonic Factory Service Center for a replacement. • Do not use the product in health care facilities if any regulations posted in the area instruct you not to do so.
- Page 11 Unplug this unit from the AC outlet if it emits smoke, an abnormal smell or makes unusual noise. These conditions can cause fire or electric shock. Confirm that smoke has stopped and contact an authorized Panasonic Factory Service Center. •...
- Page 12 1.1 For Your Safety Wireless LAN features operate between 2.412 GHz and 2.472 GHz with a peak transmission power of 100 mW. CAUTION For All Telephone Equipment The product should be kept free of dust, moisture, high temperature (more than 40 ℃ [104 ℉]) and •...
- Page 13 1.1 For Your Safety • Before touching the product (PBX, cards, etc.), discharge static electricity by touching ground or wearing a grounding strap. Failure to do so may cause the PBX to malfunction due to static electricity. • When relocating the equipment, first disconnect the telecom connection before disconnecting the power connection.
-
Page 14: Important Safety Instructions
Contact your telephone company. If all SLTs operate properly, there may be a problem with your PBX. Do not reconnect the PBX to the trunks until it has been serviced by an authorized Panasonic Factory Service Center. 1.2 Important Safety Instructions... -
Page 15: Precautions
1.3 Precautions 1.3 Precautions Disposal of Old Equipment and Batteries Only for European Union and countries with recycling systems These symbols on the products, packaging, and/or accompanying documents mean that used electrical and electronic products and batteries must not be mixed with general household waste. - Page 16 1.3 Precautions • APPLICABLE ONLY TO TELECOM CUSTOMERS WHO HAVE AUTOMATIC ACCESS TO OTHER CARRIERS FOR TOLL CALLS When calling back a number from the Caller ID list, all numbers prefixed with "0 + AREA CODE" will be automatically forwarded to your toll carrier. This includes numbers in your local calling area. The zero + area code should either be removed when calling back local numbers, or check with your toll carrier that a charge will not be levied.
- Page 17 1.3 Precautions It is strongly recommended that passwords of 10 numbers or characters be used for maximum protection against unauthorized access. For a list of numbers and characters that can be used in system passwords, refer to "1.2 Entering Characters" in the Programming Item List. Getting Started...
-
Page 18: Data Security
1.4 Data Security 1.4 Data Security In order to use the PBX safely and correctly, the Security Requirements below must be observed. Failure to do so may result in: • Loss, leakage, falsification or theft of user information. • Illegal use of the PBX by a third party. •... -
Page 19: System Outline
Section 2 System Outline This section provides general information on the PBX, including the system capacity and specifications. Getting Started... -
Page 20: Basic System Construction
2.1 Basic System Construction 2.1 Basic System Construction 2.1.1 System Configurations Main Unit The main unit contains a mother board for controlling PBX functions. Getting Started... -
Page 21: System Connection Diagram
2.1.2 System Connection Diagram 2.1.2 System Connection Diagram Remote site IP Network Analog Trunk Smartphone SIP Phone (Softphone) Smartphone (Softphone) Battery Switching Hub SIP Phone Doorphone & Fax Machine Door Opener Softphone Communication IP Camera & Video Doorphone Getting Started... -
Page 22: Block Diagram
2.1.3 Block Diagram 2.1.3 Block Diagram 6 channels 24 channels Main SIP Trunk RJ45 RJ45 L2SW Wireless Internet RJ45 8 ports LCOT4+SLC8 RJ11 LCOT4 24 ports RJ11 PSTN SLC8 RJ11 LCOT4 RJ11 SLC8 RJ11 SLC8 RJ11 Doorphone DPH2 Door Opener AC Input AC/DC Unit DC Battery input... -
Page 23: Typical Network Setting Example
2.1.4 Typical Network Setting Example 2.1.4 Typical Network Setting Example An example of typical network connection is shown below. When installing in a new office or an office where there is no network infrastructure. IP Network / Analog Trunk SIP Trunk Built-in Router (with wireless LAN) Smartphone... - Page 24 2.1.4 Typical Network Setting Example When installing in an office that already has a network infrastructure. IP Network / Analog Trunk SIP Trunk Router Smartphone WAN port (Softphone) DHCP Server SIP Phone SIP Phone SIP Phone Getting Started...
- Page 25 2.1.4 Typical Network Setting Example When installing the PBX without connecting it to an existing network. IP Network / Analog Trunk SIP Trunk Router Smartphone (Softphone) Switching Hub SIP Phone SIP Phone Getting Started...
-
Page 26: Optional Equipment
Card (LCOT4) KX-HT82470 8-Port Single Line 8 ports Standard Telephone Line Interface with Telephone Extension Caller ID (SLC8) Card KX-HT82460 2-Port Doorphone/Door 2 ports Panasonic Proprietary Door phone Interface Opener Card with door opener (no sensor interface) (DPH2) Getting Started... -
Page 27: Specifications
2.3 Specifications 2.3 Specifications 2.3.1 General Description Power Input AC 100-240 V, 50/60 Hz, 1.3-0.9A Power Supply Power consumption: 60W Unit (PSU) External Backup External battery port is supported (DC 12 V). For more information, refer to Battery 3.2.10 Backup Battery Connection. Real Time Clock Lithium battery back up Data retention period 7 years... -
Page 28: Characteristics
2.3.2 Characteristics Weight (when fully mounted) Under 2.2 kg (4.9 lb) Installation Environment Wallmount Horizontal (Desktop) installation 2.3.2 Characteristics Terminal Equipment Loop Limit • SLT: 600 Ω including set • Doorphone: 20 Ω Minimum Leakage Resistance 15 000 Ω minimum Maximum Number of Extension 1 for SLT Instruments per Line... - Page 29 2.3.3 System Capacity Maximum number (total number) Maximum Analog Trunk port number Maximum SIP Trunk port number When G729 settings are contained in Codec used by the SIP Trunk, the maximum number of combinations of the Analog Trunk port number and SIP Trunk port number is as follows: Maximum number (total number) Maximum Analog Trunk port number Maximum SIP Trunk port number...
- Page 30 2.3.3 System Capacity Maximum number of concurrent calls • The maximum number of calls that can be made simultaneously with HTS824 as below: Without Remote SIP With Remote SIP Without G729 settings 12 calls 10 calls With G729 settings 10 calls 8 calls Remote SIP: Video Support is set Enable, and Phone Location is set Remote.
- Page 31 2.3.3 System Capacity Maximum number of specific service Maximum number of specific services will be managed for the items listed below. Max. Item Description Number of remote internal lines Management of the number of internal lines set as active at the same time Remote(MRG) in Phone Location settings under SIP internal lines (Remote internal lines) (note 1)
- Page 32 2.3.3 System Capacity • When the PBX starts up with an invalid configuration, some cards will be ignored. Slot Slot type Card Name Maximum Number Trunk/Doorphone Slot LCOT4 DPH2 Extension Slot SLC8 DSP Resources KX-HTS series has a built-in DSP. There are 2 types of DSP resources (Data-ch / PCM-ch), and there is a maximum of 14 resources each on the KX-HTS series system.
-
Page 33: Installation
Section 3 Installation This section describes the procedures to install the PBX. Detailed instructions for planning the installation site, installing the main unit and optional service cards, and cabling of peripheral equipment are provided. Further information on peripheral equipment installation is included. -
Page 34: Before Installation
Be sure to comply with all applicable laws, regulations, and guidelines. Notice Panasonic assumes no responsibility for injuries or property damage resulting from failures arising out of improper installation or operation inconsistent with this documentation. Safety Installation Instructions... - Page 35 3.1.1 Before Installation Notice Do not install the system in the following locations: • On or near computers, or other office equipment, as well as microwave ovens or air conditioners. (It is preferable not to install the system in the same room as the above equipment.) •...
- Page 36 3.1.1 Before Installation • We recommend parallel-connecting the SLT to an Analog Trunk to serve as an emergency phone in times of power failure or equipment failure. Analog Trunk Preparing the Network Environment Be sure to prepare your network’s environment for the installation of the PBX according to the intended PBX networking configuration.
-
Page 37: Installation Of The Pbx
3.2 Installation of the PBX 3.2 Installation of the PBX 3.2.1 Unpacking Unpack the box and check the items below: • Main unit • AC power cord • Strap band • Screw × 2 (For Wall Mounting) • Washer × 2 (For Wall Mounting) Getting Started... -
Page 38: Names And Locations
3.2.2 Names and Locations 3.2.2 Names and Locations Inside View (The front cover is open.) A STATUS Indicator K LAN1 port B SYSTEM INITIALIZE Switch L Extension Slot C Wireless LAN SETUP (WLAN SETUP) button M SLT8 Interface D POWER Switch N FG Terminal E Cable Cover O AC Inlet... -
Page 39: Opening/Closing The
3.2.3 Opening/Closing the front cover 3.2.3 Opening/Closing the front cover Opening the front cover CAUTION Do not open the front cover soon after turning off the power. There is a risk of receiving burns. Before opening the front cover, the AC power cord must be removed from the AC inlet. Confirm that the power switch is turned off. - Page 40 3.2.3 Opening/Closing the front cover Slide out the cable cover until the end and turn the screws counterclockwise to loosen them. Then, open the cable cover turning 90 degrees as shown below. Disconnect the power cable. Open the front cover. Getting Started...
- Page 41 3.2.3 Opening/Closing the front cover Closing the front cover Close the front cover. Then, close the cable cover turning 90 degrees as shown below. Turn the screws clockwise to tighten them. Slide in the cable cover and turn the screws clockwise to tighten them. Then, close the screw cover. CAUTION For safety reasons, fix the front cover and cable cover of the PBX with screws.
- Page 42 3.2.3 Opening/Closing the front cover Removing the Cable Cover Slide out the cable cover until the end and open it. Open the cable cover turning 90 degrees as shown below. Holding the cable cover open at about a 90 angle, remove the cable cover by pushing it in the direction of the arrow as shown below.
-
Page 43: Frame Ground Connection
3.2.4 Frame Ground Connection 3.2.4 Frame Ground Connection Loosen the screw. Insert an grounding wire (user-supplied). Tighten the screw. Connect the grounding wire to ground. To ground Screw Grounding wire WARNING • Proper grounding (connection to ground) is very important to reduce the risk to the user of electrocution or to protect the PBX from the bad effects of external noise in the case of a lightning strike. - Page 44 3.2.5 Installing/Removing the Optional Service Cards • When installing or removing the optional service cards, do not put pressure on any parts of the mother board. Doing so may result in damage to the PBX. • Disconnect the AC power source before servicing the equipment. Note Make sure the AC power cord is not connected to the AC inlet of the PBX.
- Page 45 3.2.5 Installing/Removing the Optional Service Cards Remove the dummy cover plate for the Free slot. Cut off any excess plastic in order to make the surface smooth. Dummy Cover Plate (1) Cut here. Correct Incorrect Note When removing the dummy cover plate, use plastic nippers. We do not recommend using a knife such as a retractable utility knife.
- Page 46 3.2.5 Installing/Removing the Optional Service Cards Position the card in the open slot, making sure that the tabs on the both sides of the card fit into place. Then, holding the card firmly in place, lower the rear end so that the holes of the card are aligned with the screw holes.
- Page 47 3.2.5 Installing/Removing the Optional Service Cards Removing Optional Service Card from the Free Slot Loosen and remove the spacers (①). Holding the rear end of the card, pull the card in the direction of the arrows. Getting Started...
-
Page 48: Securing The Cables
3.2.6 Securing the Cables 3.2.6 Securing the Cables Attach the included strap to either of the 2 rails depending on your preference. Bind the cables inserted into the CO4 Interface using hook clips. (You can route the cables using hook clips so that the USB port will not be blocked by the cables.) A Slit B Hook Clip... - Page 49 3.2.6 Securing the Cables Close the cable cover. (For details, refer to "3.2.3 Opening/Closing the front cover".) Note • For safety reasons, do not stretch, bend, or pinch the cables. Getting Started...
-
Page 50: Placing The Pbx On A Desktop
3.2.7 Placing the PBX on a Desktop • If you prefer, you can cut the other side of the cable cover and run the cables through that opening. For safety reasons, smooth the cut edges. Note Use plastic nippers. We do not recommend using a knife such as a retractable utility knife. Cut Here •... -
Page 51: Wall Mounting
3.2.8 Wall Mounting CAUTION • When the PBX is placed on a desktop, make sure that the PBX is placed as indicated in the diagram below. Do not place it on its side or upside down. • Do not block the openings of the PBX. Allow space of at least 20 cm (8 in) above and 10 cm (4 in) at the sides of the PBX. - Page 52 3.2.8 Wall Mounting Wall Mounting Procedures CAUTION Drive mounting screws into the wall. Be careful to avoid touching any metals laths, wire laths or metal plates in the wall. Mounting on a Wooden Wall The included screws may be used when mounting the main unit on a wooden wall. Place the template (found on the last page of this manual) on the wall to mark the 2 screw positions.
- Page 53 3.2.8 Wall Mounting Hook the main unit on the screw heads. Getting Started...
- Page 54 3.2.8 Wall Mounting Mounting on a Concrete The included screws may be used when mounting the main unit on a concrete. User supplied anchor plugs are also necessary. Place the template (found on the last page of this manual) on the wall to mark the 2 screw positions. A Template B 225 mm (8-7 / 8 in) Note...
-
Page 55: Surge Protector Installation
3.2.9 Surge Protector Installation Note • As indicated above, do not tighten the screw fully. • The pull-out strength of the installation area must be at least 294 N (30 kgf) per screw. • Do not block the operations of the cabinet. Allow space of at least 20 cm (8 in) above, 10 cm (4 in) at the sides, and 10 cm (4 in) below the PBX. - Page 56 3.2.9 Surge Protector Installation Installation Trunk Trunk Trunk Surge Protector Terminal Board Extn. Extn. Frame Ground Extn.: Extension line Ground Outside Installation (Main Building) Surge Protector Trunk Trunk (Another Building) Terminal Board Extn. Extn. Surge Protector Extn. Extn. Ground Extn.: Extension Line If you install an extension outside of the building, the following precautions are recommended: Install the extension wire underground.
-
Page 57: Backup Battery Connection
3.2.10 Backup Battery Connection Installation of an Ground Rod Surge Protector Trunk Grounding Wire (Underground) Ground Rod Connect the ground rod to the surge protector using a grounding wire with a cross-sectional area of at least 1.3 mm Bury the ground rod near the protector. The grounding wire should be as short as possible. The grounding wire should run straight to the ground rod. - Page 58 3.2.10 Backup Battery Connection Note • The recommended maximum capacity is 28 Ah, to maintain effective battery charge. • The Back-up Battery Cable should not be exposed to direct sunlight. Keep the Back-up Battery Cable and the backup battery away from heating appliances and fire. Place the backup battery in a ventilated place.
-
Page 59: The Mother Board And Option Cards
3.3 The Mother Board and Option Cards 3.3 The Mother Board and Option Cards 3.3.1 Mother Board Function The motherboard has the following functions preinstalled. • Support for up to 8 trunks (SIP trunks and analog trunks combined) • Support for up to 24 extensions (SIP extensions and analog extensions combined) The following types of connections are supported for connecting to SIP extensions, SIP trunks, and PCs on private IP networks. - Page 60 3.3.1 Mother Board Note • The maximum length of the CAT 5/CAT 5e cables to be connected to the mother board is 100 m(328 ft). • For details about connecting to a LAN, refer to "3.12 LAN Connection". WARNING A lithium battery is used in the mother board. There is a risk of explosion if the battery is replaced with the incorrect type.
- Page 61 3.3.1 Mother Board Line 1-4 RJ11×4 Connector Input (I)/ Signal Name Function Output (O) FXO-A-TIP CO Tip Port1 - 4A 3B 4B 3C 4C 3D FXO-A-RING CO Ring Port1 - FXO-B-TIP CO Tip Port2 - FXO-B-RING - CO Ring Port2 FXO-C-TIP CO Tip Port3 -...
- Page 62 3.3.1 Mother Board LAN Port/WAN Port (1000BASE-T) Input (I)/ Signal Name Function Output (O) TRD0 (+) Transmit and receive - LAN1 LAN2/WAN2 WAN1 data 0 (+) TRD0 (-) Transmit and receive - data 0 (-) TRD1 (+) Transmit and receive -...
-
Page 63: Lcot4 Card (Kx-Ht82480)
3.3.2 LCOT4 Card (KX-HT82480) Indication Color Description 10BASE-T/ LINK Green Link status indication 100BASE-TX/ • OFF: Off-line 1000BASE-T • ON: Linked normally • Flashing: In communication 1000 Yellow Data transmission speed indication • OFF: Off-line/10 Mbps/100 Mbps • ON: 1000 Mbps WAN/LAN LINK Green... -
Page 64: Slc8 Card (Kx-Ht82470)
3.3.3 SLC8 Card (KX-HT82470) User-supplied (not included): RJ11 connector, Copper wire Note • Power failure Transfer feature between LCOT and SLC is not supported. • To confirm the trunk connection, refer to "Confirming the Trunk Connection" in "3.8 Starting the PBX". PIN Assignments LINE 5-8 RJ11×4 Connector Input (I)/... - Page 65 3.3.3 SLC8 Card (KX-HT82470) PIN Assignments EXTN 9-12/17-20 RJ11×4 Connector Input (I)/ Signal Name Function Output (O) FXS-A-TIP - EXT Tip Port 9/17 4A 3B 4B 3C 4C 3D FXS-A-RING EXT Ring Port 9/17 - FXS-B-TIP EXT Tip Port 10/18 -...
-
Page 66: Dph2 Card (Kx-Ht82460)
3.3.4 DPH2 Card (KX-HT82460) 3.3.4 DPH2 Card (KX-HT82460) Function A doorphone card for 2 doorphone and 2 door opener. (1) To Door opener (2) To Doorphone Accessories and User-supplied Items Accessories (included): Spacer x 3 User-supplied (not included): RJ11 connector, Copper wire Note For details about connecting to a doorphone and/or door opener, refer to "3.6 Connecting Doorphones and Door Openers". -
Page 67: Connecting Outside Trunks
3.4 Connecting Outside Trunks 3.4 Connecting Outside Trunks 3.4.1 Connecting SIP Trunks A typical connection example is shown below for connecting to 2 SIP carriers simultaneously. For details about connecting SIP trunks, refer to "Network Configuration" in the Programming Item List. Connecting via WAN1 IP Network SIP Carrier-A... - Page 68 3.4.1 Connecting SIP Trunks Connecting via an external router IP Network SIP Carrier-A SIP Carrier-B Router WAN1 Smartphone (Softphone) SIP Phone SIP Phone In the case of using an SIP carrier’s line separately from a regular IP network IP Network / IP Network / SIP Carrier-A SIP Carrier-B...
-
Page 69: Connecting Analog Trunks
3.4.2 Connecting Analog Trunks • Each trunk port can be set to a SIP carrier or an analog line. • Both of the WAN ports (WAN1 and WAN2) can be used for either SIP carrier connections (private network) or IP network connections (public network). •... - Page 70 3.4.3 Bandwidth Requirements Example: No. of SIP Trunk (G.711): 2 No. of Remote SIP Extension (G.729): 2 No. of Remote SIP Extension (G711, and Remote Video): 1 In this case, the required bandwidth will be as follows: Required Bandwidth = 87.2 × 2 + 31.2 × 2 + (87.2 + 512) × 1 = 836 kbps Bandwidth Limitation Packets used for voice and video calls have priority over other packets.
-
Page 71: Connecting Extensions
2.3.1 PBX Configuration—[2-1] Extension—Port in Programming Item List. Important When connecting the following Panasonic IP terminals, please confirm the firmware version by the phone programming menu (KX-HDV series) or Installation Wizard (KX-NTV series). The following or later version is available. - Page 72 3.5.1 Connecting SIP Extensions IP Network / SIP Trunk Built-in Router (with wireless LAN) Smartphone (Softphone) Switching Hub SIP Phone Communication IP Camera & Video SIP Phone Doorphone Getting Started...
- Page 73 3.5.1 Connecting SIP Extensions Terminal KX-HDV series KX-NTV series 3rd party SIP KX-HTS Set the DHCP Mode Enter your password to Registration Password of the Setup/ of KX-HTS series LAN SIP extension port. preparation side to Server. Refer to “2.3.1 PBX Configuration—[2-1] Extension Refer to 3.3.1 Network —Port-SIP Extension—Registration Password”...
- Page 74 3.5.1 Connecting SIP Extensions IP Network / SIP Trunk Router WAN port DHCP Server SIP Phone Getting Started...
- Page 75 3.5.1 Connecting SIP Extensions Terminal KX-HDV series KX-HTS Set the existing LAN network address on the WAN port. Setup/ Refer to ”2.3.7 PBX Configuration—[2-7] Extension—SIP Extension Property—IP preparation Address of SIP Extension in existing router” in Programming Item List. Connect KX-HTS series WAN port to existing LAN. Terminal Initialize (refer to KX-HDV series manual).
- Page 76 3.5.1 Connecting SIP Extensions Remarks The terminal is registered to the SIP extension port to which the Registration Password is entered. To confirm that the terminal has been registered to the SIP extension port, refer to “2.3.1 PBX Configuration—[2-1] Extension— Port—SIP Extension—SIP Registration Status in Programming Item List.
-
Page 77: Lan Connections For Sip Extension
3.5.2 LAN Connections for SIP Extension 3.5.2 LAN Connections for SIP Extension When an SIP Extension is connected to the LAN and power is supplied for the first time, you will be prompted to set network parameters. The network parameters must be set for the SIP Extension before it can be used. - Page 78 3.5.2 LAN Connections for SIP Extension Example: KX-HDV230 Ethernet Straight Cable AC Cord Adaptor To a Switching Hub To Wall Socket Connecting a PC to an SIP Extension You can connect a PC to some SIP Extensions using the SIP Extension’s secondary port. In this case, only a single port from the LAN’s network interface (switching hub) is required to connect both the SIP Extension and PC to the LAN.
-
Page 79: Connecting Analog Extensions (Slt)
3.5.3 Connecting Analog Extensions (SLT) 3.5.3 Connecting Analog Extensions (SLT) Maximum Cable Distance ø 0.4 mm (26 AWG): 698 m (2289 ft) ø 0.5 mm (24 AWG): 1128 m (3700 ft) ø 0.6 mm (22 AWG): 1798 m (5898 ft) Notice The maximum cabling distance may vary depending on the conditions. -
Page 80: Connecting Doorphones And Door Openers
3.6 Connecting Doorphones and Door Openers 3.6 Connecting Doorphones and Door Openers Up to 2 doorphones (KX-T30865/KX-T7765) and 2 door openers (user-supplied) can be installed. Maximum Cabling Distance Maximum Cable Distance ø 0.42 mm (25 AWG): 70 m (230 ft) ø... - Page 81 3.6 Connecting Doorphones and Door Openers Screw To DPH2 Card Note Two kinds of screws are included with the doorphone. Please choose the appropriate kind for your wall type. : when a doorphone plate has been fixed to the wall : when you wish to install the doorphone directly onto the wall Connect the wires to the screws located in the back cover.
- Page 82 3.6 Connecting Doorphones and Door Openers Connecting Doorphones (KX-T30865/KX-T7765) Connect the doorphone card to the terminal box using 4-conductor wiring and modular connectors. View of Doorphone Connector Jack Doorphone 2 Doorphone 1 Terminal Box Doorphone 1 Doorphone 2 4-conductor wiring is required. Getting Started...
- Page 83 3.6 Connecting Doorphones and Door Openers Connecting Door Openers Use a flathead screwdriver to press and hold open the button below the terminal, and insert the wire coming from the door opener into the terminal. Door Opener 1 Door Opener 2 To the door openers Wrap the strap around all of the cords.
-
Page 84: Connection Of Peripherals
3.7 Connection of Peripherals 3.7 Connection of Peripherals LAN Port USB Port Maximum Distance Maximum Distance 100 m (328 ft) 100 m (328 ft) Switching Hub Maximum Distance 5 m (16 ft) USB Memory Device USB Interface for USB Memory Device The PBX is equipped with a USB 2.0 interface. -
Page 85: Starting The Pbx
3.8 Starting the PBX 3.8 Starting the PBX WARNING Make sure that the AC outlet is properly grounded, then securely connect the 3-pin AC plug including the grounded pin. CAUTION • Use only the AC power cord included with the PBX. •... - Page 86 3.8 Starting the PBX SYSTEM INITIALIZE switch STATUS Indicator POWER switch Note • After the PBX is initialized, you can restore system data to the PBX that has been backed up earlier. For details about backing up and restoring system data, refer to "4.3.3 Maintenance—[2-3] System Control—System Data Backup &...
-
Page 87: Programming Information
3.9 Programming Information 3.9 Programming Information 3.9.1 Overview of Web Maintenance Console Web Maintenance Console is designed to serve as an overall system programming reference for the PBX. You can program and control the PBX over an IP network using Web Maintenance Console. This section describes programming basic items using Web Maintenance Console. -
Page 88: Starting Web Maintenance Console
3.9.3 Starting Web Maintenance Console Note • Use an Ethernet cable with an RJ45 connector to connect a PC to the PBX. Connection via Internet WAN Port Internet Router Note For details about connecting WAN to the PBX, refer to "3.13 WAN Connection". 3.9.3 Starting Web Maintenance Console System Requirements For the system requirements of the PC (operating system, hardware specifications, supported browsers... - Page 89 3.9.3 Starting Web Maintenance Console Access Web Maintenance Console: LAN Connection: Launch your Web browser and input the IP address into the address bar. The input method will differ according to the PC’s connection to the PBX. The default IP address for the LAN port of the PBX is 192.168.0.101.
-
Page 90: Programming The Pbx
3.9.4 Programming the PBX The Web Maintenance Console login screen is displayed. Log in with the Installer level account name and the password. • The Installer level account name is "INSTALLER". • The Installer level account password is preprogrammed in Web Maintenance Password for Remote Access. - Page 91 3.9.4 Programming the PBX • Using a Manager Extension, you can use special number operations to set whether or not to connect to the Web-MC remotely. For more information, refer to 2.1.2 Programming by Dial for Manager in Feature Manual. •...
-
Page 92: Date And Time Setting
3.10 Date and Time setting 3.10 Date and Time setting The following items can be set for the date and time settings. For details about date and time settings, refer to "2.2.1 PBX Configuration—[1-1] System—Date & Time-Date & Time" in the Programming Item List. •... -
Page 93: Network And Router Function
3.11 Network and Router Function 3.11 Network and Router Function Following table describes networking functions and router functions. For details about settings, refer to "3.1 Network Configuration" in the Programming Item List. Getting Started... -
Page 94: Lan Connection
3.12 LAN Connection 3.12 LAN Connection 3.12.1 Wired LAN Connection The PBX is equipped with a LAN port for connecting to a LAN so that SIP Extensions and PCs can be connected on a private IP network. When the PBX is connected to the LAN for the first time, you must assign IP addressing information to the PBX. - Page 95 3.12.1 Wired LAN Connection Connection for 1000BASE-T Switching Hub PBX (LAN Port) Signal Name Pin No. Pin No. Signal Name TRD0 (+) TRD0 (+) TRD0 (−) TRD0 (−) TRD1 (+) TRD1 (+) TRD2 (+) TRD2 (+) TRD2 (−) TRD2 (−) TRD1 (−) TRD1 (−) TRD3 (+)
-
Page 96: Wireless Lan Connection
3.12.2 Wireless LAN Connection 3.12.2 Wireless LAN Connection Connecting wireless devices to Main Unit Smartphone (Softphone) Perform settings for the Wireless LAN connection of the HTS Series. Change the SSID and the Passphrase. Also change other settings as necessary. For details about the Wireless LAN Connection, refer to "3.5 Network Configuration—[6] Wireless" in the Programming Item List. - Page 97 3.12.2 Wireless LAN Connection – Use Wireless LAN Setup Authorized MAC Configuration to fix the devices that can be connected (to prevent unintended Wireless LAN connections from third parties). – Avoid using an easy-to-guess passphrase (or Pre-Shared Key). – Regularly change your passphrase (or Pre-Shared Key). –...
-
Page 98: Wan Connection
3.13 WAN Connection 3.13 WAN Connection Description The following WAN connection types are supported. WAN Type Description Dynamic IP Address Retrieves an IP address dynamically from a DHCP server. Static IP Address Sets a static IP address. PPPoE Obtains an IP address dynamically from a PPPoE server. You can confirm the current connection status of the WAN interface in Web Maintenance Console. -
Page 99: Confirming Connections
Section 4 Confirming Connections This section describes the basic checks and operation methods following PBX installation for making and receiving calls to and from extensions and outside lines. Getting Started... -
Page 100: Making And Receiving Calls
4.1 Making and Receiving Calls 4.1 Making and Receiving Calls The following is a description of the basic checks and operation methods following PBX installation for making and receiving calls to and from extensions and outside lines. 4.1.1 Calling Another Extension To call an extension (Intercom Call) –... -
Page 101: Maintenance
Section 5 Maintenance This section describes maintenance procedures. Getting Started... -
Page 102: System Data Backup And Restore
5.1 System Data Backup and Restore 5.1 System Data Backup and Restore A PBX’s system data can be backed up to a USB memory device inserted into the PBX’s USB port or to a PC in the PBX’s LAN network. At a later time, the backed up data can be restored to the PBX. Note Operation data that is presently running is stored to the KX-HTS’... -
Page 103: Software Upgrading
Main unit software on the PBX’s motherboard. Terminal software Firmware of supported SIP extensions. Only Panasonic telephones are supported. For details about a specific telephone, refer to the telephone's documentation. Note • To transfer files from USB memory to HTS, store them in the directory below. -
Page 104: System Initialization Procedure
5.3 System Initialization Procedure 5.3 System Initialization Procedure The system data can be returned to its initial state by following the procedure below. While pressing and holding the Initialize Switch, turn the power ON. The LED will light amber. Continue holding down the Initialize Switch (to confirm the holding). The LED will flash amber at a rate of 240 flashes/minute. -
Page 105: Troubleshooting
Section 6 Troubleshooting This section provides information on the PBX and telephone troubleshooting. Getting Started... -
Page 106: Troubleshooting
6.1 Troubleshooting 6.1 Troubleshooting 6.1.1 Installation PROBLEM PROBABLE CAUSE SOLUTION You cannot make/receive • • Mother board Replace the mother board (be sure to turn calls via an IP network. malfunction off the PBX when replacing). • • Poor connection Make sure that an 8-pin twisted pair cable is used for connection. - Page 107 6.1.1 Installation PROBLEM PROBABLE CAUSE SOLUTION Extensions do not operate. • • Extension card Replace the corresponding card. malfunction • • Poor connection Take the extension and plug it into the same between the PBX and extension port using a short telephone cord. the extension If the extension works, then the connection between the PBX and the extension must...
-
Page 108: Connection
6.1.2 Connection 6.1.2 Connection Connection between the PBX and an SLT: CAUSE SOLUTION Can you dial an extension? The T/R is connected as below. Use the correct cord (the inner 2 wires are for T/R). If a telephone equipped with an A-A1 relay is connected to the PBX, set the A-A1 relay switch of the telephone to "OFF". -
Page 109: Operation
6.1.3 Operation 6.1.3 Operation Note For devices connected to a PBX other than the Main Unit, refer to the Troubleshooting for that PBX. PROBLEM PROBABLE CAUSE SOLUTION • • Cannot set the IP address, An unusable value is Set an IP address within the valid range. IP subnet mask address, and being set. -
Page 110: Restarting The Pbx
6.1.4 Restarting the PBX 6.1.4 Restarting the PBX If the PBX does not operate properly, restart the PBX using Web Maintenance Console or switch the power to OFF then ON. Before restarting the PBX, try the system feature again to confirm whether there definitely is a problem or not. -
Page 111: Appendix
Section 7 Appendix This section provides information about System Prompt Languages and the revision history. Getting Started... -
Page 112: System Prompt Languages
7.1 System Prompt Languages 7.1 System Prompt Languages Note • The following abbreviations are used in the language file names: – UK: United Kingdom – US: United States – LA: Latin America – BR: Brazil • No. 1 is set by default. For details, see "2.8 PBX Configuration—[7] Voice Mail―Prompt Language" in the Programming Item List. - Page 113 Note TEMPLATE FOR WALL MOUNTING Copy or print this template and place it on the wall. Install the screws as marked. If you mount the main unit on a concrete, fit anchor plugs (not included) into the wall beforehand. Hook the unit onto the screw heads. Note •...
- Page 114 Note Getting Started...
- Page 115 This device is a Hybrid IP-PBX operating in the frequency band of 2412 MHz to 2472 MHz. The usage of this device is generally allowed in all EU countries. Panasonic System Networks Co., Ltd. declares that this equipment is in compliance with the essential requirements and other relevant provisions of Radio & Telecommunications Terminal Equipment (R&TTE) Directive 1999/5/EC.
- Page 116 Web Site: http://www.panasonic.com/ Copyright: This material is copyrighted by Panasonic System Networks Co., Ltd., and may be reproduced for internal use only. All other reproduction, in whole or in part, is prohibited without the written consent of Panasonic System Networks Co., Ltd.