Table of Contents
Advertisement
Advertisement
Table of Contents

Related Manuals for Kenwood ProTalk TK-3601D


Summary of Contents for Kenwood ProTalk TK-3601D
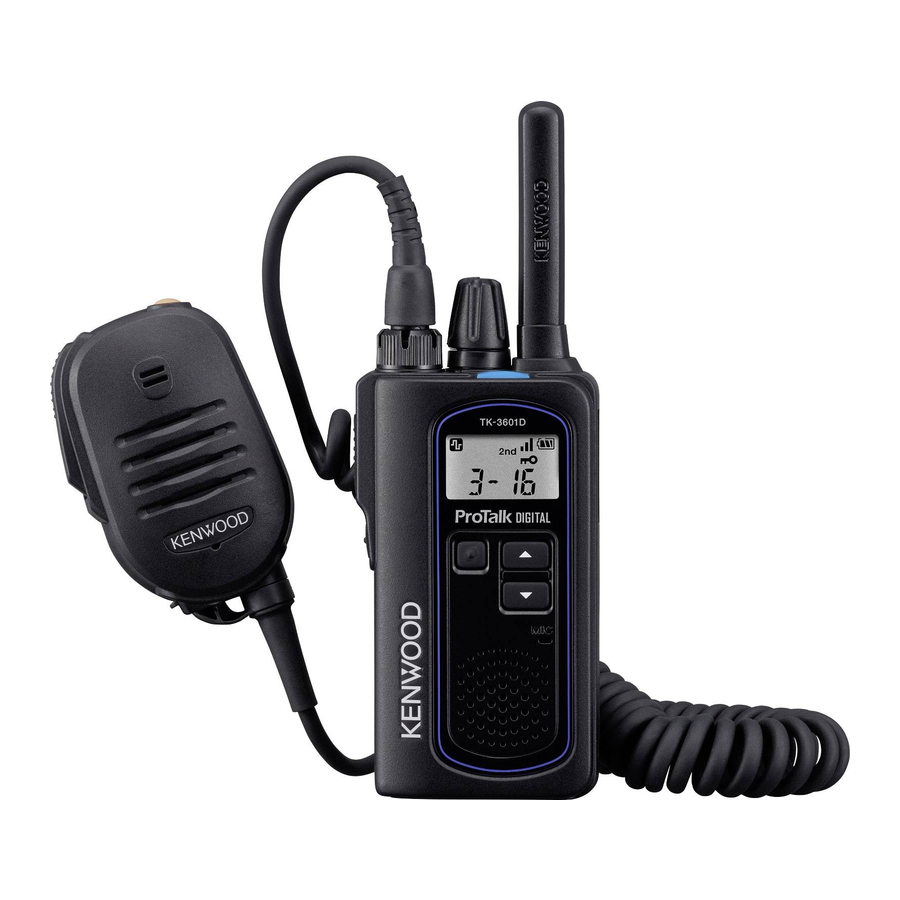
- Page 1 TK-3601D UHF DIGITAL TRANSCEIVER USER MANUAL B5A-2559-00/00 (E)
-
Page 2: Table Of Contents
CONTENTS ORIENTATION ........................4 BUTTONS AND CONTROLS ......................4 DISPLAY .............................6 BASIC OPERATION ......................8 POWER ON ............................8 ADJUST THE VOLUME........................8 SELECT A ZONE ..........................8 SELECT A CHANNEL .........................9 MAKE A CALL .............................9 RECEIVE VOICE ..........................9 CONTINUE CALLING .........................9 POWER OFF............................9 CHANNEL MENU MODE .................... - Page 3 SCAN ..............................38 SECOND CHANNEL ........................40 VOLUME ATTENUATION ........................42 ZONE ..............................42 BACKGROUND OPERATIONS ................... 43 BATTERY LEVEL INDICATOR ......................43 RESETTING THE TRANSCEIVER ..................44 OPTIONS ..........................45 INSTALLING / REMOVING THE KBH-22 ..................46 TROUBLESHOOTING GUIDE .................... 47 SPECIFICATIONS ....................... 48...
-
Page 4: Orientation
ORIENTATION BUTTONS AND CONTROLS Antenna (Not detachable) Loop hole for strap Display Microphone Speaker a Power switch/ Volume control Turn clockwise to switch the transceiver ON. Rotate to adjust volume level. Turn fully counterclockwise, until click sound, to switch transceiver OFF. b LED indicator For the LED indicator status {p.9}. - Page 5 e Side button Press to activate its programmable function. Default Function Reference Page Press None (No function) – Press and hold Zone • For function descriptions and details on how to change the function of the Side button. Refer to “BUTTON ASSIGNMENT MODE” {p. 33}. f PTT (Push to Talk) switch Press and hold, then speak into the microphone to transmit.
-
Page 6: Display
DISPLAY PRIVACY Indicator Description Appears while transmitting / receiving. When receiving: Displays the signal strength. : Strong : Sufficient : Weak Appears the battery power. :High :Sufficient :Low (Blinks) :Very Low Appears when channel type is configured to Digital. Appears when the channel is configured with a DQT code. Appears when the Scan is activated. Blinks when the scan is paused. Appears when the Compander is activated. - Page 7 Font Display Because the display is segmented, letters and numbers are displayed as shown below. "X" is not used in this transceiver. >...
-
Page 8: Basic Operation
BASIC OPERATION POWER ON Switch the transceiver power ON by turning the Power OFF / Volume DOWN Power switch/ Volume control knob clockwise. • A confirmation tone sounds, the LCD lights up momentarily, then the current zone and channel number are displayed. Power ON / Volume UP Channel number Zone number ADJUST THE VOLUME... -
Page 9: Select A Channel
SELECT A CHANNEL Select a channel by pressing the button. Press button MAKE A CALL To make a call, press and hold the PTT switch, then speak around the microphone area using your normal speaking voice. Release the PTT switch to receive. • Hold the microphone approximately 1.5 inches (3 to 4 cm) from your lips. -
Page 10: Channel Menu Mode
CHANNEL MENU MODE This transceiver allows you to reprogram each of the channels with different frequencies and / QT/DQT (Analogue)/ Common ID (Digital)/ Scrambler (Analogue)/ Compander (Analogue)/ VOX settings. Press the Menu button. • Displays the setting items of Channel Menu mode. Press the button to select your desired settings. Press the Menu button then press the button to select your desired value for the setting. -
Page 11: Qt/ Dqt (Analogue)
QT/ DQT (ANALOGUE) QT (Quiet Talk) and DQT (Digital Quiet Talk) are functions that reject signals from undesired parties that are using the same channel as you. You will hear audio from the speaker only when you receive a signal that contains a tone or code matching the one setup on the channel you are using. - Page 12 QT/DQT Table QT frequency QT frequency QT frequency QT frequency Table Table Table Table [Hz] [Hz] [Hz] [Hz] DQT Code DQT Code DQT Code DQT Code 67.0 97.4 136.5 D311N 71.9 100.0 141.3 D346N 74.4 103.5 146.2 D315N 77.0 107.2 151.4 D351N 79.7...
-
Page 13: Common Id (Digital)
COMMON ID (DIGITAL) Common ID is a signaling system designed for Digital communications. When a channel is setup with a Common ID, squelch will only open when a call containing a matching Common ID is received. If a call containing a different Common ID is made on the same channel you are using, you will not hear the call. This allows you to ignore (not hear) calls from another parties who are using the same channel. - Page 14 To change the Common ID settings: Enter the Channel Menu mode {p.10}. Press the button to select “ ”. Press the Menu button then press the button to select your desired Common ID. • The values range from 1 to 255. • If you set Common ID to 255, you can call to all Common ID transceivers.
-
Page 15: Privacy Talk (Scrambler)
PRIVACY TALK (SCRAMBLER) When the Channel Type is Analogue, whereas the QT and DQT functions allow you to ignore unwanted calls, Privacy Talk allows you to hold a conversation in complete privacy. When this function is activated, any other party that is listening to your channel will be unable to understand your conversation. - Page 16 COMPANDER The Compander (compressor/expander) allows higher clarity of sound, reducing excessive noise. When activated, transmitted sound are compressed before being sent and received sound are expanded when they arrive. This function is activated when Channel type is Analogue. Enter the Channel Menu mode {p.10}. Press the button to select “...
-
Page 17: Voice Operated Transmission (Vox)
VOICE OPERATED TRANSMISSION (VOX) Connect a headset to the transceiver. • The VOX function does not activate when a headset is not connected to the SP/MIC jack of the transceiver. Enter the Channel Menu mode {p.10}. Press the button to select “ ”. -
Page 18: Front Panel Programming Mode
FRONT PANEL PROGRAMMING MODE You can change the channel frequency for Zone 1, Zone 2, and Zone 3. Frequency List Analogue Channel Digital Channel Frequency Frequency Frequency Table No. Table No. Table No. (MHz) (MHz) (MHz) 446.006250 446.103125 446.003125 446.018750 446.109375 446.009375 446.031250... - Page 19 To change the operating frequency of a channel: With the transceiver power OFF, press and hold the Menu button while turning the transceiver power ON. Press the button to select your desired zone and channel. • Press the button to change as follows. • Press the button to change in reverse order.
-
Page 20: Function Setting Mode
FUNCTION SETTING MODE Many functions on this transceiver are selected or configured through the Menu. With the transceiver power OFF, press and hold the Menu and buttons while turning the transceiver power ON. Press the button to select your desired Setting menu. Press the Menu button then press the button to select your desired value. -
Page 21: Setting Target
Ref. Display Name Analogue Digital Settings Default Page Microphone Type OFF/ 1 ~ 6 Earphone Mode OFF/ ON VOX Type Normal/ Semi VOX Normal VOX Gain Level 1 ~ 10 0.1/ 0.3/ 0.5/ 1.0/ 1.5/ VOX Delay Time 0.5 sec 3.0 sec SETTING TARGET You can choose whether to apply channel menu settings for the current channel or... -
Page 22: Battery Saver
BATTERY SAVER This transceiver has been designed to give you the most out of your battery power. The battery saver function decreases the amount of power used when a signal is not being received and no operations are being performed. While using the transceiver, battery saver will automatically switch ON after 5 seconds have elapsed with no operations or received calls. -
Page 23: Audio Equalizer (Rx Audio Response)
AUDIO EQUALIZER (RX AUDIO RESPONSE) This setting item is function for Digital communications. Received sound quality will change depending on the characteristics of the other side's use environment, voice characteristics, microphone, external connection equipment and so on. By using this function, you can adjust the received sound quality according to usage and preferences. -
Page 24: Audio Equalizer (Tx Audio Response)
AUDIO EQUALIZER (TX AUDIO RESPONSE) This setting item is function for Digital communications. Transmission sound quality changes due to the characteristics of the environment using the transceiver, voice characteristics, microphone and external connection equipment. By using this function, you can adjust the transmission sound quality according to usage and preferences. -
Page 25: Squelch Level
SQUELCH LEVEL You can adjust the default squelch level of the transceiver. Enter the Function Setting mode {p.20}. Press the button to select “ ”. Press the Menu button then press the button to select your desired value. If you want to receive weak signal, decrease Squelch Level, and 0 ~ 3 if unnecessary signal exist, increase Squelch Level. -
Page 26: Microphone Sense
MICROPHONE SENSE You can adjust the sensitivity level of the transceiver microphone. It can be changed in 2 dB steps. To select the Microphone Sense: Enter the Function Setting mode {p.20}. Press the button to select “ ”. Press the Menu button then press the button to select your desired value. -
Page 27: External Microphone Sense
EXTERNAL MICROPHONE SENSE You can adjust the sensitivity level of the external microphone. It can be changed every in 2 dB steps. To select the External Microphone Sense: Enter the Function Setting mode {p.20}. Press the button to select “ ”. -
Page 28: Microphone Type
MICROPHONE TYPE Optional external microphones connected to the transceiver have different audio characteristics. By using this function, you can adjust the audio characteristics and set them for optimum conditions. Enter the Function Setting mode {p.20}. Press the button to select “ ”. Press the Menu button then press the button to select your desired value. -
Page 29: Earphone Mode
If you set the earphone mode to ON, you can transmit using the PTT switch of the transceiver. Note: ◆ Please use KENWOOD recommended product for monaural earphones. Enter the Function Setting mode {p.20}. Press the button to select “... -
Page 30: Vox Setup
VOX SETUP Note: ◆ To use the VOX function, you need to set the VOX function to "ON" in Channel Menu mode {p.17}. VOX TYPE Normal: When the voice level to the microphone is higher than the reference level (VOX Gain Level), the transceiver automatically starts transmission. Semi-VOX: Transmission is started by pressing PTT switch and transmission continues even after PTT switch is released. - Page 31 VOX GAIN LEVEL With VOX activated, your voice level will determine when you transmit. Due to the automatic switching between transmission and reception, we recommend you set the VOX gain level such that it will not activate when in an area with excessive ambient noise.
- Page 32 VOX DELAY TIME If the transceiver returns to receive mode too quickly after you stop speaking, the end of your message may not be transmitted. To avoid this, select an appropriate delay time that allows your entire message to be transmitted. Enter the Function Setting mode {p.20}.
-
Page 33: Button Assignment Mode
BUTTON ASSIGNMENT MODE The Side and Menu buttons can be programmed with the functions listed below. Functions LIST Function Ref. Display Press Press and hold name Page None None None – Lock/unlock the Button Lock None transceiver buttons. Calling Alert Calling Alert None Continuously... - Page 34 Function Ref. Display Press Press and hold name Page Adds or removes the Starts scanning the selected Channel Scan transceiver channels. to or from the scan sequence. Adds or removes the Scan Delete/ selected Channel to or from None the scan sequence. Apart from the channel you normally select, you can Second PTT...
-
Page 35: Button Lock
BUTTON LOCK You can lock the Menu, , and buttons to prevent accidentally changing the operating mode and channel settings. The Power switch/ Volume control knob and PTT switch still function normally. Press and hold the button programmed as [Button Lock] for 1 second to lock or unlock the transceiver buttons. -
Page 36: Maintenance Display
MAINTENANCE DISPLAY Displays the currently received signal strength numerically. Display example: • When the signal strength is -80 dBm or more • When the signal strength is -96 dBm • When the signal strength is less than -120 dBm... -
Page 37: Monitor
MONITOR Press to deactivate signaling (QT/DQT or Common ID). Press this button again to return to normal operation. Monitor: Press this button to allows you to turn the transceiver signaling off, to listen to all calls that are received on the channel. Monitor Momentary: Press and hold this button to momentarily turn the transceiver signaling off. Releasing this key turns the transceiver signaling back on. -
Page 38: Scan
SCAN Scan is useful for monitoring signals on the transceiver channels. When scanning, the transceiver checks signals on each channel in the current zone and only stops if a signal is present. If the QT/ DQT/ Common ID matches, the transceiver stops at the channel and opens the squelch so you can listen to the call. - Page 39 REVERT CHANNEL The revert channel is the channel from which you start scanning. For example, if you are on channel 1 when you begin to scan, your revert channel is channel 1. During scan, pressing the PTT switch will automatically select the transceiver’s revert channel (in the above example, channel 1) and you will begin transmitting.
-
Page 40: Second Channel
SECOND CHANNEL Apart from the channel you normally select, you can configure another channel as the main channel with a dedicated [Second PTT]. The PTT for the second channel is set with the key that registered the "Second PTT" function using button assignment function in the setting mode. With the second channel set, it alternately scans the second channel with the channel you normally select. - Page 41 SECOND CHANNEL OPERATION: Enter the Function Setting mode {p.20}. Press the Menu button then press the button to select “ ”, “ ”, or “ ” for the current zone. Press the Menu button then press the button to select your desired second channel.
-
Page 42: Volume Attenuation
VOLUME ATTENUATION Press this button to attenuate received voice signals. Speaker Attenuation is a function to temporary lower down the volume level on transceiver itself and external speaker. Use this feature in the quiet environment. As an applied operation, it is usual to leave Attenuation in active, and to cancel Attenuation at important communication, such as emergency. -
Page 43: Background Operations
BACKGROUND OPERATIONS BATTERY LEVEL INDICATOR When turned ON, the battery level indicator on the display lets you know approximately how much battery life is remaining. When turned OFF, the battery level indicator will not be displayed. When the battery voltage becomes too low while transmitting, the transceiver stops transmitting, a tone sounds, and the LED blinks red until you release the PTT switch. -
Page 44: Resetting The Transceiver
RESETTING THE TRANSCEIVER At some point in time, you may desire to reset the transceiver settings to their default values. (The default values are listed in the "Channel Menu Mode", "Front Panel Programming Mode", and "Function Setting mode" tables.) To reset the transceiver: With the transceiver power OFF, press and hold the buttons while turning the transceiver power ON. -
Page 45: Options
OPTIONS The following options are available for use with this transceiver. Model Name Name KSC-50CR Charger Pocket KNB-81L Li-ion Battery Pack KBH-22 Belt Clip Holster KSC-44SL AC Adapter (Single) KSC-44ML AC Adapter (Multiple) KBH-14 Belt Clip KBH-20 Belt Clip KBH-21 Belt Clip KMC-55 Speaker Microphone... -
Page 46: Installing / Removing The Kbh-22
INSTALLING / REMOVING THE KBH-22 Install the transceiver on the belt clip holster. • Insert the transceiver until ”click" sound is heard. Push the upper part of the holster to the rear side, remove the lock and pull out the transceiver. Belt Clip Holster Note:... -
Page 47: Troubleshooting Guide
TROUBLESHOOTING GUIDE Problem Solution Cannot turn the transceiver • The battery pack may be dead. Recharge or replace power ON. the battery pack. • The battery pack may not be installed correctly. Remove the battery pack and install it again. Battery power dies shortly after • The battery pack life is finished. The battery pack charging. may need replacing. Cannot talk to or hear other • Make sure you are using the same frequency and members in your group. -
Page 48: Specifications
SPECIFICATIONS RF output power 0.5 W e.r.p. Audio output power Approx. 750 mW Frequency stability Within ±1.0 ppm Operating voltage DC 3.8± 0.4 V Dimensions (W x H x D) 50 × 94 × 27 mm (projections not included) Weight (with KNB-81L) 160 g... - Page 49 © 2018...