Silvercrest KH 2376 Operating Instructions Manual
Bluetooth car radio
Hide thumbs
Also See for KH 2376:
- Operating instructions manual (116 pages) ,
- Operating instructions manual (116 pages) ,
- Operating instructions manual (116 pages)
Table of Contents
Advertisement
Available languages
Available languages
Quick Links
Advertisement
Chapters
Table of Contents

Related Manuals for Silvercrest KH 2376


Summary of Contents for Silvercrest KH 2376
- Page 1 BLUETOOTH CAR RADIO ■ BLUETOOTH CAR RADIO BLUETOOTH-BILRADIO KH 2376 KOMPERNASS GMBH ⋅ BURGSTRASSE 21 ⋅ D-44867 BOCHUM www.kompernass.com ID-Nr.: KH2376 06/2009-V3 Operating instructions Betjeningsvejledning...
- Page 2 KH 2376 Operating instructions ... 5 Betjeningsvejledning ...43 30 31 43 44...
-
Page 3: Table Of Contents
Index Introduction ....6 Preface ..... . . 6 Information for these operating instructions . -
Page 4: Introduction
Dear customer, by purchasing the Bluetooth car radio you have decided on a quality product from SilverCrest, which, in terms of technology and functionality, meets the most up-to-date development standards. Read the information included here so that you can quickly familiarize yourself with your device and thus make full use of its functions. -
Page 5: Limited Liability
Introduction Limited liability All technical information, data and information for installation, connection and operation contained in these operating instructions correspond to the latest at time of printing and, to the best of our knowledge, take into account our previous experience and know-how. No claims can be derived from the details, illustrations and descriptions in these instructions. -
Page 6: Proper Use
Proper use This device is intended only for reception of FM/AM radio stations as well as for the playback of audio and MP3 CDs, MP3 fi les from USB data carriers and SD/MMC memory cards as well as audio signals of external audio devices. In addition you can couple the device with a Bluetooth mobile phone and with the microphone unit use the device as a hands free facility. -
Page 7: Danger From Laser Radiation
Introduction ■ Damaged cables or connections should be replaced by authorized qualifi ed persons or by the customer service department. ■ Persons who, due to their physical, intellectual or motor abilities, are incapable of operating the device safely may only use the device under supervision or direction from a responsible person. -
Page 8: Traffi C Safety
Traffi c safety WARNING Safety in traffi c has the highest priority! Observe the following safety instructions so that you do not put yourself or others in danger: ► Before travel commencement familiarize yourself with the operation of the device. ►... -
Page 9: Package Contents And Transport
Introduction Package contents and transport inspection WARNING Risk of suff ocation! ► Packaging material should not be used as a play thing. There is a risk of suff ocation! The device is delivered with the following components as standard: ▯ Car radio (incl. -
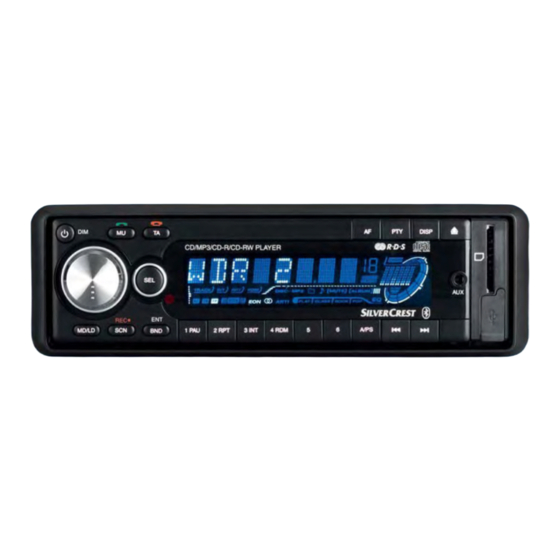
Page 10: Operating Elementse (See Foldout Sides)
Operating elementse (see foldout sides) POWER/DIM: Switch device on and off / dim display illumination Multi controller: Turn to set value/volume Switch off sound/button Activate traffi c radio/button SEL: Press or hold down to access adjustment options Display Alternative frequency search / activate regional programmes PTY: Station search by PTY group... - Page 11 Operating Elements CD compartment ISO-Block connection B Automotive blade type fuse 10 A ISO block connection A Bluetooth antenna Socket for microphone unit Securing screw (incl. M5 nut and washer) LINE OUT: Audio cinch output L/R for amplifi er Antenna connection for DIN antenna plug POWER/DIM: Switch device on and off...
-
Page 12: Installation
Installation WARNING With the installation of the device damage can occur! ► If possible have the device installed by a qualifi ed technician. ► If you want to install the device yourself, for safe and fl awless operation of the device follow the instructions for connection and installation. Connection IMPORTANT The use of incorrect connections can lead to damage to the... - Page 13 Installation To connect the device to two speakers use only the cables for the front speakers. NOTICE ► Make sure that a permanent positive connection is applied to the station memory of connection 4 in the ISO block A. ► In some automobile models the standard confi...
-
Page 14: Installation
Connection schematic Installation The device can be installed into any standard ISO mounting duct. In the event that your vehicle does not have an ISO mounting duct contact your local specialist establishment, local dealer or the technical department of the store. NOTICE ►... - Page 15 Installation ■ To avoid function disturbances the installation angle should be less than 30°. ■ Do not install the device in a location where it will be subjected to high temperatures(i.e. direct sunlight or heating vents), heavy contamination and strong vibrations. ■...
-
Page 16: Uninstalling The Device
If necessary secure your device against theft with additional measures. Attach the securing screw with the anchoring plate to the engine fi rewall of the vehicle. Carefully push the device into the mounting duct until it locks into place. After all connections have been made activate the RESET button with a ball point pen or other pointed object. -
Page 17: Initial Operation
Initial operation Initial operation Face plate To protect against theft you can remove the face plate from your device. Do not store the removed face plate in your vehicle. NOTICE ► When the face plate is not inserted into the frame the theft protection on the device blinks. -
Page 18: Remote Control
Remote control Inserting the battery Remove the supplied battery from the packing. To insert the battery and/or change the battery proceed as follows: Pull the battery compartment out of the remote control by pressing the lateral locking device and at the same time pull the battery compartment out. -
Page 19: Switching On And Off
Handling and operation Switching On and Off Press briefl y the POWER/DIM button to switch the device on. In the display the notice WELCOME appears. Briefl y touch the POWER/DIM button to dim the display illumination. To switch off hold down the POWER/DIM button longer. Settings WARNING Hearing damage as a result of too high a volume! - Page 20 ADJ - Time of day NOTICE ► The device is equipped with an RDS controlled clock. The clock sets itself automatically when the EON function is switched on and also continues to run when the radio is switched off . If you do not receive any RDS signal you can also set the time of day manually.
-
Page 21: Radio Reset (Reset)
Handling and operation Operating mode Press the MD/LD button to switch between radio reception (frequency in- dicator), CD/MP3 operation (CD), card slot (SD/MMC), USB port (USB) and audio input (AUX). NOTICE ► The operating modes CD, SD/MMC and USB can only be accessed when the corresponding medium is inserted. -
Page 22: Automatic Saving
Manual station selection Hold down one of the buttons I◂◂ or ▸▸I for two seconds. MANUAL ap- pears in the display. Now press the buttons I◂◂ or ▸▸I to change the frequency in steps of 0,05 MHz (USW) and/or 9 kHz (MW) until the desired frequency is set. If no button is pressed for approx. - Page 23 Handling and operation Regional programmes A few stations broadcast regional programmes. In order to playback only the station's regional programme hold down the AF button until the notice REG ON appears in the display. To again playback the national programme hold down the AF button until the notice REG OFF appears in the display.
-
Page 24: General Cd Functions
If no station is found that corresponds to this PTY identifi cation the notice NOT FND appears briefl y and then the search ends with the last set station. Traffi c radio (TA - "Traffi c Announcement") For this function the EON function must be switched on. Press the TA button to switch this mode on or off... -
Page 25: Title Skip
Handling and operation Immediately remove the CD from the CD slot. If an ejected CD is not removed within approx. 5 seconds the device will draw it back in, however playback of the CD will not start. Title skip Press the buttons ▸▸I or I◂◂ to select the next and/or previous title. The title number will be shown in the display. -
Page 26: Mp3 Cds Functions
MP3 CDs functions Playback ■ The device can playback fi les in the MP3 and WMA formats. ■ A mixture of titles and directories on the same level can result in problems when playing back. ■ During playback the information from the ID3 tag of the MP3 fi les are read and are shown successively in the display. -
Page 27: Usb Port
Handling and operation The fi rst symbol blinks. Press the SEL button to switch between the 3 digits of the title name. The selected symbol blinks. Turn the multi controller to set the blinking symbol. When you have set the desired symbol press the BND/ENT button to show all titles that begin with the searched for symbol. -
Page 28: Card Reader (Sd/Mmc)
Playback and search functions ■ The operations for playing fi les on the external data carrier as well as the search function are exactly the same as with MP3 CDs. ■ If the device is in another mode ( select the USB data carrier with the MD/LD button. Card reader (SD/MMC) The device can handle SD/MMC memory cards up to 8 GB. -
Page 29: Copying Data From Mp3 Cd
Handling and operation Recording Place a memory medium into the card slot or connect a data carrier to the USB port. Insert the CD, if necessary, and/or switch on the external audio device. With the MD/LD button set the desired operations mode (CD, Radio, AUX). -
Page 30: Connecting An External Audio Device To The Car Radio
Start the copy process by pressing the BND/ENT button. During the copy process COPY appears in the display and a percentage indicator from 01 - 100 shows the copying progress. After the notice COPY 100 the copying process is ended and playback of the MP3 title continues. Connecting an external audio device to the car radio Connect the audio output of an external audio device (i.e. -
Page 31: Rejecting A Call
Handling and operation Call accept/end With an incoming call you hear the call signal via your mobile telephone, whilst in the device's display is shown the call number. You accept an incoming call by pressing the TALK button on the microphone unit or the You end the call by pressing the TALK button again on the microphone unit or the... -
Page 32: Cleaning
Audio streaming (A2DP) The device uses the A2DP profi le (Advanced Audio Distribution Profi le) and there- fore can playback your mobile telephone's audio data. Select an audio fi le from your mobile telephone and start the playback. In the device's display appears the entry A2DP and the audio data will be played back via the speakers connected to the device. -
Page 33: Troubleshooting
Troubleshooting Troubleshooting In this chapter you will receive important information for malfunction localization and remedies. Observe the instructions in order to avoid danger and damage. Safety instructions WARNING Observe the following safety information to avoid danger and property damage: ► Repairs to electronic devices may only be carried out by specialists who have been trained by the manufacturer. - Page 34 Defect The CD will not load or eject Function buttons are not functioning The CD jumps Failure with burnt CDs Possible cause Solution A CD is already inserted Remove the CD. into the device. The CD has been inserted Insert the CD with the inscripted side the wrong way up.
- Page 35 Troubleshooting Defect Possible cause The antenna cable is not The radio and/ connected correctly. or the automatic station saving is The station signals are not functioning too weak. The connection 4 in the Station memory is ISO block A (Permanent not functioning positive) is not connected correctly.
-
Page 36: Disposal
Disposal Disposal of the device Do not dispose of the device in your normal domestic waste. This product is subject to the European directive 2002/96/EC-WEEE (Waste Electrical and Electronic Equipment). Dispose of the device through an approved disposal centre or at your community waste facility. -
Page 37: Declaration Of Ec Conformity
Appendix Radio frequency range Frequency FM (USW) Frequency AM (MW) Station memory cells FM (USW) Station memory cells AM (MW) Remote control Button cell battery (CR 2025) Audio input (AUX IN): Stereo jackplug USB port USB 1.1 and 2.0 compatible data carrier Card slot SD/MMC memory card slot Declaration of EC conformity... -
Page 38: Warranty
Warranty The warranty for this appliance is for 3 years from the date of purchase. The appliance has been manufactured with care and meticulously examined before delivery. Please retain your receipt as proof of purchase. In the event of a warranty claim, please make contact by telephone with our Service Department. - Page 39 Bluetooth Car Radio KH 2376 In order to guarantee a cost free repair procedure please get in touch with the service hotline. Ensure you have your sales slip handy. Sender, please write clearly: Last name First name Street Postcode/Place Country Telephone Date/Signature Description of the defect:...
- Page 41 Indholdsfortegnelse Introduktion ... . .44 Forord ..... . . 44 Informationer til denne betjeningsvejledning .
-
Page 42: Introduktion
Introduktion Forord Kære kunde! Med køb af denne Bluetooth-bilradio har du fået et kvalitetsprodukt fra SilverCrest, som er fremstillet efter den seneste udvikling inden for teknik og funktion. Du bedes læse informationerne i denne betjeningsvejledning, så du lærer bilra- dioen at kende og kan udnytte dens mange funktioner. -
Page 43: Ansvarsbegrænsning
Introduktion Ansvarsbegrænsning Alle tekniske informationer, data og anvisninger til montering, tilslutning og betjening i denne betjeningsvejledning svarer til den sidste nye viden på trykningstidspunktet og sker efter bedste viden baseret på vores hidtidige erfaringer og viden. Der kan ikke stilles nogen form for krav baseret på informationerne, billederne og beskrivelserne i denne vejledning. -
Page 44: Anvendelsesområde
Anvendelsesområde Denne bilradio er kun beregnet til at modtage FM/AM-radiostationer samt til afspilning af audio- og MP3-cd'er, MP3-fi ler fra USB-datamedier og SD/ MMC-hukommelseskort samt audiosignaler fra eksterne audioenheder. Endvidere kan du slutte bilradioen til en Bluetooth-mobiltelefon og bruge bilra- dioen med mikrofonenhed som håndfri enhed. -
Page 45: Fare På Grund Af Laserstråler
Introduktion ■ Hvis der opstår skader på kabler eller tilslutninger, skal de udskiftes af en autoriseret reparatør eller kundeservice. ■ Personer, som ikke er i stand til at betjene bilradioen sikkert på grund af deres fysiske, psykiske eller motoriske evner, må ikke bruge bilradioen uden opsyn og anvisninger fra en ansvarlige person. -
Page 46: Færdselssikkerhed
Færdselssikkerhed ADVARSEL Sikkerhed i trafi kken har højeste prioritet! Overhold de følgende sikkerhedsanvisninger, så du eller andre ikke udsættes for fare: ► Sæt dig ind i bilradioens funktion, før du begynder kørslen. ► Betjen kun bilradioen, når trafi kforholdene tillader det! Hold ind til siden, hvis du skal foretage indstillinger. -
Page 47: Leverede Dele Og Transporteftersyn
Introduktion Leverede dele og transporteftersyn ADVARSEL Fare for kvælning! ► Emballeringsmaterialer må ikke bruges til leg. Der er fare for kvælning. Bilradioen leveres standardmæssigt med følgende komponenter: ▯ Bilradio (inklusiv betjeningsdel) ▯ Monteringsramme (er sat på) ▯ Pynteramme (er sat på) ▯... -
Page 48: Betjeningselement (Se Fold-Ud-Siderne)
Betjeningselement (se fold-ud-siderne) POWER/DIM: Tænd og sluk bilradioen/dæmp displaybelysningen Multiknap: Drej for at indstille værdierne/ lydstyrken Sluk for lyden/knap Aktivér trafi kradioen/knap SEL: Tryk eller hold den nede for at åbne indstillingsmulighederne Display Søg alternativ frekvens/aktivér regionale programmer PTY: Søg station efter PTY-gruppe DISP: Vis displayinformationer Oplåsning betjeningsenhed... - Page 49 Betjeningselementer cd-rum ISO-blok tilslutning B Bil-fl adsikring 10 A ISO-blok tilslutning A Bluetooth-antenne Stik til mikrofonenhed Fastgørelsesskrue (inklusiv M5-møtrik og spændeskive) LINE OUT: Audio-cinch-udgang L/R til forstærker Antennetilslutning til DIN-antennestik POWER/DIM: Tænd og sluk bilradioen/ dæmp displaybelysningen Taste I◂◂: Titel-/stationssøgning tilbage VOL+: Skruer op for lydstyrken Taste...
-
Page 50: Installation
Installation ADVARSEL Ved installation af bilradioen kan der opstå materieller skader! ► Lad så vidt muligt en fagmand montere bilradioen. ► Hvis du selv vil montere bilradioen, skal du følge anvisningerne for tilslutning og installation for at få en sikker og fejlfri funktion. Tilslutning Hvis du anvender forkerte tilslutninger, kan bilradioen beskadiges. - Page 51 Installation Brug kun kablerne til de forreste højttalere, hvis bilradioen skal sluttes til to højttalere. BEMÆRK ► Vær opmærksom på, at tilslutning 4 i ISO-blok A skal være tilsluttet den permanente plusforbindelse for lagring af stationer. ► I nogle bilmodeller er der fra fabrikken byttet om på den standardmæssige belægning for tilslutningerne [4] og [7] i ISO-blok A.
-
Page 52: Montering
Tilslutningsskema Montering Bilradioen kan indsættes i alle ISO-standard-monteringsskakte. Hvis din bil ikke har nogen ISO-monteringsskakt, skal du kontakte dit værksted, din forhandler eller den relevante afdeling i varehuset. BEMÆRK ► Fjern begge transportsikringsskruer på det øverste kabinet (markeret med rød mærkat) før montering! ►... - Page 53 Installation ■ For at undgå felfunktioner skal monteringsvinklen være mindre end 30°. ■ Montér ikke bilradioen på et sted, hvor den er udsat for høje temperaturer (f.eks. direkte sol eller varm luft), meget snavs og voldsomme vibrationer. ■ Hvis der skal foretages ændringer på bilen, skal du kontakte din bilforhandler /et værksted.
-
Page 54: Afmontering Af Bilradioen
Sørg for at sikre din bilradio ekstra mod tyveri. Fastgør skruen med forank- ringspladen Skub bilradioen forsigtigt ind i monteringsrammen, til den går i hak. Når alle forbindelser er i orden, skal du aktivere knappen RESET med en kuglepen eller en anden spids genstand. Sæt betjeningsdelen ind, som beskrevet under "Indsætning af betjeningsdel“. -
Page 55: Ibrugtagning
Ibrugtagning Ibrugtagning Betjeningsdel Du kan beskytte bilradioen mod tyveri ved at tage betjeningsdelen til bilradioen af. Lad være med at opbevare den løse betjeningsdel i bilen. BEMÆRK ► Hvis betjeningsdelen ikke er sat ind i rammen, blinker tyverisikrings-LED'en på bilradioen ►... -
Page 56: Fjernbetjening
Fjernbetjening Indsætning af batteri Tag det medfølgende batteri ud af emballagen. Følg nedenstående punkter, når du skal sætte batteriet i eller skifte batteriet: Tag batterirummet ud af fjernbetjeningen ved at trykke låsen i siden ind og samtidig trække batterirummet ud. Fjern det brugte batteri, og sæt et nyt batteri af typen CR2025 (knapbatteri) i batterirummet. -
Page 57: Sådan Tænder/Slukker Du For Bilradioen
Betjening og funktion Sådan tænder/slukker du for bilradioen Tryk kort på knappen POWER/DIM for at tænde for bilradioen. I displayet vises WELCOME. Tryk let på knappen POWER/DIM for at dæmpe belysningen i displayet. Når du skal slukke for bilradioen, skal du holde knappen POWER/DIM trykket nede i længere tid. - Page 58 ADJ - klokkeslæt BEMÆRK ► Bilradioen er udstyret med et RDS-styret ur. Uret indstilles automatisk, når EON-funktionen er slået til, og fortsætter også, når bilradioen er slukket. Hvis du ikke modtager RDS-signalet, kan du indstille klokkeslættet manuelt her. Drej multiknappen til højre for at indstille timerne, og til venstre for at indstille minutterne.
-
Page 59: Nulstilling Af Bilradioen (Reset)
Betjening og funktion Funktionsindstilling Tryk på knappen MD/LD for at skifte mellem radiomodtagelse (frekvens- visning), CD/MP3-drift (CD), kortslot (SD/MMC), USB-tilslutning (USB) og audioindgang (AUX). BEMÆRK ► Driftstyperne CD, SD/MMC og USB kan kun aktiveres, hvis det pågælden- de medie er lagt i. Display Tryk fl... -
Page 60: Lagring Af Stationer
Manuel indstilling af stationer Hold én af knapperne I◂◂ eller ▸▸I nede i to sekunder. I displayet vises MANUAL. Tryk nu på knapperne I◂◂ eller ▸▸I for at ændre frekvensen i trin på 0,05 MHz (UKW) eller 9 kHz (MW), indtil den ønskede frekvens er indstillet. Hvis du ikke trykker på... - Page 61 Betjening og funktion Regionale programmer Nogle stationer sender regionale programmer. Hvis du kun ønsker, at stationens regionale programmer skal afspilles, skal du holde knappen AF trykket nede, indtil der i displayet står REG ON . For at afspille det landsdækkende program igen skal du holde knappen AF trykket ned, indtil der i displayet står REG OFF.
-
Page 62: Generelle Cd-Funktioner
Hvis der ikke fi ndes nogen station, der svarer til denne PTY-kode, vises beskeden NOT FND kort, og herefter slutter søgningen ved den sidst indstillede station. Trafi kradio (TA - "Traffi c Announcement") For at denne funktion kan fungere skal EON-funktionen slås til. Tryk på... -
Page 63: Kort Afspilning Af Nummer
Betjening og funktion Tag straks cd'en ud af cd-slottet. Hvis cd'en, der er skubbet ud, ikke er taget helt ud efter ca. 5 sekunder, trækker bilradioen cd'en tilbage. Afspilningen starter dog ikke. Hop over numre Tryk på knapperne ▸▸I eller I◂◂ for at vælge den næste eller foregående titel. Titelnummeret vises i displayet. -
Page 64: Funktioner Mp3-Cd'er
Funktioner MP3-cd'er Afspilning ■ Bilradioen kan afspille fi ler i formatet MP3 og WMA. ■ Hvis titler og mapper blandes på samme niveau, kan det give problemer ved afspilningen. ■ Under afspilningen udlæses informationerne fra ID3-tag til MP3-fi len og vises på... -
Page 65: Usb-Tilslutning
Betjening og funktion Det første tegn blinker. Tryk på knappen SEL for at skifte mellem de 3 steder i titelnavnet. Det valgte tegn blinker. Drej på multiknappen for at indstille det blinkende tegn. Når du har indstillet de ønskede tegn, skal du trykke på knappen BND/ENT for at få... -
Page 66: Kortlæser (Sd/Mmc)
Afspilning og søgefunktion ■ Betjeningen til afspilning af fi ler på det eksterne datamedie og søgefunktionen fungerer præcist som ved MP3-CD'erne. ■ Hvis bilradioen er på en anden indstilling ( MMC), kan du vælge USB-datamediet med knappen MD/LD. Kortlæser (SD/MMC) Bilradioen kan bearbejde SD/MMC-hukommelseskort på... - Page 67 Betjening og funktion Optagelse Sæt et lagermedie i kortslottet, eller slut et datamedie til på USB-tilslutningen. Læg evt. cd'en i, eller slut det eksterne audioapparat til. Indstil med knappen MD/LD den ønskede funktion (CD, radio, AUX). Start evt. afspilningen med den eksterne audioenhed. Hold knappen SCN/REC nede, indtil REC MMC eller REC USB vises.
-
Page 68: Tilslutning Af En Ekstern Audioenhed Til Bilradioen
Tryk på knappen SCN/REC fl ere gange for at vælge kopifunktionen COPY USB (kopiering på USB-datamedie) eller COPY MMC (på SD/MMC-kort). Start kopieringen ved at trykke på knappen BND/ENT. Under kopieringen vises der COPY på displayet og en procentangivelse fra 01 - 100, som viser kopieringsstatus. - Page 69 Betjening og funktion BEMÆRK ► Montér ikke mikrofonen i nærheden af højttalerne, da talekvaliteten så forringes.. Modtagelse/afslutning af opkald Ved indgående opkald hører du opkaldssignalet via din mobiltelefon. Opkaldsnummeret vises i bilradioens display. Du modtager et indgående opkald ved at trykke på knappen TALK på mi- krofonenheden eller knappen Afslut det indgående opkald ved at trykke på...
-
Page 70: Rengøring
Audio-streaming (A2DP) Bilradioen anvender A2DP-profi len (Advanced Audio Distribution Profi le) og kan derfor afspille audiodata fra din mobiltelefon. Vælg en audiofi l på mobiltelefonen, og start afspilningen. I bilradioens display vises teksten A2DP, og audiofi len afspilles via højttalerne, som er sluttet til bilradioen. -
Page 71: Afhjælpning Af Fejl
Afhjælpning af fejl Afhjælpning af fejl I dette kapitel får du vigtige anvisninger til fejlfi nding og fejlafhjælpning. Overhold anvisningerne, så farer og skader undgås. Sikkerhedsanvisninger ADVARSEL Overhold følgende sikkerhedsanvisninger, så farer og materielle skader undgås: ► Reparationer på elapparater må kun udføres af autoriserede reparatører, som er oplært af producenten. - Page 72 Fejl Cd'en trækkes ikke ind eller skubbes ikke ud Funktionsknapperne fungerer ikke Cd'en hopper Fejl på cd'er, du selv har brændt Afhjælpning af fejl Mulig årsag Afhjælpning Der er allerede en cd i Fjern cd'en. bilradioen. Cd'en er lagt omvendt i. Læg cd'en i med teksten opad.
- Page 73 Afhjælpning af fejl Fejl Mulig årsag Antennekablet er ikke Radioen og/eller den sluttet rigtigt til. automatiske stations- Sendersignalerne er for lagring fungerer ikke svage. Tilslutning 4 i ISO-blok A Stationshukommelsen (permanent plus) er ikke fungerer ikke korrekt tilsluttet. USB-tilslutningen er beregnet til apparater, som fungerer efter USB- standarden.
-
Page 74: Bortskaff Else
Bortskaff else Bortskaff else af bilradioen Smid aldrig bilradioen ud sammen med det normale hushold- ningsaff ald. Dette produkt er underlagt det europæiske direktiv 2002/96/EC-WEEE (Waste Electrical and Electronic Equipment). Bortskaf bilradioen via en godkendt bortskaff elsesvirksomhed eller den kommunale genbrugsstation. -
Page 75: Ce-Overensstemmelseserklæring
Tillæg Frekvensområde radio Frekvens FM Frekvens AM Hukommelsespladser til stationer Hukommelsespladser til stationer Fjernbetjening Batteri knapcelle (CR 2025) Audioindgang (AUX IN) Stereo-jackstik USB-tilslutning USB 1.1 og 2.0 kompatible datamedier Kortslot SD/MMC-hukommelseskorttilslutning CE-overensstemmelseserklæring Denne bilradio er i overensstemmelse med de grund- læggende krav og de andre relevante forskrifter i motor- køretøjsforsikringsdirektiv 2004/104/EC og direktiv R&TTE 99/5/EC. -
Page 76: Garanti
Garanti På denne donkraft får du 3 års garanti fra købsdatoen. Apparatet er produceret om- hyggeligt og inden levering afprøvet samvittighedsfuldt. Opbevar kassebonen som bevis for købet. I garantitilfælde bedes du kontakte service-afdelingen telefonisk. På denne måde kan gratis indsendelse af varen garanteres. BEMÆRK ►... - Page 77 Bluetooth-bilradio KH 2376 For at garantere reparation uden udgifter for dig bedes du kontakte vores Service-hotline. Til dette bedes du venligst have dit kassebilag parat. Afsender - skriv tydeligt: Efternavn Fornavn Gade/vej Postnummer/by Land Telefon Dato/underskrift Fejlbeskrivelse : Garanti Kompernass Service Danmark Tel.: +45 4975 8454 Fax: +45 4975 8453 e-mail: support.dk@kompernass.com...