Dell Streak 7 User Manual
Hide thumbs
Also See for Streak 7:
- User manual (145 pages) ,
- Quick start manual (53 pages) ,
- Owner's manual (43 pages)
Table of Contents
Advertisement
Quick Links
Advertisement
Table of Contents

Related Manuals for Dell Streak 7


Summary of Contents for Dell Streak 7
- Page 1 Dell™ Streak 7 User's Manual OMMENT...
- Page 2 Reproduction of these materials in any manner whatsoever without the written permission of Dell Inc. is strictly forbidden. Trademarks used in this text: Dell™ and the DELL logo are trademarks of Dell Inc. Adobe Acrobat is a trademark of Adobe Systems Incorporated which may be registered in certain jurisdictions;...
-
Page 3: Table Of Contents
Contents Dell Streak 7 Tablet Features ... Setting Up Your Dell Streak 7 Tablet ..Getting Your Tablet Ready for Use .. - Page 4 Web Applications Synchronizing Your Google Data ..Customizing Your Dell Streak 7 Tablet ..Power Management Settings ....
- Page 5 ....Connect and Sync with a Computer Using Dell Mobile Sync ....
-
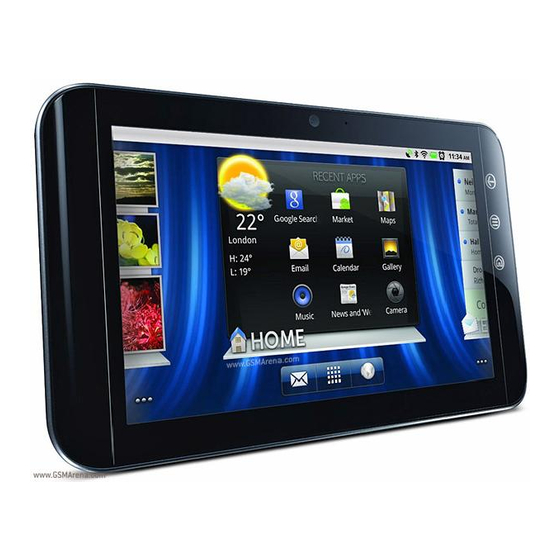
Page 6: Dell Streak 7 Tablet Features
Dell Streak 7 Tablet Features This section provides information about the features available on your device. The features or applications described in this User’s Manual may NOTE: not be all available on your device, and may vary depending on the model you purchase. - Page 7 Buttons/Ports/Parts Functionality Power and Sleep/Wake button • Press and hold to turn on the device. • Press to turn the screen on or off. • While the device is on, press and hold to turn off the device. Touch OK when the Power off menu appears.
- Page 8 Buttons/Ports/Parts Functionality • When viewing other Home screens, Home button you can touch this button to return to the central Home screen. • When performing any function on the device, such as working with applications, widgets, and so on, you can touch this button to return to the last Home screen you viewed, or touch this button again to return to the central Home...
- Page 9 30-pin port • Connects to the supplied USB cable for transferring files to and from a computer. • Connects to the supplied USB cable and USB wall-charger adapter to charge the device. Touch screen Touch the screen to use the on- screen controls including buttons, menu items, and the keyboard.
- Page 10 Camera lens Captures pictures and videos. Camera flash Used for capturing pictures and videos in dimly lit environments. Features...
-
Page 11: Setting Up Your Dell Streak 7 Tablet
Hold the SIM card with the metal contacts facing down, and follow the SIM card illustration on the slot door label to insert the SIM card into the SIM card slot. Insert the SD card Pull out the slot door. Setting Up Your Dell Streak 7 Tablet... - Page 12 When charging the battery by connecting the device to an electrical outlet, the battery is fully charged in about 4 hours. NOTE: The cable is specific for this device: 30-pin to USB and the length is less than 3 meters. Setting Up Your Dell Streak 7 Tablet...
-
Page 13: Turning On Your Device
If the device is on, but the screen is off, press the Power and Sleep/Wake button once to turn on the screen. For information on unlocking the screen, see "The Screen Lock Wallpaper" on page 39. Setting Up Your Dell Streak 7 Tablet... -
Page 14: About Your Dell Streak 7 Tablet
About Your Dell Streak 7 Tablet Touch Screen Your device has a multi-touch sensitive screen. You can touch the surface of the screen to operate the device. Finger Gestures Allows you to: Touch Tap gently on the screen with your •... - Page 15 Flick or swipe Move your finger in a vertical or Quickly scroll through Home screens, horizontal direction on the screen. web pages, lists, entries, photo thumbnails, contacts, and so on. About Your Dell Streak 7 Tablet...
- Page 16 Move two fingers close together on Reduce the view of an image or web the screen. page (zoom out). Zoom in Move two fingers apart on the screen. Enlarge the view of an image or web page (zoom in). About Your Dell Streak 7 Tablet...
-
Page 17: Screen Orientation
Facebook widget allows you to read posts on your wall and update your status. Shortcut — A link that you can create on your Home screen to provide quicker access to an application, service, and so on. About Your Dell Streak 7 Tablet... -
Page 18: Home Screen
Google Search Search your device and the web by typing. Voice Search Search your device and the web by speaking. Apps Open the Apps screen to find all the applications installed on your device. About Your Dell Streak 7 Tablet... - Page 19 • Change the wallpaper of your Home screen. Web Stage widget This is one of the Dell Stage widgets. From the Web Stage widget, you can access the bookmarked or frequently viewed websites. For more information on using Dell Stage widgets, see "The Dell Stage Widgets"...
-
Page 20: Navigation Buttons
You can find the navigation buttons from the left side of the system bar. Back • Return to the previous screen or option. • If the on-screen keyboard is open, the button changes to . Touch it to close the keyboard. About Your Dell Streak 7 Tablet... -
Page 21: Notifications And Status
Status area The status area displays status icons to show the current state of your device, such as battery power, charging progress, network connections, and so on. Time area Displays the current time. About Your Dell Streak 7 Tablet... - Page 22 • To view the details about the current date and time, network connections, and battery status, touch the Time area in the system bar to open the Status Details. • To close the Status Details, touch any other part of the screen. Status Details About Your Dell Streak 7 Tablet...
- Page 23 • Brightness: Drag the slider to change the brightness level of the screen. Or, you can touch AUTO to allow the device to set screen brightness automatically according to the amount of light in your surroundings. About Your Dell Streak 7 Tablet...
- Page 24 You can touch this icon to turn notifications back on. • Settings: Touch to open Settings. For more information, see "Customizing Your Dell Streak 7 Tablet" on page 104. The Status area may display some of the following icons: The Status area of the system bar displays status icons to show the current state of your device.
-
Page 25: Customizing Your Home Screen
Touch and hold the item, and drag it onto a Home screen where you want to add it. If you pause before lifting your finger, the Home screen will enlarge, so you can drag to place the item on a specific position you want. About Your Dell Streak 7 Tablet... - Page 26 Google Search widget, or a calendar showing upcoming events. You can also add Dell Stage widgets to provide direct access to your contacts, e-mail, pictures, music, Facebook & Twitter updates, frequently viewed websites, and recently used applications. For information on using Dell Stage widgets, see "The Dell Stage Widgets"...
- Page 27 A variety of items may be available as follows. Items Steps/Descriptions Bookmark Flick through the Bookmarks list to locate the desired bookmark. Touch the desired bookmark to create the shortcut on the Home screen. About Your Dell Streak 7 Tablet...
- Page 28 Select settings Scroll through the settings to locate the desired setting. Touch the desired setting to create the shortcut on the Home screen, where you can touch the shortcut to access the setting. About Your Dell Streak 7 Tablet...
- Page 29 1 Touch and hold an item such as a widget or shortcut that you want to remove, until it becomes movable. 2 Drag the item onto the top of the Trash icon 3 When the item turns red, release your finger from the screen. About Your Dell Streak 7 Tablet...
-
Page 30: The Dell Stage Widgets
It is recommended to upgrade to the latest software version for full functionality. The Dell Stage widgets give you direct access to the following items from the Home screen: • Kindle Books (see "Using the Books Stage Widget" on page 31.) •... - Page 31 BOOKS SETTINGS mode. Drag or flick through the rows of the book tiles, and then touch a book tile to open the browser to the Kindle website at the book detail page. About Your Dell Streak 7 Tablet...
- Page 32 Facebook to the message where the photo was originally posted. • Touch the thumbnail of a video stored on the device to start playing the video. Touch to open the Gallery application. Touch to enter the PHOTOS SETTINGS mode. About Your Dell Streak 7 Tablet...
- Page 33 Touch to enter the RADIO SETTINGS mode. Drag or flick through the list of radio stations, and then touch a station to open the TuneIn Radio application and tune in to the selected station. About Your Dell Streak 7 Tablet...
- Page 34 Drag or flick through the list of feeds, and then touch a feed to read more of the message or the details of the author. Touch to compose and post a new message to Twitter or Facebook. About Your Dell Streak 7 Tablet...
- Page 35 To refresh web page thumbnails automatically 1 Touch to enter the WEB SETTINGS mode. 2 Touch Update Thumbnails. NOTE: For more information on using the Browser application, see "Browsing the Internet" on page 66. About Your Dell Streak 7 Tablet...
- Page 36 GPS satellites automatically, depending on your settings. Touch to visit AccuWeather.com to see more weather forecast. Displays the weather information of your current location. Touch to visit AccuWeather.com to see more details. About Your Dell Streak 7 Tablet...
-
Page 37: Navigating The Applications
To close the Apps screen To return to the last Home screen you viewed, touch the Home button on the device or the Home button on the screen. To return to the central Home screen, touch again. About Your Dell Streak 7 Tablet... - Page 38 2 Scroll the list of recently used applications, and touch the desired application thumbnail to run the application. NOTE: To close the list of recently used applications, touch the Close button About Your Dell Streak 7 Tablet...
- Page 39 NOTE: To set the duration the screen remains on before turning off after → → the last operation, touch the Home button Apps button → → Settings Screen Timeout. About Your Dell Streak 7 Tablet...
-
Page 40: Using Your Dell Streak 7 Tablet
Using Your Dell Streak 7 Tablet Managing Contacts → To view and manage your contacts, touch the Home button → Contacts Apps button To add a new contact 1 Touch New. 2 Select the account where you want to add this contact, such as your Gmail account. - Page 41 1 On the Contacts list, find a desired contact. 2 Touch the contact entry to view the contact details, and then touch to send e-mail using the e-mail accounts you have set up on your device, or touch to send a message. Using Your Dell Streak 7 Tablet...
- Page 42 Menu button on the screen→ Join. 4 From the Join contacts list, touch another contact to link, and then touch Done. The joined contact’s information is displayed with the original contact’s information. Using Your Dell Streak 7 Tablet...
- Page 43 Settings Adjust the display options for your contacts. Accounts Contacts stored on your device can be synchronized with a computer using Dell Mobile NOTE: If you want to Sync; contacts stored on your personal e-mail synchronize individual data...
-
Page 44: Messaging (On 3G Model Only)
6 To start a text conversation similar to online instant messaging, you can continue to compose and send messages to the same recipient(s). All of the sent and received messages between you and recipient(s) appear in the form of chat logs. Using Your Dell Streak 7 Tablet... - Page 45 "To start the camcorder mode" on page 115. Audio Open the Select music track menu. Touch a desired audio file, and then touch OK to attach the file to your message. Using Your Dell Streak 7 Tablet...
- Page 46 • Open the Sound Recorder application to record an audio clip: –Touch to start recording. –Touch to stop recording. –Touch to listen to the recording. –Touch Use this recording to attach the recording to your message. Using Your Dell Streak 7 Tablet...
- Page 47 On the message composer screen, touch the slideshow attachment icon to play back the slide show; touch Edit to modify the slideshow. To remove the slideshow attachment from → → your message, touch Edit Discard slideshow. Using Your Dell Streak 7 Tablet...
- Page 48 Messaging application. → Apps button → • Touch the Home button Messaging to open the message list, and then touch a text message or message thread to open and read it. Using Your Dell Streak 7 Tablet...
- Page 49 To reply to a text or multimedia message 1 Touch a message or message thread to open it. 2 Type your reply message into the Type to compose text field. 3 Touch Send to send your message to the sender. Using Your Dell Streak 7 Tablet...
-
Page 50: Pop-Up Menu
To select an option or item on the pop-up menu 1 Touch the Menu button on the device or the Menu button on the screen to open the pop-up menu. 2 Touch the desired item on the pop-up menu. Using Your Dell Streak 7 Tablet... -
Page 51: Swype Keyboard
To open the Swype keyboard Touch a text box to open the Swype keyboard. To close the Swype keyboard Touch the Back button on the device or the Close button the screen to close the Swype keyboard. Using Your Dell Streak 7 Tablet... - Page 52 • Read Swype Help for detailed information on using Swype. • Tutorial: Play the animated tutorial demonstrating how to use Swype. • Settings: Adjust the Swype keyboard settings. Touch to show the keyboard for typing numbers, punctuation marks, and symbols. Using Your Dell Streak 7 Tablet...
- Page 53 You can create a personal dictionary to include words not found in the main dictionary. The keyboard will also look at the words that are added to your personal dictionary to make word suggestions. Using Your Dell Streak 7 Tablet...
- Page 54 1 Repeat Step 1 to 4 in "To add a word to the Swype dictionary" to open Personal dictionary. 2 Touch 3 Select one or more words that you want to delete by touching the check box 4 Touch to confirm deletion. Using Your Dell Streak 7 Tablet...
-
Page 55: Dell Keyboard
Dell Keyboard You can also type text using the Dell keyboard. The keyboard automatically rotates to either the portrait or landscape mode based on the device orientation. To set the Dell keyboard as the input keyboard → Apps button →... - Page 56 • Touch once to show the uppercase keyboard for typing a capital letter. • Touch twice quickly to enable the Caps Lock mode. When enabled, the icon becomes • Touch to change back to the lowercase keyboard. Using Your Dell Streak 7 Tablet...
- Page 57 2 Touch Configure input method under the Keyboard settings section. 3 Touch Settings under the Dell keyboard section. 4 To enable a setting, touch the setting option to select the check ; to disable a setting, touch the setting option to clear the...
-
Page 58: Google Search
2 Say the name or keyword of the item you want to search. 3 The browser with matching web links opens. NOTE: You can also access the Voice Search function by touching → Apps button → Home button Voice Search Using Your Dell Streak 7 Tablet... -
Page 59: Managing Your Device Settings
Settings 2 Touch Unmount SD card under the SD Card section. 3 Press and hold the Power and Sleep/Wake button until the Power off menu appears. Then, touch OK to turn off the device. Using Your Dell Streak 7 Tablet... - Page 60 1 Touch the Home button → Privacy→ Factory data reset. Settings 2 Touch Reset tablet. NOTE: You must draw your screen unlock pattern if it is enabled. 3 Touch Erase everything after you read the warning. Using Your Dell Streak 7 Tablet...
- Page 61 1 Pull out the slot door. 2 Push the force power-off button using a paper clip or other similar pointed objects. 3 Press and hold the Power and Sleep/Wake button to turn on your device. Using Your Dell Streak 7 Tablet...
-
Page 62: Internet
Internet Connecting to the Internet To browse the web and access web-based utilities such as instant messaging, one of the following data networking connections must be available: • GPRS • EDGE • 3G • HSPA • Wi-Fi GPRS/EDGE/3G/HSPA (on 3G model only) To connect to the Internet using GPRS, EDGE, 3G, or HSPA Your device is configured with the GPRS, EDGE, 3G, or HSPA network available with the service provider of the SIM card installed in your... - Page 63 NOTE: Depending on whether a GPRS, EDGE, 3G, or HSPA network is currently in use, a corresponding data network icon appears on the status bar after a data connection is established. You can set the device to search for available networks if you are outside your home network or want to register to a different network.
- Page 64 To turn on Wi-Fi and connect to a network → Apps button → 1 Touch the Home button → Wireless & networks→ Wi-Fi to select the Settings Wi-Fi check box. The device scans for available wireless networks. 2 Touch Wi-Fi settings. The network names and security settings (Open network or Secured with WEP/WPA/WPA2/WPS) of discovered Wi-Fi networks display in the Wi-Fi networks list.
- Page 65 From the Wi-Fi network: → Apps button → 1 Touch the Home button → Wireless & networks→ Wi-Fi settings. Settings 2 Touch the Wi-Fi network that the device is currently connected to (labeled Connected). A window opens displaying the Wi-Fi network’s name, status, security information, signal strength, link speed, and IP address.
-
Page 66: Browsing The Internet
Disable All Connections Using the Airplane Mode Selecting the Airplane mode disables all mobile, Bluetooth, and Wi-Fi connections. This feature is useful when wireless connectivity is strictly prohibited, such as on an airplane. 1 Touch the Time area in the system bar to open the Status Details. 2 Touch anywhere in the Status Details. - Page 67 Touch the Menu button on the device or the Menu button the screen to access the following options: • New tab: Open a web page in a new window under a new tab. • New incognito tab: Open a web page in a new window under a new tab, and the pages you view in this new window will not appear in your browsing history or search history.
- Page 68 To go to a web page 1 On the browser screen, touch the web page address field on the screen. 2 Type the web page address using the on-screen keyboard. As you type the address, matching web page addresses appear. 3 Touch an address displayed on the screen to go directly to that web page.
- Page 69 Viewing Web Pages To navigate on a web page Flick your finger horizontally or vertically on the screen to scroll and view desired areas of a web page. To zoom in on a web page Pinch-out a desired area of a web page by moving two fingers apart on the screen.
- Page 70 To switch between browser windows You can open multiple browser windows. Touch the tabs to easily switch from one web page to another. Tabs NOTE: To close a browser window, touch To find text within a web page 1 When viewing a web page, touch the Menu button on the device or the Menu button on the screen→...
- Page 71 5 Touch Copy to copy the selected text to the clipboard first. To paste the copied text to an e-mail or text message, open the application. Touch and hold the text field on a message or e-mail screen, and then touch Paste on the context menu. Using Web Links, History, and Downloads To select a link on a web page Move to a link you want on a web page.
- Page 72 To check the history of visited web pages 1 On the browser screen, touch 2 Touch the History tab that display browsing history and the most visited web pages. 3 Select a page, such as Today, Yesterday, Last 7 days, Last month, Most visited, and so on, to locate when your desired web page was last visited.
- Page 73 To check downloads • On the browser screen, touch the Menu button on the device or the Menu button on the screen→ Downloads. → Apps button → • Touch the Home button Downloads Manage Bookmarks You can store as many bookmarks as you want on your device. To bookmark a web page 1 On the browser screen, go to the web page you want to bookmark.
- Page 74 • Touch and hold the bookmark you want to open. Then, on the context menu touch Open to open the bookmark in the same browser window, or touch Open in new tab to open the bookmark in a new window. To manage your bookmarks 1 On the browser window, touch 2 On the Bookmarks window, touch and hold a desired bookmark...
- Page 75 Share link Touch to share the bookmark’s address through Bluetooth, Email, Facebook, Gmail, Messaging (on 3G model only), Twitter, and so on. • Bluetooth: Turn on Bluetooth. Touch Scan for devices. Touch the device you want to share the link with under Found devices. •...
-
Page 76: E-Mail
E-mail You can create POP3, IMAP, and exchange e-mail accounts from web-based e-mail services on your device. To open the e-mail application → Apps button → Email Touch the Home button To set up an e-mail account 1 On the Account setup screen, type the e-mail address and password of the e-mail account you want to add. - Page 77 To view your e-mails Touch to display all the e-mail accounts you have added into the Email application. The number of new e-mails received in this account. Select an account to view e-mails received in the inbox of the account. The Combined view contains all e-mails received in all your accounts.
- Page 78 To compose and send e-mail → Apps button → Email 1 Touch the Home button 2 Select an e-mail account to use if you have set up more than one account on your device. NOTE: If you do not select an account, the account set as default will be the one used for sending e-mail.
-
Page 79: Web Applications
To delete or edit an e-mail account on your device → Apps button → Email 1 Touch the Home button 2 Touch the Menu button on the device or the Menu button → Account settings. • To delete an e-mail account, touch to select the account you want to remove first. - Page 80 Gmail Gmail is a web-based e-mail service provided by Google. To open Gmail → Apps button → Gmail Touch the Home button To set up your Google account You need to sign in to a Google account to use Google applications and services such as Gmail, Google Talk, and Android Market.
- Page 81 Your Gmail inbox opens as the default Gmail view. All your received e- mails are delivered to your inbox. Touch to select an Gmail account if you have set up multiple accounts on your device. Folder (or Label) and number of unread e-mails. To view e-mails stored in the folders other than the Inbox, such as in the Sent or All Mail folder, or to view labeled or starred e-mails, touch the folder that stores the e-mails you want to view.
- Page 82 Touch the Refresh button to send or receive e-mails and to synchronize your e-mails with your Gmail account on the Internet. Touch to compose an e-mail. Touch to search for e-mails. To read e-mails • When you receive a new e-mail in the Gmail application, the e- mail icon appears in the notifications area of the system bar to alert you of a new e-mail.
- Page 83 Touch to view previous e-mails with the same subject. To create and send an e-mail → Apps button → Gmail 1 Touch the Home button 2 Select an e-mail account to use if you have set up more than one account on your device.
- Page 84 To sign in automatically You can sign in to your Google Talk account automatically whenever you turn on the device. 1 In the friends list, touch the Menu button on the device or the Menu button on the screen→ Settings. 2 Select the Sign in automatically check box.
- Page 85 To start a conversation 1 Touch to select a friend in the friends list. 2 Type your message in the text box. 3 Touch the to send the message. To add a friend to an active conversation 1 On the chat screen, close the on-screen keyboard, and then touch the icon→...
- Page 86 To block a friend from sending you messages 1 In the friends list, find the friend to block. → Block 2 Touch the friend’s thumbnail, and then touch friend. Your friend is removed from your friends list and is added to the blocked friends list.
- Page 87 → Apps button → 1 Touch the Home button → Location & security. Settings 2 Select Use wireless networks, Use GPS satellites, or both. NOTE: Selecting Use GPS satellites allows you to pinpoint locations down to the street-level. However, this mode requires a clear view of the sky and consumes battery power.
- Page 88 NOTE: As you enter information, previous searches or matching locations appear below the search box. You can touch a place name or address to show the location on the map. 3 The search results are marked on the map by lettered balloons. Scroll the list to view search results.
- Page 89 To view the details of a place Touch to display the map view. Touch to obtain directions. (For more information, see "To get directions" on page 91). Touch to switch to street view for the location. (For more information, see "To view a map in street view" on page 91). Scroll to view the address, details, and reviews for the place if the information is available.
- Page 90 To move around a map 1 Flick or drag the map in any direction on the screen to view desired areas. 2 If you spot a place of interest while navigating the map, touch and hold the place to display the address (a picture thumbnail is also displayed if the street view for the location is available).
- Page 91 To view a map in street view You can switch to street view for the location that you found on the map. The street view is composed of imagery captured from the streets. 1 Locate a place of interest on the map. For more information, see "To find a location on the map"...
- Page 92 NOTE: By default, your current location is the starting point, and the place you found on the map is your destination. Start point. End point (Destination). Choose how you want to get to your destination: driving, public transportation, or walking. Touch to render directions.
- Page 93 Using Google Latitude NOTE: To use Google Latitude, you will be required to sign in to a Google account. The Google Latitude location service allows you to share locations with your friends and family who have signed in to the service with their Google accounts.
- Page 94 • Select from Contacts: Select friends from your contacts. Friends already using Latitude have an icon next to their names. • Add via email address: Enter an e-mail address. 3 When the Send sharing requests menu appears, touch Yes. 4 Your friends already using Latitude receive an e-mail request and a notification on Latitude requesting them to share locations.
- Page 95 To connect with your friends Touch a friend’s name in map view or list view to open the friend’s profile. In the profile screen, you can send messages to your friend and configure privacy options. Switch to street view of the friend’s location. Get directions to the friend’s location.
- Page 96 To control what to share and change your public profile 1 In Latitude, touch your name on the list of friends to open your public profile window. 2 Set the following options to your preferences. View your location history Enable the Location History feature which helps store your past Latitude history.
- Page 97 Places → Apps button → Places Touch the Home button Places automatically detects your current location and offers guide to nearby restaurants, coffee shops, bars, hotels, attractions, ATMs, gas stations, and more. 1 Touch to select a category. 2 From the list of places, touch the desired place to view more details.
- Page 98 Feature Description Searching along route Search for any kind of business along your → route. Press the Menu button Layers to access popular types of places. Satellite View Satellite view allows you to view your route overlaid on 3D satellite views with Google's high-resolution aerial imagery.
- Page 99 YouTube YouTube is an Internet video streaming service that allows you to view videos uploaded by YouTube members. NOTE: Browsing and watching videos does not require you to sign in to a YouTube account. However, to use full YouTube features, such as commenting on videos, adding videos to your favorites, or uploading videos, you must create and sign in to a YouTube account.
- Page 100 3 The videos that match the words you said are listed. 4 Touch the video to start playing the video. To watch videos in full screen 1 Hold the device in the Landscape orientation. 2 Select a video on the YouTube screen. Touch the video to start playback, and then touch to enable the full screen mode.
- Page 101 NOTE: Some of the features above may require signing in to your YouTube account. To customize YouTube settings To customize YouTube settings, touch the Menu button on the device or the Menu button on the screen→ Settings. NOTE: For more information on using YouTube, touch the Menu button →...
- Page 102 3 On the application details screen, you can read the descriptions about the application or game, user ratings and reviews, and developer information. 4 On the application details screen, touch DOWNLOAD or BUY to download a free application or purchase an application. The application’s screen will show the download and installation progress.
-
Page 103: Synchronizing Your Google Data
3 Touch Uninstall. Synchronizing Your Google Data Through a web connection, your device can synchronize your Google data including Gmail, calendar, and contacts with your computer or any other device that you use to access your Google account. To select the applications to synchronize →... -
Page 104: Customizing Your Dell Streak 7 Tablet
Touch this option to select it. Touch the desired timeout period to select it. None If you select this option, data connectivity will not be disabled when the screen is turned off. Customizing Your Dell Streak 7 Tablet... -
Page 105: Display Settings
NOTE: You must draw the unlock pattern if you have set up and enabled the screen lock pattern. For more information, see "Protect Your Device Data with a Screen Unlock Pattern" on page 109. Customizing Your Dell Streak 7 Tablet... -
Page 106: Sound And Ringtone Settings
To adjust the volume, drag the sliders horizontally or touch the desired portion of the slider to increase or decrease volume. Touch OK to confirm the adjustment. NOTE: To enable the Silent mode, touch either to make these icons become Customizing Your Dell Streak 7 Tablet... -
Page 107: Date, Time, And Time Zone
; to disable a setting, touch the setting option to clear the check box Select time source Choose to set the device time manually or automatically from your mobile network or from the Internet. Automatic time zone Use network-provide time zone automatically. Customizing Your Dell Streak 7 Tablet... -
Page 108: Language Settings
To set the language of the display text: → Apps button → 1 Touch the Home button → Language & input→ Select language. Settings 2 Select a language of your choice from the list that appears. Customizing Your Dell Streak 7 Tablet... -
Page 109: Protecting Your Dell Streak 7 Tablet
2 Touch Configure lock screen under the Lock screen section→ Pattern. 3 Read the instructions on the screen and study the animated example of how to draw a pattern. Then, touch Next when you are ready to draw your own pattern. Protecting Your Dell Streak 7 Tablet... - Page 110 1 Touch the Home button → Location & security. Settings 2 To enable a setting, touch the setting option to select the check ; to disable a setting, touch the setting option to clear the check box Protecting Your Dell Streak 7 Tablet...
-
Page 111: Protect Your Device Data With A Pin
2 Touch Configure lock screen under the Lock screen section. 3 Enter the PIN you have enabled, and then touch Continue. 4 Select Not secured to disable the PIN; select PIN to change PIN. Protecting Your Dell Streak 7 Tablet... -
Page 112: Protect Your Device Data With A Password
→ Location & security. Settings 2 Touch Configure lock screen under the Lock screen section. 3 Enter the password you have enabled. 4 Select Not secured to disable the PIN; select Password to change the password. Protecting Your Dell Streak 7 Tablet... -
Page 113: Protect Your Sim Card With The Sim Lock Password (On 3G Model Only)
4 Type the old SIM card PIN, and then touch OK. 5 Type the new SIM card PIN, and then touch OK. 6 Type the new SIM card PIN again, and then touch OK. Protecting Your Dell Streak 7 Tablet... -
Page 114: Applications
Applications Camera Your device has a camera with auto-focus feature that allows you to capture and share high-quality pictures and videos. To start the camera in picture mode → Apps button → Camera Touch the Home button Camera controls Viewfinder screen. Touch the thumbnail view of the last taken picture to view and manage the picture using the Gallery application. - Page 115 On-screen shutter button. To capture a picture: Focus on the object in the viewfinder screen. Touch the on-screen shutter button and release to capture the picture. Camera setting indicator. Touch each indicator to open the camera settings, and touch to select the desired setting. Zoom-in.
-
Page 116: Bluetooth
Camcorder setting indicator. Touch each indicator to open the camcorder settings. Zoom-in. Zoom-out. ® Bluetooth Bluetooth is a short-range wireless communications technology that allows your device to connect to other Bluetooth-enabled devices over a wireless network. Bluetooth on your device operates in three different modes: Bluetooth is turned on. - Page 117 To pair with a Bluetooth device → Apps button → 1 Touch the Home button → Wireless & networks→ Bluetooth settings. Settings NOTE: Ensure Bluetooth has been enabled on the device you want to pair with, and the device is in Discoverable state. 2 Touch Find nearby devices.
- Page 118 To terminate a pairing partnership → Apps button → 1 Touch the Home button → Wireless & networks→ Bluetooth settings. Settings 2 Under the Paired devices section, touch the icon next to a paired device. 3 Touch Unpair to erase all pairing information with that device. You need to re-enter the password if you want to restore a Bluetooth connection to that device.
-
Page 119: Gallery
Gallery To view and manage the pictures and videos stored on your device, → Apps button → Gallery touch the Home button The Gallery application displays not only the pictures and videos stored on your SD card, but also those uploaded to the Picasa web album of your Gmail account which you signed in with on your device. - Page 120 To browse picture and video thumbnails 1 Touch an album to display the thumbnails of all pictures and videos in the album. 2 To browse the thumbnails: • Flick thumbnails horizontally until the desired thumbnail is located. • From the action bar on the top of the screen, touch By album or Images and videos to sort the thumbnails as desired.
- Page 121 To display a full picture Touch a desired picture thumbnail to display the picture in full screen. • Flick the picture to view the next or previous one. • To bring up the picture viewing controls, touch anywhere on the screen.
-
Page 122: Music
Music To open Music → Apps button → Music Touch the Home button The Music library screen opens, which is organized by Artists, Albums, Songs, and Playlists tabs. You can touch a tab to display your desired category. To select a song All the available music files are grouped into these categories: Artists, Albums, Songs, and Playlists. - Page 123 To control music playback The album’s cover image if present. The passing playback time. • Touch the playback control bar to jump to any part of the song. • Drag and scroll the playback control bar forward to fast-forward the song.
-
Page 124: Calendar
11 Go to the Now playing list. NOTE: Press the volume up button or volume down button to adjust the playback volume. To create a playlist 1 On the Music screen, touch the Artists, Albums, Songs tabs as needed. 2 Flick the screen until you reach the artist, album, or song that you want to add to the playlist. - Page 125 4 If there is a time period for the event, touch and type the From and To date and time. If the event is a special occasion such as a birthday or spans a whole day, set the From and To date, and then select the All day check box.
- Page 126 1 In Calendar, under the Day or Week view, the controls panel on the right displays all the calendars from the accounts you have on your device, indicated by tabs with different colors. 2 If you want to show the events from an account’s calendar, touch the account name to make it highlighted.
- Page 127 To view, dismiss, or snooze a reminder 1 Touch the upcoming event icon to open the notification. 2 Touch the upcoming event name to display the event. NOTE: If you have other pending event reminders, these events will also appear on the screen. 3 On the Calendar notifications menu that appears, you can do the following: Touch Snooze all to put off all event reminders for five...
-
Page 128: Clock
Clock Your device can work as a desk alarm clock to display current time and date, local weather, and play picture slideshow and music. → Apps button → Clock Touch the Home button Displays the first active alarm time. The current time and date. Touch to set the alarm. - Page 129 10 Alarms: Allows you to open the Alarms screen and view the alarms that have been set. To set an alarm You can set multiple alarms. 1 On the Clock main screen, touch 2 On the Alarms screen, touch Add alarm. 3 Set the alarm time from the Set time menu that appears.
-
Page 130: Calculator
To temporarily disable an alarm On the Alarms screen, clear the green check box of the alarm time you want to disable. To delete an alarm 1 On the Alarms screen, touch the alarm time you want to delete. 2 On the Set alarm screen, touch Delete. To enable the alarm in silent mode You can choose if the alarm should ring when the device is in silent mode. -
Page 131: Sound Recorder
Sound Recorder Open this application to record voice and sounds and then play them back. You can also set the recording as a ringtone for your device. NOTE: The sound recorder only supports recording in the amr format. → Apps button →... -
Page 132: Connect And Sync With A Computer Using Dell Mobile Sync
The Dell Mobile Sync software is supported by Microsoft Windows XP (SP3), Windows Vista, and Windows 7 operating systems. To install the Dell Mobile Sync software on your computer 1 Connect the supplied USB cable to your device and a computer. - Page 133 3 If the Dell Mobile Sync installer does not start automatically: Double-click the new Removable Disk that appears on your computer. Navigate to the Dell Mobile Sync folder on the removable disk. Double-click the InstallDellMSync.exe file to start the installation.
-
Page 134: Troubleshooting
Troubleshooting Problem Possible causes Possible solutions PIN Code is blocked You have entered an Contact your service incorrect PIN code three provider. If the service consecutive times. provider provides the SIM card's PUK code, use the PUK code to unlock the SIM card. - Page 135 Problem Possible causes Possible solutions Messaging problems Unable to send or Your device is in Airplane 1 Touch the Time area in mode with no wireless the system bar to open receive text messages. connectivity. the Status Details. 2 Touch anywhere in the Status Details.
-
Page 136: Starting Your Device In The Safe Mode
Problem Possible causes Possible solutions Internet problems Unable to connect to the Invalid SIM card. Contact your service provider. network. You are not within the Check the service area with network’s service area. your service provider. Poor signal. Move to an open space or if you are inside a building, move closer to a window. -
Page 137: Emergency Recovery
The DELL logo appears twice as the device starts up. 3 When the DELL logo appears the second time, touch and hold the Menu button until “Safe mode” appears at the bottom of the screen. NOTE: To exit Safe mode, turn off your device and turn it on again. - Page 138 5 Wait for the device to restart. To upgrade the device software 1 Insert an SD card on your computer. 2 On your computer, go to support.dell.com and follow the instructions to download the software upgrade package “update.pkg” and save it on the SD card.
- Page 139 Bluetooth, 116 Button Back, 7 Data connection, 62 Home, 8 Date, 107 Menu, 7 Power and Sleep/Wake, 7 Dell Mobile Sync, 132 Volume up/down, 6 Dell Stage widgets, 30 Device Customize, 104 Calculator, 130 Emergency recovery, 137 Factory reset, 137...
- Page 140 Protect, 109 Safe Mode, 136 Home screen Settings, 59 Customize, 25 Setup, 11 Software upgrade, 138 Turn off, 13 Turn on, 13 Disable all connections, 66 Internet Browse, 66 Display settings, 105 Connection, 62 E-mail, 76 Keyboard Emergency recovery, 137 Android, 55 Swype, 51 Erase all data, 60...
- Page 141 Sound, 106 Stage widgets, 30 Swype keyboard, 51 Synchronize Google Data, 103 Recorder, 131 Synchronize with Computer Ringtone, 106 Use Dell Mobile Sync, 132 Safe Mode, 136 Text message, 44 Screen Time, 107 Orientation, 17 Turn off/on, 13 Time zone, 107...
- Page 142 Voice Search, 58 Applications, 79 Bookmarks, 73 Widgets Definition, 17 Google Search, 58 Wi-Fi, 63 YouTube, 99 Index...