
Related Manuals for ABB REACT-3.6-TL


Summary of Contents for ABB REACT-3.6-TL
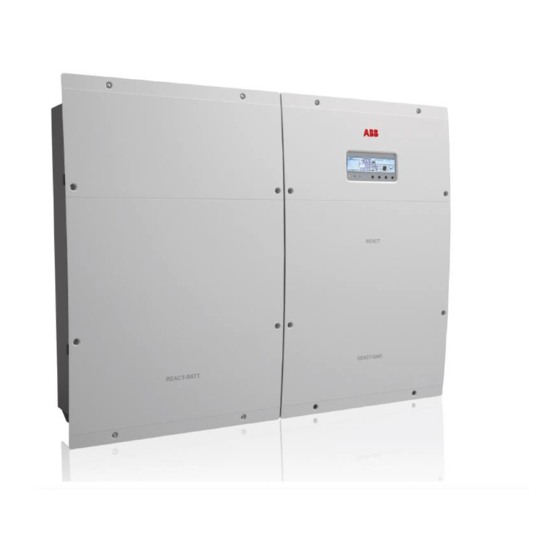
- Page 1 ABB solar inverters Product manual REACT-3.6/4.6-TL (from 3.6 to 4.6 kW) Скачано с сайта интернет магазина https://axiomplus.com.ua/...
- Page 2 Operators are required to read this manual and scrupulously follow the instructions given in it, since ABB cannot be held responsible for damage caused to people and/or property or to the equipment if the conditions described below are not observed.
- Page 3 4 - Lifting and transport 5 - Installation 6 - Instruments 7 - Operation 8 - Maintenance REACT-3.6_4.6-TL-Product Manual EN-Rev B (M000025BG) EFFECTIVE 28/04/2016 © Copyright 2016 ABB. All Rights Reserved. - 3 - Скачано с сайта интернет магазина https://axiomplus.com.ua/...
-
Page 4: Ntroduction And General Information
ABB declares that the equipment complies with the provisions of law currently in force in the country of installation and has issued the corresponding declaration of conformity. -
Page 5: Table Of Contents
1 - Introduction and general information able of Contents ntroduction and general information ....................4 Warranty and supply conditions ......................4 Not included in the supply .......................4 Table of Contents ............................5 Reference number index ........................9 Graphical representation of references .....................10 REACT-3.6/4.6-TL .........................10 REACT-UNO-3.6/4.6-TL .......................11 REACT-BATT-AP1 ........................12 REACT-MTR-1PH .........................13... - Page 6 1 - Introduction and general information Safety devices ............................44 Anti-Islanding ........................44 Ground fault of the photovoltaic panels ................44 “ STOP” button ........................44 REACT-BATT-AP1 state of health (SOH) ................44 Other safeguards ........................44 afety and accident prevention ..................... 45 Safety information and instructions ....................45 Hazardous areas and operations .......................46 Environmental conditions and risks ..................46 Signs and labels ........................46...
- Page 7 1 - Introduction and general information Configuration of independent or parallel input channels ..............81 Channel configuration examples ..................82 Independent channel configuration (default configuration) ..........83 Configuration of parallel-connected channels ..............83 Input connection to PV generator (DC side) ..................84 Installation procedure for quick-fit connectors ..............86 Communication and control signal connections ................90 Description of communication and control signal terminal blocks ........91 External backup command connection ................92...
- Page 8 1 - Introduction and general information Procedure for dismantling of the REACT system ................164 Registration on “Registration” website and calculation of second-level password (Service Menu) ..............................165 Resetting the time remaining to change the grid standard ............168 Verification of ground leakage ......................169 Behaviour of a system without leakage ................169 Behaviour of a system with leakage ...................170 Measuring the insulation resistance of photovoltaic generator ...........171...
-
Page 9: Reference Number Index
1 - Introduction and general information eference number index wall bracket battery communication and control cable heat sink battery power cable REACT-UNO battery protection fuse display smoke sensor (inverter) keypad ground connection points LED panel cable conduit (male) cable conduit (female) power connector (cable from unit on the left) DC disconnect switch power connector (cable from unit on the right) -
Page 10: Graphical Representation Of References
1 - Introduction and general information raphical representation of references EACT-3.6/4.6-TL - 10 - Скачано с сайта интернет магазина https://axiomplus.com.ua/... -
Page 11: React-Uno-3.6/4.6-Tl
1 - Introduction and general information EACT-UNO-3.6/4.6-TL LOAD MANAGER BOX LOAD MANAGER BOX - 11 - Скачано с сайта интернет магазина https://axiomplus.com.ua/... -
Page 12: React-Batt-Ap1
1 - Introduction and general information EACT-BATT-AP1 BATTERY ADDRESS SELECTOR DC POWER BATT. COMM. BATT. COMM. MULTI-BATTERY DC POWER LINK BATTERY ADDRESS SELECTOR DC POWER BATT. COMM. BATT. COMM. MULTI-BATTERY DC POWER LINK - 12 - Скачано с сайта интернет магазина https://axiomplus.com.ua/... -
Page 13: React-Mtr-1Ph
1 - Introduction and general information EACT-MTR-1PH -1 PH RE AC T- M TR IN PU T : 11 0/ 23 0 V 50 /6 0 Hz 10 mA ma EACT-MTR-3PH - 13 - Скачано с сайта интернет магазина https://axiomplus.com.ua/... -
Page 14: Scope And Target Audience
1- Introduction and general information cope and target audience urpose and document structure This operating and maintenance manual is a useful guide that will enable you to work safely and carry out the operations necessary for keeping the equipment in good working order. If the equipment is used in a manner not specified in this manual, the protection provided by the equipment may be impaired. -
Page 15: Symbols And Signs
1 - Introduction and general information ymbols and signs In the manual and/or in some cases on the equipment, the danger or hazard zones are indicated with signs, labels, symbols or icons. Symbol Description Indicates that it is mandatory to consult the manual or original document, which must be available for future use and must not be damaged in any way. - Page 16 1 - Introduction and general information Symbol Description Indicates a risk of electric shock. The discharge time of the stored energy (represented in the figure by the letters XX), is provided on the identification label. Direct Current Alternate current With insulation transformer Without insulation transformer Positive pole of the input voltage (DC) Negative pole of the input voltage (DC)
-
Page 17: Field Of Use, General Conditions
The REACT system can be used only if all the technical characteristics are observed. Batteries other than those approved by ABB cannot be connected to the REACT system - 17 - Скачано с сайта интернет магазина https://axiomplus.com.ua/... -
Page 18: Improper Or Disallowed Use
1 - Introduction and general information mproper or disallowed use IT IS STRICTLY FORBIDDEN TO: • Install the system in such a way that it is exposed to direct sunlight • Install the equipment in environments with particular flammability conditions or in environmental conditions (temperature and humidity) other than those specified. -
Page 19: Haracteristics
Characteristics eneral conditions A description of the equipment characteristics is provided to identify its main components and specify the technical terminology used in the manual. This chapter contains information about the models, details of the equipment, characteristics and technical data, overall dimensions and equipment identification. -
Page 20: Models And Range Of Equipment
2 - Characteristics odels and range of equipment The pieces of equipment which make up the REACT system to which this manual is dedicated are: Single-phase inverter unit: REACT-UNO-3.6-TL single-phase, maximum output power 3600W REACT-UNO-4.6-TL single-phase, maximum output power 4600W Main characteristics •... -
Page 21: Identification Of The Equipment And Manufacturer
1. Manufacturer 2. Model 3. Rating data 4. Certification marks Made in Italy PROTECTIVE CLASS: I www.abb.com/solar MODEL: SOLAR INVERTER REACT-UNO-3.6-TL © Copyright 2016 Power-One Italy Spa. All rights reserved. Reproduction, use or disclosure to third parties without express written authority 600 V 230 V 1Ø... -
Page 22: Characteristics And Technical Data
2 - Characteristics haracteristics and technical data Photovoltaic system with storage REACT-3.6-TL REACT-4.6-TL REACT-UNO-3.6-TL REACT-UNO-4.6-TL System components REACT-BATT-AP1 REACT-MTR-1PH or REACT-MTR-3PH Photovoltaic inverter with integrated charger REACT-UNO-3.6-TL REACT-UNO-4.6-TL Input Absolute maximum DC voltage (Vdc, max) 600V DC start-up voltage (Vstart) 200 V (adj. - Page 23 AP1 battery pack with the IP21 protection level, the protection level of the whole system becomes IP21. 4) Please refer to the document “String inverters – Product manual appendix” available at www.abb.com/solarinverters for information on the quick-fit connector brand and model used in the inverter.
- Page 24 2 - Characteristics Battery Pack REACT-BATT-AP1 Manufacturer Panasonic Type Li-Ion Typical/maximum discharge power 1.5 kW / 1.8 kW. Maximum charge power 1.1 kW Average useful capacity over life 2 kWh (6 kWh, with 3x REACT-BATT-AP1) Useful life >4500 cycles Useful life in years, typical 10 years (maximum 9MWh discharged) Relative humidity 5…95% without condensation...
-
Page 25: Tightening Torques
2 - Characteristics ightening torques To maintain the IP65 protection of the system and for optimal installation, the following tightening torques must be used: REACT-UNO AC cable gland called AC GRID (M25) 7.5 Nm AC back-up cable gland called AC-1 (M25) 7.5 Nm Service cable glands... -
Page 26: Overall Dimensions React-3.6/4.6-Tl
2 - Characteristics verall dimensions REACT-3.6/4.6-TL The overall dimensions are expressed in millimetres and include the wall installation bracket. 4 9 2 m 4 9 2 m 9 8 5 m 4 9 2 m 4 9 2 m 1 4 7 8 4 9 2 m 4 9 2 m 4 9 2 m... -
Page 27: Overall Dimensions React-Mtr-1Ph
2 - Characteristics verall dimensions REACT-MTR-1PH The overall dimensions are given in mm. REACT-MTR-1PH INPUT : 110/230 V 50/60 Hz 10 mA max verall dimensions REACT-MTR-3PH The overall dimensions are given in mm. - 27 - Скачано с сайта интернет магазина https://axiomplus.com.ua/... -
Page 28: Dimensions Main Bracket React-3.6/4.6-Tl
2 - Characteristics imensions main bracket REACT-3.6/4.6-TL The dimensions of the wall mounting bracket are expressed in mm - 28 - Скачано с сайта интернет магазина https://axiomplus.com.ua/... -
Page 29: Dimensions Additional Bracket (React-Batt-Ap1)
2 - Characteristics imensions additional bracket (REACT-BATT-AP1) The dimensions of the wall mounting bracket are expressed in mm - 29 - Скачано с сайта интернет магазина https://axiomplus.com.ua/... -
Page 30: Efficiency Curves
2 - Characteristics fficiency curves The equipment was designed considering current energy conservation standards, to avoid waste and unnecessary leakage. Graphs of the efficiency curves of all models of inverter described in this manual are shown below. The efficiency curves are linked to technical parameters that are continually being developed and improved and should therefore be considered approximate. -
Page 31: Power Limitation (Power Derating)
2 - Characteristics ower limitation (Power Derating) In order to allow inverter operation in safe thermal and electrical conditions, the unit automatically reduces the amount of power fed into the grid. Power limiting may occur due to: • Adverse environmental conditions (thermal derating) •... -
Page 32: Power Reduction Due To Environmental Conditions
2 - Characteristics ower reduction due to environmental conditions The power reduction value and the inverter temperature at which it occurs depend on the ambient temperature and on many operating parameters. Example: input voltage, grid voltage and power available from the photovoltaic field. The inverter can therefore reduce the power during certain periods of the day according to the value of these parameters. -
Page 33: Power Reduction Due To The Altitude Of The Installation
2 - Characteristics ower reduction due to the altitude of the installation The graphs show the automatic reduction of supplied power as a function of the altitude of the installation. Derating Pout Vs Altitude REACT-UNO-3.6-TL Altitude Vs Max output power REACT-UNO-4.6-TL 1000 1200... -
Page 34: Output Power Reduction Due To The Input Voltage
2 - Characteristics utput power reduction due to the input voltage The graphs show the automatic reduction of supplied power when input voltage values are too high or too low. REACT-UNO-3.6-TL Pout Vs. Vin 5000 4500 4000 3500 3000 Pout - 3 battery 2500 Pout - 2 battery 2000... -
Page 35: Input Power Reduction Due To The Input Voltage
2 - Characteristics nput power reduction due to the input voltage The graphs show the automatic reduction of supplied power when input voltage values are too high or too low. REACT-UNO-3.6-TL Pin Vs. Vin 6000 Pin - with battery Pcharge - 1 battery Pcharge - 3 battery 5500 Pin - No battery... -
Page 36: Characteristics Of A Photovoltaic Generator
2 - Characteristics haracteristics of a photovoltaic generator A PV generator consists of an assembly of photovoltaic modules that transform solar radiation into DC electrical energy and can be made up Strings: number (X) of PV modules connected in series Array: group of X strings connected in parallel trings and Arrays The string technology was developed to significantly reduce the... -
Page 37: Description Of The React System
A configuration program that can help to correctly size the photovoltaic system is available on the ABB website http://stringsizer.abb.com. - 37 - Скачано с сайта интернет магазина https://axiomplus.com.ua/... -
Page 38: Operating Diagram
2 - Characteristics perating diagram Aurora Vision web portal (Remote monitoring and settings) Backup Load Manager Reference Description Photovoltaic generator REACT system (consisting of REACT-UNO and REACT-BATT) Meter for energy produced (where required by national regulations) REACT-MTR Exchange meter (on the supply point of the grid) Electricity grid Domestic utilities connected to the back-up output Domestic utilities... -
Page 39: Operating Stages Of The System
2 - Characteristics perating stages of the system The REACT system enables the storage of unused energy and makes it available during evening hours or times of maximum absorption, enabling self-consumption to be maximised. The main operating stages of the system are: 1. -
Page 40: Functionality And Components Of The Equipment
Aurora Manager LITE. Power feeding management modes vary according to the country of installation and the grid companies. For detailed information on the parameters and characteristics of this function, please contact ABB directly. Limiting the active power fed into the grid... - Page 41 REACT system. For further details relating to the external load management system and the configurations required for its operation, refer to the document “REACT -3.6/4.6-TL EXTERNAL LOADS MANAGEMENT – Load Manager Description” available on website www.abb.com/ solarinverters. Optimisation of self-consumption...
- Page 42 For further details relating to the Backup output and the corresponding operation modes, please refer to the document “REACT -3.6/4.6-TL BACKUP OUTPUT - Operation and setup", available on the website www.abb.com/solarinverters - 42 - Скачано с сайта интернет магазина https://axiomplus.com.ua/...
-
Page 43: Topographic Diagram Of The Equipment
2 - Characteristics opographic diagram of the equipment REACT-UNO Inverter IN1.1(+) MPPT 1 (DC/AC) Switch (DC/DC) Bulk caps IN1.2(+) Backup Output IN1.1(-) IN1.2(-) Line Grid parallel fil t er relay Output MPPT 2 IN2.1(+) (DC/DC) IN2.2(+) Residual current detection IN2.1(-) IN2.2(-) Control circuit RS485... -
Page 44: Safety Devices
2 - Characteristics afety devices nti-Islanding In the event of a local grid outage by the electricity company, or when the equipment is switched off for maintenance operations, the inverter must be physically disconnected to ensure the protection of the people working on the grid, in accordance with the relevant national laws and regulations. -
Page 45: Afety And Accident Prevention
It is therefore necessary for the customer to appropriately inform the manufacturer about particular installation conditions. ABB accepts no liability for failure to comply with the instructions for correct installation and cannot be held responsible for the upstream or downstream equipment. -
Page 46: Hazardous Areas And Operations
These conditions are listed in the technical data and in the installation chapter. ABB is not responsible for any loss of the equipment, or part of it, which does not take place on the basis of the regulations and laws in force in the country of installation. -
Page 47: Thermal And Electrical Hazard
ABB has done its best to eliminate sharp edges and corners, but as this is not always possible you are advised always to wear theclothing and personal protection equipment provided by the employer. -
Page 48: Safety Precautions Relating To React-Batt-Ap1
COULD cause serious personal harm or damage to the product or property. • Do not use the battery pack REACT-BATT-AP1 with other battery models if not expressly indicated by ABB. • Do not use a battery pack that is leaking electrolyte material. The electrolyte material which has leaked from the battery could burn or catch fire and cause smoke, breakages or flames. - Page 49 3 - Safety and accident prevention CAUTION. The caution messages (set out below) are used to indicate risks or dangerous actions which could cause serious harm to people or damage to property. • Do not use or leave the battery pack exposed to direct sunlight (or in a vehicle which is exposed to the sun).
-
Page 50: Residual Risks
3 - Safety and accident prevention esidual risks Despite the warnings and safety systems, there are still some residual risks that cannot be eliminated. These risks are listed in the following table with some suggestions to prevent them. able of residual risks RISK ANALYSIS AND DESCRIPTION SUGGESTED REMEDY Noise pollution due to installation in unsuitable environments or where... -
Page 51: Ifting And Transport
Lifting and transport eneral conditions Storage, handling and transport must comply with particular rules and regulations indicated in the subsequent paragraphs. The lifting and transporting of pallets containing the equipment can be done using pallet trucks or forklifts, by picking up the pallet in the area intended for lifting. -
Page 52: Storage Of Equipment
The storage of REACT-BATT starts from the moment of delivery by ABB. In order to guarantee the full operation of the system, REACT-BATT must be put into service within 3 months at most of the date of delivery by ABB to the recipient of the goods. -
Page 53: Lifting
4 - Lifting and transport ifting ABB usually stores and protects individual components by suitable means to make their transport and subsequent handling easier. Nonetheless, as a rule, it is necessary to turn to the experience of specialised staff to take charge of loading and unloading components. -
Page 54: Transport Of The Equipment
“Ancillary rule” and the “1,000 units rule”. ABB does not accept any responsibility for the correctness and completeness of what is set out. The installer must check and comply with all the regulations in force. - Page 55 4 - Lifting and transport For the transport of lithium-ion batteries the installers can make use of legal exemptions, which are: - “Ancillary rule” (1.1.3.1 c ADR, attachment 2 GGVSEB) - “1,000 units rule” for carriage in exempt quantities (1.1.3.6 ADR). The “ancillary rule”...
-
Page 56: Unpacking And Checking
If any defect or damage is detected, please stop, contact the carrier and also promptly inform the ABB Service . ist of components supplied Inside the package the following components required to correctly install... - Page 57 4 - Lifting and transport Components available for REACT-UNO Quantity Two-hole gasket for M25 service cable glands and cover 2 + 2 Two-hole gasket for M20 service cable glands and cover 3 + 3 Wi-Fi antenna EMI filter for AC cable gland (back-up) IP65 cover (with fastening ring nut) for individual installation on REACT-UNO solar...
-
Page 58: Nstallation
Installation eneral conditions The device is installed depending on the system and the place where the device is installed. Its performance therefore depends on the correctness of the connections. Staff authorised to carry out the installation must be specialised and experienced in this job. -
Page 59: Environmental Checks
5 - Installation nvironmental checks The installation location must comply with the requirements of the standards EN 50272-2 and EN 60069-10. • The installation location must be easily accessible • Prevent access to the installation location by children • The minimum air volume in the installation location must be 15m and equipped with two openings with a diameter of 6cm for natural air circulation. - Page 60 5 - Installation • Avoid electromagnetic interference that can compromise the correct operation of electronic equipment, with the consequent hazards • The ambient temperature of the installation location must be between 5°C and 35°C to guarantee the optimal operation of the battery unit (REACT-BATT-AP1).
-
Page 61: Installation Position
5 - Installation nstallation position When choosing the place of installation, observe the following conditions: • Install on a wall or strong structure capable of bearing the weight of the equipment • Install in safe, easy to reach locations • If possible, install at eye-level so that the display and status LEDs can be seen easily •... -
Page 62: Wall Installation Of The React System
5 - Installation all installation of the REACT system 10 mm Ø • Position the bracket so that it is perfectly level on the wall and use it as a drilling template. • Make the 4 holes necessary, using a drill with a 10 mm. diameter bit. - Page 63 5 - Installation • Lift and fasten the REACT-BATT by inserting the to the wall bracket springs that are on the bracket itself into the 2 holes on the rear bracket of the REACT-BATT Risk of injury due to the weight of the equipment.
- Page 64 5 - Installation • Remove the plastic covers installed on the REACT-UNO and on the REACT-BATT screws in total). Then remove the metal covers of the compartments for the electric connections (16 screws in total). • Remove the protective cover from the support of the Wi-Fi antenna located on the lower part of the REACT-UNO...
- Page 65 5 - Installation • Insert the battery pack connection cables (which come out of the inverter) into the REACT-BATT using the hole present on the side of the mechanical cover. • Feed the cables into the cable conduit (male) supplied with the REACT-BATT •...
-
Page 66: Wall Installation Of The React-Uno Alone
5 - Installation all installation of the REACT-UNO alone 10 mm Ø • Position the bracket so that it is perfectly level on the wall and use it as a drilling template. • Make the 4 holes necessary, using a drill with a 10 mm. diameter bit. - Page 67 5 - Installation • Anchor the lower part of the REACT to the wall by installing 2 plugs (10 mm. diameter supplied). Then screw in 2 screws with washers into the holes on the lower side of the equipment. • Remove the plastic cover installed on the REACT-UNO (8 screws in total).
- Page 68 5 - Installation • Remove the protective cover from the support of the Wi-Fi antenna located on the lower part of the REACT-UNO and install the Wi-Fi antenna screwing it into the specific connector. • Remove the fastening ring nut of the cable conduit.
- Page 69 5 - Installation • Install the sealing cover IP65 (supplied) in the hole left free by the cabling to connect to the battery unit. Position the cover outside the REACT-UNO and screw the fastening ring nut on the internal side. •...
-
Page 70: Connection Of The Energy Meter (React-Mtr)
For further details relating to compatibility and the relative configurations required for opera- tion of the energy meters, refer to the document REACT-MTR 1PH/3PH Compatibility and Configuration of the meters to manage energy flows” available on website www.abb. com/solarinverters. onnection of the REACT-MTR-1PH (mono-phase) The indications set out below are necessary to connect the REACT-MTR to the REACT sy- stem. -
Page 71: Communication And Control Signal Terminal Block
5 - Installation Serial line terminal block Communication and control signal of the REACT-MTR terminal block of the REACT-UNO Terminal 16 (+T/R) Terminal 14 (-T/R) Terminal 18 (RTN) RS485 METER To connect the serial cable inside the inverter, refer to the section “Connection of METER RS485 serial communication line”... -
Page 72: Connection And Configuration Of The React-Mtr-3Ph
5 - Installation onnection and configuration of the REACT-MTR-3PH (three-phase) The indications set out below are necessary to connect the REACT-MTR to the REACT sy- stem. Always refer to the specific documentation supplied with the REACT-MTR-3PH. The energy meter REACT-MTR-3PH is a DIN rail device (4 modules) and must be installed where the electricity supply is three-phase. - Page 73 5 - Installation • Once the phase of mechanical installation of the METER is finished, it is necessary to configure the METER in order to make it compatible with the REACT system. Set the parameters of the meter as set out in the table: Parameter Settings...
-
Page 74: Preliminary Operations For Connection Of The Pv Generator
All ABB string inverters marketed in Europe are equipped with a device for protection against ground faults in accordance with the safety standard IEC 62109-2, sections 4.8.2 and 4.8.3 of the Standard (equivalent to Standard DIN V VDE V 0126-1:2006, section 4.7). - Page 75 B differential switch. In accordance with article 712.413.1.1.1.2 of Section 712 of IEC Standard 64-8/7, we hereby declare that, because of their construction, ABB inverters do not inject ground fault direct currents. The use of an AC type circuit breaker with differential thermal magnetic protection with tripping current of 300 mA is advisable so as to prevent false tripping, due to the normal capacitive leakage current of photovoltaic modules.
-
Page 76: Distribution Grid Output Connection (Ac Side)
The table shows the maximum length of the line conductor based on the cross-section of this conductor: Conductor cross-sec- Maximum length of the tion line conductor (m) of line (mm²) REACT-3.6-TL REACT-4.6-TL 16 m 10 m 24 m 15 m 41 m... -
Page 77: Load Protection Switch (Ac Disconnect Switch)
(AC disconnect switch) It is recommended that the inverter AC connection line be fitted with a device to protect against maximum current and leakage to ground, with the following characteristics: REACT-3.6-TL REACT-4.6-TL Type Automatic circuit breaker with differential thermal magnetic protection... -
Page 78: Back-Up Output Connection (Ac)
5 - Installation ack-up output connection (AC) To connect the back-up output of the inverter, you need 3 connections: ground, neutral and phase. In any case, connection of the inverter to ground is mandatory. Any failure of the inverter when it is not connected to ground through the appropriate terminal is not covered by the warranty. -
Page 79: Characteristics And Sizing Of The Cable For Back-Up Output
To protect the AC back-up connection line of the inverter, a device must be installed to protect against maximum current and leakage to ground, with the following characteristics: REACT-3.6-TL REACT-4.6-TL Automatic circuit breaker with diffe- Type rential thermal magnetic protection... -
Page 80: Connection To Back-Up Ac Output Terminal Block
5 - Installation onnection to back-up AC output terminal block To avoid risks of electrical shock, all wiring operations must be carried out after putting the system out of service. For all the models the connection is made with the AC output terminal block by passing the cables through the AC cable gland Strip 10mm of sheathing from the cables and then insert into the inverter the cable, making it pass through the AC cable gland... -
Page 81: Configuration Of Independent Or Parallel Input Channels
5 - Installation onfiguration of independent or parallel input channels All versions of the inverter are equipped with two input channels (therefore with double maximum power point tracker MPPT) independent of each other, which can however be connected in parallel using a single MPPT. Each channel must be connected with strings of PV modules having the same type and number of panels in series;... -
Page 82: Channel Configuration Examples
5 - Installation hannel configuration examples Characteristics of PV generator MPPT Notes configuration The photovoltaic generator is made A NECESSARY condition for the two MPPT to up of strings with differing series MPPT be used independently is that the photovoltaic modules numbers. -
Page 83: Independent Channel Configuration (Default Configuration)
5 - Installation ndependent channel configuration (default configuration) This configuration uses the two input channels (MPPT) independently. This means that the jumper (supplied) between the positive poles of the DC (MPPT1) connectors and the DC (MPPT2) connectors must not be installed and that the mode which must be selected during the guided setup for commissioning the system is “INDEPENDENT”. -
Page 84: Input Connection To Pv Generator (Dc Side)
5 - Installation nput connection to PV generator (DC side) Once preliminary checks have been carried out and no problems found with the photovoltaic system, and the channel configuration has been selected (parallel or independent) you may connect the inputs to the inverter. - Page 85 5 - Installation If any string inputs are not required, you must ensure that covers are installed to the connectors, and install any which are missing. This is necessary both for the inverter grade IP seal, and to avoid damage to the free connector which may be used at a later time.
-
Page 86: Installation Procedure For Quick-Fit Connectors
5 - Installation nstallation procedure for quick-fit connectors There are typically four different types of quick-fit connector models used on ABB inverters: Weidmüller PV-Stick or WM4, MultiContact MC4 and Amphenol H4. Please refer to the document “String inverters – Product manual ap- pendix”... - Page 87 5 - Installation 2. WEIDMÜLLER WM4 quick-fit connectors Installation of Weidmüller WM4 connectors requires crimping to be carri- ed out with suitable equipment. - Strip the cable to which you want to apply the connector (after verifying that it complies with the connector limits). 4...6mm - Apply the terminal to the conductor using the designated pliers.
- Page 88 5 - Installation 3. MULTICONTACT MC4 quick-fit connectors Installation of Multicontact MC4 connectors requires crimping to be carri- ed out with suitable equipment. - Strip the cable to which you want to apply the connector (after verifying that it complies with the connector limits). 4...6mm - Apply the terminal to the conductor using the designated pliers.
- Page 89 5 - Installation 4. AMPHENOL H4 quick-fit connectors Installation of Amphenol H4 connectors requires crimping to be carried out with suitable equipment. - Strip the cable to which you want to apply the connector (after verifying that it complies with the connector limits). 4...6mm - Apply the terminal to the conductor using the designated pliers.
-
Page 90: Communication And Control Signal Connections
5 - Installation ommunication and control signal connections Each communication and control service cable that must be connected inside the REACT-UNO must pass through one of the four service cable glands available, named OUT-1, OUT-2, OUT-3 and OUT-4. They are M20 service cable glands and can take a cable with a diameter of 7 mm to 13 mm. -
Page 91: Description Of Communication And Control Signal Terminal Blocks
5 - Installation escription of communication and control signal terminal blocks Description of communication and control signal terminal block Terminal Terminal Description name number WIND 1, 3 External backup command 2, 4 Remote external ON/OFF command 5, 6 Auxiliary 5V positive 7, 8 -T/R of the RS485 M-B (ModBus) communication line RS485... -
Page 92: External Backup Command Connection
5 - Installation xternal backup command connection Inverter The REACT system is equipped with a Backup AC output that can be activated in different operating modes that can be set via a display menu. ENTER Impostazioni Some modes (“Manual 1”, “Manual 4” and “Auto 1”) demand that entry ENTER Password 0000 into backup is also subordinate to the state of terminal 1 compared to... -
Page 93: Output Connection
5 - Installation 5V output connection On the communication and control signal terminal block there is auxiliary voltage of +5V. The maximum absorption permitted from this auxiliary power supply voltage is 100 mA. onnection of RS485 M-B (Modbus) serial communication line The RS485 M-B serial communication line on the communication and control signal terminal block is reserved for the connection of the... - Page 94 5 - Installation When connecting a single inverter to the monitoring system, activate the communication line termination resistance by setting the switch for RS485 M-B line termination (to the ON position). Set a different RS485 address on each inverter of the chain. An address can be chosen freely from out of 1 to 63.
-
Page 95: Connection Of Rs485 Pc Serial Communication Line
5 - Installation onnection of RS485 PC serial communication line The RS485 PC serial communication line on the communication and control signal terminal block is reserved for connecting the inverter to advanced configuration software or monitoring devices that communicate with the proprietary "Aurora"... - Page 96 5 - Installation Cables connecting the RS485 PC line may use two different types of connection: • Connection of the conductors using the terminals of the communication and control signal terminal block (+T/R, -T/R, and RTN) Connect the signals respecting the following positions: Terminal Terminal Description...
-
Page 97: Connection Of Rs485 Meter Serial Communication Line
5 - Installation onnection of RS485 METER serial communication line The RS485 METER serial communication line on the communication and control signal terminal block is reserved for the connection of the REACT-MTR (energy meter) that must be installed at the AC line's delivery point. - Page 98 5 - Installation Connect the signals respecting the following positions: Terminal Terminal Description name number -T/R RS485 METER communication line RS485 +T/R RS485 METER communication line METER Reference (RTN) of the RS485 METER communication line For long distance connections, it is preferable to use a shielded twisted pair cable with characteristic impedance of Z0=120 Ohm like the one shown in the following table: Signal Symbol...
-
Page 99: Configurable Relay Connection (Alarm)
5 - Installation onfigurable Relay connection (ALARM) The inverter is equipped with a multifunction relay with configurable activation. It can be connected with normally open contact (being connected between the NO terminal and the common contact C) and with normally closed contact (being connected between the NC terminal and the common contact C). -
Page 100: Connection To Load Management System (Load Manager Box)
Fuse (non-resettable) For further details relating to the external load management system and the configurations required for its operation, refer to the document “REACT -3.6/4.6-TL EXTERNAL LOADS MANAGEMENT – Load Manager Description” available on website www.abb.com/ solarinverters. - 100 -... -
Page 101: Nstruments
We, therefore, advise that you carefully read this manual. If you are not sure about any information in this manual, please ask ABB Service for more detailed information. Do not use the equipment if: - you do not have suitable qualifications to work on this equipment or similar products;... -
Page 102: Display, Keyboard And Status Led
6 - Instruments isplay, keyboard and status LED The system is equipped with a graphic display and status LEDs which make it possible to immediately understand the operating status of the system. In addition, on the display it is possible to make configurations, view statistics and information relating to all the components which make up the system itself. - Page 103 6 - Instruments Ref. Description b10 Displays the total energy from the inverter installation b11 Shows the energy produced throughout the day b12 Indicates that the PV generator voltage is greater than the inverter Vstart b13 Indicates the input channel (or the list) for which the data relating to the input parameters are shown in the field b22 b14 Indicates the DC/DC input circuit part (Booster) b15 Indicates the DC to AC conversion circuit (inverter)
- Page 104 6 - Instruments Example 2: - Photovoltaic production of 2.5kW. - 2.5kW is supplied in full to the house to meet the power requirement of 3kW for the domestic loads - 0.5kW is supplied to the house to meet the power request (the line between the symbol representing the inverter has the arrow pointed towards the inverter.
- Page 105 6 - Instruments The display has a graphics area (summary) b11 where it is possible to graphically represent one of the parameters monitored by the system. The type of graphic to be viewed can be selected through display menus (Display→Settings→Power Graph) - Graphic “PW Vs GRID”...
-
Page 106: Description Of The Keyboard And Status Leds
6 - Instruments escription of the keyboard and status LEDs Using the combination of the keyboard keys below the display, values can be set or data can be viewed by scrolling. By pressing the ENTER key, cyclic display of the parameters can be: Locked Cyclical POWER... -
Page 107: Peration
Operation eneral conditions Before checking the operation of the equipment, it is necessary to have a thorough knowledge of the Instruments chapter 6 and the functions that have been enabled in the installation process. The equipment operates automatically without the aid of an operator; the operating state should be controlled through the equipment’s instrumentation. -
Page 108: Monitoring And Data Transmission
• Data transmission on the dedicated RS-485 serial line. The data can be collected by a PC or a data logger equipped with an RS-485 port. Con- tact the ABB support service with any queries about device compatibility. easurement tolerance The data supplied by the inverter may differ from measurements taken by certified measuring instruments (e.g. -
Page 109: Commissioning
Point created by the REACT system approx. 60 seconds after its switch- The name of the Wi-Fi network created by the system (approx. 60 se- conds after its switch-on), that the connection should be established with, will be: ABB-SSSSSS-PPPP-WWYY Field Description SSSSSS... - Page 110 (a password is not required for the Wi-Fi network). ABB-123456-3N08-0115 The screens shown below pertain to a tablet with the Android operating system. Screens on other devices or operating systems may differ.
- Page 111 7 - Operation • Assisted setup - STEP 2 Setting Wi-Fi network This setup stage relates to connecting the REACT system to a Wi-Fi network. The parameters relating to the home Wi-Fi network (set on the router) that must be known and set during setup are: - IP address acquisition type: DHCP or Static.
- Page 112 From now on the REACT system is connected to the home Wi-Fi net- work. The Wi-Fi board automatically disables its access point with the name ABB-SSSSSS-PPPP-WWYY (no longer necessary). If the REACT system loses the connection with the home Wi-Fi network (and therefore, loses the internet connection), it will once again enable its own access point.
- Page 113 7 - Operation • Assisted setup - STEP 4 Setting general data relating to the system, the installer and the client. - System data to monitor (system name, address, town, etc.). Latitude and Longitude are fundamental parameters; incorrect values could render it impossible for the system to operate correctly. If the system is connected to the internet, the Longitude and Latitude fields are filled in automatically.
- Page 114 7 - Operation • Assisted setup - STEP 5 Setting type of METER and REACT-BATT number. - Type of REACT-MTR: 1. No meter (where system is installed without meter) 2. REACT-MTR-1PH (single-phase) 3. REACT-MTR-3PH (three-phase) If the METER is three-phase the phase to which the REACT system is connected must be selected.
- Page 115 7 - Operation • Assisted setup - STEP 6 Settings related to energy management. Energy Management Energy consumption Energy consumption - Power committed: setting related to the power of the electrical energy supply expressed in kW. Power committed Energy management policy - Grid standard: set the grid standard of the country in which the REACT Energy management policy is installed...
- Page 116 7 - Operation • Assisted setup - STEP 7 Registration with Aurora Registration on the Aurora Vision website ® Vision The commissioning procedure is concluded. Click on "Finito" (End) to The setup procedure is completed. Access the main page of the REACT web server by clicking on FINITO enter the REACT web interface and start to use and monitor the system.
-
Page 117: Updating The Firmware From An Sd Card
The firmware can be easily updated by means of an SD Card (4GB ma- ximum capacity) The latest firmware version is available from the download area of the website www.abb.com/solarinverters or from https://registration. abbsolarinverters.com Perform the update during good irradiation conditions (avoid the dawn and dusk hours) •... -
Page 118: Led Behaviour
7 - Operation ED behaviour The LEDs on the front panel can behave in different ways depending on the inverter's operating state. All possible LED activation combinations are shown in the following table. In particular, each LED could behave in one of the following ways: = LED on = LED flashing (slow) = LED flashing (fast) -
Page 119: Specifications On The Behaviour Of The Leds
7 - Operation LED status Operating state green: Backup operating modes yellow: Depending on the different modes that can be set, and after detecting the conditions required red: for the output to be enabled, the system went into backup operation green: yellow: Blackstart operating mode... -
Page 120: Description Of The Menus
7 - Operation escription of the menus The ABB inverters are equipped with a graphical display , consisting of 2 lines of 16 characters each, which can be used to: • Display the operating status of the inverter and the statistical data •... - Page 121 7 - Operation The sequence of screens displayed is shown below, with a description of the parameters monitored. Presence of Errors/Warnings Errors/Warnings Warning/Error xxx Inverter OK Inverter status: The code for any malfunction will be displayed. Alarm description Mon 22 Jan 15:55 Date and time as set on the inverter DOWN DOWN...
-
Page 122: Menu Structure
7 - Operation enu structure **** **** **** System Inverter Display Meter Battery Load Manager WIFI Logger > Statistics > Statistics > Settings > Settings > General > info > Settings > Self consumpti. > Lifetime Password 0000 Password 0000 >... -
Page 123: System Menu
7 - Operation ystem Menu By selecting the System menu, the following menus can be accessed: **** System > Statistics System Inverter Display Meter 1. Self consumpti. This section of the menu displays the statistics relating to self-con- sumption (expressed as a %). In particular: •... - Page 124 7 - Operation 6. PV en. to load This section of the menu displays the statistics relating to the photovol- **** taic energy used to fulfil the requests from residential loads. In particular: • E-day: photovoltaic energy used for residential loads today System Inverter Display...
- Page 125 7 - Operation 3. Set RS485 Com This section of the menu allows you to adjust the settings relating to the **** RS485 communication serial portsSet port 1” and “Set port 2”). • RS485 address: Allows you to set the address for serial communica- System Inverter Display...
- Page 126 7 - Operation System > Measures **** Select Measures to see the instantaneous value of the following para- System Inverter Display Meter meters: • P PV tot: instantaneous power of the photovoltaic generator • Pinv: instantaneous output power > Statistics >...
-
Page 127: Inverter Menu
7 - Operation nverter Menu **** **** Select the Inverter menu to access the following sub-menus: Inverter Display Meter Battery Inverter > Statistics Select Statistics to access the following sub-menus: tics > Statistics > Settings > Settings > General onsumpti. >... - Page 128 7 - Operation 5. Last 30 days This section of the menu displays the statistics for the last 30 days: **** • E-30d: Energy produced over the last 30 days **** • Er-30d: Inverter Display Meter Battery • Val. : Value of production over the last 30 days, calculated using the currency and conversion coefficient set in the relevant section of the Set- tings menu >...
- Page 129 We advise changing the activation voltage only if really necessary and to set it to the correct value: the photovoltaic generator sizing tool availa- **** **** ble on the ABB website will indicate whether Vstart needs changing and what value to set it to. Inverter Display...
- Page 130 7 - Operation The table below shows the parameters which cannot be modified. **** **** Parameter Description Grid over-voltage (OV) threshold (extended range): Inverter Display Meter Battery En/Dis U>>. Enable/Disable the parameter Set U>> Value U>>. Set tripping value Time U>>. Set tripping time >...
- Page 131 7 - Operation Parameter Description F Der. Mode. Select power derating in the event of grid **** **** over-frequency. F Der. Res. T. Time period after OF derating in which the Inverter Display Meter Battery inverter checks that the frequency is back within the opera- Set F Derating ting ranges (parameters “F<Connect”...
- Page 132 7 - Operation 8. Reactive Power This section of the menu may be used to manage the supply of reactive **** **** power into the grid. There are 5 possible types of management: • No Regulation: no regulation of reactive power. To activate this mode, Inverter Display Meter...
- Page 133 7 - Operation 9. Autotest This section of the menu is available only for the Italian country standard. **** **** Refer to the section on this topic in the manual. Inverter Display Meter Battery 10. Alarm This section of the menu allows you to set the activation status of a relay tics >...
- Page 134 7 - Operation • Alarm with reset at the end of the alarm signalling process (display text “Alarm”): **** **** The relay is activated (status: switched) whenever an error (code Exxx) Inverter Display Meter Battery or warnings related to grid parameters out of range (Warning – codes W003, W004, W005, W006, W007) are present on the inverter.
- Page 135 7 - Operation • Configurable alarm with reset at the end of the alarm signalling process (display text “Alarm Conf.”) **** **** INVERTER RUN Inverter Display Meter Battery N.C. Relay State: Idle The relay is activated (status: switched) N.O. whenever an error (code Exxx) or a war- SELECTED tics >...
- Page 136 7 - Operation This means that during the absence of grid voltage (display message "Missing Grid") the alarm contact remains in its resting position. **** **** • Crepuscular (display text “Crepuscular”) Inverter Display Meter Battery Vin > Vstart The relay is activated (status: switched) as soon as the inverter input voltage N.C.
- Page 137 7 - Operation If the alarm condition is persistent, the relay will remain activated (status:switched) **** **** Inverter Display Meter Battery • Latch configurable alarm (display text “Al. Conf. Latch”) INVERTER RUN tics > Statistics > Settings > Settings > General N.C.
- Page 138 OUTPUT - Operation and setup modes", available on the website www. grid > Last 7 days > Buzzer > Meter com > Battery Pack abb.com/solarinverters • Set SOC Th. : Threshold (percentage) relating to state of load through load > Last 30 days > Power Graph > Info >...
-
Page 139: Display Menu
7 - Operation isplay Menu **** **** **** Select the Display menu to access the following sub-menus: Display Meter Battery Load Manager Display > Settings Selecting Settings brings up the first screen relating to the password. tics > Settings > Settings >... -
Page 140: Meter Menu
7 - Operation eter Menu **** **** **** Select the Meter menu to access the following sub-menus: Meter Battery Load Manager WIFI Logger Meter > Settings Selecting Settings brings up the first screen relating to the password. > Settings > General >... - Page 141 7 - Operation Meter > Measure **** Select the Measure menu to access the following sub-menus: **** **** Meter Battery Load Manager WIFI Logger 1. Voltage Grid voltage value. Depending on the type of meter connected it is pos- sible to have a single value L1 (for the single-phase) or three values L1, L2 and L3 (for the three-phase).
-
Page 142: Battery Menu
7 - Operation Battery Menu **** **** **** Select the Battery menu to access the following sub-menus: Meter Battery Load Manager WIFI Logger Battery > General > Settings > Settings > General > info > Settings Selecting Settings brings up the first screen relating to the password. Password 0000 >... - Page 143 7 - Operation 5. SOC State of charge - Value of state of charge of the battery (expressed as a **** **** percentage) **** Meter Battery Load Manager WIFI Logger 6. SOH State of health - Percentage value that indicates the state of health of the >...
- Page 144 7 - Operation 2. Serial No. Displays the serial number of battery pack 1 connected to the REACT system **** **** **** Meter Battery Load Manager WIFI Logger 3. FW Rel. Displays the revision of the firmware installed on the REACT-BATT. >...
- Page 145 7 - Operation 6. RC Remaining Capacity - Battery pack capacity currently available. **** **** **** Meter Battery Load Manager WIFI Logger 7. RE Remaining Energy - Battery pack energy currently available. > Settings > General > info > Settings Password 0000 >...
-
Page 146: Load Manager Menu
7 - Operation oad Manager Menu **** Select the Meter menu to access the following sub-menus: Load Manager WIFI Logger Load Manager > Info Select Info to access the following sub-menus: > info > Settings 1. Relay Status > Relay Status >... -
Page 147: React System Switch-Off
7 - Funzionamento EACT system switch-off Some parts may be very hot and could cause burns. Some inverter parts may be subject to voltages that could be hazardous for the operator. Before performing any work on the inverter, follow the procedure for turning off the inverter. •... -
Page 148: Aintenance
Maintenance eneral conditions Routine and periodic maintenance operations must only be carried out by specialized staff with knowledge of how to perform these tasks. Maintenance operations must be performed with the apparatus disconnected from the grid (power switch open) and the photovoltaic panels obscured or isolated, unless otherwise indicated. -
Page 149: Routine Maintenance
PV system. It is recommended that maintenance operations are only performed by qualified personnel or ABB personnel (under a servicing contract). The maintenance schedule may vary depending on the environmental conditions of the installation premises. - Page 150 8 - Maintenance - Error code - Error message Name of Alarm and Cause Solution - Warning • Measure the insulation resistance using a megohmmeter positioned in the photovoltaic field (positive terminal short- circuited at the negative pole) compared to ground. The measurement is strongly influenced by the environmental - No code Ground fault of photovoltaic generator:...
- Page 151 8 - Maintenance - Error code - Error message Name of Alarm and Cause Solution - Warning • Check the grid voltage on the inverter. If the voltage tends to rise (when the inverter is connected), there is a problem of high line or grid impedance. •...
- Page 152 8 - Maintenance - Error code - Error message Name of Alarm and Cause Solution - Warning • Check that the grid to which the inverter is connected is not - W015 Disconnection due to Anti-Islanding: an island grid. - Island Detect. The inverter has been improperly connected to an - If the grid to which the inverter is connected is an island Yellow LED...
- Page 153 8 - Maintenance - Error code - Error message Name of Alarm and Cause Solution - Warning - W027 * • The reset of the Latch alarm conditions is done directly by Resetting of the Latch alarm conditions: - Latch-Manual reset Manual reset of the Latch alarm conditions;...
- Page 154 8 - Maintenance - Error code - Error message Name of Alarm and Cause Solution - Warning - W049 * • The variation in the inverter's grid standard is done directly - Global-Settings Variation of the grid standard Event Variation of the inverter's grid standard; this change by the customer/installer and is not an error.
- Page 155 8 - Maintenance - 155 - Скачано с сайта интернет магазина https://axiomplus.com.ua/...
- Page 156 8 - Maintenance - Error code - Error message Name of Alarm and Cause Solution - Warning Output overcurrent: • Error inside the inverter and cannot be checked externally. - E006 The alarm occurs when the inverter's output current - Output OC - If the problem persists (once the inverter has been switched exceeds the inverter's threshold for maximum output Yellow LED...
- Page 157 8 - Maintenance - Error code - Error message Name of Alarm and Cause Solution - Warning • Measure the insulation resistance using a megohmmeter positioned in the photovoltaic field (positive terminal short- High leakage current measured on the DC side (photovoltaic generator): circuited at the negative pole) compared to ground.
- Page 158 8 - Maintenance - Error code - Error message Name of Alarm and Cause Solution - Warning Low value of insulation resistance: Before connecting to the grid the inverter measures the insulation resistance of the PV generator compared to ground. Should the measurement of the insulation •...
- Page 159 8 - Maintenance - Error code - Error message Name of Alarm and Cause Solution - Warning Average of the measurements of grid voltage outside of range: • Check the grid voltage in the connection point to the inverter. The average value of the grid voltage (sampled every 10 minutes) does not fall within the permitted ranges.
- Page 160 8 - Maintenance - Error code - Error message Name of Alarm and Cause Solution - Warning Error in the check of Pin vs Pout: E058 • Error inside the inverter and cannot be checked externally. The error occurs if the difference between the - Pin vs Pout check measured value of input power and that of output - If the problem persists (once the inverter has been switched...
- Page 161 8 - Maintenance - Error code - Error message Name of Alarm and Cause Solution - Warning • If the problem has occurred during the installation phase or during the inverter maintenance phase (therefore the cover has been removed or the cable glands have been acted upon), carry out the following operations: - Disconnect the AC grid and DC input from the inverter and check for the front cover and all the cable glands, also...
-
Page 162: Power Limitation Messages
8 - Maintenance ower limitation messages The equipment can signal possible output power limitations which may occur on the basis of: - settings made by the user - settings required by the grid standard of the country of installation - protective devices inside the inverter The signals and the messages can only be verified using the Aurora Manager LITE software. - Page 163 8 - Maintenance - Message on display Name of Derating and Cause Solution - Warning Power limitation due to excess temperature: The message indicates that a power limitation is active since • Check that the inverter is not exposed to direct an excess temperature condition has been recorded inside the sunlight.
-
Page 164: Procedure For Dismantling Of The React System
8 - Maintenance rocedure for dismantling of the REACT system The REACT system consists of an inverter part (REACT-UNO) and of a battery part (REACT-BATT) which may be dismantled separately. To dismantling and disassemble the equipment, refer to the chapters: Wall installation of the REACT system Wall installation of the REACT-UNO alone Follow the indications for the mounting procedure but in the reverse order... -
Page 165: Registration On "Registration" Website And Calculation Of Second-Level Password (Service Menu)
8 - Maintenance egistration on “Registration” website and calculation of second- level password (Service Menu) Settings In order to obtain the second-level password needed to access the in- ENTER Password 0000 verter's service menu, it is necessary to go through the following stages: ENTER Service ENTER... - Page 166 8 - Maintenance Stage 3 - Request for second level password - Go online and access https://registration.abbsolarinverters.com - Insert the Username (corresponding to the email used during registra- tion) and the Password obtained at the end of Stage 2 - Access the section dedicated to requesting the second-level password - Choose the inverter model from the drop-down list and insert Update Ver., Serial Number and Week of Production of the inverter which were obtained previously (Stage 1)
- Page 167 8 - Maintenance - Click on icon to request password. Should there be an error in inputting data, the fields containing the error will be highlighted in red. If, on the other hand, the data are correct, the passwords will be shown in a new window and at the same time sent to the email address used for registration.
-
Page 168: Resetting The Time Remaining To Change The Grid Standard
8 - Maintenance esetting the time remaining to change the grid standard From the time a valid grid standard is entered and the inverter is turned on, a period of 24 hours is available to modify the grid standard setting. The 24 hours are counted only when the inverter is turned on. -
Page 169: Verification Of Ground Leakage
8 - Maintenance erification of ground leakage In the presence of anomalies or report of ground fault (where provided), there may be a ground leakage from the PV generator (DC side). To check this, measure the voltage between the positive pole and ground and between the negative pole (of the PV generator) and ground using a voltmeter whose input accepts a voltage sufficient for the dimensions of the photovoltaic generator. -
Page 170: Behaviour Of A System With Leakage
8 - Maintenance ehaviour of a system with leakage If the voltage measured between one of the two poles and ground does not tend to 0V and stabilizes on a value, there is a ground leakage from the PV generator. Example: When the measurement is made between positive pole and ground, a voltage of 200V is measured. -
Page 171: Measuring The Insulation Resistance Of Photovoltaic Generator
8 - Maintenance easuring the insulation resistance of photovoltaic generator To measure the insulation resistance of the PV generator compared to , the two poles of the PV generator must be short-circuited ground (using a suitably sized switch). Once the short-circuit has been made, measure the insulation resistance (Riso) using a megohmmeter positioned between the two shorted poles and ground (of the inverter). -
Page 172: Storage And Dismantling
ABB is not responsible for any loss of the equipment, or part of it, which does not take place on the basis of the regulations and laws in force in the country of installation. -
Page 173: Further Information
For more information on ABB solar products and services, visit www.abb.com/solarinverters - 173 - Скачано с сайта интернет магазина https://axiomplus.com.ua/... -
Page 174: Contact Us
Скачано с сайта интернет магазина https://axiomplus.com.ua/...