Table of Contents
Advertisement
Quick Links
Advertisement
Table of Contents
Troubleshooting

Related Manuals for Sharp CD-DH790N


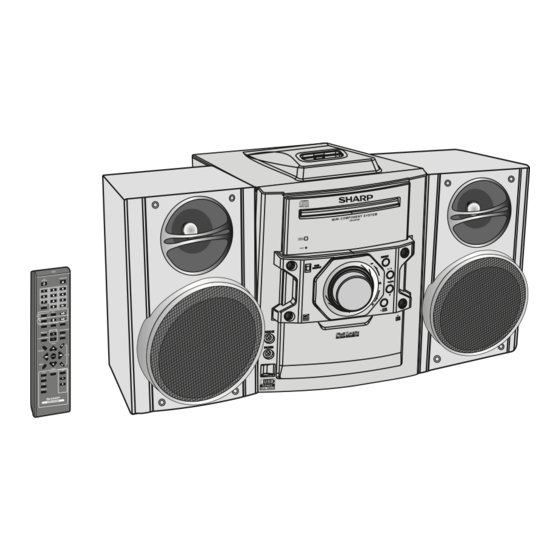
Summary of Contents for Sharp CD-DH790N
- Page 1 MINI COMPONENT SYSTEM SISTEMA MINI ENGLISH ESPAÑOL MODEL MODELO CD-DH790N OPERATION MANUAL MANUAL DE MANEJO iPod is a trademark of Apple Inc., registered in the U.S. and other countries. Please refer to pages i to ii and E-1 to E-21.
- Page 2 Thank you for purchasing this SHARP product. To obtain the best performance from this product, please read this manual carefully. It will guide you in operating your SHARP product. CD-DH790N Mini Component System consisting of CD-DH790N (main unit) and CP-DH790N (speaker system). Special Note...
-
Page 3: Table Of Contents
CONTENTS General Information Precautions ........2 Controls and indicators . -
Page 4: Controls And Indicators
Controls and indicators M INI COM PO NENT S YST EM CD-DH790 POWER POWER ON/STAND-BY ON/STAND-BY AUDIO IN AUDIO IN PHONES PHONES ■ Front panel 1. iPod Docking Station..... . . 8 2. - Page 5 Controls and indicators (continued) TAPE ■ Remote control 1. Remote Control Transmitter ....6 2. On/Stand-by Button....6, 7, 8, 9, 17 3.
-
Page 6: System Connections
System connections Make sure to unplug the AC power cord before making any connections. AM loop antenna Installing the AM loop antenna < Assembling > < Attaching to the wall > wall screws (not supplied) FM antenna Right speaker AC outlet (AC 120 V ~ 60 Hz) ■... -
Page 7: Remote Control
Remote control ■ Battery installation Open the battery cover. Insert the batteries according to the direction indicated in the battery compartment. When inserting or removing the batteries, push them toward the (–) battery terminals. Close the cover. Caution: ● Replace all old batteries with new ones at the same time. ●... -
Page 8: Setting The Clock (Remote Control Only)
Setting the clock (Remote control only) TAPE In this example, the clock is set for the 24-hour (0:00) display. Press the ON/STAND-BY button to turn the power on. Press the CLOCK/TIMER button. Within 10 seconds, press the MEMORY button. Press the button to select 24-hour or 12-hour display and then press the MEMORY button. -
Page 9: Ipod Play/Pause Button
Listening to the iPod (continued) ■ To insert iPod adaptor Press the ON/STAND-BY button to turn the power on. Insert the iPod adaptor into the iPod dock and connect your iPod. iPod (bottom) Dock connector iPod adaptor (not supplied) iPod dock iPod connector POWER POWER... -
Page 10: Listening To The Ipod
Listening to the iPod (continued) ■ Watching videos on a TV connected to iPod Press the DISPLAY (TV OUT) button for more than 2 seconds. “TV DISP” will appear on display. Press the ENTER button to start playback. Notes: ● If the TV Out setting is already turned on at video menu, the video is automatically displayed on the TV screen when ENTER key is pressed. -
Page 11: Advanced Cd Or Mp3/Wma Disc Playback
Listening to a CD or MP3/WMA disc (continued) ■ Disc playback Press the ON/STAND-BY button to turn the power on. Press the CD button on the remote control or FUNCTION button repeatedly on the main unit to select CD function. Press the OPEN/CLOSE button to open the disc tray. -
Page 12: Play Mode Button
Advanced CD or MP3/WMA disc playback (continued) ■ Random play The tracks on the disc can be played in random order automatically. To random play all tracks: Press and hold down PLAY MODE button on the remote control until “RANDOM” appears. Press the button. -
Page 13: Mp3/Wma Folder Mode (Only For Mp3/Wma Files)
MP3/WMA folder mode (only for MP3/WMA files) To play back MP3/WMA (Windows Media Audio) file There are many music sites on the internet that you can download MP3/WMA (Windows Media Audio) music files. Follow the instructions from the website on how to download the music files. -
Page 14: Listening To Usb Mass Storage Device/Mp3 Player
Listening to USB mass storage device/MP3 player TIMER FUNCTION FUNCTION POWER POWER ON/STAND-BY ON/STAND-BY AUDIO IN AUDIO IN PHONES PHONES TAPE Note: This USB mass storage device or MP3 player is not compatible with MTP and AAC file systems. ■ To play back USB/MP3 player with folder mode off Press the USB button on the remote control or FUNCTION button repeatedly on main unit to select... -
Page 15: Advanced Usb Playback
Listening to USB mass storage device/MP3 player (continued) Notes: ● This product can play WMA and MP3 files. It will automatically detect the file type being played. If unplayable file is played on this product, “NO SUPPORT” is indicated and the file will be automatically skipped. -
Page 16: Listening To The Radio
Listening to the radio MI NI COMPONENT S YSTEM CD-DH790 POWER POWER ON/STAND-BY ON/STAND-BY POWER POWER ON/STAND-BY ON/STAND-BY TAPE Auto power on function: When you press any of the following buttons, the unit turns ● TUNER (BAND) button (remote control only): The unit turns on and the “TUNER”... -
Page 17: Tape Playback
Listening to a cassette tape Before playback: ● For playback, use normal or low-noise tapes for the best sound. (Metal or tapes are not recommended.) ● Do not use C-120 tapes or poor-quality tapes, as they may cause malfunctions. ● Before loading a tape into the cassette compartment, tighten the slack with a pen or a pencil. -
Page 18: Timer And Sleep Operation (Remote Control Only)
Timer and sleep operation (Remote control only) TAPE Timer playback: The unit turns on and plays the desired source (CD, TUNER, USB, iPod, AUDIO IN, TAPE) at a preset time. This unit has 2 types of timer: ONCE TIMER and DAILY TIMER. -
Page 19: Sleep Button
Timer and sleep operation (Remote control only) (continued) When the timer end time is reached, the system will enter the power stand-by mode automatically. Once timer: The timer will be canceled. Daily timer: The timer operates at the same time every day. It will continue until the daily timer setting is canceled. -
Page 20: Enhancing Your System
Enhancing your system The connection cord is not included. Purchase a commercially available cord as shown below. Portable audio player, etc. Audio cable (not supplied) AUDIO IN AUDIO IN PHONES PHONES Auto power on function (AUDIO IN): When you press any of the following buttons, the unit turns ●... -
Page 21: Maintenance
Troubleshooting chart (continued) ■ USB Symptom Possible cause ● Device cannot be ● Is there any MP3/WMA file detected. available? ● Is connected? ● Is it an MTP device? ● Does the device contain AAC file only? ● Playback does not ●... -
Page 22: Specifications
Specifications As part of our policy of continuous improvement, SHARP reserves the right to make design and specification changes for product improvement without prior notice. The performance specification figures indicated are nominal values of production units. There may be some deviations from these values in individual units. - Page 23 SHARP CORPORATION Printed in Malaysia Impreso en Malaysia 09H R MW TINSZA519AWZZ...