Table of Contents
Advertisement
Advertisement
Table of Contents

Related Manuals for Honeywell Tema-Voyager Multi VMC Series


Summary of Contents for Honeywell Tema-Voyager Multi VMC Series
- Page 1 Tema-Voyager™ Multi VMC-xx Installation Manual...
- Page 2 Copyright laws of the United States protect all information in this document or in the software product itself. While this information is presented in good faith and believed to be accurate, Honeywell disclaims the implied warranties of merchantability and fitness for a purpose and makes no express warranties except as may be stated in its written agreement with and for its customer.
-
Page 3: Table Of Contents
TABLE OF CONTENTS INTRODUCTION ................................9 Purpose of this manual ............................9 Device overview ..............................9 System Architecture ............................10 Device components ............................. 11 Related documentation ............................11 PREPARING FOR INSTALLATION .......................... 12 Contents of the box ............................. 12 Multi device ..............................12 Device support kit ............................ - Page 4 Configurable Input 4 ..........................33 Configurable Input 5 ..........................34 Configurable Input 6 ..........................34 Configurable Input 7 ..........................35 Configurable Input 8 ..........................35 Connecting Outputs ............................36 Connecting Fixed Outputs ..........................37 Fixed Output 1 ............................37 Fixed Output 2 ............................37 Fixed Output 3 ............................
- Page 5 External tampers connection ......................... 64 OPERATING INSTRUCTIONS & MAINTENANCE ....................65 Reset Multi device ............................... 65 Switch off Multi device ............................65 Multi application quick health check ........................66 CONDITIONS RESULTING IN IMPAIRED OPERATION ..................67 PROTECTIVE FEATURES (WARNING OF BYPASSING) ..................68 TECHNICAL SPECIFICATIONS ..........................
- Page 6 Customer harmless for any costs or damages including reasonable attorneys’ fees which Customer may be required to pay as a result of the defective Product or the negligence of Honeywell S.r.l. Italy, its agents, or its employees.
- Page 7 Customer shall hold harmless and indemnify Honeywell S.r.l. Italy from and against all claims, demands, losses and liability arising out of damage to property or injury to persons occasioned by or in connection with the acts or omissions of Customer and its agents and employees, and from and against all claims, demands, losses and liability for costs of fees, including reasonable attorneys’...
- Page 8 Confidentiality All software, drawings, diagrams, specifications, catalogs, literature, manuals and other materials furnished by Honeywell HSG –Temaline relating to the design, use and service of the Products shall remain confidential and shall constitute the proprietary rights of Honeywell HSG -Temaline and Customer agrees to treat such information as confidential.
-
Page 9: Introduction
INTRODUCTION Purpose of this manual This manual details how to install the Tema-Voyager™ Multi (from now on it will be simply called: Multi). Details on operating instruction, plant maintenance and troubleshooting are also provided. Device overview Multi acts as a controller in Temaline architecture. Multi manages applications included: Access Control, Time&Attendance, Canteen and light Intrusion detection. -
Page 10: System Architecture
Figure 1 shows a typical system architecture in which Multi is inserted. Figure 1 – Multi system architecture The connections shown are: • The Ethernet connection: it connects Honeywell Enterprise Buildings Integrator™ (EBI) supervision center and in peer to peer other Temaline peripheral devices. -
Page 11: Device Components
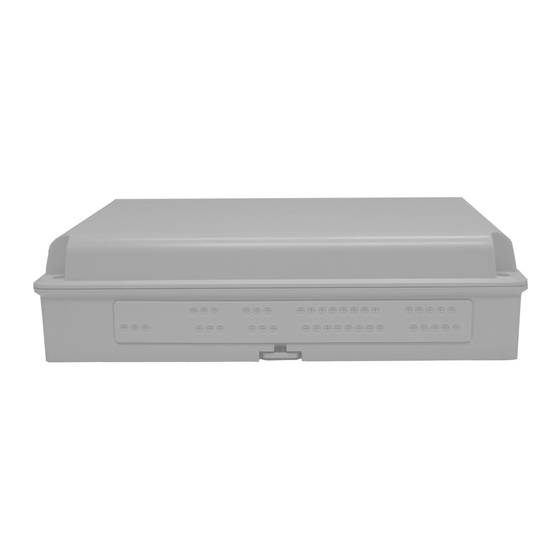
Device components This chapter gives an overview of the components of MULTI device; the intent is to provide the main terms used into the installation phase. For a more deep understanding of the device please refer to the chapter Multi Device Anatomy. Figure 2 - Multi components overview Related documentation Document... -
Page 12: Preparing For Installation
PREPARING FOR INSTALLATION Contents of the box Before you begin, unpack the shipment and check the parts list against the components in the shipment. Your shipment contains: Multi device One of the following Multi devices: Code Item VMC-00WENN1 Tema-Voyager Multi-0, it is used for management of only I/O, no reader connection available.. -
Page 13: Spare Parts
VMA-07 Tema-Voyager Multi Emergency Relay Output board, provides: 4 Relay Output, dry contact NO/NC 24V-3A; 1 Input, dry contact, for emergency alarm, with separate power supply. Up to 1 can be added to a Multi device. 800-20479 Tema-Voyager Multi - VMA06, VMA07 - Quick Installation Guide (only when optional boards are present) Spare Parts It is possible to order the following spare parts for this device:... - Page 14 Figure 3 - Tema-Voyager Multi - Consumption verifier spreadsheet To get the spreadsheet follow one of the below options. If you are reading this document in Acrobat pdf format click here to get the spreadsheet attached to this document. Follow this hyperlink to retrieve the last version of the document from the EBI Global Support repository:...
-
Page 15: Wires Characteristics
Wires Characteristics Use this chapter to understand the types of wire you need to use for your plant. Power supply wire Multi device can be powered either with a 10V-30V DC third party power supply, with PoE or with PoE+. To determine the correct size for power cables need to be used for third party power supply, refer to the below table (The following table lists examples of wire gauge and distance for a 12V):... -
Page 16: Wiegand Reader Cables
Communication speed Length in meters (bit/sec) 50nF/Km 9600 1200 19200 38400 Table 3 - Length of RS485 Data Cables shielded (m) Caution: If the distance between the reader and the Multi device is more that 15 m you need to change the RS485 switch position to insert the 120 ohm termination resistor. -
Page 17: Mounting The Device
MOUNTING THE DEVICE Wall mount These are the steps needed to be followed to mount the device on the wall: 1. Determine an appropriate mounting position for the device; keep into consideration that the wires shall be connected on the top and bottom side of the box. -
Page 18: Din Rail Mount
8. Connect the inputs/outputs 9. Connect the power supply of the device. 10. Use screws to lock the cover of the device DIN rail mount These are the steps needed to be followed to mount the device on a DIN rail: 1. - Page 19 1. Have the device mounted with Ethernet connector on the right bottom corner. 2. Apply the adhesive seals rubber provided in the Device support kit. The two seals are different in shape; the longer one is for the top of the device where the shorter is for the bottom. To wire the device when adhesive seals rubber are in place follow these steps: 1.
-
Page 20: Connecting The Cables
CONNECTING THE CABLES Caution: To ensure IP32 protection to the device you must follow what specified into “IP32 protection mount” chapter. Cables to be connected are (see Figure 6 - Multi Wiring Diagram): • DC power supply (only if the device is not supplied using POE/POE+) •... -
Page 21: Connecting The Dc Power Supply
Connecting the DC Power Supply The connection of an external power supply is required only if the device is not supplied using POE or POE+. Warning: To be in compliance with UL60950 the Tema-Voyager Multi device must be supplied by a separately certified NEC Class 2 (LPS) power unit. -
Page 22: Connecting The Network Cable
Figure 8 - Power supply LED Connecting the network cable The Multi device is equipped with an RJ45 female connector J4. The network cable must be a BaseT standard unshielded CAT5 or CAT6 cable terminated with an RJ45 male connector. Select the network cable in compliance to what specified into the “Network wire”... - Page 23 • Auto-MDIX: automatically detects and corrects for straight or cross-over cables • Error free operation up to 150mt: dependable network performance over long distance • > 8.0 KV ESD protection: robust operation in Harsh environments Check: once the Ethernet wire is properly connected and the Multi device switched on, one of the two led LED2 or CR18 (Ethernet physical link) must be on.
-
Page 24: Connecting The Readers
Figure 11 - Power supply LED for POE/POE+ Connecting the readers Multi can connect up to 4 third party readers; connection can be established using RS485 lines (for OSDP readers) or using Wiegand line (for Wiegand readers). The actual number of readers it is possible to connect depends from the product code has been purchased (see: Multi device on page 12). - Page 25 OSDP and Wiegand readers can be connected to the same terminal blocks; to inform the device of the type of connection need to be used it is required to set specific jumpers present on the board. Multi is set in factory for the management of Wiegand readers;...
-
Page 26: Reader In Position 1
Reader in position 1 The below pictures show the connections schematics and jumpers setting for reader in position 1: Wiegand reader OSDP reader Reader in position 2 The below pictures show the connections schematics and jumpers setting for reader in position 2: Wiegand reader OSDP reader... -
Page 27: Reader In Position 3
Reader in position 3 The below pictures show the connections schematics and jumpers setting for reader in position 3: Wiegand reader OSDP reader Reader in position 4 The below pictures show the connections schematics and jumpers setting for reader in position 4: Wiegand reader OSDP reader... -
Page 28: Rs485 Line Length Setting
OSDP reader check: once the connection with the reader is properly established and configured, the Multi and the reader are switched on; the bi-color LED (Red and Green) must blink regularly. Red color indicates transmission where green color receiving. Figure 12 - OSDP readers, communication LED positions RS485 line length setting On Multi device there is a series of switches used, when OSDP readers are connected, to select RS-485 matched distance mode. -
Page 29: Connecting Inputs
OSDP Switch Meaning Default reader Reader1 SW3.1 RS485 termination resistor, Data A. ON = termination resistor inserted OFF = termination resistor not inserted SW3.2 RS485 termination resistor, Data B. ON = termination resistor inserted OFF = termination resistor not inserted Reader2 SW4.1 RS485 termination resistor, Data A. -
Page 30: Connecting Fixed Inputs
Characteristics and connections are the same for fixed and configurable inputs. Connecting Fixed Inputs Fixed Input 1 The below pictures show the connections schematics for dry contact and supervised contact for fixed input 1: Dry contact connection Supervised connection Fixed Input 2 The below pictures show the connections schematics for dry contact and supervised contact for fixed input 2: Dry contact connection... -
Page 31: Fixed Input 3
Fixed Input 3 The below pictures show the connections schematics for dry contact and supervised contact for fixed input 3: Dry contact connection Supervised connection Fixed Input 4 The below pictures show the connections schematics for dry contact and supervised contact for fixed input 4: Dry contact connection Supervised connection... -
Page 32: Connecting Configurable Inputs
Connecting configurable Inputs Configurable Input 1 The below pictures show the connections schematics for dry contact and supervised contact for configurable input 1: Dry contact connection Supervised connection Configurable Input 2 The below pictures show the connections schematics for dry contact and supervised contact for configurable input 2: Dry contact connection Supervised connection... -
Page 33: Configurable Input 3
Configurable Input 3 The below pictures show the connections schematics for dry contact and supervised contact for configurable input 3: Dry contact connection Supervised connection Configurable Input 4 The below pictures show the connections schematics for dry contact and supervised contact for configurable input 4: Dry contact connection Supervised connection... -
Page 34: Configurable Input 5
Configurable Input 5 The below pictures show the connections schematics for dry contact and supervised contact for configurable input 5: Dry contact connection Supervised connection Configurable Input 6 The below pictures show the connections schematics for dry contact and supervised contact for configurable input 6: Dry contact connection Supervised connection... -
Page 35: Configurable Input 7
Configurable Input 7 The below pictures show the connections schematics for dry contact and supervised contact for configurable input 7: Dry contact connection Supervised connection Configurable Input 8 The below pictures show the connections schematics for dry contact and supervised contact for configurable input 8: Dry contact connection Supervised connection Caution: Temaline recommends that you establish... -
Page 36: Connecting Outputs
Connecting Outputs Multi provides four fixed outputs and other eight lines can be freely configured as Inputs or Outputs; when such lines are configured as Outputs these are called: Configurable outputs. Multi outputs are provided with open collector transistors. Using the open collector directly (i.e. to connect an external relay), the current must not exceed 50mA;... -
Page 37: Connecting Fixed Outputs
Connecting Fixed Outputs Fixed Output 1 The below pictures show the connections schematics for an external relay powered directly from Multi or from an external power supply using fixed output 1: External Relay Powered by Multi External relay powered by external power supply Fixed Output 2 The below pictures show the connections schematics for an external... -
Page 38: Fixed Output 3
Fixed Output 3 The below pictures show the connections schematics for an external relay powered directly from Multi or from an external power supply using fixed output 3: External Relay Powered by Multi External relay powered by external power supply Fixed Output 4 The below pictures show the connections schematics for an external relay powered directly from Multi or from an external power supply... -
Page 39: Connecting Configurable Outputs
Connecting Configurable Outputs Configurable Output 1 The below pictures show the connections schematics for an external relay powered directly from Multi or from an external power supply using configurable output 1: External Relay Powered by Multi External relay powered by external power supply Configurable Output 2 The below pictures show the connections schematics for an external... -
Page 40: Configurable Output 3
Configurable Output 3 The below pictures show the connections schematics for an external relay powered directly from Multi or from an external power supply using configurable output 3: External Relay Powered by Multi External relay powered by external power supply Configurable Output 4 The below pictures show the connections schematics for an external relay powered directly from Multi or from an external power supply... -
Page 41: Configurable Output 5
Configurable Output 5 The below pictures show the connections schematics for an external relay powered directly from Multi or from an external power supply using configurable output 5: External Relay Powered by Multi External relay powered by external power supply Configurable Output 6 The below pictures show the connections schematics for an external relay powered directly from Multi or from an external power supply... -
Page 42: Configurable Output 7
Configurable Output 7 The below pictures show the connections schematics for an external relay powered directly from Multi or from an external power supply using configurable output 7: External Relay Powered by Multi External relay powered by external power supply Configurable Output 8 The below pictures show the connections schematics for an external relay powered directly from Multi or from an external power supply... - Page 43 Outputs check: On Multi board are present 8 green LED to monitor the Outputs state. To be able to use this check the outputs must be properly configured and the Multi switched on; Green color indicates output active where LED switched off means output not configured or inactive.
-
Page 44: Using Relays Plugs-In (Vma-06, Vma-07)
USING RELAYS PLUGS-IN (VMA-06, VMA-07) VMA-06 and VMA-07 are optional plugs-in used together with Multi devices. When these are plugged on the Multi board and properly configured using the related jumpers they turn the open collector digital outputs of the board in relay outputs. VMA-07 includes the connection for an input that drives the cut of the power supply of the device in case of emergency. -
Page 45: Mounting The Plugs-In
Figure 14 - VMA-06 relays Plug-in Figure 15 - VMA-07 Relay Plug-in Mounting the plugs-in To mount the plugs-in on the Multi device follows the below steps: 1. Determine an appropriate mounting position for the plugs in. If you have a VMA-07 you have to plug it only on the position 1, where VMA-06 can be plugged in any of the 3 sockets' positions (in relation to the outputs to be managed). - Page 46 Figure 16 - Plugs-in position 2. Switch off the Multi device. 3. Unscrew the cover of the Voyager Multi case and remove it. 4. Plug the VMA-0x devices on the Multi board. Figure 17 - Plugging the VMA-06 on position 1 Caution: The plugin has two connectors, one with 8 pins and another with 6 pins, this has to be matched with the...
-
Page 47: Setting Up Plug-In Jumper
7. If you are using VMA-07 wire the input used to cut the POE/POE+ internal power supply (see for details: Connection of the emergency input to VMA-07 on page 55). Setting up Plug-in jumper On VMA-06 and VMA-07 each jumpers block is relating to a single output;... -
Page 48: Configuration Of Multi To Use Vma-06 And Vma-07 Plugs-In
• Dry contact normally closed • Power output normally open • Power output normally closed The below picture shows the way to set the jumpers to have the desired mode: Figure 19 - Relay output mode Configuration of Multi to use VMA-06 and VMA-07 plugs-in To use relay outputs on VMA-06 and VMA-07 plugs-in it is required to properly configure the jumpers on Multi board. -
Page 49: Connecting Fixed Outputs (Plug-In In Slot Of Position 1)
Connecting Fixed Outputs (Plug-in in slot of position 1) The below pictures show the connections schematics for Multi using VMA-06 or VMA-07 plugs-in and fixed outputs: a door lock powered by Multi relay and a door lock power from an external power supply and driven by an internal relay used as dry contact. -
Page 50: Fixed Output 3
Fixed Output 3 Door Lock Powered by Multi relay Door lock powered by external power supply and driven by Multi relay Relay output mode: Relay output mode: Power Output NO (as in above picture) or NC Dry Contact NO (as in above picture) or Fixed Output 4 Door Lock Powered by Multi relay Door lock powered by external... -
Page 51: Connecting Configurable Outputs (Plug-In In Slot Of Position 2)
Connecting Configurable Outputs (Plug-in in slot of position 2) The below pictures show the connections schematics for Multi using VMA-06 plugs-in and configurable outputs: a door lock powered by Multi relay and a door lock power from an external power supply and driven by an internal relay used as dry contact. -
Page 52: Configurable Output 5
Configurable Output 5 Door Lock Powered by Multi relay Door lock powered by external power supply and driven by Multi relay Relay output mode: Relay output mode: Power Output NO (as in above picture) or NC Dry Contact NO (as in above picture) or Configurable Output 6 Door Lock Powered by Multi relay Door lock powered by external power... -
Page 53: Connecting Configurable Outputs (Plug-In In Slot Of Position 3)
Connecting Configurable Outputs (Plug-in in slot of position 3) The below pictures show the connections schematics for Multi using VMA-06 plugs-in and configurable outputs: a door lock powered by Multi relay and a door lock power from an external power supply and driven by an internal relay used as dry contact. -
Page 54: Configurable Output 7
Configurable Output 7 Door Lock Powered by Multi relay Door lock powered by external power supply and driven by Multi relay Relay output mode: Relay output mode: Power Output NO (as in above picture) or NC Dry Contact NO (as in above picture) or Configurable Output 8 Door Lock Powered by Multi relay Door lock powered by external power... -
Page 55: Connection Of The Emergency Input To Vma-07
Connection of the emergency input to VMA-07 When the door lock is powered by the Multi (POE/POE+ or +12V) using the VMA-07 relay plug-in, it’s possible to connect an external dry contact signal (normally closed) used to cut the power of the door lock. This can be used in case of emergency like a fire alarm. -
Page 56: Final Operations
FINAL OPERATIONS Closing the device To close the terminal, follow these steps: 1. Position the cover with the corner with “Honeywell label” in the lower right (this is important to properly close the anti-tamper switch). 2. Close the device cover. -
Page 57: Configuring The Voyager Multi
Configuring the Voyager Multi Factory default IP Address A device from factory is configured with this default IP address: 160.221.230.127 After the first connection, the IP address must be changed because, to avoid conflicts, every device in the network must have a different address. -
Page 58: Multi Device Anatomy
MULTI DEVICE ANATOMY Figure 22 is a picture of the Multi device board in it case. Figure 21 – Photo of Multi device board Figure 22 provides a graphical representation of the MULTI device and of the boards (Main board and VMA-0x plugs-in). VMA-06/VMA-07 VMA-06 VMA-06... -
Page 59: Terminal Blocks And Jumpers
Terminal Blocks and Jumpers Figure 23 - Position of terminal blocks and jumpers (factory configuration) The above picture shows the position of Terminal Blocks and Jumpers on the Voyager Multi board. Terminal Blocks The below table lists the terminal blocks and explain their meaning. Terminal Block Meaning Configurable I/O line 1... -
Page 60: Jumpers
TB12 Reader4 TB13 Configurable I/O line 5 TB14 Configurable I/O line 6 TB15 Configurable I/O line 7 TB16 Configurable I/O line 8 Table 6 Terminal blocks Jumpers The below table lists the Jumpers and explain their meaning. Jumper Meaning External tamper Console serial line Configurable Output 4 relay selector Fixed Output 4 relay selector... -
Page 61: Switches And Leds
Reader 2 Wiegand/OSDP selector Reader 2 Wiegand/OSDP selector Reader 3 Wiegand/OSDP selector Reader 4 Wiegand/OSDP selector Reader 3 Wiegand/OSDP selector Reader 3 Wiegand/OSDP selector Reader 4 Wiegand/OSDP selector Reader 4 Wiegand/OSDP selector Table 7 Jumpers Switches and LEDs Figure 33 – Switches and LEDs Switches The below table lists the switches and explain their meaning. -
Page 62: Led
See Appendix 1 for details. SW1.5 Application Switches: Spare SW1.6 Application Switches: Manufacturing test. Open DO NOT USE: This feature is used for factory test. See Appendix 1 for details. SW3.1 RS485 (Reader 1) termination resistor, Data A. Open ON = termination resistor inserted OFF = termination resistor not inserted SW3.2 RS485 (Reader 1) termination resistor, Data B. -
Page 63: Device Tampers
CR68 RS485 2 TX/RX activity, Bi-color Red Blinking when TX is active LED, Red and Green Green Blinking when RX is active OFF=no RX/TX activity CR69 RS485 3 TX/RX activity, Bi-color Red Blinking when TX is active LED, Red and Green Green Blinking when RX is active OFF=no RX/TX activity CR70... -
Page 64: External Tampers Connection
External tampers connection The Jumper P1 present on Multi is designed to connect an external tampers for the device (not provided). Such tamper could be used as anti removal tamper for the device or to connect the anti open tamper of an external case who hosts the Multi device. -
Page 65: Operating Instructions & Maintenance
OPERATING INSTRUCTIONS & MAINTENANCE Reset Multi device To reset Multi device press for at least 3 seconds the SW7 Reset Button located on the upper left corner of the device. Figure 26 - Multi Reset button Switch off Multi device To switch off the unit, follow these steps: 1. -
Page 66: Multi Application Quick Health Check
Multi application quick health check Using diagnostic Led, present on to the Multi main board, it is possible to perform a first quick check of the application without the use of SW tools. Check the chapter “MULTI DEVICE ANATOMY” on page 58 for LED and reset button positions. -
Page 67: Conditions Resulting In Impaired Operation
CONDITIONS RESULTING IN IMPAIRED OPERATION Impaired operation conditions Impaired operation result 12VDC connected in reverse way The protection inside the Multi will avoid permanent damage Connect the input port to output port The 12Vcc will be distributed to the contact/detector; this can damage the detector or create a short circuit. -
Page 68: Protective Features (Warning Of Bypassing)
PROTECTIVE FEATURES (WARNING OF BYPASSING) Unit Name Protective features and warning Multi To reduce the electric shock risk, do not wire the device during power on condition Multi To reduce the fire risk, do not operate the device over the operating temperature. -
Page 69: Technical Specifications
TECHNICAL SPECIFICATIONS Parameter Value DC power supply 10-30VDC (for UL60950 compliance units must be supplied by a separately certified NEC Class 2 (LPS) power unit) POE power supply POE IEEE 802.3af-2003 POE+ power supply POE+ IEEE 802.3at-2009 Power consumption 4,8 W Board only DC power supply: max 36 W POE+: max 25.5W POE: max 15.4W... - Page 70 Mounting Wall or DIN rail mounting Security screw 4 Torx screws Anti-Tampering 1 internal switch (against opening) Protection level IP32 Environmental -10°C to +55°C temperature for correct operation -25°C ÷ 70°C Storage temperature Storage operating 0÷95% not condensing humidity...
-
Page 71: Regulations
REGULATIONS CE Compliance Company name: Honeywell S.r.l. Via Philips, 12 20052 Monza Italy Product name: Tema-Voyager™ Multi Product models: VMC-00WENN1, VMC-01WENN1, VMC-02WENN1, VMC- 03WENN1, VMC-04WENN1, VMA-06, VMA-07. Are in conformity with the European Union following harmonization legislation: Directives: Electromagnetic Compatibility Directive (2014/30/EU) -
Page 72: Fcc Notice
FCC Notice Company name: Honeywell S.r.l. Identification code: VMC-00WENN1 VMC-01WENN1 VMC-02WENN1 VMC- 03WENN1 VMC-04WENN1. This device complies with CFR 47 FCC part 15 subpart B, 2014 rules. Operation is subject to the two following conditions: • This device may not cause harmful interference and •... -
Page 73: Australian Ctick Conformity
Directives 2011/65/EU WEEE compliance In accordance with directive 2012/19/EU regarding waste electrical and electronic apparatus (effective since 14 February 2014), Honeywell commits, when requested by the customer, to the collection, treatment, recovery, and disposal of the apparatus produced. Customers in the European Union are advised to dispose this product, at the end of its useful life, in accordance with local laws, regulations, and procedures. -
Page 74: Appendix 1 - Application Switches
The activation of LINUX console may be required only for deep debug purpose; don't change this jumper if it is not specifically required from Honeywell Technical Assistance Center. Open = Linux console not active Close = Linux console active SW1.5... -
Page 75: Appendix 2 - Meaning Of Graphical Symbols Used
Appendix 2 – Meaning of graphical symbols used In compliance with “EN60950 Amendment 2 – Information Technology – Safety, General Requirements” this appendix shows the list of graphical symbols used in the product and their meanings. Symbol Meaning Located Keep away from rain Carton Box To indicate that the transport package shall be kept away from rain and in dry... - Page 76 China RoHS environmental protection Label use period Indicates the environmental protection use period of the product.