
Related Manuals for Sony MSZ-2100G


Summary of Contents for Sony MSZ-2100G
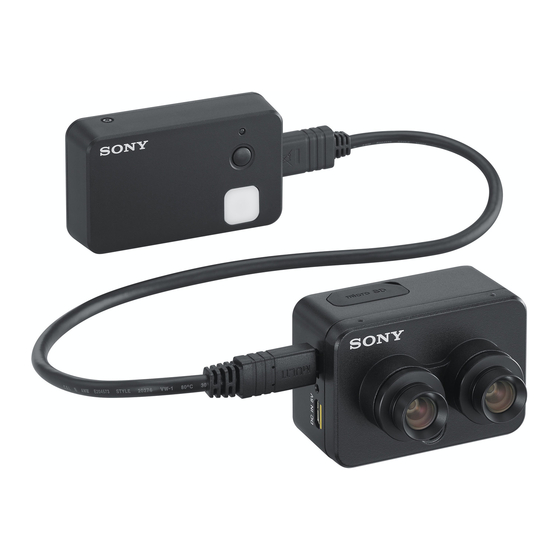
- Page 1 D-829-100-12 (1) Smart Agriculture Solution Operation Guide MSZ-2100G MULTISPECTRAL SENSING UNIT FFA-PCW Fast Field Analyzer © 2019 Sony Corporation...
-
Page 2: Table Of Contents
Creating a Flight Plan ............14 All other system names and product names are registered trademarks or trademarks of their Preparing MSZ-2100G .............17 respective owners. Further, the ® or ™ symbols are Sample Flight Plan Setting ..........18 not used in this document. -
Page 3: Read This First
Data backup permitting private or public access without the permission of the copyright holder is prohibited Back up data frequently to prevent data loss. Sony by law. will not be liable for loss of data resulting from circumstances of any kind. -
Page 4: Chapter 1 Overview
Smart Agriculture Solution is a solution that helps identify abnormal areas and lets you check vegetation using the Fast Field Analyzer dedicated software to quickly analyze flight data recorded on the MSZ-2100G MULTISPECTRAL SENSING UNIT (camera, sensor unit) mounted on a drone. - Page 5 Chapter 1 Overview : What is Smart Agriculture Solution? Fast stitching Generating stitched images Viewing original images recorded by the camera You can record images that efficiently overlap You can quickly generate stitched images from flight data recorded with the camera to check vegetation the drone’s flight route on each side.
-
Page 6: Basic Configuration
Mobile battery Camera GeoJSON (see Glossary)/ GPX/KML Viewer Mobile Flight plan creation app Fast Field Analyzer device iPad Transfer via email attachment, etc. Computer Drone controller 1) MULTISPECTRAL SENSING UNIT MSZ-2100G (camera, sensor unit) 2) MULTISPECTRAL SENSING UNIT MSZ-2100G software... -
Page 7: Items Necessary For Smart Agriculture Solution
ˎ Map Pilot for DJI - Business (recommended) ˎ – Sensor unit – Connecting cable Apps required for viewing POI/ROI information The MSZ-2100G is mounted to the drone using (recommended) a dedicated bracket. ˎ Drone set ˎ POI and ROI can be output in the following –... -
Page 8: Operating Process (Workflow)
Chapter 1 Overview Operating Process (Workflow) Preparing to use the system Checking crop health Creating a flight plan Shooting for the first time conditions Installing the software Set a flight path for efficiently photographing Check the weather and connect the required Adjust the display for viewing clearly, then the agricultural field using a flight plan equipment. -
Page 9: Recommended Flight Conditions
Chapter 1 Overview Recommended Flight Conditions The appropriate time to execute a flight differs Weather Shooting objects depending on the area and season. Execute flights during times and weather conditions that fulfill the ˎ Execute a flight during clear, slightly cloudy, ˎ... -
Page 10: Chapter 2 Installing The Software (For The First Time)
[Notes] You can also purchase a license after setting fields in Fast If you do not have an account of Sony Creative Field Analyzer and checking the total farm size. Software web site, click [Register] on the top right of the screen and follow the on-screen instructions to create an account. -
Page 11: Downloading An App
Chapter 2 Installing the Software (for the first time) Downloading an App Download an app required for creating flight plans Downloading a viewer app Setup flight log recording and viewing POI/ROI information. This section explains how to download the recommended app. Download the required app for viewing POI/ROI Create an AIRDATA UAV account for viewing flight information on a mobile device. -
Page 12: Chapter 3 Preparation
Chapter 3 Preparation Configuring the Drone Use DJI GO4 to update the drone firmware to the Updating the drone firmware Configuring the drone Tap [...] on the top right of the screen. latest version and set the maximum flight altitude and RTH (see Glossary) altitude. - Page 13 Chapter 3 Preparation : Configuring the Drone How to configure the obstacle avoidance sensor Confirm that the icon and message indicating that the obstacle avoidance sensor has been disabled is displayed in the main screen. Select (Visual Navigation Settings) on the menu bar and turn [Enable Visual Obstacle Avoidance] off.
-
Page 14: Creating A Flight Plan
The “Model” screen appears. displayed during operations may differ. Precautions when creating a flight plan Select [Sony MSZ-2100G] and tap [Settings]. The base map must be downloaded from the network before creating a flight plan. Make sure Set a preliminary home point. - Page 15 Chapter 3 Preparation : Creating a Flight Plan For other recommended values, see “Sample Flight Plan on the top of the screen to end mission Setting” (page 18). creation and return to the home screen. Check the flight speed and lower it according Tap [Saved Missions].
- Page 16 Chapter 3 Preparation : Creating a Flight Plan Using an existing mission to create Unprotect the mission and edit it. another You can use an existing mission to create a new one. In the Map Pilot for DJI - Business home screen, tap [Saved Missions].
-
Page 17: Preparing Msz-2100G
Chapter 3 Preparation Preparing MSZ-2100G Prepare the microSD card used for shooting and microSD card folder configuration Configuration file Charging the mobile battery charge the mobile battery. The file/folder configuration on the microSD card The following parameters are included in the is as follows. -
Page 18: Sample Flight Plan Setting
Chapter 3 Preparation Sample Flight Plan Setting Sample setting Parameter setting Purpose Altitude Airspeed Overlap rate Low-speed photography Resolution Single flight range No. of shots (front/side) (10 min.) (15 min.) NDVI Camera function setting Fast stitching 120 m 15 m/s 30% / 30% 3.0 s 4.9 cm/pixel 11.8 cm/pixel 150 ac (60.7 ha) -
Page 19: Chapter 4 Shooting
Chapter 4 Shooting Before Shooting This section describes what to prepare on the day [Caution] Installing the mobile battery Inserting the microSD card in the Forcibly inserting a microSD card in the improper you want to shoot. orientation may damage the microSD card or microSD camera card slot. - Page 20 Chapter 4 Shooting : Before Shooting Connecting the camera and sensor Preparing the drone Make sure the other end of the connecting cable is oriented correctly and connect it to unit the sensor unit HOST terminal. Attach the battery and propellers to the drone and Make sure it is securely connected with a connect the iPad and controller.
-
Page 21: Shooting
Chapter 4 Shooting Shooting When you are ready, begin the flight and shoot. ˎ If you change the drone takeoff location, calibrate ˎ Select the mission. the drone, or change its position or attitude, turn the Always visually monitor the process during the ... - Page 22 Chapter 4 Shooting : Shooting ˎ When the move home point confirmation ˎ The sensor unit and camera shutter button are ˎ Upload a mission. synchronized. Note that if you press the camera message appears, tap [OK]. shutter button after pressing the sensor unit shutter ...
- Page 23 Chapter 4 Shooting : Shooting [Caution] Starting another shoot after the flight ends When the drone lands, wait for the motor to ˎ Do not press the shutter button during restart. ˎ automatically turn off. ˎ The sensor unit and camera shutter button are ˎ...
- Page 24 Chapter 4 Shooting : Shooting Press the sensor unit shutter button to resume shooting. Tap [Start] to resume the mission.
-
Page 25: Checking Flight Success
Chapter 4 Shooting Checking Flight Success Use Fast Field Analyzer to confirm that the drone Checking the flight path Click [Import Flight Data] on the bottom left of has flown according to the flight plan, and make the screen. sure there are no missing images due to sudden weather condition change such as strong gust, You can check whether or not the drone flew according to the flight plan and whether any recorded before generating stitched map. - Page 26 Chapter 4 Shooting : Checking Flight Success Select a time (hours : minutes : seconds), When you did not obtain the desired data When the folder name is not in Generating stitched images “YYYYMMDDhhmmss” format or when and click [OK]. adjusting the date and time manually If the flight or shooting failed and you were not ...
- Page 27 Chapter 4 Shooting : Checking Flight Success Click [Stitch] on the bottom left of the screen. Click The “Field Analysis” screen appears and you can check the stitched image. Click here to return to the previous screen. Stitched image The stitching process begins and an indicator showing the progress appears.
-
Page 28: Checking Crop Health
Chapter 4 Shooting Checking Crop Health You can use stitched images to check vegetation status and set POI/ROI in specific areas. How to display stitched images Add a check mark to the data you want to This section describes rough procedures for doing so. display. - Page 29 Chapter 4 Shooting : Checking Crop Health How to adjust the scope of application for NDVI How to turn gradation off How to narrow down the NDVI value display value display colors range If you turn gradation off, it can be easier to obtain a rough picture of circumstances.
- Page 30 Chapter 4 Shooting : Checking Crop Health How to carry over POI and ROI information (pin Sample image Setting POI/ROI function) You can set POI and ROI in areas of concern such In the [POI / ROI List] pane, turn the POI/ROI Healthy as delayed growth and withered sections.
- Page 31 Chapter 4 Shooting : Checking Crop Health The selected image is displayed at a large size Enabling side-by-side view Viewing original images recorded by Checking the size of a region of so you can check the details of vegetation the camera concern status.
-
Page 32: Generating Reports
Chapter 4 Shooting Generating Reports You can export information such as POI, ROI, and ˎ ROI details: Image in applicable location, ROI ˎ Generating a report NDVI values as a PDF file. name, last modified date, latitude, longitude, statistical information, ratio by NDVI value and Sample report region area, comments In the “Field Analysis”... -
Page 33: Displaying Mobile Device Data
Chapter 4 Shooting Displaying Mobile Device Data You can export POI and ROI information for Viewing in a viewer app Viewing reports viewing with a viewer app on a mobile device such as a smartphone or tablet PC. Reports (PDF) can also be viewed on a mobile If you open the file transferred from a computer, For on creating a report, see “Generating Reports”... -
Page 34: Chapter 5 Appendix
Chapter 5 Appendix Updating the firmware Update the camera and sensor unit firmware using the following steps. Access the Sony Professional website via the following URL. https://pro.sony/ue_US/products/ multispectral-cameras/msz-2100g Download the firmware for the product in [Resources and downloads] on the above page. -
Page 35: Troubleshooting
Because the product was Change the “ShutterInterval” value in the record at the set shutter used without changing configuration file (config.csv) located in the “Sony” The status indicator The microSD card is not Disconnect the mobile battery cable from the interval (ShutterInterval). - Page 36 Chapter 5 Appendix : Troubleshooting Symptom Possible cause Solution The color of artificial Because man-made Try shooting at a different time of day. objects (roof, cars) objects have a degree of may not be correctly reflection, they tend to be recorded.
-
Page 37: Maintenance And Usage Precautions
ˎ correctly. If the surface becomes dirty with oil, – Close to sources of powerful electromagnetic or deleted in the following cases. Sony is not water or fingerprints, wipe them off right away radiation, such as radios or TV transmitters responsible for compensation for damage or with a soft cloth. - Page 38 If you cannot use Fast Field Analyzer on your ˎ As the positions of GPS/GLONASS satellites vary ˎ assets has been intentionally modified. current computer, deactivate it from the Sony constantly, it may take longer to determine Creative Software site. On the restriction of use of GPS the location or the receiver may not be able to https://www.sonycreativesoftware.com/jp/...
-
Page 39: Read This First Glossary
Chapter 5 Appendix Glossary NDVI (Normalized Difference Vegetation Index) Alphabetical order This index uses the characteristics of light reflected from vegetation along with satellite data and a simple formula to understand the status of vegetation. It represents the amount and health of Farm vegetation.