
Related Manuals for Miele WWB 020


Summary of Contents for Miele WWB 020
- Page 1 Operating Instructions Washing machine It is essential to read these operating instructions before installation or use of this appliance. This prevents both personal injury and damage to the appliance. en-CA M.-Nr. 11 003 030...
-
Page 2: Caring For The Environment
Consult with local authorities, dealers or Miele in order to dispose of and recycle electrical and electronic appliances. Miele assumes no responsibility for deleting any personal data left on the appliance being disposed. -
Page 3: Table Of Contents
Contents Caring for the environment .................. 2 Important safety instructions ................ 6 Operating the washing machine ................ 11 Control panel ......................11 How the control panel works ................12 Before using for the first time ................ 14 Removing the protective foil and stickers ............14 Environmentally friendly washing .............. - Page 4 Contents Detergent ...................... 38 Miele-recommended detergents ................38 General detergent recommendations..............39 Cleaning and care .................... 40 Cleaning the drum (Hygiene info) ................40 Cleaning the housing and control panel..............40 Cleaning the detergent dispensing drawer ............40 Cleaning the water inlet filter ................. 43 Frequently asked questions .
- Page 5 Contents Product dimensions ....................63 Dimensions....................... 63 Installation on a plinth .................. 64 Washer-dryer stack .................. 64 The Miele water protection system ............... 65 Water intake ......................66 Drainage ........................ 67 Electrical connection ..................... 68 Technical data...................... 69 Programmable functions .................. 70 Choosing and selecting programmable functions ..........
-
Page 6: Important Safety Instructions
Important safety instructions Warning In order to reduce the risk of fire, electric shock, or injuries, persons operating the appliance must adhere to the following safety precautions: It is essential to read the operating instructions before using the washing machine. - Page 7 Do not make any changes or repairs on the washing machine if this is not expressly permitted in these operating instructions. Only Miele is permitted to replace a damaged power cord. Miele service technicians use original power cords from Miele. ...
- Page 8 Important safety instructions Children are not allowed to play with, on, or inside the washing machine. If you are operating the washing machine in the presence of children, the children must be supervised at all times. The temperature of the porthole glass becomes very high during washing.
- Page 9 Miele tumble dryer and the Miele washing machine. If installing the machine on a Miele plinth (available as an optional accessory), please make sure you order the correct one for this washing machine.
- Page 10 Important safety instructions FCC Declaration of Conformity These devices comply with FCC Rules Part 15. This equipment has been tested and found to be in compliance with the limits for a Class B digital device, pursuant to Part 15 of the FCC Rules of Operation and is subject to the following conditions: These devices may not cause harmful interference.
-
Page 11: Operating The Washing Machine
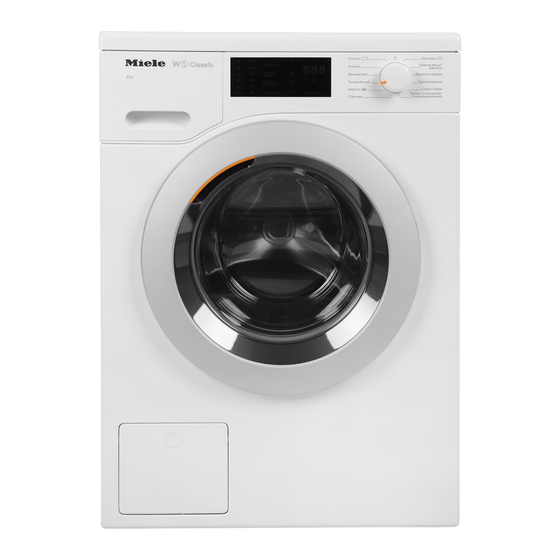
Operating the washing machine Control panel a Control panel g Time display for the program duration b Temperature sensor buttons h Sensor buttons for selecting the temperature. for the Delay start function c Spin speed sensor buttons i Start/Stop sensor button for selecting the spin speed. -
Page 12: How The Control Panel Works
Operating the washing machine Sensor buttons for extra options How the control panel works You can supplement the wash programs with extra options. If a wash program has been selected, the sensor buttons for the possible extra options light up dimly. Indicator lights –... - Page 13 Operating the washing machine Time display Start/Stop sensor button After the program has started, the Touching the Start/Stop sensor button program duration will appear on the starts the selected program or cancels display in hours and minutes. a program that has already been started.
-
Page 14: Before Using For The First Time
Before using for the first time Damage from incorrect installation and connection. Installing and connecting the washing machine incorrectly will cause serious damage to property. See “Installation and connection”. Removing the protective foil and stickers Remove: – The protective foil from the door ... - Page 15 Before using for the first time Useful tip: Leave the door slightly open Running the first program to allow the drum to dry. Turn on the tap. When the program has ended, turn Turn the program selector to Normal. the program selector to .
-
Page 16: Environmentally Friendly Washing
Environmentally friendly washing Energy and water consumption Detergent consumption – To get the most out of your machine, – Do not exceed the amounts of load the maximum dry load for the detergent recommended on the program you are using. packaging. -
Page 17: Preparing The Laundry
Useful tip: Stains (e.g. blood, egg, coffee, tea) can be pre-treated using some handy tricks which can be found in the Miele guide to laundry care. Please contact Miele directly or submit a request via Internet page to obtain or view a copy of this manual. -
Page 18: Loading The Washing Machine
2. Loading the washing machine Opening the door Closing the door Take hold of the door and pull it Make sure that no items are caught open. between the door and the seal. Check the drum for pets or foreign objects before loading it with laundry. -
Page 19: Selecting A Program
3. Selecting a program Selecting a temperature and spin Program selection speed The washing machine is switched on by turning the program selector to a wash The wash program’s pre-set program. temperature and spin speed light up brightly. The choice of temperatures and spin speeds selectable for the wash program light up dimly. - Page 20 3. Selecting a program Selecting extra options The selection of extra options available for the wash program lights up dimly. Touch the sensor button for the required extra option. It will then light up brightly. Useful tip: You can select multiple extra options for a wash program.
-
Page 21: Adding Detergent
4. Adding detergent Tips for dispensing Detergent dispenser drawer Adjust the detergent dosage to the level This washing machine requires of soiling of the laundry and the particularly efficient detergent. Adhere maximum load. Reduce the amount of strictly to the dispensing amounts detergent with smaller loads (e.g. -
Page 22: Using Chlorine Bleach
4. Adding detergent Using chlorine bleach Using powder detergent The detergent dispenser drawer Damage due to chlorine bleach. contains an insert for liquid detergent in Textiles may be discoloured or their the compartment as standard. This fibres damaged. insert must be removed to use powder Only use chlorine bleach on suitable detergent. -
Page 23: Using Fabric Softener And Liquid Starch
Each capsule contains the correct amount for one wash cycle. Capsules are available to order from Miele's online shop, Miele's customer service, or from your Miele dealer. Capsules pose a health risk. The ingredients of capsules can be hazardous to health if they are swallowed or come into contact with skin. - Page 24 4. Adding detergent Inserting a capsule Open the detergent dispenser drawer. Close the lid and press it firmly shut. Close the detergent dispenser drawer. Open the lid of the / compartment. The capsule is opened by the act of inserting it in the detergent dispenser drawer.
- Page 25 4. Adding detergent The contents of the capsule will be Colour run and dye removers/ added to the wash program at the dyes correct time. Damage due to colour run/dye During CapDosing, water intake to removers. the compartment is solely via the Colour run and dye removers can capsule.
-
Page 26: Starting A Program
5. Starting a program Starting a program Touch the flashing Start/Stop sensor button. The door will lock and the program will start. – As long as the symbol is flashing on the control panel, you can add laundry. – When the symbol lights up constantly, the door is locked until the end of the program. -
Page 27: Program End - Removing The Laundry
6. Program end – removing the laundry Program end Items left in the drum could discolour other items in the next wash or The time display shows 0:00. The become discoloured themselves. symbol will remain lit up in the Remove all items from the drum. control panel. -
Page 28: Spinning
Spinning Final spin speeds Program Selectable spin speeds Normal – – – Wrinkle-free – Delicates – – Sanitize – – Handwash – Dress Shirts – – Express – Darks/Denims – Extra White –... - Page 29 Spinning Deselecting the rinse-spin and final Final spin speed in the wash spin program Touch the sensor button. When a program is selected, the sensor button for the optimum spin speed for After the final rinse cycle, the water will that program will be brightly lit up on be pumped away and the Anti-crease the control panel...
-
Page 30: Delay Start
Delay start With Delay start, you can delay the start Starting Delay start of a program from 30 minutes up to a Touch the flashing Start/Stop sensor maximum of 24 hours. This allows you button. to make use of night-time economy The Delay start process starts and electricity rates, for example. -
Page 31: Program Chart
Program chart Temperature Item/Tip with garment care label symbols Normal Full load (17.6 lb/8 kg) Hot+ 140°F/60°C Cotton, linen, and mixed fibre fabrics made of both cotton and linen. 120°F/50°C 105°F/40°C Warm+ Warm 85°F/30°C Cold Cold USA test program in accordance with: DOE Federal Register 10 CFR Part 430 Appendix J2 to subpart B Canada test program in accordance with: CAN/CSA-C360-13 Wrinkle-free... -
Page 32: Handwash
Program chart Temperature Item/Tip with garment care label symbols Handwash Small load (4.4 lb/2 kg) 105°F/40°C For delicate fabrics which are only suitable for Warm+ hand washing. Warm 85°F/30°C Cold Cold Dress Shirts Small load (4.4 lb/2 kg) Hot+ 140°F/60°C Pre-treat collars and cuffs depending on the level of soiling. -
Page 33: Extra White X
Program chart Temperature Item/Tip with garment care label symbols Extra White Full load (17.6 lb/8 kg) 140°F/60°C Hot+ For white fabrics made of cotton or linen without special hygiene requirements. Outdoor Small load (5.5 lb/2.5 kg) 105°F/40°C Performance outerwear (e.g. jackets and Warm+ trousers) made from membrane fabric such as ... -
Page 34: Extra Options
Extra options You can supplement the wash Light soiling programs with extra options. For slightly soiled textiles that are not Extra options are selected and stained. The wash duration is reduced. deselected using the relevant sensor buttons on the control panel. Prewash For laundry with large amounts of dirt, e.g. -
Page 35: The Following Extra Options Can Be Selected In Addition To The Programs
Extra options The following extra options can be selected in addition to the programs Heavy Light soiling Prewash Buzzer soiling Normal Wrinkle-free Delicates SaniWash Handwash – – Dress Shirts Express – – Darks/Denims Extra White Outdoor Proofing – – – Drain/Spin –... -
Page 36: Changing The Program Sequence
Changing the program sequence Removing laundry after cancelling Changing the program the program After the successful start of a program it If you want to remove the laundry when is no longer possible to select a it is dripping wet: different program. -
Page 37: Adding Or Removing Laundry
Changing the program sequence Adding or removing laundry You can add or remove laundry at the start of a wash program as long as the symbol is flashing on the control panel. Briefly touch the Start/Stop button. The program will stop and the door will unlock. -
Page 38: Detergent
Detergent Miele-recommended detergents Miele detergents have been developed by Miele especially for Miele washing machines. You can order the Miele detergents from Miele's online store, Miele Experience Centers, or you can purchase them from Miele's customer service. Miele Miele Miele... -
Page 39: General Detergent Recommendations
Detergent General detergent recommendations The wash programs that are not listed do not have a detergent recommendation Universal Colour Detergent for Bleach detergent detergent woollens and delicates Normal – Wrinkle-free – Delicates –... -
Page 40: Cleaning And Care
Cleaning and care Cleaning the drum Damage due to cleaning agents. (Hygiene info) Solvent-based cleaning agents, abrasive cleaners, glass cleaners or Washing at low temperatures and/or multi-purpose cleaning agents can using liquid detergent can cause cause damage to plastic surfaces bacteria and unpleasant odours to build and other parts. - Page 41 Cleaning and care Removing and cleaning the insert for Cleaning the compartment liquid detergents Compartment 1 has a siphon for better An insert for liquid detergents is located dispensing of the chlorine bleach. in the compartment of the detergent dispenser drawer.
- Page 42 Cleaning and care Cleaning the siphon and the / compartment channel Liquid starch results in clogging. The siphon in the / compartment no longer works and the compartment can overflow. Clean the siphon particularly thoroughly after using liquid starch a few times. Clean the fabric softener channel with a brush and warm water.
-
Page 43: Cleaning The Water Inlet Filter
Cleaning and care Cleaning the filter in the inlet valve Cleaning the water inlet filter Using pliers, carefully loosen the The washing machine has two filters to ribbed plastic nut on the inlet valve protect the inlet valve. You should and unscrew. -
Page 44: Frequently Asked Questions
Frequently asked questions . . . Problem solving guide Many malfunctions and faults that can occur in daily operation can be easily remedied. In many cases this will save you time and money because you won't need to book a service technician. The tables below will help you to find the reason for a fault, and how to correct it. -
Page 45: The Control Panel
Frequently asked questions . . . The program is cancelled and a fault indicator light lights up on the control panel Problem Possible cause and solution The fault indicator The water inlet is blocked or restricted. light lights up, Check whether the tap is turned on properly. and ... -
Page 46: During The Program, A Symbol Appears On The Time Display
A wash program using a temperature above 60°C has lights up. not been run for a long period of time. In order to prevent bacteria and unpleasant odours building up in the machine, run the Normal 90°C program using Miele Washing Machine Cleaner or universal powder detergent. -
Page 47: General Problems With The Washing Machine
In order to prevent bacteria and unpleasant odours building up in the machine, run the Normal 90°C program using Miele Washing Machine Cleaner or universal powder detergent. The door and detergent dispenser drawer were closed after washing. - Page 48 Frequently asked questions . . . General problems with the washing machine Problem Possible cause and solution Fabric softener is not The siphon tube is not correctly positioned or completely dispensed clogged. or too much water Clean the siphon (see “Cleaning and care – remains in the ...
-
Page 49: An Unsatisfactory Wash Result
Frequently asked questions . . . An unsatisfactory wash result Problem Possible cause and solution Liquid detergent is not Liquid detergents do not contain bleaching agents. achieving the required Consequently, fruit, coffee, and tea stains cannot results. always be removed. ... -
Page 50: The Door Will Not Open
Frequently asked questions . . . The door will not open Problem Possible cause and solution The door cannot be The drum is locked during a program. pulled open during a Touch the Start/Stop sensor button to cancel the program. program. -
Page 51: Opening The Door In The Event Of A Blocked Drain Outlet And/Or Power Failure
Carefully allow all suds to drain off. Draining the washing machine Remove the drain filter completely. Remove the drain filter, though not completely. Place a suitable container under the flap, e.g. a Miele universal oven tray. - Page 52 Frequently asked questions . . . Opening the door Risk of injury due to rotating drum. Reaching into a rotating drum is extremely dangerous. Always make sure that the drum is stationary before reaching in to remove laundry. Clean it thoroughly. ...
-
Page 53: Technical Service
In the event of any faults which you Optional spare parts and accessories cannot remedy yourself, please contact for this washing machine are available your Miele Dealer or the Miele Technical from Miele. Service. Warranty Contact information for Miele Service... - Page 55 Installation instructions Alteration rights reserved. Visit our website for all the current product specifications, technical appliance information, and warranty information. To avoid accidents or damage to the appliance, please read these instructions before installing and/or using it.
-
Page 56: Installation And Connection
Installation and connection Front view a Drain hose e Control panel b Hot-water inlet hose (pressure-proof f Detergent dispenser drawer to 1,015 psi/7,000 kPa) g Door c Cold-water inlet hose (pressure- h Flap for drain filters, drain pump, and proof to 1,015 psi/7,000 kPa) emergency release d Electrical connection i Four height-adjustable feet... -
Page 57: Rear View
Installation and connection Rear view a Drain hose e Cold-water inlet hose (pressure- proof to 1,015 psi/7,000 kPa) b Transport clips for inlet and drain f Hot-water inlet hose (pressure-proof hoses and electrical supply cable to 1,015 psi/7,000 kPa) c Electrical connection g Safety caps for transit bars d Protruding lid for holding when h Transport clips for inlet and drain... -
Page 58: Installation Surface
Remove the left and right covers. clamp/fastening bracket (MTS floor 1. Pull off the shipping strut covers and mounting kit – available from your Miele dealer or Miele Service 2. then use a screwdriver to release the department). catches at the top and bottom. - Page 59 Installation and connection Using the wrench supplied, turn the Turn the right-hand shipping strut left-hand shipping strut 90°, then 90°, then withdraw the shipping strut. withdraw the shipping strut.
-
Page 60: Refitting The Transit Bars
Installation and connection Risk of injury from sharp edges. There is a risk of injury from reaching into holes that are not covered. Cover the holes for the shipping struts after they have been removed. Secure the shipping struts to the back of the washing machine. -
Page 61: Levelling The Machine
Installation and connection Levelling the machine The washing machine must stand perfectly level on all four feet to ensure safe and proper operation. Incorrect installation may increase electric and water consumption and may cause the machine to move about. Unscrewing and adjusting the feet The four adjustable screw feet are used to level the washing machine. -
Page 62: Additional Installation Requirements
Installation and connection Setting up the cabinet Additional installation requirements The washing machine must be installed in accordance with the relevant local regulations. Risk of damage due to failure to remove the shipping struts. Failure to remove the shipping struts can result in damage to the washing machine and to adjacent cabinetry or appliances. -
Page 63: For Closets At Room Height
Installation and connection For closets at room height Product dimensions You can also insert a ventilation Dimensions opening at the top of the closet. In addition, you must also provide an opening on the bottom side of the door. Risk of damage due to overheating of the washing machine. -
Page 64: Installation On A Plinth
Installation and connection Installation on a plinth – WTS 510 (only available in white) Washer-dryer stack – WTV 512 and WTV 502 washer-dryer stacking kit... -
Page 65: The Miele Water Protection System
The Miele water protection system – Sump: Any leaking water from the washing machine is collected in a The Miele water protection system sump in the base of the machine. A protects all parts of the washing float switches off the water inlet machine and its surroundings from valves. -
Page 66: Water Intake
Installation and connection Maintenance Water intake Only use a genuine Miele hose that has The washing machine should be been tested to withstand pressure of connected to a domestic water supply over 1,015.26 psi/7,000 kPa should you in accordance with current local and ever need a replacement. -
Page 67: Drainage
If required, the hose can be extended to a length of up to 5 m. Accessories are available from Miele or from your Miele dealer. Drainage options: 1. Direct into a sink or basin: Please note: –... -
Page 68: Electrical Connection
Installation and connection Instructions for electrical connection Electrical connection The installation must be carried out by GROUNDING INSTRUCTIONS an experienced and qualified specialist The washing machine must be in accordance with local regulations. grounded. Connecting the appliance to ground reduces the danger of The washing machine is equipped with electric shock in the event of a a 5' 3"... -
Page 69: Technical Data
Technical data Height 33 7/16" (850 mm) mm Width 23 7/16" (596 mm) mm Depth 25 1/16" (636 mm) mm Depth with door open 41 1/2" (1054 mm) mm Height for building under 32 5/16" (+5/16"/-1/16") (820 mm) mm Width for building under 23 5/8" (600 mm) mm Weight Approx. -
Page 70: Programmable Functions
Programmable functions Programmable functions The programmable functions are used to alter the machine’s electronics to Buzzer suit changing requirements. Keypad tone Programmable functions can be altered at any time. PIN code Control panel switch-off status Programming is carried out in 8 steps (, , ... -
Page 71: Editing And Saving The Programmable Function
Programmable functions Editing and saving the Exiting the programming level programmable function Turn the program selector to . You can either switch a programmable The settings you have selected are now function on/off or select different stored in the memory. You can alter the options. -
Page 72: Pin Code
Programmable functions PIN code Control panel switch-off status The PIN code prevents the washing machine being used without your To save energy, the time display and knowledge. sensor buttons will go out after 10 minutes, and only the Start/ When the PIN code has been activated, Stop sensor button will flash. -
Page 73: Memory
Programmable functions Memory Water inlet The washing machine will save the You can program 2 options for the last settings (temperature, spin speed, water inlet. The water inlet is and some of the Options) selected for controlled by the two inlet hoses. a program after the program has Options started. -
Page 74: Additional Long Prewash - Normal
= + 12 minutes increase in the Reduce temperature prewash time At high altitudes, water has a lower boiling point. Miele recommends activating the reduce temperature setting at altitudes of or above 2,000 m to prevent water from boiling. The maximum temperature is reduced to 80°C, even if a higher temperature... -
Page 75: Maximum Rinse Level
Programmable functions Maximum rinse level Anti-crease The water level in the rinse can be The Anti-crease function reduces permanently set to the highest value. creasing after the end of the program. This function is important for allergy At the end of the program, the drum sufferers as it achieves excellent wash continues to turn at intervals for up to results. -
Page 76: Chlorine Bleach
Programmable functions Chlorine bleach Welcome tone You can activate the automatic The welcome tone sounds whenever addition of chlorine bleach at the end the washing machine is switched on. of the main wash. You can switch the welcome tone on or Chlorine bleach may only be used in off. -
Page 77: Optional Accessories
Miele Washing Machines. Outdoor These and many other useful products can be ordered via the Miele online – Liquid detergent for outerwear and shop, from your Miele dealer, or from performance clothing Miele directly. -
Page 78: Fabric Care
Optional accessories WoolCare Additive – Liquid detergent for woollens and Booster delicates – For removing stains – Includes a special wheat protein – For white and coloured laundry conditioning formula – Available as capsules in – Helps prevent pilling convenient single dose amounts –... - Page 79 Canada Importer Miele Limited Headquarters and Miele Centre 161 Four Valley Drive Vaughan, ON L4K 4V8 www.miele.ca Customer Care Centre Phone: 800 565-6435 customercare@miele.ca Germany Manufacturer Miele & Cie. KG Carl-Miele-Straße 29 33332 Gütersloh...
- Page 80 WWB 020 en-CA M.-Nr. 11 003 030 / 00...