Advertisement
Quick Links
Always there to help you
Register your product and get support at
www.philips.com/welcome
Question?
Contact
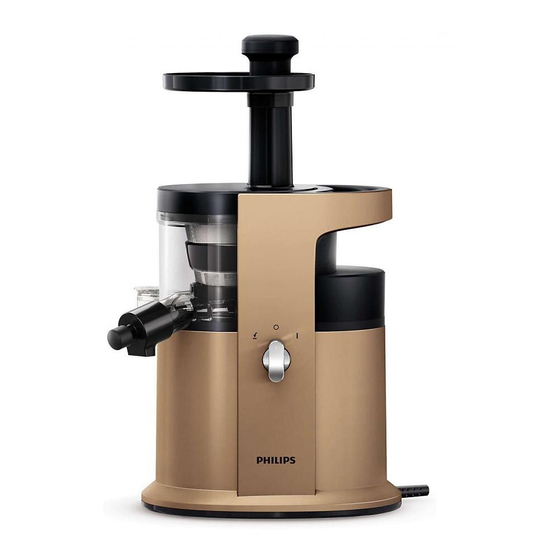
Philips
EN User manual
LV Lietotāja rokasgrāmata
BG Ръководство за потребителя
PL Instrukcja obsługi
CS Příručka pro uživatele
RO Manual de utilizare
ET Kasutusjuhend
RU Руководство пользователя
HR Korisnički priručnik
SK Príručka užívateľa
HU Felhasználói kézikönyv
SL Uporabniški priročnik
KK Қолданушының нұсқасы
SR Korisnički priručnik
LT Vartotojo vadovas
UK Посібник користувача
Specifications are subject to change without notice
© 2016 Koninklijke Philips N.V.
4241 210 20292
All rights reserved.
English
1 Your slow juicer
Congratulations on your purchase, and welcome to Philips!
To fully benefit from the support that Philips offers, register your product at
www.philips.com/welcome. Read this user manual carefully before you install
and use the unit. Save it for future reference.
2 Important
Read this user manual carefully before you use the appliance, and save it for
future reference.
Danger
Do not immerse the main unit of the slow
•
juicer in water, any other fluid, nor rinse it
under the tap. Use only a moist cloth to
clean.
Warning
Check if the voltage indicated on the slow
•
juicer corresponds to the local power voltage
before you connect it.
Do not connect the appliance to an external
•
timer to prevent danger.
Only connect the slow juicer to a grounded
•
power outlet. Always make sure that the plug
is inserted firmly into the power outlet.
Make sure that the damaged power cord
•
is replaced by Philips, a service center
authorized by Philips or similarly qualified
persons in order to avoid a hazard.
If you detect cracks in the sieve, the driving
•
shaft, or any accessories is damaged in any
way, do not use the appliance anymore and
contact the nearest Philips service center. Do
not replace parts of the appliance yourself.
This appliance shall not be used by children.
•
This appliance can be used by persons
•
with reduced physical, sensory or mental
capabilities or lack of experience and
knowledge if they have been given
supervision or instruction concerning use
of the appliance in a safe way and if they
understand the hazards.
For their safety, do not allow children to play
•
with the appliance.
Keep the appliance and its power cord out of
•
the reach of children. Do not hang the power
cord over the desk or table edge, where you
place the appliance.
To prevent a short circuit or an electric shock,
•
make sure that your hands are dry before
you insert the plug into the power outlet and
switch on the appliance.
Never let the appliance run unattended.
•
Never reach into the feeding tube and the
•
main unit with your fingers or an object
while the slow juicer is running. Never use
any objects to replace the pusher. Keep
your eyes from the feeding tube to avoid
accidents.
1/5
1
HR1883
HR1884
a
b
c
d
e
f
g
1
2
4
3
5
Caution
This appliance is intended for household use
•
only.
Never use any accessories or parts from
•
other manufacturers or that Philips does
not specifically recommend. If you use
such accessories or parts, your guarantee
becomes invalid.
Do not use this appliance on an unstable or
•
uneven surface.
Before you inse0rt the plug into the power
•
outlet, make sure that the appliance is
assembled correctly.
Unplug the appliance immediately after use.
•
Switch off and unplug the appliance from the
•
power outlet after use. Wait till the main unit
and the driving shaft stop turning, then you
can take out any accessories from the main
unit.
Cut large ingredients into pieces that fit into
•
the feeding tube. Remove stones, cores,
seeds, and thick peels in fruits or vegetables
before juicing.
Do not exert too much pressure on the
•
pusher, since this would affect the quality of
the end result and it could even cause the
driving shaft to come to a halt.
Food coloring can discolor components. This
•
is normal and has no impact on use.
Do not use the appliance continuously for
•
more than 30 minutes. This is to protect the
lifetime of the appliance.
When the appliance is stopped and cannot
•
automatically reverse, turn the control knob
to OFF. Then, turn the control knob to the
REV position to clear the ingredients from the
appliance. Turn the control knob to ON again
to use the appliance. If it is still blocked,
clean the driving shaft before you re-use
again. This is to protect the appliance.
To prevent damages due to heat
•
deformation, never use water with a
temperature of over 60°C or a sterilizer to
clean all components.
Do not use scouring pads, abrasive cleaning
•
agents or aggressive liquids such as petrol,
alcohol or acetone to clean the appliance.
EMF
This Philips appliance complies with all applicable standards and regulations
regarding exposure to electromagnetic fields.
3 Overview (fig. 1)
a Driving shaft
j Main unit
b Fine sieve
k Control knob
c Coarse sieve (HR1884 only)
l Detachable juice spout
d Detachable pulp spout
m Juice collector
e Sorbet sieve
n Lid
f Pulp container
o Feeding tube
g Juice jug
p Tray
h Backup sealing ring
q Pusher
i Cleaning brush
q
1
2
p
o
n
3
m
1
l
2
4
k
j
i
h
1
2
5
6
4 Before first use
Take out all the accessories and clean the parts of the slow juicer thoroughly
before using it for the first time (see chapter "Cleaning").
Make sure all parts are completely dry before you start using the slow juicer.
5 Assembling the slow juicer (fig. 2)
Note
•
Make sure the sealing ring is firmly inserted into the
juice collector before using the appliance.
•
If the sealing ring on the juice collector is aging or
damaged, replace it with the backup sealing ring.
•
There is a switch on the juice spout. Pull it outward to
open the spout, and push it inward to close the spout.
1
Insert the detachable pulp spout into the pulp outlet; Insert the
detachable juice spout into the juice outlet, turn the spout clockwise until
the
icon on the spout and the
icon on the outlet are aligned.
2
Put the sieve into the juice collector first, and then place the driving shaft
into the sieve.
3
Place the lid onto the juice collector. Turn the lid clockwise until the
on the lid and the
icon on the juice collector are aligned.
4
Align the
icon on the juice collector and the
icon on the main unit,
and then insert the juice collector into the main unit.
5
Put the pulp container and juice jug under the outlets respectively.
6 Using the slow juicer (fig. 3)
Caution
•
Never insert your fingers or an object into the feeding tube.
•
When the appliance is stopped and cannot automatically reverse, turn the control
knob to the off position "O". Then, turn the control knob to the reverse position
" " to clear the ingredients from the appliance. Turn the control knob to "I" again
to use the appliance. If it is still blocked, clean the driving shaft and remove food
residues in it before you re-use again. This is to protect the appliance.
•
Do not exert too much pressure on the pusher, as this could affect the quality of
the end result and it could even cause the driving shaft to come to a halt.
Note
•
The appliance will only function if all parts have been properly assembled and the
lid has been properly locked in place with the juice collector.
•
Before juicing, make sure that the detachable pulp spout is assembled properly, and
the juice jug and pulp container are put under the corresponding spouts.
•
Cut the ingredients into pieces that fit into the feeding tube.
•
The coarse sieve is more suitable to juice soft fruits or vegetables such as tomatoes
and berries.
•
During processing, the appliance may vibrate slightly. This is normal.
•
To prevent juice from dripping onto the table, push the spout switch inward to close
the spout before moving the juice jug from under the juice outlet.
•
Drink the juice immediately after you have extracted it. If it is exposed to air for some
time, the juice loses its taste and nutritional value.
Tip
•
Use fresh fruit and vegetables, as they contain more juice. Fruits like apples, pears,
pineapples, grapes, pomegranates, oranges and melons, and vegetables like carrots,
cucumbers, tomatoes, celery stalks are suitable for processing in the slow juicer.
•
When juicing a large amount of hard fruits or vegetables such as carrots, celery
stalks and spinach, the rubber pad on the juice collector might be pushed open,
and the appliance might be blocked. To help avoid the situation, cut the fruits or
vegetables into small cubes or pieces.
•
Remove thick peels, e.g. those of pineapples, oranges and pomegranates. You do
not have to remove thin peels or skins
•
If you want to juice fruits with stones, such as peach, plum or cherry, remove the
stone before juicing.
•
The slow juicer is not suitable for processing very hard and/or fibrous fruits or
vegetables such as sugar cane. Very soft and/or starchy fruits, such as bananas,
papayas, avocados, figs and mangoes are also not suitable for processing in the
slow juicer. For very soft fruits, you can freeze them in the refrigerator and use the
sorbet sieve to make sorbet.
Using the sorbet sieve (fig. 4)
Note
•
Replace the fine/coarse sieve with the sorbet sieve before use.
•
Make sure to remove the detachable pulp spout before use.
•
Peel the fruits and remove the cores. Cut them into small cubes first (around 2cm x
2cm), and then put them in the refrigerate. Freeze the fruits in the refrigerator for at
least 10 hours before making sorbet in the slow juicer.
•
Push the switch inward to close the juice spout when using the sorbet sieve.
2
1
3
4
5
3
4
9
7
8
7 Cleaning (fig. 5)
Cautions
•
Before cleaning, make sure the appliance is switched off and the sieve has stopped
rotating.
•
Never use scouring pads, abrasive cleaning agents or aggressive liquids such as
alcohol, petrol or acetone to clean the appliance.
•
Never immerse the motor unit in water nor rinse it under the tap.
•
Do not clean the sieve with your hands to avoid getting cut. Use the provided brush
for this matter.
Note
•
Apart from the main unit, lid, pusher, and the brush, all the other parts are
dishwasher proof.
•
Wipe the appliance with a soft cloth and make sure the appliance is clean and dry
before storage.
Tip
•
The appliance is easier to clean if you do so immediately after use.
•
Use both ends of the cleaning brush to poke out the pulp stuck in the detachable
parts.
icon
1
Switch off the appliance and unplug it. Wait until the sieve has stopped
rotating.
2
Take out the pusher.
3
Turn the lid anti-clockwise until the
icon on the lid aligns with the
on the juice collector, and then remove the lid.
4
Remove the juice collector from the main unit.
5
Take out the driving shaft, sieve and sealing ring.
6
Pull out the detachable pulp spout; turn the detachable juice spout anti-
clockwise until the
icon on the spout and the
aligned, then pull it out.
Tip
•
To detach the rubber pad on the detachable pulp spout, pull the pad out of the two
retaining slots first, and then take the other side of the rubber pad out; To reattach it,
fix the rubber pad into the retaining slots first, and then insert the other side into the
spout.
7
Clean the detachable parts with the provided cleaning brush in warm
water with some washing-up liquid and rinse them under the tap.
8
Use the silicone end of the cleaning brush to wipe off the pulp on the
sieve, and then brush away the pulp stuck in the holes.
9
Wipe the main unit with a damp cloth.
8 Recycling
This symbol means that this product shall not be disposed of with
normal household waste (2012/19/EU).
Follow your country's rules for the separate collection of electrical
and electronic products. Correct disposal helps prevent negative
consequences for the environment and human health.
9 Guarantee and service
If you have a problem, need service or need information, see
www.philips.com/support or contact the Philips Consumer Care Center in your
country.
3
icon
icon on the outlet are
Advertisement

Related Manuals for Philips HR1883


Summary of Contents for Philips HR1883
- Page 1 • • Before cleaning, make sure the appliance is switched off and the sieve has stopped To fully benefit from the support that Philips offers, register your product at 5 Assembling the slow juicer (fig. 2) rotating. other manufacturers or that Philips does www.philips.com/welcome.
- Page 2 предотвратяването на потенциални негативни последици за околната среда и nebo aceton. човешкото здраве. Tento symbol znamená, že výrobek nelze likvidovat s běžným Този уред на Philips е в съответствие с нормативната уредба и всички действащи komunálním odpadem (2012/19/EU). 9 Гаранция и сервиз стандарти, свързани с излагането на електромагнитни излъчвания.
- Page 3 Mahlakoguja propisima koji se tiču izloženosti elektromagnetskim poljima. Philipsi klienditeeninduskeskusega. Ako imate problem, trebate servis ili informacije, posjetite www.philips.com/ support ili se obratite korisničkoj službi tvrtke Philips u svojoj državi. e Šerbetisõel n Kaas 3 Pregled (sl. 1) f Viljaliha nõu...
- Page 4 Баяу шырын сыққышты пайдаланбастан бұрын барлық бөліктерінің жақсы кепкенін Сатып алғаныңыз құтты болсын және Philips компаниясына қош келдіңіз! тексеріңіз. Köszönjük, hogy Philips terméket vásárolt, és üdvözöljük a Philips világában! 4 Teendők az első használat előtt Philips ұсынатын қолдауды толық пайдалану үшін, өнімді www.philips.com/welcome A Philips által biztosított teljes körű...
- Page 5 Apsveicam ar pirkumu un laipni lūdzam Philips! daļas ir pilnībā nožuvušas. Norėdami pasinaudoti visa „Philips“ siūloma pagalba, savo gaminį Lai pilnībā izmantotu Philips piedāvātā atbalsta iespējas, reģistrējiet produktu užregistruokite adresuwww.philips.com/welcome. Prieš pradėdami naudoti 5 Lėtaeigės sulčiaspaudės surinkimas vietnē www.philips.com/welcome. Uzmanīgi izlasiet šo lietotāja rokasgrāmatu 5 Zemo apgriezienu sulu spiedes prietaisą, atidžiai perskaitykite šį...
- Page 6 Sită grosieră (numai HR1884) problemów przejdź na stronę www.philips.com/support lub skontaktuj się z pentru suc To urządzenie firmy Philips spełnia wszystkie normy i jest zgodne z wszystkimi lokalnym Centrum Obsługi Klienta firmy Philips. przepisami dotyczącymi narażenia na działanie pól elektromagnetycznych.
- Page 7 Posúvač e Фильтр для сорбета n Крышка Поздравляем с покупкой и приветствуем вас в клубе Philips! Blahoželáme vám ku kúpe a vítame vás medzi zákazníkmi spoločnosti Philips. i Čistiaca kefka Чтобы воспользоваться всеми преимуществами поддержки Philips, зарегистрируйте f Контейнер для мякоти o Камера подачи...
- Page 8 Pravilno odlaganje doprinosi g Vrč za sok p Pladenj sprečavanju negativnih posledica po životnu sredinu i zdravlje ljudi. Ovaj Philips aparat usklađen je sa svim primenjivim standardima i propisima u h Rezervni tesnilni obroček q Potiskalo vezi sa elektromagnetnim poljima.
-
Page 9: Важлива Інформація
звисав із краю столу, де стоїть пристрій. Щоб попередити коротке замикання або ЕМП • ураження електричним струмом, штепсель у Цей пристрій Philips відповідає усім чинним стандартам та правовим нормам, що розетку та перемикач на пристрої потрібно стосуються впливу електромагнітних полів. вмикати сухими руками. 3 Огляд (мал. 1) Ніколи... -
Page 10: Перед Першим Використанням
пристроїв у Вашій країні. Належна утилізація допоможе запобігти негативному використовувати спеціальне сито для приготування шербету. впливу на навколишнє середовище та здоров’я людей. 9 Гарантія та обслуговування Якщо Вам необхідна інформація чи обслуговування або ж виникла проблема, відвідайте веб-сайт www.philips.com/support чи зверніться до Центру обслуговування клієнтів Philips у своїй країні.