Table of Contents
Advertisement
Advertisement
Table of Contents

Related Manuals for HP 25x


Summary of Contents for HP 25x
- Page 1 User Guide...
- Page 2 United States and/or other countries. The information contained herein is subject to change without notice. The only warranties for HP products and services are set forth in the express warranty statements accompanying such products and services. Nothing herein should be construed as constituting an additional warranty.
-
Page 3: About This Guide
About This Guide This guide provides information about monitor features, setting up the monitor, using the software and technical specifications. WARNING! Indicates a hazardous situation that, if not avoided, could result in death or serious injury. CAUTION: Indicates a hazardous situation that, if not avoided, could result in minor or moderate injury. IMPORTANT: Indicates information considered important but not hazard-related (for example, messages related to property damage). - Page 4 About This Guide...
-
Page 5: Table Of Contents
Using the ambient light ............................16 Selecting a faster response time for gaming ...................... 17 Adjusting blue light output ..........................17 Using HP Enhance+ .............................. 17 Using RGB Gain Control ............................18 Viewing the Frame Rate ............................18 Using Message Timers ............................19 Using the Crosshair feature .......................... - Page 6 International Association of Accessibility Professionals (IAAP) ............27 Finding the best assistive technology ....................28 Assessing your needs ..................... 28 Accessibility for HP products ..................28 Standards and legislation ............................ 29 Standards ............................29 Mandate 376 – EN 301 549 .................... 29 Web Content Accessibility Guidelines (WCAG) ..............
-
Page 7: Getting Started
The Safety & Comfort Guide also provides important electrical and mechanical safety information. The Safety & Comfort Guide is also available on the Web at http://www.hp.com/ergo. IMPORTANT:... -
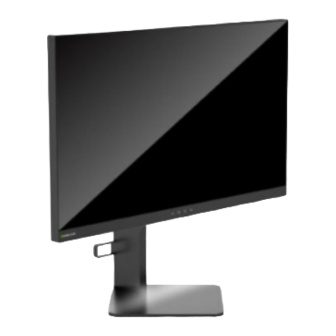
Page 8: Product Features And Components
NOTE: For safety and regulatory information, refer to the Product Notices provided in your documentation kit. To access the latest user guide, go to http://www.hp.com/support and follow the instructions to find your product. Then select User Guides. Chapter 1 Getting started... -
Page 9: Rear Components
Rear components Table 1-1 Rear components and their descriptions Component Function Power button Turns the monitor on or off. OSD joystick Opens the OSD menu, selects an item from the menu, or closes the OSD menu. Security cable slot Connects an optional security cable to the monitor. Audio-out jack Connects optional powered stereo speakers, headphones, earbuds, a headset, or a television audio cable. -
Page 10: Setting Up The Monitor
The Safety & Comfort Guide also provides important electrical and mechanical safety information. The Safety & Comfort Guide is available on the Web at http://www.hp.com/ergo. IMPORTANT: To prevent damage to the monitor, do not touch the surface of the LCD panel. Pressure on the panel may cause nonuniformity of color or disorientation of the liquid crystals. -
Page 11: Connecting The Cables
Connecting the cables NOTE: The monitor ships with select cables. Place the monitor in a convenient, well-ventilated location near the computer or source device. Before connecting the cables, route the cables through the cable management guide on the rear of the monitor. - Page 12 Connect one end of an HDMI cable to the HDMI port on the rear of the monitor and the other end to ● the HDMI port on the source device. Connect the Type-B connector on the USB upstream cable to the USB Type-B upstream port on the rear of the monitor.
-
Page 13: Connecting Usb Devices
Connect one end of the AC power cord to the AC adapter (1) and the other end to a grounded AC outlet (2), and then connect the AC adapter to the power connector on the monitor (3). WARNING! To reduce the risk of electric shock or damage to the equipment: Do not disable the AC power cord grounding plug. -
Page 14: Adjusting The Monitor
The Safety & Comfort Guide also provides important electrical and mechanical safety information. The Safety & Comfort Guide is available on the Web at http://www.hp.com/ergo. Tilt the monitor head forward or backward to set it to a comfortable eye level. -
Page 15: Installing A Security Cable
Installing a security cable You can secure the monitor to a fixed object with an optional security cable available from HP. Use the key provided to attach and remove the lock. Storing headphones The monitor features a headphone hook at the top of the stand for convenient headphone storage. -
Page 16: Mounting The Monitor Head
Mounting the monitor head The monitor head can be attached to a wall, swing arm, or other mounting fixture. IMPORTANT: This monitor supports the VESA industry-standard 100 mm mounting holes. To attach a third- party mounting solution to the monitor, four 4 mm, 0.7 pitch, and 10 mm–long screws are required. Longer screws may damage the monitor. -
Page 17: Attaching The Vesa Mounting Bracket
Attaching the VESA mounting bracket A VESA mounting bracket is included with the monitor for use when attaching the monitor head to a wall, swing arm, or other mounting fixture. Remove the monitor stand. See Removing the monitor stand on page Insert the VESA mounting bracket into the slot on the back of the monitor head’s hinge (1), and then install the two screws (2) to secure the bracket. -
Page 18: Turning On The Monitor
Image retention is a condition that may occur on all LCD screens. A burned-in image on the monitor is not covered under the HP warranty. NOTE: You can disable the power light in the OSD menu. -
Page 19: Using The Monitor
Select Software and Drivers. Select your product type. Enter your HP monitor model in the search field and follow the on-screen instructions. This monitor is Windows Plug and Play–compatible and the monitor will work correctly without installing the INF file. Monitor Plug and Play compatibility requires that the computer’s graphics card is VESA DDC2–... -
Page 20: Display Mode
Display Mode The display mode of the monitor is reported in the monitor status message that appears when the monitor is turned on and when the video input is changed. The current display mode is shown in the Information menu window and at the bottom of the OSD’s main menu in the status bar area. -
Page 21: Using The Sleep Timer
Using the Sleep Timer The Sleep Timer menu is used to program the monitor to enter and exit the reduced power/sleep state at predetermined user-selectable times. For example, you can set the monitor to automatically enter sleep mode at 5 p.m. and then automatically wake from sleep mode at 8 a.m. When the monitor is in sleep mode, the power light blinks amber. -
Page 22: Using The Power-Off Timer
Using the Power-Off Timer The Power-Off Timer menu is used to program the monitor to automatically turn off at a predetermined user- selectable time. For example, you can manually turn on the monitor in the morning and configure the Power- Off Timer to automatically turn off the monitor at 6 p.m. -
Page 23: Selecting A Faster Response Time For Gaming
Adjusting blue light output Decreasing the blue light emitted by the display reduces the blue light exposure to your eyes. HP monitors provide settings to reduce the blue light output and create a more relaxing and less stimulating image while you view content on the screen. -
Page 24: Using Rgb Gain Control
Using RGB Gain Control The RGB Gain Control can be used to manually adjust the color temperature of any color preset, making all color presets adjustable user modes. Adjustments are stored separately for each color preset. To adjust the color temperature: Press the center of the OSD joystick to open the OSD. -
Page 25: Using Message Timers
Using Message Timers The Message Timers menu presents two types of timers that display preset reminder/information messages. The timer menu will have an On/Off option and Start, Stop, and Reset controls. Selecting On shows the current selected timer value at the current selected location of the screen. The default is the top right corner. The on-screen timer format will initially show minutes and seconds (0:00) but will display hours as time progresses. -
Page 26: Using The Crosshair Feature
If the Crosshair option is active, pressing the Message Timer hot key will turn on the selected Message ● Timer and turn off Crosshair. If the FPS option is active, pressing the Message Timer hot key will turn on the selected Message Timer ●... -
Page 27: Support And Troubleshooting
Support and troubleshooting Solving common issues The following table lists possible issues, the possible cause of each issue, and the recommended solutions. Table 3-1 Common issues and solutions Issue Possible cause Solution Screen is blank or video is AC power cord is disconnected. Connect the AC power cord. -
Page 28: Contacting Support
Contacting support To resolve a hardware or software issue, go to http://www.hp.com/support. Use this site to get more information about your product, including links to discussion forums and instructions on troubleshooting. You can also find information about how to contact HP and open a support case. -
Page 29: Maintaining The Monitor
● increase the life expectancy of the monitor. NOTE: A burned-in image on the monitor is not covered under the HP warranty. Never block the slots and openings of the cabinet or push objects into them. These openings provide ●... -
Page 30: Appendix A Technical Specifications
Technical specifications NOTE: All specifications represent the typical specifications provided by HP's component manufacturers; actual performance may vary either higher or lower. For the latest specifications or additional specifications on this product, go to http://www.hp.com/go/ quickspecs/ and search for your specific model to find the model-specific QuickSpecs. -
Page 31: Preset Display Resolutions
Table A-1 Technical specifications (continued) Specification Measurement Altitude 0 m to 5,000 m 0 ft to 16,400 ft Operating 0 m to 12,192 m 0 ft to 40,000 ft Storage Power source 100 V ac to 240 V ac 50/60 Hz Measured power consumption 65 W Full power... -
Page 32: Entering User Modes
Table A-2 Preset display resolutions (continued) Preset display resolutions 1920 × 1080 @ 160 Hz 1920 × 1080 @ 200 Hz 1920 × 1080 @ 240 Hz Entering user modes Under the following conditions, the video controller signal may occasionally call for a mode that is not preset: You are not using a standard graphics adapter. -
Page 33: Appendix B Accessibility
Accessibility HP is working to weave diversity, inclusion and work/life into the fabric of our company, so it is reflected in everything we do. Here are some examples of how we are putting differences to work to create an inclusive environment focused on connecting people to the power of technology throughout the world. -
Page 34: Finding The Best Assistive Technology
HP is committed to increasing accessibility awareness within HP and with our customers and partners. Whether it’s large fonts that are easy on the eyes, voice recognition that lets you give your hands a rest, or any other assistive technology to help with your specific situation—a variety of assistive technologies make HP products easier to use. -
Page 35: Standards And Legislation
Assistive Technologies sorted by impairment type ● Assistive Technologies sorted by product type ● Assistive Technology vendors with product descriptions ● Assistive Technology Industry Association (ATIA) ● Standards and legislation Standards Section 508 of the Federal Acquisition Regulation (FAR) standards was created by the US Access Board to address access to information and communication technology (ICT) for people with physical, sensory, or cognitive disabilities. -
Page 36: United States
United Kingdom ● Australia ● Worldwide ● United States Section 508 of the Rehabilitation Act specifies that agencies must identify which standards apply to the procurement of ICT, perform market research to determine the availability of accessible products and services, and document the results of their market research. The following resources provide assistance in meeting Section 508 requirements: www.section508.gov ●... -
Page 37: Europe
Europe EU Mandate 376 ETSI Technical Report ETSI DTR 102 612: "Human Factors (HF); European accessibility requirements for public procurement of products and services in the ICT domain (European Commission Mandate M 376, Phase 1)" has been released. Background: The three European Standardization Organizations have set up two parallel project teams to carry out the work specified in the European Commission "Mandate 376 to CEN, CENELEC and ETSI, in Support of Accessibility Requirements for Public Procurement of Products and Services in the ICT Domain."... -
Page 38: Useful Accessibility Resources And Links
NOTE: This is not an exhaustive list. These organizations are provided for informational purposes only. HP assumes no responsibility for information or contacts you may encounter on the Internet. Listing on this page does not imply endorsement by HP. -
Page 39: Contacting Support
Time. Customers with other disabilities or age-related limitations who have questions about technical support ● or accessibility of HP products, choose one of the following options: Call (888) 259-5707 Monday through Friday, 6 a.m. to 9 p.m. Mountain Time. –...