Sony STR-ZA3100ES Help Manual
Multi channel av receiver
Hide thumbs
Also See for STR-ZA3100ES:
- Installation manual (77 pages) ,
- Operating instructions manual (72 pages) ,
- Startup manual (2 pages)
Table of Contents
Advertisement
Help Guide
MULTI CHANNEL AV RECEIVER
STR-ZA3100ES/STR-ZA2100ES/STR-ZA1100ES
Use this Help Guide when you have any questions on how to use the receiver.
In this Help Guide, the STR-ZA3100ES is used for illustrative purposes unless otherwise noted.
By updating your software to the latest version, you can take advantage of the newest functions.
Parts and Controls
Receiver
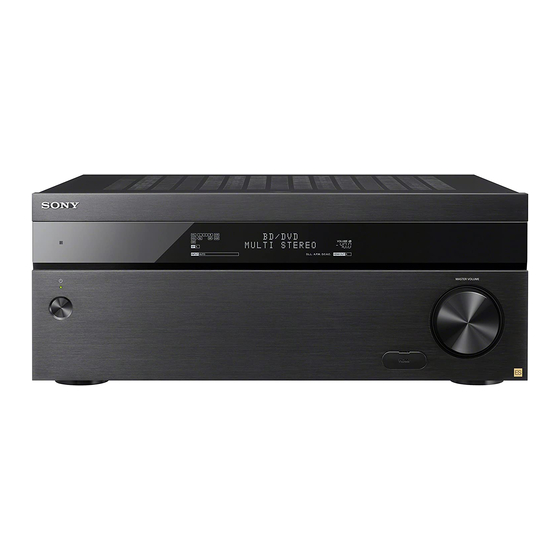
Front panel (with the front cover attached)
Front panel (without the front cover attached)
Power indicator
Indicators on the display panel
Rear panel (STR-ZA3100ES)
Rear panel (STR-ZA2100ES)
Rear panel (STR-ZA1100ES)
Remote control
Remote control (upper section)
Remote control (lower section)
1
Advertisement
Table of Contents

Related Manuals for Sony STR-ZA3100ES


Summary of Contents for Sony STR-ZA3100ES
- Page 1 Use this Help Guide when you have any questions on how to use the receiver. In this Help Guide, the STR-ZA3100ES is used for illustrative purposes unless otherwise noted. By updating your software to the latest version, you can take advantage of the newest functions.
- Page 2 Installing 7.1.2-channel speaker system using front Dolby Atmos enabled speakers with an additional stereo power amplifier (for STR-ZA3100ES/STR-ZA2100ES) Installing 5.1-channel speaker system with Zone 2 connection Installing 5.1.2-channel speaker system with bi-amplifier connection (for STR-ZA3100ES/STR-ZA2100ES) Installing 5.1-channel speaker system with bi-amplifier connection Speaker configuration and speaker pattern settings 2.
- Page 3 5. Connecting to the network System requirements for a wired LAN connection Connecting the receiver to the network using LAN cables (for STR-ZA3100ES) Connecting the receiver to the network using LAN cables (for STR-ZA2100ES/STR-ZA1100ES) 6. Turning on the receiver/preparing the remote control...
- Page 4 What is eARC (Enhanced Audio Return Channel)? When using an ARC-compatible TV that supports Dolby Atmos audio output When using an eARC-compatible TV that supports Dolby Atmos and DTS:X audio output Watching HDCP 2.2 copyright-protected content Listening to the radio Listening to FM/AM radio Presetting FM/AM radio stations (Preset Memory) Tuning to a station directly (Direct Tuning)
-
Page 5: Using Other Features
Enjoying sound from speakers located in other rooms using another amplifier Connecting another amplifier in Zone 2/3 Setting the volume control for Zone 2/3 (Zone2/3 Line Out) Setting the Zone 2 HDMI audio output of connected devices (Zone2 Audio Out) Setting the priority for the main zone (Priority) Enjoying sound using another amplifier in Zone 2 and/or Zone 3 Using Other Features... - Page 6 Setting up the receiver using the Easy Setup Input Setup Changing the assignment and display for the input jacks Changing the name for each input (Name) Speaker Setup 1. About Auto Calibration 2. Before you perform Auto Calibration 3. Connecting the calibration microphone 4.
- Page 7 Enabling the network function even when this receiver is in standby mode (Network Standby) Enjoying Hi-Fi System sound (Music Connect) Audio Setup Playing audio signals with high-quality sound (Digital Legato Linear (D.L.L.)) Enjoying clear and dynamic sound at a low volume (Sound Optimizer) Selecting a sound field (Sound Field) Enjoying more natural sound with speakers installed in the ceiling (In-Ceiling Speaker Mode) Enjoying high-fidelity sound (Pure Direct)
-
Page 8: Troubleshooting
Setting the tuner (Tuner Setup) Install Setup Turning on control mode for maintenance (External Control) Switching on/off the 12V trigger output (Trigger 1/2/3) (for STR-ZA3100ES) Switching on/off the 12V trigger output (Trigger) (for STR-ZA2100ES/STR-ZA1100ES) Displaying a test screen (Test Picture for HDMI Out A/B) - Page 9 Network features message list General The receiver is turned off automatically. The receiver does not turn on after performing USB Update or Network Update. The receiver does not turn on even when the TV is turned on. The receiver turns off when the TV is turned off. The receiver does not turn off even when the TV is turned off.
-
Page 10: Other Information
Remote control The remote control does not function. If the problem is not solved Reverting to the factory default settings Resetting sound fields to the default settings Customer support websites Other Information Trademarks Software License Information 4-686-529-11(5) Copyright 2017 Sony Corporation... - Page 11 Remote sensor Receives signals from remote control. MASTER VOLUME Turns to adjust the volume level. HDMI jack cover (for STR-ZA3100ES/STR-ZA2100ES only) Open the cover when you use HDMI IN 6 (GAME) jack. Related Topic Front panel (without the front cover attached)
- Page 12 Help Guide MULTI CHANNEL AV RECEIVER STR-ZA3100ES/STR-ZA2100ES/STR-ZA1100ES Front panel (without the front cover attached) Fixing points for the front cover Attach the front cover using these points. PING Displays the IP address and MAC address on the display panel. Input buttons Select the device you want to use.
- Page 13 SOUND FIELD (2CH/DIRECT, A.F.D., MOVIE, MULTI ST.) Selects the sound field you want. HDMI IN 6 (GAME) jack (for STR-ZA3100ES/STR-ZA2100ES only) Connect to a video game console. The video and sound from your video game console is input. Related Topic...
-
Page 14: Power Indicator
The top of the cabinet may become hot. This is because part of the circuit(s) inside the receiver is(are) still turned on, and is not a malfunction. Note The indicator flashes slowly when a software update is in progress. 4-686-529-11(5) Copyright 2017 Sony Corporation... -
Page 15: Indicators On The Display Panel
Surround Left Surround Right Surround Back Left Surround Back Right Height1 Left Height1 Right H2L (for STR-ZA3100ES/STR-ZA2100ES only) Height2 Left H2R (for STR-ZA3100ES/STR-ZA2100ES only) Height2 Right Indicates currently available operation on the display panel using on the remote control. IN-CEILING Lights up when the In-Ceiling Speaker Mode is activated. - Page 16 MONO FM receiving mode is set to the mono mode. PRESET The tuning mode is set to the preset mode. ZONE2, ZONE3 The applicable indicator lights up while [Zone2 Power] or [Zone3 Power] is set to [On]. VOLUME Displays the current volume. HDMI OUT A+B Displays the output you have selected using HDMI OUT on the front panel or HDMI OUTPUT on the remote control.
- Page 17 4-686-529-11(5) Copyright 2017 Sony Corporation...
- Page 18 ZONE 2/ZONE 3 AUDIO OUT jacks AUDIO IN jacks This is the control expansion terminals for custom installation. HDCP 2.2 is newly enhanced copyright protection technology that is used to protect content such as 4K movies. 4-686-529-11(5) Copyright 2017 Sony Corporation...
- Page 20 ZONE 2/ZONE 3 AUDIO OUT jacks AUDIO IN jacks This is the control expansion terminal for custom installation. HDCP 2.2 is newly enhanced copyright protection technology that is used to protect content such as 4K movies. 4-686-529-11(5) Copyright 2017 Sony Corporation...
- Page 22 ZONE 2/ZONE 3 AUDIO OUT jacks AUDIO IN jacks This is the control expansion terminal for custom installation. HDCP 2.2 is newly enhanced copyright protection technology that is used to protect content such as 4K movies. 4-686-529-11(5) Copyright 2017 Sony Corporation...
- Page 24 Help Guide MULTI CHANNEL AV RECEIVER STR-ZA3100ES/STR-ZA2100ES/STR-ZA1100ES Remote control (upper section) Use the supplied remote control to operate this receiver. MAIN (power) Turns the receiver on or sets it to the standby mode. Saving power in standby mode Save power by setting the receiver as follows: Set [Control for HDMI], [Standby Through], [Audio Return Channel], [Network Standby], [Zone2 Power] and [Zone3 Power] to [Off].
- Page 25 Saves and recalls various settings for the receiver. DISPLAY Displays information on the TV screen. RETURN Returns to the previous menu. Note The above explanations are intended to serve as examples. Related Topic Remote control (lower section) 4-686-529-11(5) Copyright 2017 Sony Corporation...
- Page 26 Help Guide MULTI CHANNEL AV RECEIVER STR-ZA3100ES/STR-ZA2100ES/STR-ZA1100ES Remote control (lower section) Use the supplied remote control to operate this receiver. HOME Displays the home menu on the TV screen. INPUT SETUP Displays the [Input Setup] menu. AUTO CAL Displays the auto calibration menu on the display panel of the receiver to perform Auto Calibration.
- Page 27 Turns off the sound temporarily. Press the button again to restore the sound. + button has tactile dot. Use the tactile dot as a reference when operating the receiver. Note The above explanations are intended to serve as examples. Related Topic Remote control (upper section) 4-686-529-11(5) Copyright 2017 Sony Corporation...
- Page 28 Help Guide MULTI CHANNEL AV RECEIVER STR-ZA3100ES/STR-ZA2100ES/STR-ZA1100ES Locations and names of speakers Location of each speaker Abbreviations used in illustrations Speaker name Front left speaker Front right speaker Center speaker Surround left speaker Surround right speaker Surround back left speaker...
- Page 29 Surround Dolby Atmos enabled right speaker SBDL Surround back Dolby Atmos enabled left speaker SBDR Surround back Dolby Atmos enabled right speaker Zone 2 left speaker Zone 2 right speaker Zone 3 left speaker Zone 3 right speaker 4-686-529-11(5) Copyright 2017 Sony Corporation...
- Page 30 30° 100° - 120° Same angle Hint As the subwoofer does not emit highly directional signals, you can place it wherever you want. Related Topic Locations and names of speakers Connecting 7.1-channel speaker system 4-686-529-11(5) Copyright 2017 Sony Corporation...
- Page 31 Help Guide MULTI CHANNEL AV RECEIVER STR-ZA3100ES/STR-ZA2100ES/STR-ZA1100ES Installing 5.1.2-channel speaker system using top middle speakers This speaker installation is configured by adding top middle speakers to standard 5.1-channel speaker system placed on the listener-level. Place the speakers on the listener-level at the angles shown below.
- Page 32 65° - 100° Hint As the subwoofer does not emit highly directional signals, you can place it wherever you want. Related Topic Locations and names of speakers Connecting 5.1.2-channel speaker system using top middle speakers 4-686-529-11(5) Copyright 2017 Sony Corporation...
- Page 33 STR-ZA3100ES/STR-ZA2100ES/STR-ZA1100ES Installing 5.1.4-channel speaker system using top front and top rear speakers with an additional stereo power amplifier (for STR-ZA3100ES/STR-ZA2100ES) This speaker installation is configured by adding top front speakers and top rear speakers to 5.1-channel speaker system placed on the listener-level. An additional stereo power amplifier is used for the top rear speakers.
- Page 34 As the subwoofer does not emit highly directional signals, you can place it wherever you want. Related Topic Locations and names of speakers Connecting 5.1.4-channel speaker system using top front and top rear speakers with an additional stereo power amplifier (for STR-ZA3100ES/STR-ZA2100ES) 4-686-529-11(5) Copyright 2017 Sony Corporation...
- Page 35 STR-ZA3100ES/STR-ZA2100ES/STR-ZA1100ES Installing 7.1.2-channel speaker system using front Dolby Atmos enabled speakers with an additional stereo power amplifier (for STR-ZA3100ES/STR-ZA2100ES) This speaker installation is configured by adding front Dolby Atmos enabled speakers (*) to 7.1-channel speaker system consisting of standard 5.1-channel speaker system and additional surround back speakers placed on the listener-level.
- Page 36 100° - 120° Hint As the subwoofer does not emit highly directional signals, you can place it wherever you want. Related Topic Locations and names of speakers Connecting 5.1-channel speaker system with Zone 2 connection 4-686-529-11(5) Copyright 2017 Sony Corporation...
- Page 37 Help Guide MULTI CHANNEL AV RECEIVER STR-ZA3100ES/STR-ZA2100ES/STR-ZA1100ES Installing 5.1.2-channel speaker system with bi-amplifier connection (for STR- ZA3100ES/STR-ZA2100ES) In this speaker installation, top middle speakers are added to a 5.1-channel speaker system in a bi-amplified configuration at the listener’s level. You can enhance the sound quality of the front speakers by separately connecting the built-in amplifiers to tweeters and woofers in a bi-amplifier configuration.
- Page 38 65° - 100° Hint As the subwoofer does not emit highly directional signals, you can place it wherever you want. Related Topic Locations and names of speakers Connecting 5.1.2-channel speaker system with bi-amplifier connection (for STR-ZA3100ES/STR-ZA2100ES) 4-686-529-11(5) Copyright 2017 Sony Corporation...
- Page 39 30° 100° - 120° Hint As the subwoofer does not emit highly directional signals, you can place it wherever you want. Related Topic Locations and names of speakers Connecting 5.1-channel speaker system with bi-amplifier connection 4-686-529-11(5) Copyright 2017 Sony Corporation...
- Page 40 (FRONT B/BI-AMP/ZONE 2) terminals is selected. Related Topic Locations and names of speakers Speaker patterns and terminals to be connected (for STR-ZA3100ES/STR-ZA2100ES) Speaker patterns and terminals to be connected (for STR-ZA1100ES) Selecting the speaker pattern (Speaker Pattern) Assigning the surround back speaker terminals (SB Speaker Assign)
- Page 41 Help Guide MULTI CHANNEL AV RECEIVER STR-ZA3100ES/STR-ZA2100ES/STR-ZA1100ES Connecting 7.1-channel speaker system Connect each speaker as illustrated below. Before connecting cables, be sure to disconnect the AC power cord (mains lead). For details on how to connect speaker cables to the receiver, see “How to connect speaker...
- Page 42 How to connect speaker cables 4-686-529-11(5) Copyright 2017 Sony Corporation...
- Page 43 Help Guide MULTI CHANNEL AV RECEIVER STR-ZA3100ES/STR-ZA2100ES/STR-ZA1100ES Connecting 5.1.2-channel speaker system using top middle speakers Connect each speaker as illustrated below. Before connecting cables, be sure to disconnect the AC power cord (mains lead). For details on how to connect speaker cables to the receiver, see “How to connect speaker...
- Page 44 How to connect speaker cables 4-686-529-11(5) Copyright 2017 Sony Corporation...
- Page 45 MULTI CHANNEL AV RECEIVER STR-ZA3100ES/STR-ZA2100ES/STR-ZA1100ES Connecting 5.1.4-channel speaker system using top front and top rear speakers with an additional stereo power amplifier (for STR-ZA3100ES/STR-ZA2100ES) Connect each speaker as illustrated below. Before connecting cables, be sure to disconnect the AC power cord (mains lead).
- Page 46 Installing 5.1.4-channel speaker system using top front and top rear speakers with an additional stereo power amplifier (for STR-ZA3100ES/STR-ZA2100ES) Speaker configuration and speaker pattern settings Assigning the surround back speaker terminals (SB Speaker Assign) Selecting the speaker pattern (Speaker Pattern) How to connect speaker cables 4-686-529-11(5) Copyright 2017 Sony Corporation...
- Page 47 MULTI CHANNEL AV RECEIVER STR-ZA3100ES/STR-ZA2100ES/STR-ZA1100ES Connecting 7.1.2-channel speaker system using front Dolby Atmos enabled speakers with an additional stereo power amplifier (for STR-ZA3100ES/STR-ZA2100ES) Connect each speaker as illustrated below. Before connecting cables, be sure to disconnect the AC power cord (mains lead).
- Page 48 Installing 7.1.2-channel speaker system using front Dolby Atmos enabled speakers with an additional stereo power amplifier (for STR-ZA3100ES/STR-ZA2100ES) Speaker configuration and speaker pattern settings Assigning the surround back speaker terminals (SB Speaker Assign) Selecting the speaker pattern (Speaker Pattern) How to connect speaker cables 4-686-529-11(5) Copyright 2017 Sony Corporation...
- Page 49 Help Guide MULTI CHANNEL AV RECEIVER STR-ZA3100ES/STR-ZA2100ES/STR-ZA1100ES Connecting 5.1-channel speaker system with Zone 2 connection Connect each speaker as illustrated below. Before connecting cables, be sure to disconnect the AC power cord (mains lead). For details on how to connect speaker cables to the receiver, see “How to connect speaker...
- Page 50 Speaker configuration and speaker pattern settings Assigning the speakers for Zone 2 Assigning the surround back speaker terminals (SB Speaker Assign) Selecting the speaker pattern (Speaker Pattern) How to connect speaker cables 4-686-529-11(5) Copyright 2017 Sony Corporation...
- Page 51 Help Guide MULTI CHANNEL AV RECEIVER STR-ZA3100ES/STR-ZA2100ES/STR-ZA1100ES Connecting 5.1.2-channel speaker system with bi-amplifier connection (for STR- ZA3100ES/STR-ZA2100ES) You can enhance the sound quality of the front speakers by separately connecting the built-in amplifiers to tweeters and woofers in a bi-amplifier configuration.
- Page 52 Connect speaker cables properly with the polarities (+/–) matched between the speaker cables and the SPEAKERS terminals. Related Topic Locations and names of speakers Installing 5.1.2-channel speaker system with bi-amplifier connection (for STR-ZA3100ES/STR-ZA2100ES) Speaker configuration and speaker pattern settings Assigning the surround back speaker terminals (SB Speaker Assign)
- Page 53 4-686-529-11(5) Copyright 2017 Sony Corporation...
- Page 54 Help Guide MULTI CHANNEL AV RECEIVER STR-ZA3100ES/STR-ZA2100ES/STR-ZA1100ES Connecting 5.1-channel speaker system with bi-amplifier connection You can enhance the sound quality of the front speakers by separately connecting the built-in amplifiers to tweeters and woofers in a bi-amplifier configuration. If a speaker pattern in which speakers are not connected to the SPEAKERS SURROUND BACK/HEIGHT(FRONT B/BI- AMP/ZONE 2) terminals is selected, you can connect front speakers to those terminals for bi-amplifier connection.
- Page 55 Locations and names of speakers Installing 5.1-channel speaker system with bi-amplifier connection Speaker configuration and speaker pattern settings Assigning the surround back speaker terminals (SB Speaker Assign) Selecting the speaker pattern (Speaker Pattern) How to connect speaker cables 4-686-529-11(5) Copyright 2017 Sony Corporation...
- Page 56 MULTI CHANNEL AV RECEIVER STR-ZA3100ES/STR-ZA2100ES/STR-ZA1100ES Speaker patterns and terminals to be connected (for STR-ZA3100ES/STR-ZA2100ES) When you connect speakers to the receiver, refer to the following table. You can use the following table to confirm the speaker patterns supported by the receiver as well as the speaker terminals to which the speakers of each speaker pattern are to be connected.
- Page 57 Zone 2 SPEAKERS terminals PRE OUT jacks connection/ Front B Speaker SURROUND speaker pattern FRONT BACK/HEIGHT (FRONT CENTER SURROUND HEIGHT SUBWOOFER connection/ B/BI-AMP/ZONE 2) Bi-amplifier (L/R) connection 3.0.2 ○ ○ ○ (TM) (*) (TM) 3.0.2 ○ ○ ○ (FD) (*) (FD) ○...
- Page 58 Zone 2 SPEAKERS terminals PRE OUT jacks connection/ Front B Speaker SURROUND speaker pattern FRONT BACK/HEIGHT CENTER SURROUND HEIGHT SUBWOOFER connection/ (FRONT B/BI- Bi-amplifier AMP/ZONE 2) (L/R) connection 4.0.4 ○ ○ ○ (TM) ○ (RH) (TM+RH) Available 4.0.4 ○ ○ ○...
- Page 59 If you are connecting speakers to SURROUND BACK/HEIGHT (FRONT B/BI-AMP/ZONE 2) terminals for Zone 2, front B speaker or bi-amplifier connection, set SB Speaker Assign setting to [Zone2], [Front B] or [Bi-amp] and use the PRE OUT HEIGHT jacks for height speakers. Zone 2 SPEAKERS terminals PRE OUT jacks...
- Page 60 Zone 2 SPEAKERS terminals PRE OUT jacks connection/ Front B Speaker SURROUND speaker pattern FRONT BACK/HEIGHT CENTER SURROUND HEIGHT SUBWOOFER connection/ (FRONT B/BI- Bi-amplifier AMP/ZONE 2) (L/R) connection 5.1.2 (TM) ○ ○ ○ ○ (TM) (*) ○ 5.1.2 (FD) ○ ○...
- Page 61 Zone 2 SPEAKERS terminals PRE OUT jacks connection/ Front B Speaker SURROUND speaker pattern FRONT BACK/HEIGHT CENTER SURROUND HEIGHT SUBWOOFER connection/ (FRONT B/BI- Bi-amplifier AMP/ZONE 2) (L/R) connection 5.0.2 ○ ○ ○ (SB Single) ○ (FD) (SB+FD) Available 5.0.2 ○ ○...
- Page 62 Zone 2 SPEAKERS terminals PRE OUT jacks connection/ Front B Speaker SURROUND speaker pattern FRONT BACK/HEIGHT CENTER SURROUND HEIGHT SUBWOOFER connection/ (FRONT B/BI- Bi-amplifier AMP/ZONE 2) (L/R) connection 6.1.2 ○ ○ ○ ○ (SB Single) ○ (FD) ○ (SB+FD) Available 6.1.2 ○...
- Page 63 ○ (TM) ○ (TM) Available 7.1.2 ○ ○ ○ ○ ○ (FD) ○ (FD) Available 7.1.2 ○ ○ ○ ○ ○ (SRD) ○ (SRD) Available 7.1.2 ○ ○ ○ ○ ○ (SBD) ○ (SBD) Available 4-686-529-11(5) Copyright 2017 Sony Corporation...
- Page 64 Help Guide MULTI CHANNEL AV RECEIVER STR-ZA3100ES/STR-ZA2100ES/STR-ZA1100ES Speaker patterns and terminals to be connected (for STR-ZA1100ES) When you connect speakers to the receiver, refer to the following table. You can use the following table to confirm the speaker patterns supported by the receiver as well as the speaker terminals to which the speakers of each speaker pattern are to be connected.
- Page 65 Zone 2 PRE OUT connection/ SPEAKERS terminals jacks Front B Speaker speaker pattern connection/ FRONT SURROUND BACK/HEIGHT CENTER SURROUND SUBWOOFER Bi-amplifier (FRONT B/BI-AMP/ZONE 2) (L/R) connection 3.0.2 (FD) ○ ○ ○ (FD) Available ○ ○ ○ 3.1.2 (TM) ○ ○ ○...
- Page 66 Bi-amplifier Speaker FRONT SURROUND BACK/HEIGHT PRE OUT Zone 2 CENTER SURROUND SPEAKERS terminals SUBWOOFER connection pattern (FRONT B/BI-AMP/ZONE 2) (L/R) jacks connection/ Front B speaker connection/ Bi-amplifier FRONT SURROUND BACK/HEIGHT CENTER SURROUND SUBWOOFER connection (FRONT B/BI-AMP/ZONE 2) (L/R) ○ ○ ○...
- Page 67 Front B Speaker speaker pattern connection/ FRONT SURROUND BACK/HEIGHT CENTER SURROUND SUBWOOFER Bi-amplifier (FRONT B/BI-AMP/ZONE 2) (L/R) connection ○ ○ ○ ○ Available ○ ○ ○ ○ Available ○ ○ ○ ○ ○ Available 4-686-529-11(5) Copyright 2017 Sony Corporation...
- Page 68 Note Sony recommends that you use an HDMI cable made by Sony or another HDMI-authorized cable. Be sure to use a High Speed HDMI Cable with Ethernet. Premium High Speed HDMI Cable with Ethernet that supports 18 Gbps is required for 4K/60p 4:4:4,...
- Page 69 A jack on your receiver is labeled “eARC/ARC,” its software already supports the eARC function. Sony recommends that you use an HDMI cable made by Sony or another HDMI-authorized cable. Be sure to use a High Speed HDMI Cable with Ethernet. Premium High Speed HDMI Cable with Ethernet that supports 18 Gbps is required for 4K/60p 4:4:4, 4:2:2, and 4K/60p 4:2:0 10 bit, etc.
- Page 70 To use this connection in only one room, select [Setup] - [HDMI Setup], and set [HDMI Out B Mode] to [Main]. Connecting a TV without HDMI jacks Solid lines show recommended connections and the dashed lines show alternative connections for both video and audio signals.
- Page 71 4-686-529-11(5) Copyright 2017 Sony Corporation...
- Page 72 Note Sony recommends that you use an HDMI cable made by Sony or another HDMI-authorized cable. Be sure to use a High Speed HDMI Cable with Ethernet. Premium High Speed HDMI Cable with Ethernet that supports 18 Gbps is required for 4K/60p 4:4:4, 4:2:2, and 4K/60p 4:2:0 10 bit, etc.
- Page 73 Note Sony recommends that you use an HDMI cable made by Sony or another HDMI-authorized cable. Be sure to use a High Speed HDMI Cable with Ethernet. Premium High Speed HDMI Cable with Ethernet that supports 18 Gbps is required for 4K/60p 4:4:4, 4:2:2, and 4K/60p 4:2:0 10 bit, etc.
-
Page 74: Connecting A 4K Tv That Supports Hdcp 2.2 And A 4K Streaming Box Using A 4K- Compatible Hdmi Cable
Help Guide MULTI CHANNEL AV RECEIVER STR-ZA3100ES/STR-ZA2100ES/STR-ZA1100ES Connecting a 4K TV that supports HDCP 2.2 and a 4K streaming box using a 4K- compatible HDMI cable To enjoy audio from 4K content such as 4K movies, connect the HDMI output/input jacks of each device that supports HDCP 2.2 (*) using HDMI cables, as illustrated below. - Page 75 Note Sony recommends that you use an HDMI cable made by Sony or another HDMI-authorized cable. Be sure to use a High Speed HDMI Cable with Ethernet. Premium High Speed HDMI Cable with Ethernet that supports 18 Gbps is required for 4K/60p 4:4:4, 4:2:2, and 4K/60p 4:2:0 10 bit, etc.
-
Page 76: Notes On Connecting Cables
It is not necessary to connect all of the cables. Connect cables according to the availability of jacks on the connected device. Sony recommends that you use an HDMI cable made by Sony or another HDMI-authorized cable. Be sure to use a High Speed HDMI Cable with Ethernet. Premium High Speed HDMI Cable with Ethernet that supports 18 Gbps is required for 4K/60p 4:4:4, 4:2:2, and 4K/60p 4:2:0 10 bit, etc. - Page 77 Setup] menu is set to [Enhanced format], and bandwidths of up to 9 Gbps when [HDMI Signal Format] in the [HDMI Setup] menu is set to [Standard format]. The HDMI IN 6 (GAME) jack (STR-ZA3100ES/STR-ZA2100ES only) supports bandwidths of up to 9 Gbps. The HDMI OUT A jack supports bandwidths of up to 18 Gbps.
- Page 78 Refer to the operating instructions of each connected device for details. Related Topic Connecting devices with HDMI jacks Digital audio formats supported by the receiver What is “BRAVIA” Sync? Preparing for “BRAVIA” Sync 4-686-529-11(5) Copyright 2017 Sony Corporation...
-
Page 79: Connecting Devices With Hdmi Jacks
HDCP 2.2, such as 4K content, connect these HDMI jacks to jacks that support HDCP 2.2 on the TV and AV device. Refer to the operating instructions of the connected device for details. Rear (for STR-ZA3100ES/STR-ZA2100ES) Rear (for STR-ZA1100ES) - Page 80 The HDMI IN 6 (GAME) jack (STR-ZA3100ES/STR-ZA2100ES only) supports bandwidths of up to 9 Gbps. Sony recommends that you use an HDMI cable made by Sony or another HDMI-authorized cable. Be sure to use a High Speed HDMI Cable with Ethernet. Premium High Speed HDMI Cable with Ethernet that supports 18 Gbps is required for 4K/60p 4:4:4,...
- Page 81 The image quality depends on the connecting jack. We recommend that you connect your devices via an HDMI connection if they have HDMI jacks. Related Topic Notes on connecting cables About HDMI connections Watching HDCP 2.2 copyright-protected content Changing the name for each input (Name) Connecting devices with jacks other than HDMI jacks 4-686-529-11(5) Copyright 2017 Sony Corporation...
-
Page 82: Connecting Devices With Jacks Other Than Hdmi Jacks
Help Guide MULTI CHANNEL AV RECEIVER STR-ZA3100ES/STR-ZA2100ES/STR-ZA1100ES Connecting devices with jacks other than HDMI jacks Connect devices to the receiver as illustrated below. Solid lines show recommended connections and the dashed lines show alternative connections. Before connecting cables, be sure to disconnect the AC power cord (mains lead). - Page 83 The image quality depends on the connecting jack. We recommend that you connect your devices via an HDMI connection if they have HDMI jacks. Related Topic Notes on connecting cables Using other video/audio input jacks (Input Assignment) Changing the name for each input (Name) 4-686-529-11(5) Copyright 2017 Sony Corporation...
-
Page 84: Connecting The Antennas (Aerials)
To prevent noise pickup, keep the AM loop antenna (aerial) away from the receiver and other devices. Be sure to fully extend the FM wire antenna (aerial). After connecting the FM wire antenna (aerial), keep it as horizontal as possible. Related Topic Notes on connecting cables 4-686-529-11(5) Copyright 2017 Sony Corporation... -
Page 85: Connecting Another Amplifier In Zone
Help Guide MULTI CHANNEL AV RECEIVER STR-ZA3100ES/STR-ZA2100ES/STR-ZA1100ES Connecting another amplifier in Zone 2/3 You can enjoy image and sound from a device connected to the receiver in a zone other than the main zone. For example, you can watch a DVD in the main zone and listen to a CD in Zone 2. - Page 86 Speakers Other amplifier/receiver HDMI cable (not supplied) Note The following settings are required for this connection. Set [HDMI Out B Mode] in the [HDMI Setup] menu to [Zone2] Set [Zone2 Audio Out] in the [HDMI Setup] menu to [Zone2 AMP] When outputting optical/coaxial audio signals, set the audio output to PCM on the connected device.
- Page 87 Selecting the method to use the HDMI OUT B (ZONE 2) jack (HDMI Out B Mode) 4-686-529-11(5) Copyright 2017 Sony Corporation...
-
Page 88: Digital Audio Formats Supported By The Receiver
Help Guide MULTI CHANNEL AV RECEIVER STR-ZA3100ES/STR-ZA2100ES/STR-ZA1100ES Digital audio formats supported by the receiver The digital audio formats that this receiver can decode depend on the digital audio output jacks of the connected device. This receiver supports the following audio formats. The words in brackets are those indicated on the display panel. - Page 89 IMAX® is decoded if DTS audio signal format is DTS 5.1 without IMAX® Enhanced content and IMAX® MODE is set to ON. IMAX® is decoded if DTS audio signal contains IMAX® Enhanced content and IMAX® MODE is set to ON or AUTO. 4-686-529-11(5) Copyright 2017 Sony Corporation...
-
Page 90: Video Format
Help Guide MULTI CHANNEL AV RECEIVER STR-ZA3100ES/STR-ZA2100ES/STR-ZA1100ES Video formats supported by the receiver Video format Frame packing Side-by-Side (Half) Over-Under (Top-and-Bottom) 4096 × 2160p @ 59.94/60 Hz ○ (*1) 4096 × 2160p @ 50 Hz ○ (*1) 4096 × 2160p @ 29.97/30 Hz ○... - Page 91 4-686-529-11(5) Copyright 2017 Sony Corporation...
- Page 92 It is not necessary to connect all of the cables. Connect cables according to the availability of jacks on the connected device. Sony recommends that you use an HDMI cable made by Sony or another HDMI-authorized cable. Be sure to use a High Speed HDMI Cable with Ethernet. Premium High Speed HDMI Cable with Ethernet that supports 18 Gbps is required for 4K/60p 4:4:4, 4:2:2, and 4K/60p 4:2:0 10 bit, etc.
- Page 93 Setup] menu is set to [Enhanced format], and bandwidths of up to 9 Gbps when [HDMI Signal Format] in the [HDMI Setup] menu is set to [Standard format]. The HDMI IN 6 (GAME) jack (STR-ZA3100ES/STR-ZA2100ES only) supports bandwidths of up to 9 Gbps. The HDMI OUT A jack supports bandwidths of up to 18 Gbps.
- Page 94 Refer to the operating instructions of each connected device for details. Related Topic Connecting devices with HDMI jacks Digital audio formats supported by the receiver What is “BRAVIA” Sync? Preparing for “BRAVIA” Sync 4-686-529-11(5) Copyright 2017 Sony Corporation...
-
Page 95: System Requirements For A Wired Lan Connection
This function automatically assigns IP addresses to devices on the LAN. LAN cable We recommend using a normal shielded type cable for a wired LAN to avoid electric noise. Some flat-type LAN cables are easily affected by noise. We recommend using a Category 7 cable. 4-686-529-11(5) Copyright 2017 Sony Corporation... - Page 96 Help Guide MULTI CHANNEL AV RECEIVER STR-ZA3100ES/STR-ZA2100ES/STR-ZA1100ES Connecting the receiver to the network using LAN cables (for STR-ZA3100ES) The following illustration is an example configuration of a home network with the receiver, and a computer. Computer LAN cable (not supplied) Wireless access point, etc.
- Page 98 The following illustration is an example configuration of a home network with the receiver, and a computer. The STR-ZA2100ES is used for illustrative purpose in this topic. Computer LAN cable (not supplied) Router Modem Internet Related Topic Notes on connecting cables Setting up a network (Internet Setup) 4-686-529-11(5) Copyright 2017 Sony Corporation...
-
Page 99: Inserting Batteries Into The Remote Control
If you do not intend to use the remote control for an extended period of time, remove the batteries to avoid possible damage from battery leakage and corrosion. When the receiver no longer responds to the remote control, replace both of the batteries with new ones. 4-686-529-11(5) Copyright 2017 Sony Corporation... -
Page 100: Turning On The Receiver
Help Guide MULTI CHANNEL AV RECEIVER STR-ZA3100ES/STR-ZA2100ES/STR-ZA1100ES Turning on the receiver Before connecting the AC power cord (mains lead), be sure to make connections with speakers and the other devices. Connect the supplied AC power cord (mains lead) to the AC IN terminal on the receiver firmly, then connect the AC power cord (mains lead) to a wall outlet. - Page 101 4-686-529-11(5) Copyright 2017 Sony Corporation...
- Page 102 Magnets are attached to both the front panel and front cover. Do not place cards with magnetic stripes, such as bank cards or ID passes, near the receiver. These cards may become unusable due to the effects of the magnets on the receiver. 4-686-529-11(5) Copyright 2017 Sony Corporation...
-
Page 103: Setting Up The Receiver Using The Easy Setup
1. About Auto Calibration 2. Before you perform Auto Calibration 3. Connecting the calibration microphone 4. Selecting the front speakers 5. Performing Auto Calibration 6. Checking Auto Calibration results Setting up a network (Internet Setup) 4-686-529-11(5) Copyright 2017 Sony Corporation... - Page 104 The D.C.A.C. is designed to achieve proper sound balance for your room. However, you can adjust the speaker levels manually according to your preference using [Test Tone]. Related Topic Outputting a test tone from each speaker (Test Tone) 4-686-529-11(5) Copyright 2017 Sony Corporation...
- Page 105 It may not be possible to take the correct measurements or to perform Auto Calibration at all if special speakers such as dipole speakers are used. Related Topic 4. Selecting the front speakers 3. Connecting the calibration microphone Confirming active subwoofer setup Selecting the speaker pattern (Speaker Pattern) Assigning the surround back speaker terminals (SB Speaker Assign) 4-686-529-11(5) Copyright 2017 Sony Corporation...
- Page 106 Insert the plug of the calibration microphone all the way into the CALIBRATION MIC jack. If the calibration microphone is not connected securely, measurements may not be made properly. Position the calibration microphone horizontally with the L (left) and R (right) ends at the same height. 4-686-529-11(5) Copyright 2017 Sony Corporation...
-
Page 107: Selecting The Front Speakers
[SPEAKERS OFF] appears on the display panel. No audio signals are output from any speaker terminals, or the PRE OUT jacks. To select [SP B] or [SP AB], set the assignment for the SPEAKERS SURROUND BACK/HEIGHT (FRONT B/BI-AMP/ZONE 2) terminals to [Front B] by using [SB Speaker Assign] in the [Speaker Setup] menu. 4-686-529-11(5) Copyright 2017 Sony Corporation... -
Page 108: Performing Auto Calibration
Help Guide MULTI CHANNEL AV RECEIVER STR-ZA3100ES/STR-ZA2100ES/STR-ZA1100ES 5. Performing Auto Calibration You can perform automatic calibration from your listening position. Select [Setup] - [Speaker Setup] from the home menu. Select [Auto Calibration]. Follow the instructions on the TV screen, then press to select [Start]. - Page 109 Press AUTO CAL. Change the volume level. Related Topic 1. About Auto Calibration 2. Before you perform Auto Calibration 6. Checking Auto Calibration results 4-686-529-11(5) Copyright 2017 Sony Corporation...
- Page 110 Hint The measurement results may vary depending on the position of the subwoofer. However, continuing to use the receiver with that value does not cause problems. Related Topic List of messages after Auto Calibration measurements 4-686-529-11(5) Copyright 2017 Sony Corporation...
-
Page 111: Using The Menu On The Tv Screen
When [OPTIONS] appears in the lower right portion of the TV screen, you can display the function list by pressing OPTIONS and selecting a related function. To return to the previous screen, press RETURN. To exit the menu, press HOME to display the home menu, then press HOME again. 4-686-529-11(5) Copyright 2017 Sony Corporation... -
Page 112: Enjoying Video/Sound From The Connected Device
Help Guide MULTI CHANNEL AV RECEIVER STR-ZA3100ES/STR-ZA2100ES/STR-ZA1100ES Enjoying video/sound from the connected device Switch the input of the TV to the input to which the receiver is connected. Press HOME. The home menu is displayed on the TV screen. Depending on the TV, the home menu may take some time to appear on the TV screen. - Page 113 Turn the knob quickly. Press and hold one of the buttons. To make fine adjustments Turn the knob slowly. Press one of the buttons and release it immediately. Related Topic Selecting a sound field (Sound Field) 4-686-529-11(5) Copyright 2017 Sony Corporation...
- Page 114 Help Guide MULTI CHANNEL AV RECEIVER STR-ZA3100ES/STR-ZA2100ES/STR-ZA1100ES Enjoying sound from a TV compatible with eARC or ARC (Enhanced Audio Return Channel/Audio Return Channel) If your TV supports the eARC or ARC function, set the receiver by the following procedure to output the sound of the TV from the speakers connected to the receiver.
- Page 115 Notes on connecting cables About HDMI connections What is eARC (Enhanced Audio Return Channel)? Digital audio formats supported by the receiver 4-686-529-11(5) Copyright 2017 Sony Corporation...
- Page 116 Dolby Atmos - Dolby TrueHD, and DTS:X as well as Multi Channel Linear PCM, which cannot be transmitted by ARC. Related Topic Enjoying sound from a TV compatible with eARC or ARC (Enhanced Audio Return Channel/Audio Return Channel) Digital audio formats supported by the receiver 4-686-529-11(5) Copyright 2017 Sony Corporation...
- Page 117 Help Guide MULTI CHANNEL AV RECEIVER STR-ZA3100ES/STR-ZA2100ES/STR-ZA1100ES When using an ARC-compatible TV that supports Dolby Atmos audio output The receiver can receive Dolby Atmos signals in the Dolby Digital Plus format, not only when audio signals are input from the HDMI input jack but also from a TV connected to the receiver by using the ARC function.
- Page 118 4-686-529-11(5) Copyright 2017 Sony Corporation...
- Page 119 When using an ARC-compatible TV that supports Dolby Atmos audio output Digital audio formats supported by the receiver Switching between digital and analog audio (Input Mode) Switching the monitors that output the HDMI video signals 4-686-529-11(5) Copyright 2017 Sony Corporation...
- Page 121 TV and 4K devices. Related Topic Connecting a TV Connecting a 4K TV Connecting a 4K TV that supports HDCP 2.2 and a 4K streaming box using a 4K-compatible HDMI cable Notes on connecting cables About HDMI connections 4-686-529-11(5) Copyright 2017 Sony Corporation...
-
Page 122: Listening To Fm/Am Radio
Help Guide MULTI CHANNEL AV RECEIVER STR-ZA3100ES/STR-ZA2100ES/STR-ZA1100ES Listening to FM/AM radio You can listen to FM and AM broadcasts through the built-in tuner. Before operation, be sure you have connected the FM and AM antennas (aerials) to the receiver. Select [Listen] - [FM TUNER] or [AM TUNER] from the home menu. - Page 123 The receiver stops scanning whenever a station is received. Preset station list You can tune to a station by selecting the preset number from the list. Related Topic Connecting the antennas (aerials) Setting the FM station receiving mode (FM Mode) 4-686-529-11(5) Copyright 2017 Sony Corporation...
-
Page 124: Presetting Fm/Am Radio Stations (Preset Memory)
Repeat steps 1 to 5 to store another station. You can store stations as follows: AM band: AM 1 to AM 30 FM band: FM 1 to FM 30 Related Topic Listening to FM/AM radio Naming preset stations (Name Input) 4-686-529-11(5) Copyright 2017 Sony Corporation... -
Page 125: Tuning To A Station Directly (Direct Tuning)
The tuning scale for direct tuning is shown below: FM: 100 kHz AM: 10 kHz (*) The AM tuning scale can be changed. For details, see “Changing the AM tuning scale.” Related Topic Changing the AM tuning scale 4-686-529-11(5) Copyright 2017 Sony Corporation... -
Page 126: Changing The Am Tuning Scale
The current AM tuning scale is changed to 9 kHz (or 10 kHz). To reset the scale to 10 kHz (or 9 kHz), repeat the procedure above. Note Depending on the settings, the receiver may take some time to change the AM tuning scale. All preset stations will be erased when you change the tuning scale. 4-686-529-11(5) Copyright 2017 Sony Corporation... -
Page 127: Selecting A Sound Field (Sound Field)
You can also select [Sound Field] in [Sound Effects] from the home menu. You can also use 2CH/DIRECT, A.F.D., MOVIE or MULTI ST. on the remote control or the receiver to select a sound field. Related Topic Selectable sound fields and their effects 4-686-529-11(5) Copyright 2017 Sony Corporation... -
Page 128: Selectable Sound Fields And Their Effects
When multi-channel audio signals are input, sound may not be output from certain speakers depending on the speaker settings or playback content. Note Dolby Atmos is decoded as Dolby TrueHD or Dolby Digital Plus when [Direct], [2ch Stereo] or [Neural:X] is being used. 4-686-529-11(5) Copyright 2017 Sony Corporation... -
Page 129: Resetting Sound Fields To The Default Settings
Be sure to use the buttons on the receiver to perform this operation. Turn off the receiver. Hold down MULTI ST. and press (power) on the receiver. [S.F. INITIALIZED!] appears on the display panel and all sound fields are reset to their default setting. 4-686-529-11(5) Copyright 2017 Sony Corporation... -
Page 130: Adjusting The Equalizer (Equalizer)
Depending on the audio format, the receiver may play signals at a lower sampling frequency than the original sampling frequency of the input signals. Hint You can also select [Equalizer] in [Sound Effects] from the home menu. 4-686-529-11(5) Copyright 2017 Sony Corporation... -
Page 131: Enjoying Clear And Dynamic Sound At A Low Volume (Sound Optimizer)
The receiver may play signals at a lower sampling frequency than the actual sampling frequency of the input signals, depending on the audio format. Hint You can also select [Sound Optimizer] in the [Audio Setup] menu. 4-686-529-11(5) Copyright 2017 Sony Corporation... - Page 132 You can also switch the function on/off by pressing IN-CEILING SP on the remote control or the receiver. To obtain optimal effects in the listening environment, configure the [Ceiling Height] setting and perform Auto Calibration. Related Topic Setting the height from the floor to the ceiling speakers (Ceiling Height) 4-686-529-11(5) Copyright 2017 Sony Corporation...
-
Page 133: Enjoying High-Fidelity Sound (Pure Direct)
[Equalizer], [Sound Optimizer], [Dynamic Range Compressor] and [In-Ceiling Speaker Mode] do not work when the Pure Direct function is selected. Hint You can also use PURE DIRECT to turn the Pure Direct function on or off. You can also select [Pure Direct] in the [Audio Setup] menu. 4-686-529-11(5) Copyright 2017 Sony Corporation... - Page 134 This function enables you to increase the dialog levels in contrast with the background sound and hear dialog easily even under noisy circumstances. Press OPTIONS. The options menu appears. Select [Dialog Control]. Press to adjust the dialog level. Note This function may not work depending on the audio signals. 4-686-529-11(5) Copyright 2017 Sony Corporation...
- Page 135 You can change the IMAX Mode from the options menu. While inputting a DTS stream, press OPTIONS and select a setting under [IMAX Mode] in the options menu. Related Topic Operating the receiver with the menu on the display panel Menu list (on the display panel) 4-686-529-11(5) Copyright 2017 Sony Corporation...
- Page 136 You can select from the following speakers. For the STR-ZA3100ES/ZA2100ES: FRONT, CENTER, SURROUND, HEIGHT1 or HEIGHT2 For the STR-ZA1100ES: FRONT, CENTER, SURROUND or HEIGHT...
- Page 137 Setting the level of the subwoofer for IMAX Enhanced content playback (SUBWOOFER VOLUME) Activating the IMAX DTS:X Subwoofer Redirect setting (REDIRECT TO SUBWOOFER) Operating the receiver with the menu on the display panel Menu list (on the display panel) 4-686-529-11(5) Copyright 2017 Sony Corporation...
- Page 138 Adjusting the crossover frequency settings for IMAX Enhanced content playback (IMAX ADJUSTMENT) Activating the IMAX DTS:X Subwoofer Redirect setting (REDIRECT TO SUBWOOFER) Operating the receiver with the menu on the display panel Menu list (on the display panel) 4-686-529-11(5) Copyright 2017 Sony Corporation...
- Page 139 Adjusting the crossover frequency settings for IMAX Enhanced content playback (IMAX ADJUSTMENT) Setting the level of the subwoofer for IMAX Enhanced content playback (SUBWOOFER VOLUME) Operating the receiver with the menu on the display panel Menu list (on the display panel) 4-686-529-11(5) Copyright 2017 Sony Corporation...
- Page 140 Help Guide MULTI CHANNEL AV RECEIVER STR-ZA3100ES/STR-ZA2100ES/STR-ZA1100ES What you can do with multi-zone features Enjoying sound in two locations via an analog connection - Zone 2 You can enjoy sound at the same time in another room by connecting the speakers that are located in another room to the SPEAKERS SURROUND BACK/HEIGHT (FRONT B/BI-AMP/ZONE 2) terminals.
- Page 141 Note There are restrictions on the audio sources that can be used in Zone 2/3. For details, see “Available input sources for each zone.” Related Topic Available input sources for each zone 4-686-529-11(5) Copyright 2017 Sony Corporation...
- Page 142 GAME panel or HDMI IN 3 (GAME) jack (for STR-ZA1100ES) Source signal from the HDMI IN 3 (STB) jack (for STR-ZA3100ES/STR-ZA2100ES) or HDMI IN 4 (STB) jack (for STR-ZA1100ES) Source signal from the HDMI IN 4 (VIDEO) jack (for STR-ZA3100ES/STR-ZA2100ES only)
- Page 143 GAME panel or HDMI IN 3 (GAME) jack (for STR-ZA1100ES) (*1) Source signal from the HDMI IN 3 (STB) jack (for STR-ZA3100ES/STR-ZA2100ES) or HDMI IN 4 (STB) jack (for STR-ZA1100ES) Source signal from the HDMI IN 4 (VIDEO) jack (for STR-ZA3100ES/STR-ZA2100ES only) (*1)
- Page 144 GAME panel or HDMI IN 3 (GAME) jack (for STR-ZA1100ES) Source signal from the HDMI IN 3 (STB) jack (for STR-ZA3100ES/STR-ZA2100ES) or HDMI IN 4 (STB) jack (for STR-ZA1100ES) Source signal from the HDMI IN 4 (VIDEO) jack (for STR-ZA3100ES/STR-ZA2100ES only)
- Page 145 AM broadcast received through the built-in tuner AM TUNER Note When [FM TUNER] or [AM TUNER] is selected at the same time in the main zone and Zone 3, the item most recently selected will be set. 4-686-529-11(5) Copyright 2017 Sony Corporation...
- Page 146 Help Guide MULTI CHANNEL AV RECEIVER STR-ZA3100ES/STR-ZA2100ES/STR-ZA1100ES Connecting 5.1-channel speaker system with Zone 2 connection Connect each speaker as illustrated below. Before connecting cables, be sure to disconnect the AC power cord (mains lead). For details on how to connect speaker cables to the receiver, see “How to connect speaker...
- Page 147 Speaker configuration and speaker pattern settings Assigning the speakers for Zone 2 Assigning the surround back speaker terminals (SB Speaker Assign) Selecting the speaker pattern (Speaker Pattern) How to connect speaker cables 4-686-529-11(5) Copyright 2017 Sony Corporation...
- Page 148 You can only set [SB Speaker Assign] if a speaker pattern that does not use the SPEAKERS SURROUND BACK/HEIGHT (FRONT B/BI-AMP/ZONE 2) terminals is selected. Related Topic Connecting 5.1-channel speaker system with Zone 2 connection Assigning the surround back speaker terminals (SB Speaker Assign) Enjoying sound in Zone 2 4-686-529-11(5) Copyright 2017 Sony Corporation...
- Page 149 Connecting 5.1-channel speaker system with Zone 2 connection Assigning the speakers for Zone 2 Assigning the surround back speaker terminals (SB Speaker Assign) Setting up the receiver to enjoy sound in Zone 2/3 (Zone Controls) 4-686-529-11(5) Copyright 2017 Sony Corporation...
- Page 150 Help Guide MULTI CHANNEL AV RECEIVER STR-ZA3100ES/STR-ZA2100ES/STR-ZA1100ES Connecting another amplifier in Zone 2/3 You can enjoy image and sound from a device connected to the receiver in a zone other than the main zone. For example, you can watch a DVD in the main zone and listen to a CD in Zone 2.
- Page 151 Speakers Other amplifier/receiver HDMI cable (not supplied) Note The following settings are required for this connection. Set [HDMI Out B Mode] in the [HDMI Setup] menu to [Zone2] Set [Zone2 Audio Out] in the [HDMI Setup] menu to [Zone2 AMP] When outputting optical/coaxial audio signals, set the audio output to PCM on the connected device.
- Page 152 Selecting the method to use the HDMI OUT B (ZONE 2) jack (HDMI Out B Mode) 4-686-529-11(5) Copyright 2017 Sony Corporation...
- Page 153 When [Variable] is set, the volume level is turned down by default. Turn up the volume while listening to the sound after completing setup. Related Topic Enjoying sound using another amplifier in Zone 2 and/or Zone 3 4-686-529-11(5) Copyright 2017 Sony Corporation...
- Page 154 Help Guide MULTI CHANNEL AV RECEIVER STR-ZA3100ES/STR-ZA2100ES/STR-ZA1100ES Setting the Zone 2 HDMI audio output of connected devices (Zone2 Audio Out) You can set the Zone 2 HDMI audio signal output for playback devices connected to the receiver via an HDMI connection.
- Page 155 4-686-529-11(5) Copyright 2017 Sony Corporation...
- Page 156 Main Only: You can enjoy good audio and video quality in the main zone. There is no output in Zone 2. Note This function is enabled only when [HDMI Out B Mode] is set to [Zone2]. 4-686-529-11(5) Copyright 2017 Sony Corporation...
- Page 157 Available input for Zone 2/3 operations “Available input sources for each zone.” Related Topic Setting the volume control for Zone 2/3 (Zone2/3 Line Out) Setting up the receiver to enjoy sound in Zone 2/3 (Zone Controls) 4-686-529-11(5) Copyright 2017 Sony Corporation...
-
Page 158: What Is "Bravia" Sync
What is “BRAVIA” Sync? “BRAVIA” Sync is an extended function developed by Sony based on the Control for HDMI (*1) function. By connecting “BRAVIA” Sync-compatible devices, such as a TV or a Blu-ray Disc player, using an HDMI cable (*2) (not supplied) you can control the devices with the TV remote control. -
Page 159: Preparing For "Bravia" Sync
Perform the steps above again if you unplug the HDMI cable or change the connection. This function is enabled only when [HDMI Out B Mode] is set to [Main]. Related Topic Selecting the method to use the HDMI OUT B (ZONE 2) jack (HDMI Out B Mode) 4-686-529-11(5) Copyright 2017 Sony Corporation... - Page 160 This setting is valid when [Control for HDMI] is set to [On]. The connected device may not turn off depending on the status of the device. System Power Off function may work with devices other than those manufactured by Sony, but operation is not guaranteed. Related Topic Preparing for “BRAVIA”...
- Page 161 TV may differ from the number on the front panel display of the receiver. System Audio Control function may work with other devices than those manufactured by Sony, but operation is not guaranteed. Depending on the settings of the TV, the System Audio Control function may not be available. For details, refer to the operating instructions of the TV.
- Page 162 TV, the receiver does not turn on and the sound and picture are output from the TV even if you play content on the device. Depending on the TV, the beginning part of content being played may not play correctly. One-Touch Play function may work with other devices than those manufactured by Sony, but operation is not guaranteed. Related Topic...
- Page 163 Photo: Multi Stereo Game: Dolby Surround Graphics: Multi Stereo News: Multi Stereo Note The Scene Select function is a function developed by Sony, and cannot be used on other devices than those manufactured by Sony. 4-686-529-11(5) Copyright 2017 Sony Corporation...
- Page 164 The receiver is recognized as [Tuner] by the TV. Some of the operations may not be available depending on the type of TV. Remote Easy Control function may work with other devices than those manufactured by Sony, but operation is not guaranteed. 4-686-529-11(5) Copyright 2017 Sony Corporation...
- Page 165 This function cannot be used when the sound is output from the TV. The Echo Canceling function is a function developed by Sony, and cannot be used on other devices than those manufactured by Sony.
- Page 166 While the receiver is turned on, the on-screen display language of the receiver may be changed simultaneously when you change the language for the on-screen display of the TV. Related Topic Preparing for “BRAVIA” Sync Controlling HDMI devices (Control for HDMI) 4-686-529-11(5) Copyright 2017 Sony Corporation...
-
Page 167: Switching The Monitors That Output The Hdmi Video Signals
HDR10 or SDR (Standard Dynamic Range) format. To enjoy Dolby Vision content as it is, connect only one Dolby Vision- compatible TV to the receiver, or select either [HDMI OUT A] or [HDMI OUT B]. Hint You can also use HDMI OUT on the receiver to switch the monitor. 4-686-529-11(5) Copyright 2017 Sony Corporation... -
Page 168: Switching Between Digital And Analog Audio (Input Mode)
Optical: Specifies input of digital audio signals to the OPTICAL jack. Coaxial: Specifies input of digital audio signals to the COAXIAL jack. Analog: Specifies input of analog audio signals to the AUDIO IN (L/R) jacks. 4-686-529-11(5) Copyright 2017 Sony Corporation... - Page 169 [OPT 1]. Press repeatedly to select [IN 1] under [COMPONENT] and repeatedly to select [IN 2]. Assignable HDMI input jacks (for STR-ZA3100ES/STR-ZA2100ES) IN 1: BD/DVD (*), SAT/CATV, GAME, STB, VIDEO, AUX, TV, SA-CD/CD IN 2: BD/DVD, SAT/CATV (*), GAME, STB, VIDEO, AUX, TV, SA-CD/CD...
- Page 170 When you assign the digital audio input, the Input Mode setting may change automatically. One reassignment is allowed for each input. If no sound is output from the assigned jacks, also check the Input Mode settings. 4-686-529-11(5) Copyright 2017 Sony Corporation...
-
Page 171: About Custom Preset
For example, by saving the settings in the [1: Movie] preset as follows, you can switch the settings of the receiver all at one time without switching each setting for [Input], [Calibration Type], and [Sound Field] individually. Input: BD/DVD Sound Field: Dolby Surround Calibration Type: No change 4-686-529-11(5) Copyright 2017 Sony Corporation... -
Page 172: Saving The Settings To A Preset
When you select [3: Party], Zone 2 and Zone 3 are turned on automatically and you can simultaneously enjoy the same music as the main zone in these zones. Related Topic Items for which you can save settings and the default values for each item 4-686-529-11(5) Copyright 2017 Sony Corporation... -
Page 173: Recalling The Settings Saved To The Scene
You can recall the setting(s) saved for [1: Movie], [2: Music], [3: Party] or [4: Night] directly by pressing CUSTOM PRESET 1, CUSTOM PRESET 2, CUSTOM PRESET 3 or CUSTOM PRESET 4 on the remote control. Related Topic Items for which you can save settings and the default values for each item 4-686-529-11(5) Copyright 2017 Sony Corporation... -
Page 174: Items For Which You Can Save Settings And The Default Values For Each Item
Help Guide MULTI CHANNEL AV RECEIVER STR-ZA3100ES/STR-ZA2100ES/STR-ZA1100ES Items for which you can save settings and the default values for each item 1: Movie Preset Name: Movie Input: BD/DVD Tuner Preset: No change Volume: No change HDMI OUT: No change Party Mode: No change... - Page 175 Surround Treble: No change Height1 Bass (*1): No change Height1 Treble (*1): No change Height2 Bass (*1): No change Height2 Treble (*1): No change Height Bass (*2): No change Height Treble (*2): No change for STR-ZA3100ES/STR-ZA2100ES for STR-ZA1100ES 4-686-529-11(5) Copyright 2017 Sony Corporation...
-
Page 176: Using The Sleep Timer (Sleep)
TV screen when it becomes 1 minute or less. The sleep timer will be canceled if you perform the following: Update the software of the receiver. Turn the receiver on or off. 4-686-529-11(5) Copyright 2017 Sony Corporation... -
Page 177: Viewing Information On The Display Panel
Appears only when you have set an arbitrary preset station name. In this case, the preset station name and frequency are displayed alternately each time you press DISPLAY. Note Characters or marks in some languages may not be displayed. Related Topic Indicators on the display panel 4-686-529-11(5) Copyright 2017 Sony Corporation... - Page 178 1. About Auto Calibration 2. Before you perform Auto Calibration 3. Connecting the calibration microphone 4. Selecting the front speakers 5. Performing Auto Calibration 6. Checking Auto Calibration results Setting up a network (Internet Setup) 4-686-529-11(5) Copyright 2017 Sony Corporation...
-
Page 179: Changing The Assignment And Display For The Input Jacks
[COMPONENT], [VIDEO IN], [AUDIO IN], [Input Mode], [Preset Sound Field], [In-Ceiling Speaker Mode], [A/V Sync], [Subwoofer Low Pass Filter], [Subwoofer Level], [Preset Gain Level], [Trigger 1] (*1), [Trigger 2] (*1), [Trigger 3] (*1) and [Trigger] (*2) for the desired input. for STR-ZA3100ES for STR-ZA2100ES/STR-ZA1100ES Note The settings of [AUDIO IN] on the Input Setup screen are fixed. - Page 180 HDMI input jack is assigned independently. Preset Gain Level You can preset the gain level for each input. Trigger 1 to 3 (for STR-ZA3100ES) Trigger (for STR-ZA2100ES/STR-ZA1100ES) You can select input options for use of the 12V Trigger function.
-
Page 181: Changing The Name For Each Input (Name)
Select the input name you want to change. Select [Name]. An on-screen keyboard appears on the TV screen. Press to select characters one by one to enter the name. Select [Enter]. The name you entered is registered. 4-686-529-11(5) Copyright 2017 Sony Corporation... - Page 182 The D.C.A.C. is designed to achieve proper sound balance for your room. However, you can adjust the speaker levels manually according to your preference using [Test Tone]. Related Topic Outputting a test tone from each speaker (Test Tone) 4-686-529-11(5) Copyright 2017 Sony Corporation...
- Page 183 It may not be possible to take the correct measurements or to perform Auto Calibration at all if special speakers such as dipole speakers are used. Related Topic 4. Selecting the front speakers 3. Connecting the calibration microphone Confirming active subwoofer setup Selecting the speaker pattern (Speaker Pattern) Assigning the surround back speaker terminals (SB Speaker Assign) 4-686-529-11(5) Copyright 2017 Sony Corporation...
- Page 184 Insert the plug of the calibration microphone all the way into the CALIBRATION MIC jack. If the calibration microphone is not connected securely, measurements may not be made properly. Position the calibration microphone horizontally with the L (left) and R (right) ends at the same height. 4-686-529-11(5) Copyright 2017 Sony Corporation...
- Page 185 [SPEAKERS OFF] appears on the display panel. No audio signals are output from any speaker terminals, or the PRE OUT jacks. To select [SP B] or [SP AB], set the assignment for the SPEAKERS SURROUND BACK/HEIGHT (FRONT B/BI-AMP/ZONE 2) terminals to [Front B] by using [SB Speaker Assign] in the [Speaker Setup] menu. 4-686-529-11(5) Copyright 2017 Sony Corporation...
- Page 186 Help Guide MULTI CHANNEL AV RECEIVER STR-ZA3100ES/STR-ZA2100ES/STR-ZA1100ES 5. Performing Auto Calibration You can perform automatic calibration from your listening position. Select [Setup] - [Speaker Setup] from the home menu. Select [Auto Calibration]. Follow the instructions on the TV screen, then press to select [Start].
- Page 187 Press AUTO CAL. Change the volume level. Related Topic 1. About Auto Calibration 2. Before you perform Auto Calibration 6. Checking Auto Calibration results 4-686-529-11(5) Copyright 2017 Sony Corporation...
- Page 188 Hint The measurement results may vary depending on the position of the subwoofer. However, continuing to use the receiver with that value does not cause problems. Related Topic List of messages after Auto Calibration measurements 4-686-529-11(5) Copyright 2017 Sony Corporation...
- Page 189 [Direct] is being used and an analog input is selected. [Auto Calibration] has not been performed. The receiver may play signals at a lower sampling frequency than the actual sampling frequency of the input signals, depending on the audio format. 4-686-529-11(5) Copyright 2017 Sony Corporation...
-
Page 190: Selecting The Auto Calibration Type (Calibration Type)
Select the setting you want. Full Flat: Makes the measurement of frequency from each speaker flat. Engineer: Sets to “the Sony listening room standard” frequency characteristics. Front Reference: Adjusts the characteristics of all of the speakers to match the characteristics of the front speaker. -
Page 191: Selecting The Speaker Pattern (Speaker Pattern)
You can select the speaker pattern according to the speaker system which you are using. Select [Setup] - [Speaker Setup] from the home menu. Select [Speaker Pattern]. Select the speaker pattern you want. Related Topic Assigning the surround back speaker terminals (SB Speaker Assign) 4-686-529-11(5) Copyright 2017 Sony Corporation... - Page 192 Select the speaker you want from the list on the right side of the screen The position of the speaker and the corresponding terminals on the receiver to which the speaker should be connected are shown on the screen. 4-686-529-11(5) Copyright 2017 Sony Corporation...
- Page 193 You can only set [SB Speaker Assign] if one of the following speaker patterns that do not use the SPEAKERS SURROUND BACK/HEIGHT (FRONT B/BI-AMP/ZONE 2) terminals is selected: STR-ZA3100ES/STR-ZA2100ES: 2.0, 2.0.2, 2.1, 2.1.2, 3.0, 3.0.2, 3.1, 3.1.2, 4.0, 4.0.2, 4.1, 4.1.2, 5.0, 5.0.2, 5.1 or 5.1.2 STR-ZA1100ES: 2.0, 2.1, 3.0, 3.1, 4.0, 4.1, 5.0 or 5.1...
- Page 194 The surround back speakers will be set to the same setting as that of the surround speakers. When the front speakers are set to [Small], the center, surround, surround back, height1 (for STR-ZA3100ES/STR-ZA2100ES), height2 (for STR-ZA3100ES/STR-ZA2100ES) and height (for STR-ZA1100ES) speakers are also automatically set to [Small].
- Page 195 STR-ZA1100ES Select [Setup] - [Speaker Setup] from the home menu. Select [Distance]. Select the speaker on the screen for which you want to adjust the distance from where you are sitting. Adjust the distance. 4-686-529-11(5) Copyright 2017 Sony Corporation...
- Page 196 (*1), height2 left/right (*1), height left/right (*2), subwoofer). for STR-ZA3100ES/STR-ZA2100ES for STR-ZA1100ES Select [Setup] - [Speaker Setup] from the home menu. Select [Level]. Select the speaker on the screen for which you want to adjust the speaker level. Adjust the level. 4-686-529-11(5) Copyright 2017 Sony Corporation...
-
Page 197: Outputting A Test Tone From Each Speaker (Test Tone)
To adjust the level of all speakers at the same time, press +/–. You can also use MASTER VOLUME on the receiver. The adjusted value is shown on the TV screen during adjustment. 4-686-529-11(5) Copyright 2017 Sony Corporation... -
Page 198: Setting The Crossover Frequency Of The Speakers (Crossover Frequency)
Select the speaker for which you want to adjust the crossover frequency on the screen. Set the crossover frequency of the selected speaker. Note The surround back speakers will be set to the same setting as that of the surround speakers. 4-686-529-11(5) Copyright 2017 Sony Corporation... - Page 199 Depending on the audio format, the receiver may play signals at a lower sampling frequency than the original sampling frequency of the input signals. Hint You can also select [Equalizer] in [Sound Effects] from the home menu. 4-686-529-11(5) Copyright 2017 Sony Corporation...
-
Page 200: Lifting Up The Sound Of The Center Speaker (Center Speaker Lift Up)
Front high speakers are not assigned to the SPEAKERS SURROUND BACK/HEIGHT (FRONT B/BI-AMP/ZONE 2) terminals. The [2ch Stereo] or [Multi Stereo] sound field is being used. [In-Ceiling Speaker Mode] is set to [Front & Center] or [Front]. Related Topic Speaker patterns and terminals to be connected (for STR-ZA3100ES/STR-ZA2100ES) 4-686-529-11(5) Copyright 2017 Sony Corporation... - Page 201 Front: When the surround speakers are placed at less than 90° (forward from your listening position). Back: When the surround speakers are placed at more than 90° (backward from your listening position). Note This function does not work when there are no surround speakers. 4-686-529-11(5) Copyright 2017 Sony Corporation...
- Page 202 Help Guide MULTI CHANNEL AV RECEIVER STR-ZA3100ES/STR-ZA2100ES/STR-ZA1100ES Calibrating speaker positioning (Speaker Relocation) You can calibrate speaker positioning (configuration angle of each speaker from the measurement position) to improve the surround effect. Select [Setup] - [Speaker Setup] from the home menu.
- Page 203 [Direct] is being used and an analog input is selected. There are no surround back speakers and [Surround Speaker Position] is set to [Front]. When [In-Ceiling Speaker Mode] is set to [Front & Center] or [Front]. Perform Auto Calibration before you use this function. 4-686-529-11(5) Copyright 2017 Sony Corporation...
- Page 204 Auto Calibration. Select [Setup] - [Speaker Setup] from the home menu. Select [Ceiling Height]. Adjust the height. Related Topic Enjoying more natural sound with speakers installed in the ceiling (In-Ceiling Speaker Mode) 4-686-529-11(5) Copyright 2017 Sony Corporation...
-
Page 205: Selecting The Unit Of Measurement (Distance Unit)
You can select the unit of measurement for setting distances. Select [Setup] - [Speaker Setup] from the home menu. Select [Distance Unit]. Select the setting you want. meter: The distance is displayed in meters. feet: The distance is displayed in feet. 4-686-529-11(5) Copyright 2017 Sony Corporation... - Page 206 Hint See [Information] when checking the network settings. Related Topic Connecting the receiver to the network using LAN cables (for STR-ZA3100ES) Connecting the receiver to the network using LAN cables (for STR-ZA2100ES/STR-ZA1100ES) Checking the network information (Information) 4-686-529-11(5) Copyright 2017 Sony Corporation...
-
Page 207: Checking The Network Information (Information)
You can check the settings (*) for [Connection Status], [Internet Access], [IP Address Setting], [IP Address], [Subnet Mask], [Default Gateway], [DNS Settings], [Primary DNS], [Secondary DNS] and [MAC Address]. The setting items during setup differ depending on the network environment and connection type. 4-686-529-11(5) Copyright 2017 Sony Corporation... - Page 208 (power) indicator on the front panel lights up in amber if [Network Standby] is set to [On]. The top of the cabinet may become hot. This is because part of the circuit(s) inside the receiver is(are) still turned on, and is not a malfunction. 4-686-529-11(5) Copyright 2017 Sony Corporation...
- Page 209 Input for Music Connect 2: Select the input to link with. Preset Volume: Preset the volume level. Output Zone: Select the zone to which you want to output sound. Note For details on how to configure settings for this function, consult your nearest Sony dealer. 4-686-529-11(5) Copyright 2017 Sony Corporation...
- Page 210 STR-ZA3100ES/STR-ZA2100ES/STR-ZA1100ES Playing audio signals with high-quality sound (Digital Legato Linear (D.L.L.)) The D.L.L. function is a technology developed by Sony that allows low-quality digital and analog audio signals to be played with high-quality sound. Select [Setup] - [Audio Setup] from the home menu.
- Page 211 The receiver may play signals at a lower sampling frequency than the actual sampling frequency of the input signals, depending on the audio format. Hint You can also select [Sound Optimizer] in the [Audio Setup] menu. 4-686-529-11(5) Copyright 2017 Sony Corporation...
- Page 212 You can also select [Sound Field] in [Sound Effects] from the home menu. You can also use 2CH/DIRECT, A.F.D., MOVIE or MULTI ST. on the remote control or the receiver to select a sound field. Related Topic Selectable sound fields and their effects 4-686-529-11(5) Copyright 2017 Sony Corporation...
- Page 213 You can also switch the function on/off by pressing IN-CEILING SP on the remote control or the receiver. To obtain optimal effects in the listening environment, configure the [Ceiling Height] setting and perform Auto Calibration. Related Topic Setting the height from the floor to the ceiling speakers (Ceiling Height) 4-686-529-11(5) Copyright 2017 Sony Corporation...
- Page 214 [Equalizer], [Sound Optimizer], [Dynamic Range Compressor] and [In-Ceiling Speaker Mode] do not work when the Pure Direct function is selected. Hint You can also use PURE DIRECT to turn the Pure Direct function on or off. You can also select [Pure Direct] in the [Audio Setup] menu. 4-686-529-11(5) Copyright 2017 Sony Corporation...
- Page 215 On: Always activates the low-pass filter with a cutoff frequency of 120 Hz. Off: Does not activate the low-pass filter. Note This function does not work when [Direct] is being used and an analog input is selected. 4-686-529-11(5) Copyright 2017 Sony Corporation...
-
Page 216: Synchronizing Audio With Video Output (A/V Sync)
0 ms – 300 ms: You can adjust the delay from 0 ms to 300 ms in 10 ms intervals. Note The receiver may play signals at a lower sampling frequency than the actual sampling frequency of the input signals, depending on the audio format. 4-686-529-11(5) Copyright 2017 Sony Corporation... -
Page 217: Selecting The Language Of Digital Broadcasts (Dual Mono)
Sub: Sound in the sub language will be output. Main/Sub: Sound in the main language will be output through the front left speaker and sound in the sub language will be output through the front right speaker simultaneously. 4-686-529-11(5) Copyright 2017 Sony Corporation... -
Page 218: Compressing The Dynamic Range (Dynamic Range Compressor)
Auto: The dynamic range is compressed automatically when there is a flag in the sound source that recommends using the Dynamic Range Compressor function. On: The dynamic range is compressed as intended by the recording engineer. Note This function does not work when [Pure Direct] is set to [On]. 4-686-529-11(5) Copyright 2017 Sony Corporation... - Page 219 You cannot set this function to [Off] when [Neural:X] is selected. You cannot set this function to [On] in the following cases: [2ch Stereo], [Direct] or [Dolby Surround] is selected. [Pure Direct] is set to [On]. 4-686-529-11(5) Copyright 2017 Sony Corporation...
-
Page 220: Up-Converting Video Signals To 4K (4K Scaling)
When [4K Scaling] is set to [Auto] and the HDMI OUTPUT setting is set to [HDMI OUT A+B], the options menus, the current volume and the input name are not displayed on the screen of the TV connected to the HDMI OUT B (ZONE 2) jack. Related Topic Switching the monitors that output the HDMI video signals 4-686-529-11(5) Copyright 2017 Sony Corporation... -
Page 221: Controlling Hdmi Devices (Control For Hdmi)
(power) indicator on the front panel lights up in amber if [Control for HDMI] is set to [On]. This function is enabled only when [HDMI Out B Mode] is set to [Main]. Related Topic Preparing for “BRAVIA” Sync 4-686-529-11(5) Copyright 2017 Sony Corporation... - Page 222 This setting is valid when [Control for HDMI] is set to [On]. The connected device may not turn off depending on the status of the device. System Power Off function may work with devices other than those manufactured by Sony, but operation is not guaranteed. Related Topic Preparing for “BRAVIA”...
- Page 223 Help Guide MULTI CHANNEL AV RECEIVER STR-ZA3100ES/STR-ZA2100ES/STR-ZA1100ES Enjoying sound from a TV compatible with eARC or ARC (Enhanced Audio Return Channel/Audio Return Channel) If your TV supports the eARC or ARC function, set the receiver by the following procedure to output the sound of the TV from the speakers connected to the receiver.
- Page 224 Notes on connecting cables About HDMI connections What is eARC (Enhanced Audio Return Channel)? Digital audio formats supported by the receiver 4-686-529-11(5) Copyright 2017 Sony Corporation...
- Page 225 Auto: The receiver outputs HDMI signals to the TV from the HDMI OUT A jack when the TV is turned on while the receiver is in the standby mode. Sony recommends this setting if you are using a “BRAVIA” Sync-compatible TV manufactured by Sony. This setting saves power in the standby mode compared to the [On] setting.
-
Page 226: Setting The Hdmi Audio Signal Output Of Connected Devices (Audio Out)
TV, even when playing back multi-channel source. When you connect the receiver to a video device (projector, etc.), sound may not be output from the receiver. In this case, select [AMP]. 4-686-529-11(5) Copyright 2017 Sony Corporation... - Page 227 Help Guide MULTI CHANNEL AV RECEIVER STR-ZA3100ES/STR-ZA2100ES/STR-ZA1100ES Setting the Zone 2 HDMI audio output of connected devices (Zone2 Audio Out) You can set the Zone 2 HDMI audio signal output for playback devices connected to the receiver via an HDMI connection.
- Page 228 4-686-529-11(5) Copyright 2017 Sony Corporation...
-
Page 229: Setting The Level Of The Subwoofer (Subwoofer Level)
Select [Setup] - [HDMI Setup] from the home menu. Select [Subwoofer Level]. Select the setting you want. Auto: Automatically sets the level to 0 dB or +10 dB, depending on the audio stream. +10 dB 0 dB 4-686-529-11(5) Copyright 2017 Sony Corporation... - Page 230 Zone 2 is SOURCE or the same input is selected in the main zone and Zone 2. When [Zone2] is selected, the HDMI OUT B (ZONE 2) jack supports bandwidth up to 9 Gbps. 4-686-529-11(5) Copyright 2017 Sony Corporation...
- Page 231 Main Only: You can enjoy good audio and video quality in the main zone. There is no output in Zone 2. Note This function is enabled only when [HDMI Out B Mode] is set to [Zone2]. 4-686-529-11(5) Copyright 2017 Sony Corporation...
-
Page 232: Speeding Up The Display When Switching The Hdmi Input (Fast View)
This function is enabled only when [HDMI Out B Mode] is set to [Main]. If you select [Off], it takes more time for images to appear after switching the input. However, the sound quality is improved because the receiver receives signals only from the selected HDMI input jack. 4-686-529-11(5) Copyright 2017 Sony Corporation... - Page 233 For details on the setting of the TV menu, refer to the operating instructions of the TV. You cannot apply the setting to the HDMI IN 6 (GAME) jack (for STR-ZA3100ES/STR-ZA2100ES only). 4-686-529-11(5) Copyright 2017 Sony Corporation...
- Page 234 Zone2 Volume: Adjusts the volume level for Zone 2. Zone3 Power: Turns on/off the power for Zone 3. Zone3 Input: Selects the input source for Zone 3. Zone3 Volume: Adjusts the volume level for Zone 3. 4-686-529-11(5) Copyright 2017 Sony Corporation...
- Page 235 Presetting the volume in the main zone (Main Preset Volume) You can set the volume level to be used when the receiver is turned on. Select [Setup] - [Zone Setup] from the home menu. Select [Main Preset Volume]. Adjust the volume level. 4-686-529-11(5) Copyright 2017 Sony Corporation...
- Page 236 Limiting the volume for the main zone (Main Max Volume) You can limit the maximum volume level output to the main zone. Select [Setup] - [Zone Setup] from the home menu. Select [Main Max Volume]. Adjust the volume level. 4-686-529-11(5) Copyright 2017 Sony Corporation...
- Page 237 You can set the volume level in Zone 2 or Zone 3 when turning on the receiver. Select [Setup] - [Zone Setup] from the home menu. Select [Zone2 Preset Volume] or [Zone3 Preset Volume]. Adjust the volume level. Related Topic Enjoying sound using another amplifier in Zone 2 and/or Zone 3 4-686-529-11(5) Copyright 2017 Sony Corporation...
- Page 238 You can limit the maximum volume level output to Zone 2 and/or Zone 3. Select [Setup] - [Zone Setup] from the home menu. Select [Zone2 Max Volume] or [Zone3 Max Volume]. Adjust the volume level. Related Topic Enjoying sound using another amplifier in Zone 2 and/or Zone 3 4-686-529-11(5) Copyright 2017 Sony Corporation...
- Page 239 When [Variable] is set, the volume level is turned down by default. Turn up the volume while listening to the sound after completing setup. Related Topic Enjoying sound using another amplifier in Zone 2 and/or Zone 3 4-686-529-11(5) Copyright 2017 Sony Corporation...
-
Page 240: Selecting The Language (Language)
When the Control for HDMI function on both the receiver and the TV (BRAVIA TV) is turned on, the on-screen display language of the receiver is changed simultaneously when you change the language for the on-screen display of the TV. Related Topic About Language Follow function 4-686-529-11(5) Copyright 2017 Sony Corporation... -
Page 241: Tuning On/Off The Display For The Volume Level Or Sound Field (Auto Display)
You can turn on or off the information display which appears on the TV screen when the volume level or sound field, etc., of the receiver is changed. Select [Setup] - [System Setup] from the home menu. Select [Auto Display]. Select the setting you want. 4-686-529-11(5) Copyright 2017 Sony Corporation... -
Page 242: Setting Standby Mode (Auto Standby)
[FM TUNER] or [AM TUNER] is selected as the input. The software of the receiver is being updated. If you use the Auto Standby mode and the sleep timer at the same time, the sleep timer has priority. 4-686-529-11(5) Copyright 2017 Sony Corporation... - Page 243 You can set the volume display on the TV screen and display panel. Select [Setup] - [System Setup] from the home menu. Select [Volume Display]. Select the setting you want. Relative: Indicates the volume in dB. Absolute: Indicates the number of steps. 4-686-529-11(5) Copyright 2017 Sony Corporation...
- Page 244 Switching the brightness of the display panel (Dimmer) You can switch the brightness of the display panel between 3 levels. Select [Setup] - [System Setup] from the home menu. Select [Dimmer]. Select the setting you want. Bright Dark 4-686-529-11(5) Copyright 2017 Sony Corporation...
- Page 245 TV screen when it becomes 1 minute or less. The sleep timer will be canceled if you perform the following: Update the software of the receiver. Turn the receiver on or off. 4-686-529-11(5) Copyright 2017 Sony Corporation...
-
Page 246: Checking The Software Version (Software Version)
Help Guide MULTI CHANNEL AV RECEIVER STR-ZA3100ES/STR-ZA2100ES/STR-ZA1100ES Checking the software version (Software Version) You can check the current software version of the receiver. Select [Setup] - [System Setup] from the home menu. Check [Software Version]. 4-686-529-11(5) Copyright 2017 Sony Corporation... - Page 247 Connect the receiver to the Internet beforehand, and then make sure [Internet Connection] is displayed as [OK] in the [Network Information] menu. Select [Setup] - [System Setup] from the home menu. Select [Network Update]. Follow the instructions on the TV screen. 4-686-529-11(5) Copyright 2017 Sony Corporation...
- Page 248 (USB) port of the receiver. Select [Setup] - [System Setup] from the home menu. Select [USB Update]. [UPDATING...XXX%] appears on the display panel while updating. When the update completes, receiver will restart automatically. Related Topic Customer support websites 4-686-529-11(5) Copyright 2017 Sony Corporation...
- Page 249 You can configure the FM receiving mode (*), Name Input and Preset Gain Level settings. This function only works while the [FM TUNER] input is selected. Related Topic Setting the FM station receiving mode (FM Mode) Naming preset stations (Name Input) Presetting the gain level of the FM/AM tuner 4-686-529-11(5) Copyright 2017 Sony Corporation...
- Page 250 Turning on control mode for maintenance (External Control) You can set whether or not to control the receiver from external devices. Select [Setup] - [Install Setup] from the home menu. Select [External Control]. Select the setting you want. 4-686-529-11(5) Copyright 2017 Sony Corporation...
- Page 251 MULTI CHANNEL AV RECEIVER STR-ZA3100ES/STR-ZA2100ES/STR-ZA1100ES Switching on/off the 12V trigger output (Trigger 1/2/3) (for STR-ZA3100ES) If you connect a device equipped with trigger input jacks, you can turn on the device or set it to standby simultaneously with the receiver.
- Page 252 12V trigger outputs. Settings for [HDMI OUT A], [HDMI OUT B] and [HDMI OUT OFF] are available only when they work in sync with the power in the main zone. 4-686-529-11(5) Copyright 2017 Sony Corporation...
- Page 253 You can also display a test screen with 480p/60 Hz for HDMI OUT A and HDMI OUT B jacks by pressing TEST PICTURE on the remote control. HDMI audio signals are not output while the test screen is displayed. 4-686-529-11(5) Copyright 2017 Sony Corporation...
- Page 254 You can lock the receiver settings to prevent setting values from being accidentally erased. Select [Setup] - [Install Setup] from the home menu. Select [Settings Lock]. Select [On]. Hint To set this function to [Off], press PING, AMP MENU and ENTER on the receiver at the same time. 4-686-529-11(5) Copyright 2017 Sony Corporation...
-
Page 255: Operating The Receiver With The Menu On The Display Panel
To exit the menu Press AMP MENU. Note Some parameters and settings may appear dimmed on the display panel. This means that they are either unavailable or fixed and unchangeable. Related Topic Menu list (on the display panel) 4-686-529-11(5) Copyright 2017 Sony Corporation... - Page 256 Appears only when you have set an arbitrary preset station name. In this case, the preset station name and frequency are displayed alternately each time you press DISPLAY. Note Characters or marks in some languages may not be displayed. Related Topic Indicators on the display panel 4-686-529-11(5) Copyright 2017 Sony Corporation...
-
Page 257: Reverting To The Factory Default Settings
(power) on the receiver for 5 seconds. [MEMORY CLEARING] appears on the display panel for a while, then changes to [MEMORY CLEARED!]. Note Do not turn the receiver off until [MEMORY CLEARED!] appears on the display panel. 4-686-529-11(5) Copyright 2017 Sony Corporation... - Page 258 After checking the above items and fixing any problems, plug in the AC power cord (mains lead) and turn on the receiver. If the problem persists, consult your nearest Sony dealer. 4-686-529-11(5) Copyright 2017 Sony Corporation...
-
Page 259: Update Failed
While Network Update is performed, press (power). If the problem persists, insert a USB flash drive on which the package file for updating the receiver is saved, and then press (power) again. 4-686-529-11(5) Copyright 2017 Sony Corporation... - Page 260 Help Guide MULTI CHANNEL AV RECEIVER STR-ZA3100ES/STR-ZA2100ES/STR-ZA1100ES FAN STOPPED (for STR-ZA3100ES only) Check that the ventilation holes on the top of the receiver are not blocked. 4-686-529-11(5) Copyright 2017 Sony Corporation...
-
Page 261: List Of Messages After Auto Calibration Measurements
AMP/ZONE 2) R terminal. If connecting only one surround back speaker, connect it to the SPEAKERS SURROUND BACK/HEIGHT (FRONT B/BI-AMP/ZONE 2) L terminal. Either the Height1 left or Height1 right speaker is not connected (for STR-ZA3100ES/STR-ZA2100ES). Either the Height2 left or Height2 right speaker is not connected (for STR-ZA3100ES/STR-ZA2100ES). -
Page 262: Network Features Message List
Help Guide MULTI CHANNEL AV RECEIVER STR-ZA3100ES/STR-ZA2100ES/STR-ZA1100ES Network features message list Invalid XXX (*): The entered value is incorrect or invalid. XXX represents an IP Address, Subnet Mask, Default Gateway, Primary DNS or Secondary DNS. 4-686-529-11(5) Copyright 2017 Sony Corporation... -
Page 263: The Receiver Is Turned Off Automatically
The receiver is turned off automatically. [Auto Standby] is set to [On]. The sleep timer function was activated. [PROTECTOR] was activated. [FAN STOPPED] (for STR-ZA3100ES only) was activated. Related Topic Setting standby mode (Auto Standby) Using the sleep timer (Sleep) - Page 264 While a USB flash drive containing the package file for updating the receiver is inserted, disconnect the AC power cord (mains lead) and connect it again. If the problem persists, consult your nearest Sony dealer. 4-686-529-11(5) Copyright 2017 Sony Corporation...
- Page 265 Check the speaker settings of the TV. The receiver power syncs with the speaker settings of the TV. For details, refer to the operating instructions of the TV. If sound was output from the speakers of the TV last time, the receiver does not turn on even when the TV is turned 4-686-529-11(5) Copyright 2017 Sony Corporation...
- Page 266 Check [Standby Linked to TV] in the [HDMI Setup] menu. When the function is set to [On], the receiver automatically turns off interlocked with the TV-power off operation, regardless of the input of the receiver. 4-686-529-11(5) Copyright 2017 Sony Corporation...
- Page 267 Linked to TV] to [On]. The TV must support the Control for HDMI function. For details, refer to the operating instructions of your TV. Set [Control for HDMI] to [On] in the [HDMI Setup] menu. The TV must support the Control for HDMI function. For details, refer to the operating instructions of your TV. 4-686-529-11(5) Copyright 2017 Sony Corporation...
- Page 268 When you are upconverting input signals using the receiver, use the same type of output signals as input signals. Make sure that cables are correctly and securely connected to devices. Set [HDMI Signal Format] for the selected HDMI IN jack except HDMI IN 6 (GAME) jack on STR-ZA3100ES/STR- ZA2100ES to [Standard format] in the [HDMI Setup] menu.
- Page 269 Depending on the TV or the video device, 3D content may not be displayed. Check the HDMI video formats supported by the receiver. Be sure to use a High Speed HDMI Cable with Ethernet. Related Topic Notes on connecting cables About HDMI connections 4-686-529-11(5) Copyright 2017 Sony Corporation...
- Page 270 HDMI cable to an HDMI jack that supports HDCP 2.2 when you use a playback device for 4K resolution video content, etc. Related Topic Notes on connecting cables About HDMI connections Setting HDMI signal formats (HDMI Signal Format) 4-686-529-11(5) Copyright 2017 Sony Corporation...
- Page 271 One-Touch Play operation, or turn on the receiver to select the HDMI device from which you want to enjoy content. Make sure [Standby Through] is set to [Auto] or [On] in the [HDMI Setup] menu. Related Topic Enjoying content of a connected device without turning on the receiver (Standby Through) 4-686-529-11(5) Copyright 2017 Sony Corporation...
- Page 272 HDR10 or SDR (Standard Dynamic Range) format. To enjoy Dolby Vision content as it is, connect only one Dolby Vision-compatible TV to the receiver, or select either [HDMI OUT A] or [HDMI OUT B]. 4-686-529-11(5) Copyright 2017 Sony Corporation...
-
Page 273: The Home Menu Does Not Appear On The Tv Screen
Setup] menu, the home menu does not appear on the TV screen. In this case, set [HDMI Out B Mode] to [Main]. Press HOME to display the home menu. Check that the TV is connected correctly. The home menu may take some time to appear on the TV screen depending on the TV. 4-686-529-11(5) Copyright 2017 Sony Corporation... -
Page 274: The Display Panel Is Turned Off
Make sure [Pure Direct] is set to [Off] in the [Sound Effects] menu. When the function is set to [On], the display panel is turned off. Adjust the brightness of the display panel using [Dimmer] in the [System Setup] menu. Related Topic Enjoying high-fidelity sound (Pure Direct) Switching the brightness of the display panel (Dimmer) 4-686-529-11(5) Copyright 2017 Sony Corporation... - Page 275 Turn on the receiver, then select the input to which the playing device is connected. If connected to other devices than those manufactured by Sony that support the Control for HDMI function, set [Control for HDMI] to [On] in the [HDMI Setup] menu.
- Page 276 Check [Control for HDMI] in the [HDMI Setup] menu. If [Control for HDMI] is set to [On], the on-screen display language of the receiver may be changed simultaneously when you change the language for the on-screen display of the TV. Select the language on the receiver again to return to the previous setting. 4-686-529-11(5) Copyright 2017 Sony Corporation...
-
Page 277: No Sound Or Only A Very Low Level Of Sound Is Heard, No Matter Which Device Is Selected
If you want to listen to sound from the TV speaker in Zone 2, set [Zone2 Audio Out] to [Zone2 TV + AMP] in the [HDMI Setup] menu. Sound may be interrupted when the sampling frequency, number of channels or audio format of audio output signals from the playback device is switched. 4-686-529-11(5) Copyright 2017 Sony Corporation... -
Page 278: There Is Severe Humming Or Noise
Make sure that the connecting cables are not near a transformer or motor. Move your audio device away from the TV. The plugs and jacks are dirty. Wipe them with a cloth slightly moistened with alcohol. 4-686-529-11(5) Copyright 2017 Sony Corporation... -
Page 279: No Sound Or Only A Very Low Level Of Sound Is Heard From Specific Speakers
[Speaker Setup] menu. Then check that sound is output from each speaker correctly using [Test Tone] in the [Speaker Setup] menu. Check that the subwoofer is connected correctly and securely. Make sure you have turned on your subwoofer. Depending on the selected sound field, sound may not be available from the subwoofer. 4-686-529-11(5) Copyright 2017 Sony Corporation... -
Page 280: There Is No Sound From A Specific Device
Help Guide MULTI CHANNEL AV RECEIVER STR-ZA3100ES/STR-ZA2100ES/STR-ZA1100ES There is no sound from a specific device. Check that the device is correctly connected to the corresponding audio input jacks. Check that the cable(s) used for the connection is (are) fully inserted into the jacks on both the receiver and the device. - Page 281 4-686-529-11(5) Copyright 2017 Sony Corporation...
- Page 282 Make sure the HDMI OUTPUT setting is set to [HDMI OUT A] or [HDMI OUT A+B]. Related Topic Enjoying sound from a TV compatible with eARC or ARC (Enhanced Audio Return Channel/Audio Return Channel) Digital audio formats supported by the receiver Switching between digital and analog audio (Input Mode) 4-686-529-11(5) Copyright 2017 Sony Corporation...
- Page 283 Connect the receiver to an HDMI input jack of the TV which supports the eARC or ARC function, and then perform the operation described in “When using an ARC-compatible TV that supports Dolby Atmos audio output” or “When using an eARC-compatible TV that supports Dolby Atmos and DTS:X audio output.” 4-686-529-11(5) Copyright 2017 Sony Corporation...
-
Page 284: The Left And Right Sound Is Unbalanced Or Reversed
MULTI CHANNEL AV RECEIVER STR-ZA3100ES/STR-ZA2100ES/STR-ZA1100ES The left and right sound is unbalanced or reversed. Check that the speakers and device are connected correctly and securely. Adjust the sound level parameters using the [Speaker Setup] menu. 4-686-529-11(5) Copyright 2017 Sony Corporation... -
Page 285: Dolby Digital Or Dts Multi-Channel Sound Is Not Reproduced
Set [Audio Out] to [AMP] in the [HDMI Setup] menu. You can only enjoy High Bitrate Audio (DTS-HD Master Audio, Dolby TrueHD, DTS:X Master Audio, Dolby Atmos), DSD and Multi Channel Linear PCM with an HDMI connection. 4-686-529-11(5) Copyright 2017 Sony Corporation... -
Page 286: The Surround Effect Cannot Be Obtained
[IMAX Mode] does not work when [Sound Field] is set to [Dolby Surround], even when you play back IMAX Enhanced content. Related Topic Changing the IMAX Mode setting for IMAX Enhanced content playback (IMAX MODE) Selecting a sound field (Sound Field) Selectable sound fields and their effects 4-686-529-11(5) Copyright 2017 Sony Corporation... -
Page 287: A Test Tone Is Not Output From The Speakers
A test tone is not output from the speakers. The speaker cables may not be connected securely. Check that they are connected securely and cannot be disconnected by pulling on them slightly. The speaker cables may have short-circuited. 4-686-529-11(5) Copyright 2017 Sony Corporation... -
Page 288: A Test Tone Is Output From A Different Speaker Than The Speaker Displayed On The Tv Screen
A test tone is output from a different speaker than the speaker displayed on the TV screen. The speaker pattern setup is incorrect. Make sure that the speaker connections and the speaker pattern match correctly. 4-686-529-11(5) Copyright 2017 Sony Corporation... -
Page 289: No Sound Is Output From The Tv When The Receiver Is In Standby Mode
One-Touch Play operation, or turn on the receiver to select the HDMI device from which you want to enjoy content. Make sure [Standby Through] is set to [Auto] or [On] in the [HDMI Setup] menu. Related Topic Enjoying content of a connected device without turning on the receiver (Standby Through) 4-686-529-11(5) Copyright 2017 Sony Corporation... - Page 290 Change the [A/V Sync] settings in the [Audio Setup] menu. Adjust the A/V Sync settings on the TV. For details, refer to the operating instructions of the TV. Related Topic Synchronizing audio with video output (A/V Sync) 4-686-529-11(5) Copyright 2017 Sony Corporation...
-
Page 291: The Fm Reception Is Poor
Extend and adjust the position of the FM wire antenna (aerial) to a place where the reception conditions are good. Place the FM wire antenna (aerial) near a window. Related Topic The FM stereo reception is poor. 4-686-529-11(5) Copyright 2017 Sony Corporation... -
Page 292: The Fm Stereo Reception Is Poor
MULTI CHANNEL AV RECEIVER STR-ZA3100ES/STR-ZA2100ES/STR-ZA1100ES The FM stereo reception is poor. Set the FM station receiving mode to the monaural mode. Related Topic Setting the FM station receiving mode (FM Mode) The FM reception is poor. 4-686-529-11(5) Copyright 2017 Sony Corporation... -
Page 293: You Cannot Tune To Radio Stations
No stations have been preset or the preset stations have been cleared (when tuning by scanning preset stations is used). Preset the stations. Press DISPLAY repeatedly on the receiver so that the frequency appears on the display panel. 4-686-529-11(5) Copyright 2017 Sony Corporation... -
Page 294: A Usb Device Is Not Recognized
Connect a compatible USB device. USB devices are only supported when formatted with the FAT16 or FAT32 file systems. The USB device does not work properly. Refer to the section on how to deal with this problem in the operating instructions of the USB device. 4-686-529-11(5) Copyright 2017 Sony Corporation... -
Page 295: A Usb Device Cannot Be Connected To The Usb Port
Help Guide MULTI CHANNEL AV RECEIVER STR-ZA3100ES/STR-ZA2100ES/STR-ZA1100ES A USB device cannot be connected to the USB port. The USB plug is being inserted upside down. Connect the plug in the correct orientation. 4-686-529-11(5) Copyright 2017 Sony Corporation... -
Page 296: An Error Message Appears
Help Guide MULTI CHANNEL AV RECEIVER STR-ZA3100ES/STR-ZA2100ES/STR-ZA1100ES An error message appears. Check the nature of the error. See “Network features message list.” Related Topic Network features message list 4-686-529-11(5) Copyright 2017 Sony Corporation... -
Page 297: Cannot Connect To The Network
Check that the LAN cable is connected to the receiver when you want to connect the receiver to the network via a wired LAN connection. Check the network information. If [Not Connected] appears, set up the network connection again. Related Topic Checking the network information (Information) 4-686-529-11(5) Copyright 2017 Sony Corporation... -
Page 298: The Control For Hdmi Function Does Not Work
Tuner-related devices: up to 4 devices (the receiver uses one of them for its GUI operations.) Audio system (receivers): up to 1 device (used by this receiver) Set [Control for HDMI] to [On] in the [HDMI Setup] menu. Related Topic Preparing for “BRAVIA” Sync 4-686-529-11(5) Copyright 2017 Sony Corporation... - Page 299 Related Topic Enjoying sound from a TV compatible with eARC or ARC (Enhanced Audio Return Channel/Audio Return Channel) Connecting a TV Controlling HDMI devices (Control for HDMI) Switching between digital and analog audio (Input Mode) 4-686-529-11(5) Copyright 2017 Sony Corporation...
-
Page 300: The Remote Control Does Not Function
Point the remote control at the remote control sensor on the receiver. Remove any obstructions between the remote control and the receiver. Replace both of the batteries in the remote control with new ones if they are weak. Related Topic Inserting batteries into the remote control 4-686-529-11(5) Copyright 2017 Sony Corporation... - Page 301 (power) on the receiver for 5 seconds. [MEMORY CLEARING] appears on the display panel for a while, then changes to [MEMORY CLEARED!]. Note Do not turn the receiver off until [MEMORY CLEARED!] appears on the display panel. 4-686-529-11(5) Copyright 2017 Sony Corporation...
- Page 302 Be sure to use the buttons on the receiver to perform this operation. Turn off the receiver. Hold down MULTI ST. and press (power) on the receiver. [S.F. INITIALIZED!] appears on the display panel and all sound fields are reset to their default setting. 4-686-529-11(5) Copyright 2017 Sony Corporation...
-
Page 303: Customer Support Websites
Help Guide MULTI CHANNEL AV RECEIVER STR-ZA3100ES/STR-ZA2100ES/STR-ZA1100ES Customer support websites Refer to the following website for the latest information on the receiver. https://www.sony.com/am/support 4-686-529-11(5) Copyright 2017 Sony Corporation... - Page 304 HDMI Licensing Administrator, Inc. “BRAVIA” is a trademark of Sony Corporation. “PlayStation®” is a registered trademark of Sony Computer Entertainment Inc. All other trademarks and registered trademarks are of their respective holders. In this manual, ™ and ® marks are not specified.
-
Page 305: Software License Information
Help Guide MULTI CHANNEL AV RECEIVER STR-ZA3100ES/STR-ZA2100ES/STR-ZA1100ES Software License Information md5.c, md5.h Copyright (C) 1991-2, RSA Data Security, Inc. Created 1991. All rights reserved. License to copy and use this software is granted provided that it is identified as the “RSA Data Security, Inc. MD5 Message-Digest Algorithm”... - Page 306 If this package is used in a product, Eric Young should be given attribution as the author of the parts of the library used. This can be in the form of a textual message at program startup or in documentation (online or textual) provided with the package.
- Page 307 If this package is used in a product, Eric Young should be given attribution as the author of the parts of the library used. This can be in the form of a textual message at program startup or in documentation (online or textual) provided with the package.
- Page 308 This can be in the form of a textual message at program startup or in documentation (online or textual) provided with the package. Redistribution and use in source and binary forms, with or without modification, are permitted provided that the following conditions are met: Redistributions of source code must retain the copyright notice, this list of conditions and the following disclaimer.
- Page 309 $KAME: crypto_openssl.c, eaytest.c v 1.70 2001/09/11 14:21:12 sakane Exp $ Copyright (C) 1995, 1996, 1997, and 1998 WIDE Project. All rights reserved. Redistribution and use in source and binary forms, with or without modification, are permitted provided that the following conditions are met: Redistributions of source code must retain the above copyright notice, this list of conditions and the following disclaimer.
- Page 310 trespcor.c $KAME: esp_core.c,v 1.50 2000/11/02 12:27:38 itojun Exp $ Copyright (C) 1995, 1996, 1997, and 1998 WIDE Project. All rights reserved. Redistribution and use in source and binary forms, with or without modification, are permitted provided that the following conditions are met: Redistributions of source code must retain the above copyright notice, this list of conditions and the following disclaimer.
- Page 311 The licence and distribution terms for any publically available version or derivative of this code cannot be changed. i.e. this code cannot simply be copied and put under another distribution licence [including the GNU Public Licence.] trmd4.c Copyright (C) 1991-2, RSA Data Security, Inc. Created 1991. All rights reserved.
- Page 312 The word 'cryptographic' can be left out if the rouines from the library being used are not cryptographic related :-). If you include any Windows specific code (or a derivative thereof) from the apps directory (application code) you must include an acknowledgement: “This product includes software written by Tim Hudson (tjh@cryptsoft.com)”...
- Page 313 All advertising materials mentioning features or use of this software must display the following acknowledgement: “This product includes cryptographic software written by Eric Young (eay@cryptsoft.com)” The word 'cryptographic' can be left out if the rouines from the library being used are not cryptographic related :-). If you include any Windows specific code (or a derivative thereof) from the apps directory (application code) you must include an acknowledgement: “This product includes software written by Tim Hudson (tjh@cryptsoft.com)”...
- Page 314 $KAME: sha1.c,v 1.5 2000/11/08 06:13:08 itojun Exp $ Copyright (C) 1995, 1996, 1997, and 1998 WIDE Project. All rights reserved. Redistribution and use in source and binary forms, with or without modification, are permitted provided that the following conditions are met: Redistributions of source code must retain the above copyright notice, this list of conditions and the following disclaimer.
- Page 315 This software is provided as-is, without any kind of warrenty or guarantee. And that is really all you can expect when you download code for free from the Internet. trqsort.c Copyright (c) 1992, 1993 The Regents of the University of California. All rights reserved.
- Page 316 Redistribution and use in source and binary forms, with or without modification, are permitted provided that the following conditions are met: Redistributions of source code must retain the above copyright notice, this list of conditions and the following disclaimer. Redistributions in binary form must reproduce the above copyright notice, this list of conditions and the following disclaimer in the documentation and/or other materials provided with the distribution.
- Page 317 All advertising materials mentioning features or use of this software must display the following acknowledgement: This product includes software developed by the University of California, Berkeley and its contributors. Neither the name of the University nor the names of its contributors may be used to endorse or promote products derived from this software without specific prior written permission.
- Page 318 Thanks to many people for bug reports and testing. REFERENCES Deutsch, L.P., “DEFLATE Compressed Data Format Specification”. Available in http://www.ietf.org/rfc/rfc1951.txt A description of the Rabin and Karp algorithm is given in the book “Algorithms” by R. Sedgewick, Addison-Wesley, p252. Fiala,E.R., and Greene,D.H. Data Compression with Finite Windows, Comm.ACM, 32,4 (1989) 490-595 This software is provided 'as-is', without any express or implied warranty.
- Page 319 The origin of this software must not be misrepresented; you must not claim that you wrote the original software. If you use this software in a product, an acknowledgment in the product documentation would be appreciated but is not required. Altered source versions must be plainly marked as such, and must not be misrepresented as being the original software.
- Page 320 ALGORITHM The “deflation” process uses several Huffman trees. The more common source values are represented by shorter bit sequences. Each code tree is stored in a compressed form which is itself a Huffman encoding of the lengths of all the code strings (in ascending order by source values).
- Page 321 The implementation was written so as to conform with Netscapes SSL. This library is free for commercial and non-commercial use as long as the following conditions are aheared to.The following conditions apply to all code found in this distribution, be it the RC4, ttRSA, lhash, DES, etc., code; not just the SSL code.
- Page 322 “This product includes software written by Tim Hudson (tjh@cryptsoft.com)” THIS SOFTWARE IS PROVIDED BY ERIC YOUNG “AS IS” AND ANY EXPRESS OR IMPLIED WARRANTIES, INCLUDING, BUT NOT LIMITED TO, THE IMPLIED WARRANTIES OF MERCHANTABILITY AND FITNESS FOR A PARTICULAR PURPOSE ARE DISCLAIMED. IN NO EVENT SHALL THE AUTHOR OR CONTRIBUTORS BE LIABLE FOR ANY DIRECT, INDIRECT, INCIDENTAL, SPECIAL, EXEMPLARY, OR CONSEQUENTIAL DAMAGES (INCLUDING, BUT NOT LIMITED TO, PROCUREMENT OF SUBSTITUTE GOODS OR SERVICES;...
- Page 323 email: m-mat @ math.sci.hiroshima-u.ac.jp (remove space) jsmn Copyright (c) 2010 Serge A. Zaitsev Permission is hereby granted, free of charge, to any person obtaining a copy of this software and associated documentation files (the “Software”), to deal in the Software without restriction, including without limitation the rights to use, copy, modify, merge, publish, distribute, sublicense, and/or sell copies of the Software, and to permit persons to whom the Software is furnished to do so, subject to the following conditions: The above copyright notice and this permission notice shall be included in all copies or substantial portions of the...
- Page 324 HOWEVER CAUSED AND ON ANY THEORY OF LIABILITY, WHETHER IN CONTRACT, STRICT LIABILITY, OR TORT (INCLUDING NEGLIGENCE OR OTHERWISE) ARISING IN ANY WAY OUT OF THE USE OF THIS SOFTWARE, EVEN IF ADVISED OF THE POSSIBILITY OF SUCH DAMAGE. 4-686-529-11(5) Copyright 2017 Sony Corporation...
-
Page 325: How To Connect Speaker Cables
Be sure not remove too much of the speaker cable sleeves, so as to prevent the wires of the speaker cables from touching each other. Connect speaker cables properly with the polarities (+/–) matched between the receiver and the speakers. Improper connection may result in fatal damage to the receiver. 4-686-529-11(5) Copyright 2017 Sony Corporation... - Page 326 Some letters that can be displayed on the TV screen cannot be displayed on the display panel. Hint You can also select [Name Input] from [Tuner Setup] in the [System Setup] menu instead of performing steps 1 to 4. 4-686-529-11(5) Copyright 2017 Sony Corporation...
- Page 327 Calibration type [2.3. CALIBRATION TYPE] (*1) FULL FLAT, ENGINEER, FRONT REF., OFF Speaker pattern [2.4. SPEAKER PATTERN] 7.1.2 (SBD) to 2.0 (112 patterns) (for STR-ZA3100ES/STR-ZA2100ES) 7.1 to 2.0 (40 patterns) (for STR-ZA1100ES) Surround back speaker assign [2.6. SB SPEAKER ASSIGN] (*2) ZONE2, BI-AMP, FRONT B, OFF Size [2.7.
- Page 328 IMAX adjustment [4.13. IMAX ADJUSTMENT] [4.13.1. HPF/CROSSOVER] For the STR-ZA3100ES/ZA2100ES: FRONT, CENTER, SURROUND, HEIGHT1 or HEIGHT2 / 40 Hz - 200 Hz (10 Hz interval) for each speaker For the STR-ZA1100ES: FRONT, CENTER, SURROUND or HEIGHT / 40 Hz - 200 Hz (10 Hz interval) for each speaker [4.13.2.
- Page 329 HDMI OUTB Mode [5.9. HDMI OUTB MODE] MAIN, ZONE2 Priority [5.10. PRIORITY] MAIN&ZONE2, MAIN ONLY Fast View [5.11. FAST VIEW] AUTO, OFF HDMI Signal Format [5.12. HDMI SIGNAL FORMAT] STANDARD, ENHANCED 6. Zone Setup [6. ZONE SETUP] Zone Controls [6.1.ZONE CONTROLS] Zone2 Power [6.1.1 ZONE2 POWER] ON, OFF Zone2 Input [6.1.2 ZONE2 INPUT]...
- Page 330 When [Setup] - [System Setup] - [Volume Display] is set to [Relative]. When [Setup] - [System Setup] - [Volume Display] is set to [Absolute]. x.xxx represents the version number. for STR-ZA3100ES for STR-ZA2100ES/STR-ZA1100ES for STR-ZA3100ES/STR-ZA2100ES for STR-ZA1100ES 4-686-529-11(5) Copyright 2017 Sony Corporation...
- Page 331 Monaural: The FM station is received in monaural. Note You can set FM mode in the options menu if the frequency indication is selected in step 3. Hint You can also set FM mode with [Tuner Setup] in the [System Setup] menu. 4-686-529-11(5) Copyright 2017 Sony Corporation...
- Page 332 If you connect a subwoofer with an auto standby function, set it to off (deactivated). For details, refer to the operating instructions of the subwoofer. Note Depending on the characteristics of the subwoofer you are using, the setup distance value may be different from the actual position. 4-686-529-11(5) Copyright 2017 Sony Corporation...
- Page 333 Presetting the gain level of the FM/AM tuner You can preset the gain level of the FM/AM tuner. Select [Setup] - [System Setup] from the home menu. Select [Tuner Setup]. Select [Preset Gain Level]. Press to adjust the gain level. 4-686-529-11(5) Copyright 2017 Sony Corporation...