
Related Manuals for Brother Stampcreator PRO SC2000USB


Summary of Contents for Brother Stampcreator PRO SC2000USB
- Page 1 SC-2000USB SC-2000USB Quick Reference *Be sure to read and understand this guide before using the machine. We recommend that you keep this guide nearby for future reference. D00FSW001...
- Page 2 Quick Reference...
- Page 3 Thank you for purchasing the SC-2000USB! With your new Brother stamp printer, you can print personalised stamps for any purpose. Simply insert a stamp cassette into the SC-2000USB, design your stamp with the enclosed P-touch Editor software or Stampcreator Express software, and then print it out. Your customised stamp prints out in seconds. Stamps are available in various sizes.
-
Page 4: Table Of Contents
Table of Contents General Information ..........................2 Safety Precautions ..........................3 General Precautions ..........................5 System Requirements........................... 5 Unpacking ............................6 Changing the LCD display language ....................8 Connecting the Interface and Power Supply Cables ................9 Installing the Software ........................10 P-touch Editor, Stampcreator Express and printer driver .............. -
Page 5: General Information
General Information Compilation and Publication Notice Under the supervision of Brother Industries, Ltd., this manual has been compiled and published, covering the latest product’s descriptions and specifications. The contents of this manual and the specifications of this product are subject to change without notice. -
Page 6: Safety Precautions
Safety Precautions Read all of these instructions and save them for later reference. Follow all warnings and instructions marked on the product. Tells you what to do to avoid the risk of injury. Warning Tells you about procedures you must follow to prevent damage to the printer. Caution The symbols used in this manual are as follows: Action NOT allowed. - Page 7 Warning Follow these guidelines to avoid fire, electric shock, or other damage. ■ Power Cord Use only the authorised power source (220-240 V Do not cut, damage, alter or place heavy objects on AC) for the printer. the power cord. Use only the power cord included with the printer.
-
Page 8: General Precautions
General Precautions • Be sure the machine is always placed on a level, stable surface. • Lift the machine by grabbing the specified areas. • Be sure to meet the power requirements specified for this machine. • Keep the machine and its accessories out of direct sunlight and extremely dusty places. •... -
Page 9: Unpacking
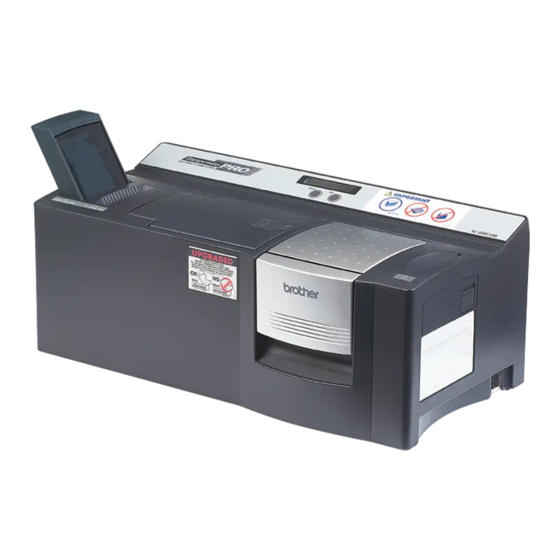
Unpacking SC-2000USB Mode and Set buttons Xenon lamp unit release button Draft tray slot Stamp compartment LCD display cover Exit slot Xenon lamp unit ID label slot Ink ribbon Power switch compartment cover Power supply cord (for connecting the SC-2000USB to the AC outlet) ☞... - Page 10 CD-ROM. temperatures. Brother Industries, Ltd. and its suppliers possess all rights and copyrights to this software (including, but not limited to, the programming, images, clip art, templates, and text incorporated into the software), the text in the enclosed manuals, and duplicates of the software. This software, either in part or in whole, may not be duplicated, modified,...
-
Page 11: Changing The Lcd Display Language
Changing the LCD display language a While holding down the [Set] button, turn on the SC-2000USB. When “READY” appears in the display, release the [Set] button. b Press the [MODE] button three times until “LANGUAGE” appears. c Press the [Set] button once. d Press the [MODE] button until the name of the desired language ENGLISH appears. -
Page 12: Connecting The Interface And Power Supply Cables
Connecting the Interface and Power Supply Cables After connecting the interface and power supply cables to the SC-2000USB, it can be used to create stamps from any layout that you design in the P-touch Editor software or Stampcreator Express software installed on your computer. a Be sure both the SC-2000USB and the computer are turned off. -
Page 13: Installing The Software
Installing the Software P-touch Editor, Stampcreator Express and printer driver Before stamps can be engraved on the SC-2000USB, the stamp-editing tool P-touch Editor software, Stampcreator Express software and the SC-2000USB printer driver must be installed. Follow the procedure described below to install the stamp-editing tool P-touch Editor software onto the computer. ☞... - Page 14 f In the Add shortcut dialog box, specify where to add shortcuts for P-touch Editor, and then click the Next button. g If you are satisfied with the settings that appear in the Start Copying Files dialog, click the Next button to begin copying files. h When the Driver Setup dialog box appears, select “USB cable”...
- Page 15 ® ® For Windows Vista and Windows 7 users k Click the Finish button to exit the wizard. This completes the installation of P-touch Editor, Stampcreator Express and the printer driver for USB connection. Restart your computer now. ® For Windows XP users k The Found New Hardware Wizard starts up.
- Page 16 Restart your computer now. For a serial connection: p A Driver Setup dialog box appears, allowing you to select whether to install or uninstall the printer driver. Check that “Brother SC-2000USB” is selected for installation, select “Install”, and then click the Next button.
-
Page 17: Using The Software
Using the Software P-touch Editor software a Use P-touch Editor to create a stamp design. For details on using the P-touch Editor software to create a stamp design, refer to the P-touch Editor Help, which can be opened by selecting “How To” from the “Help” menu in the P-touch Editor software. - Page 18 Click in the Print Properties to display the Printer Setup dialog box. Check that “Brother SC-2000USB” is selected below “Application Matching Printer”, and then click the OK button. Click in the Print Properties. The Print dialog box appears.
-
Page 19: Stampcreator Express Software
Stampcreator Express software a Start up Stampcreator Express by following the procedure described below. (a) Click the start button in the taskbar to display the Start menu. (b) Select “All Programs”. (c) Select “Stampcreator Express”. (d) Click “Stampcreator Express”. b After Stampcreator Express is started, the Style Selection window appears. - Page 20 In this example, select text line 1, and then type in “Brother Industries, Ltd.” Change text lines 2 and 3 as you wish. If the entered text exceeds the length of the original text, the text size is automatically adjusted so that the text fits within the text field.
- Page 21 i Below “Print ID Label or Make Stamp?” in the window, click the ID Label button. When the Print ID Label dialog box appears, check the stamp size, insert the appropriate ID label into the ID label slot of SC-2000USB, and then click the OK button.
-
Page 22: Adding New Styles To The Stampcreator Express Software
Adding new styles to the Stampcreator Express software A style in the Stampcreator Express software is a type of template. A template is created from the same type of file designed using the P-touch Editor software. For details on using the P-touch Editor software, refer to the User’s Guide, which can be opened by selecting “User’s Guide”... - Page 23 Save the stamp design as a template file in the “.lbl” file format. Select “Save As…” from the “File” menu. Save the template file in the following folder. <Windows_drive>:\Program Files\Brother\SE42\Template\SC2000\ In this example, make a new folder titled “09_Original” in the “SC2000USB” folder and name the template file “901”.
-
Page 24: Using The Sc-2000Usb
Using the SC-2000USB After you have designed a stamp layout using the P-touch Editor software or Stampcreator Express software, you can engrave it into a stamp. Installing the ink ribbon cassette a Press down on the ink ribbon compartment cover button to open the cover. -
Page 25: Engraving A Stamp
f Fully insert the draft tray straight into the draft tray slot. Draft tray ☞ Be careful not to pinch your fingers while inserting the draft tray. To remove the draft tray, grab its outer case, then pull out the entire Draft tray slot draft tray. - Page 26 f Remove the cap from a stamp, insert the stamp between the doors so that the teeth in the centre of the doors fit into the notches in the centre of the stamp and so that the stamp surface lies flat on the printed draft sheet, and then slowly close the doors.
-
Page 27: Printing An Id Label For The Engraved Stamp
Printing an ID label for the engraved stamp After we have engraved the stamp, we can print the same layout on a label which we can attach to our stamp to easily identify it. In order to see how the stamp will appear when it is engraved, the ID label can be printed before engraving the stamp. -
Page 28: Assembling The Stamp
Assembling the Stamp a With the cap on the stamp, place it face down. Grip ☞ If the packing board has been removed, put it back into the stamp. b Place the skirt over the top of the stamp and push it down firmly. c Place the grip over the skirt and push it down firmly so that the fasteners hook onto the tabs and the ink bag inside the stamp breaks. -
Page 29: Refilling The Stamp Ink
Refilling the Stamp Ink If the stamp is faint or incomplete, use the ink bottle (sold separately) to refill the ink. a Remove the grip from the stamp. Grip b Use the ink bottle to add five drops of ink to each refill hole in the stamp. -
Page 30: Maintenance
Maintenance Cleaning the draft sheet rollers The draft sheet rollers should be cleaned after 50 draft sheets (1 pack) have been printed. a Peel off the pre-cut section from the side of the cleaning sheet marked SIDE A. ☞ Never reuse a cleaning sheet. Do not use a cleaning sheet that has been folded or damaged or has had any part of the paper other than the pre-cut section removed. -
Page 31: Cleaning The Print Head
Cleaning the print head Print head cover a Flip off the SC-2000USB’s power switch. b Open the ink ribbon compartment cover, then pull back the print head cover. c Use the enclosed print head cleaning pen to gently wipe back and forth along the print head. -
Page 32: Troubleshooting
Troubleshooting PROBLEM SOLUTION • Nothing happens after the OK button is clicked in the • Delete the print job and after turning the SC-2000USB Print dialog box. off, then on again, try printing again. • The printed characters are blurred. •... - Page 33 PROBLEM SOLUTION • The xenon lamp flashed, but the desired stamp could • Check that the cap was removed from the stamp not be engraved. before it was inserted. • Check that there is no dust on the protective film covering the surface of the stamp.
-
Page 34: Removing A Jammed Draft Sheet Or Id Label Sheet
Removing a jammed draft sheet or ID label sheet For a jam at the draft tray slot (“CHECK TRAY !” appears on the display): a Grab the outer case of the draft tray, then pull out the tray. b Pull out the jammed draft sheet. ☞... -
Page 35: Error Message List
Error Message List MESSAGE SOLUTION CLOSE COVER ! • Close the ink ribbon compartment cover. CHECK RIBBON ! • Install the ink ribbon cassette. • Replace the ink ribbon cassette. INSTALL Xe UNIT • Install the xenon lamp unit. REPLACE Xe UNIT •...