
Related Manuals for Philips HTS6120/98


Summary of Contents for Philips HTS6120/98
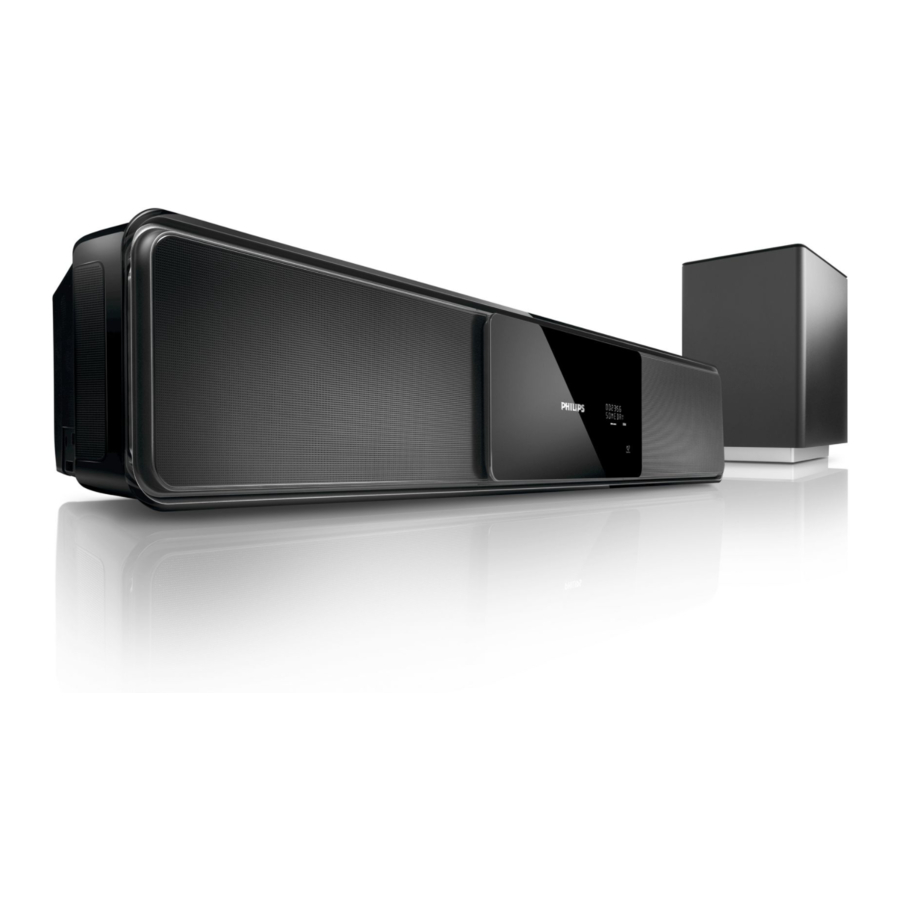
- Page 1 Register your product and get support at www.philips.com/welcome User manual MS-MY Manual pengguna HTS6120...
- Page 2 O: Indicates that this toxic or hazardous substance contained in all of the homogeneous materials for this part is below the limit requirement in SJ/T11363 – 2006. X: Indicates that this toxic or hazardous substance contained in at least one of the homogeneous materials used for this part is above the limit requirement in SJ/T11363 - 2006.
-
Page 3: Table Of Contents
Mount the Home Theater System 4 Get started Insert the remote control batteries Find the correct viewing channel Start Ambisound setup Turn on Progressive Scan Use Philips EasyLink Select a play source 5 Play Play a disc Play video Play music... -
Page 4: Important
1 Important Safety and important notice Warning • Risk of overheating! Never install the product in a conÀ ned space. Always leave a space of at least 4 inches around the product for ventilation. Ensure curtains or other objects never cover the ventilation slots on the product. -
Page 5: Trademark Notice
Trademark notice Manufactured under license from Dolby Laboratories. Dolby, Pro Logic and the double-D symbol are trademarks of Dolby Laboratories. DivX, DivX Ultra CertiÀ ed, and associated logos are trademarks of DivX, Inc. and are used under license. OfÀ cial DivX® Ultra CertiÀ ed product. Plays all versions of DivX ®... -
Page 6: Your Home Theater System
2 Your Home Theater System Congratulations on your purchase, and welcome to Philips! To fully beneÀ t from the support that Philips offers, register your product at www.philips.com/welcome. Feature highlights Philips EasyLink Your Home Theater System supports Philips EasyLink, which uses the HDMI CEC (Consumer Electronics Control) protocol. -
Page 7: Product Overview
Product overview Main unit ( Standby-On ) • Turns on the Home Theater System or switches to standby mode. b SOURCE • Selects a media to play or listen to audio from the connected device. c VOL +/- • Increases or decreases volume. STOP •... - Page 8 c Source buttons • DISC : Switches to the disc source. • USB : Switches to the USB source. • RADIO : Switches to FM band. • AUDIO SOURCE : Selects an audio input source. • iPod DOCK : Switches to the iPod in the dock.
-
Page 9: Connect
Different types of connectors may be used to connect this product to your TV, depending on availability and your needs. A comprehensive interactive guide to help you connect your product is available at www.connectivityguide. philips.com. Place the Home Theater System • Place the Home Theater System where it cannot be pushed, pulled over or knocked down. -
Page 10: Connect Video Cables
Home Theater System too close to any radiation devices. • You may purchase a separate table top stand that can support both your Philips Plasma/LCD TV and this Home Theater System from the nearest Philips retailers. Connect video cables Connect this Home Theater System to TV to view disc play. - Page 11 • If the TV has a DVI connection only, connect via a HDMI/DVI adaptor. Connect an audio cable for sound output. • You can optimize the video output. (see ‘Adjust settings’ > ‘Video setup’ > [HDMI Setup] ). • This type of connection provides the best picture quality.
-
Page 12: Connect Subwoofer
Connect subwoofer Unwind the subwoofer’s interconnect cable at TO MAIN UNIT . Connect the white end of the interconnect cable to the LOUDSPEAKERS jack on this Home Theater System. Connect the gray end of the interconnect cable to the TO SUBWOOFER jack on this Home Theater System. -
Page 13: Connect Audio Cables/Other Devices
Connect audio cables/other devices Route the audio from other devices to this Home Theater System to enjoy audio play with multi-channel surround capabilities. Connect audio from TV (also used for EasyLink control) Connect the audio cables (not supplied) to the AUDIO IN-AUX1 jacks on the Home Theater System and the AUDIO output jacks on the TV. - Page 14 Connect to coaxial jack Connect a coaxial cable (not supplied) to the COAXIAL DIGITAL-IN jack on the subwoofer and the COAXIAL/DIGITAL output jack on the device. Note • To listen to the audio output from this connection, press AUDIO SOURCE repeatedly until ‘COAXIAL INPUT’...
-
Page 15: Connect Power Cord
Connect USB device Connect the USB device to on this Home Theater System. Note • This Home Theater System can only play/view MP3, WMA, DivX (Ultra) or JPEG À les that are stored on such devices. • Press USB to access the content and play the À... -
Page 16: Mount The Home Theater System
Mount the Home Theater System Caution • Risk of personal injury and damage to the product. Allow only qualiÀ ed persons to mount the product. Ensure all the required cables are connected to this Home Theater System and close the rear cover. Attach the supplied knobs to the rear of this Home Theater System. - Page 17 Secure the bracket onto the wall with screws (not supplied). Hook this Home Theater System À rmly onto the mounted bracket. Slide the knobs through the key holes to lock into position.
-
Page 18: Get Started
4 Get started Insert the remote control batteries Slide the battery cover off the back of the remote control. Insert the 2 supplied batteries (AAA). Be sure the + and - ends of the batteries line up with the markings inside the case. Slide the cover back into position. -
Page 19: Find The Correct Viewing Channel
• Go to the lowest channel on your TV, then press the Channel Down button until you see the Philips screen. • Press SOURCE button repeatedly on the remote control of your TV. - Page 20 Please select the type of walls that surround your room: Hard (Concrete, wood) Soft (Curtains, open space) Back Change Select the condition of the room, then press . » [Room Placement] screen is displayed. Select the Sound Bar system placement position in your room: Middle of room Corner of room...
-
Page 21: Turn On Progressive Scan
Home Theater System and the TV. Use Philips EasyLink Your Home Theater System supports Philips EasyLink, which uses the HDMI CEC (Consumer Electronics Control) protocol. EasyLink-compliant devices that are connected through HDMI connectors can be controlled by a single remote control. - Page 22 One-touch standby When you connect your Home Theater System to devices that support standby, you can use your Home Theater System remote control to put your Home Theater System and all connected HDMI devices in standby mode. You can perform one-touch standby using the remote control from any of the connected HDMI devices.
-
Page 23: Select A Play Source
Select a play source On the main unit • Press SOURCE button repeatedly to select: DISC > iPOD > RADIO FM > COAXIAL INPUT > OPTICAL INPUT > AUX 1 INPUT > AUX2 INPUT > AUX3 INPUT > MP3 LINK > USB > DISC ... -
Page 24: Play
5 Play Play a disc Caution • Never place any objects other than discs into the disc compartment. • Never touch the disc optical lens inside the disc compartment. Press to open the disc compartment. Insert a disc with its label facing up. •... - Page 25 Change video play Play a title. Use the remote control to change the video play. Button Action AUDIO Selects an audio language or SYNC channel on a disc. SUBTITLE Selects the subtitle language on a disc. REPEAT Selects or turns off repeat or shufÁ...
-
Page 26: Sync Audio Output With Video Play
Sync audio output with video play If the video play is slower than the audio output (sound does not match with the pictures), you can delay the audio output to match the video. Press and hold AUDIO SYNC until ‘AUDIO SYNC’ is displayed. Within À... -
Page 27: Play Music
Play DivX® video DivX video is a digital media format that retains high quality despite a high rate of compression. You can enjoy DivX video on this DivX® CertiÀ ed Home Theater System. Insert a disc or USB that contains the DivX videos. -
Page 28: Play Photo
Play MP3/WMA music MP3/WMA is a type of highly compressed audio À le (À les with .mp3 or .wma extensions). Insert a disc or USB that contains the MP3/WMA music. Press DISC or USB . » A contents menu is displayed. Select a folder, then press OK . - Page 29 Note • You may require longer time to display the disc content on the TV due to the large number of songs/photos compiled onto one disc. • If the JPEG photo is not recorded with an ‘exif ’ type À le, the actual thumbnail picture is not be shown on the display.
-
Page 30: Play From Usb Device
Play from USB device This Home Theater System plays/views MP3, WMA, DivX (Ultra) or JPEG À les on the following USB devices: • digital camera that complies with the PTP standard • Á ash drive • memory card reader • HDD (external power source needed) Connect a USB device to the jack. -
Page 31: Play From Ipod
4th/5th gen Note • Refer to the Philips website for latest updates on the supported iPod range. Prepare the docking station If your iPod cannot À t into the docking station, adjust the ‘support’ as below. -
Page 32: Play From Radio
Button Action VOL +/- Increases or decreases volume. SOUND Selects a predeÀ ned sound effect. AMBISOUND Selects stereo sound output or multi-channel surround output. Skips to the previous or next track. Searches fast-forward (right) or fast-backward (left). Press repeatedly to change the search speed. -
Page 33: Search And Store Radio Stations
Listen to radio Press RADIO . Use the remote control to control the radio. Button Action Selects a preset radio station. Tunes the radio frequency up or down. Press and hold this button to erase the current radio station from the preset list. The preset number for other radio stations remain unchanged. -
Page 34: Adjust Sound
6 Adjust sound Control the volume Press +/- ( VOL +/- ) to increase or decrease the volume. • To mute, press • To restore the volume, press or press VOL + . Adjust Bass/Treble Press TREBLE or BASS . Within 5 seconds, press to set the high (TREBLE) or low (BASS) tone level. -
Page 35: Adjust Settings
7 Adjust settings You can customize various kinds of settings as you prefer. Refer to the following instructions to navigate through the setup menus. Symbol Options [General Setup] [Audio Setup] [Video Setup] [Preferences] Note • If the setup option is grayed out, it means the setting cannot be changed at the current state. - Page 36 You must turn on the HDMI CEC operations on the TV/devices before you can enjoy the EasyLink controls. See the TV/devices manual for details. • Philips does not guarantee 100% interoperability with all HDMI CEC compliant devices. [Disc Lock] Sets play restriction for a speciÀ c discs.
-
Page 37: Audio Setup
• Enter this Home Theater System DivX registration code when you rent or purchase video from www.divx.com/vod. The DivX videos rented or purchased through the DivX® VOD (Video On Demand) service can be played only on the device to which it is registered. -
Page 38: Video Setup
Video setup TV System TV Display Picture Setting HDMI Setup Closed Caption Progressive Press SETUP . » [General Setup] menu is displayed. Press to select [Video Setup] , then press . Select an option, then press OK Select a setting, then press OK . •... -
Page 39: Preferences
Note • This setting is only available if you have set the [TV Display] setting to [16:9 Wide Screen] . • [HDMI Video] – Selects the HDMI video output resolution that is compatible with your TV display capability. Option Description [Auto] Detects and selects the best supported video resolution... - Page 40 Note • If the language you have set is not available on the disc, the disc uses its own default language. • For some discs, the subtitle/audio language can only be changed from the disc menu. • To select the languages that are not listed in the menu, select [Others] .
- Page 41 Theater System. • This information is required when you want to À nd out if a newest software version is available at the Philips website that you may download and install on this Home Theater System. [Default] Resets all the settings of this Home Theater System to factory default, except for [Disc Lock] , [Password] and [Parental] settings.
-
Page 42: Additional Information
OK . Write down the version number, then press SETUP to exit the menu. Go to www.philips.com/support to check the latest software version available for this Home Theater System. If the latest software version is higher than the software version of this Home Theater System, download it and store onto a CD-R or USB Á... -
Page 43: Specià Cations
9 Specifications Note • SpeciÀ cation and design are subject to change without notice Playback media • DVD-Video, DVD+R/+RW, DVD-R/- RW, DVD+R DL, CD-R/CD-RW, Audio CD, Video CD/SVCD, Picture CD, MP3- CD, WMA-CD, DivX-CD, USB Á ash drive AmpliÀ er •... - Page 44 Power (Subwoofer) • Power supply: 110-127V/220-240V;~50- 60Hz switchable • Power consumption: 150 W • Standby power consumption: • Normal: <3 W • Low Power: < 0.3 W • System: Bass ReÁ ex System • Impedance: 4 ohm • Speaker drivers: 165 mm (6.5”) woofer •...
-
Page 45: Troubleshooting
If the problem remains unsolved, register your product and get support at www.philips.com/welcome. If you contact Philips, you will be asked for the model and serial number of your Home Theater System. The model number and serial number are on the back or bottom of your Home Theater System. - Page 46 Play DivX video À les cannot be played. • Ensure that the DivX À le is encoded according to the ‘Home Theater ProÀ le’ with the DivX encoder. • Ensure that the DivX video À le is complete. The aspect ratio of the screen is not aligned with the TV display setting.
-
Page 47: Glossary
11 Glossary Aspect ratio Aspect ratio refers to the length to height ratio of TV screens. The ratio of a standard TV is 4:3, while the ratio of a high-deÀ nition or wide TV is 16:9. The letter box allows you to enjoy a picture with a wider perspective on a standard 4:3 screen. - Page 48 A À le format with a sound data compression system. MP3 is the abbreviation of Motion Picture Experts Group 1 (or MPEG-1) Audio Layer 3. With the MP3 format, one CD-R or CD-RW can contain about 10 times more data than a regular CD. MPEG Motion Picture Experts Group.
- Page 50 © 2008 Koninklijke Philips Electronics N.V. All rights reserved. Document order number: 000000000000...