
Related Manuals for Philips CEM210/98


Summary of Contents for Philips CEM210/98
- Page 1 Register your product and get support at CEM210 www.philips.com/welcome EN User manual...
-
Page 2: Table Of Contents
Contents 1 Important Safety Notice 2 Your car audio system Introduction What’s in the box Overview of the main unit Overview of the remote control 3 Get started Install the car audio Install remote control battery Turn on Set clock 4 Listen to radio Tune to a radio station Store radio stations in memory... -
Page 3: Important
1 Important Safety Read and understand all instructions before you use your apparatus. If damage is caused by failure to follow instructions, the warranty does not apply. This apparatus is designed for negative ground (earth) 12 V DC operation only. To ensure safe driving, adjust the volume to a safe and comfortable level. - Page 4 Philips Consumer Lifestyle may void the user’s authority to operate the equipment. 2009 © Koninklijke Philips Electronics N.V. All rights reserved.
-
Page 5: Your Car Audio System
2 Your car audio system Congratulations on your purchase, and support that Philips offers, register your product at www.philips.com/welcome. Introduction With the in-car audio system, you can enjoy your drive while you listen to: FM or AM (MW) radio Audio from CD or MP3 disc... -
Page 6: Overview Of The Main Unit
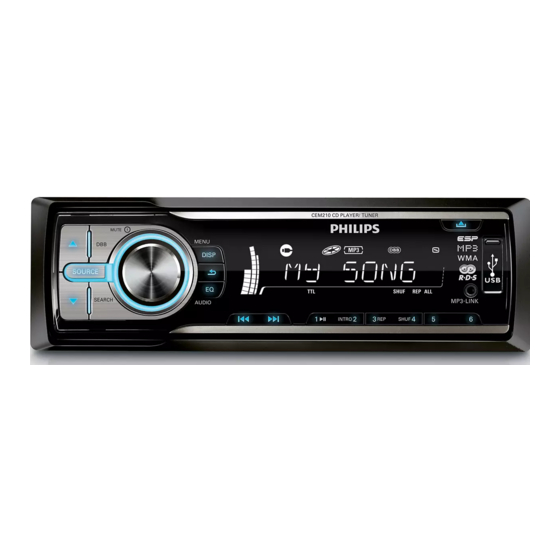
Overview of the main unit Select tuner band. Select MP3/WMA folder. Scroll up or down menu. b DBB Turn on or off Dynamic Bass Boost (DBB) sound. c SOURCE Select audio source. /MUTE Turn the unit on or off. Adjust volume. Enter characters for search. -
Page 7: Overview Of The Remote Control
i USB socket j External device socket Select preset station no. 6 Select preset station no. 5 m SHUF, 4 Select preset station no. 4 n 3, REP Set repeat play mode. Select preset station no. 3 o INTRO, 2 Turn intro play on or off. - Page 8 g DISP Display radio frequency and clock. Display track, elapsed time, artist, Select preset station no. 6. Select preset station no. 5. j SHUF, 4 Select preset station no. 4. k 1, Start play. Pause or resume play. Select preset station no. 1. l INTRO, 2 Turn intro play on or off.
-
Page 9: Get Started
Always follow the instructions in this chapter in sequence. If you contact Philips, you will be asked for the model and serial number of your apparatus. The model number and serial number are on the bottom of your apparatus. Write the numbers here: Model No. - Page 10 Connection: for cars with ISO connectors Caution Ensure that all loose leads are insulated with electrical tape. Pull out the ISO connectors from car dashboard and connect them to the bigger end of the supplied standard connector. Connect the other end of the supplied standard connector to the unit.
- Page 11 Connector Connect to ANTENNA Antenna REAR LINE Rear right OUT R speaker REAR LINE Rear left speaker OUT L Cut off the bigger end of the supplied standard connector. Check the car’s wiring carefully and connect them to the supplied standard connector.
- Page 12 Remove the two screws on the top of the unit. Remove the mounting sleeve with the supplied disassembly tools. Ensure that car dashboard opening is within these measurements: Install the sleeve into the dashboard and Note but by supplied screws. Place the supplied rubber cushion over the end of the mounting bolt.
-
Page 13: Install Remote Control Battery
Slide the unit into the dashboard until you hear a click sound. Reconnect the negative terminal of the car battery. Attach the front panel Attach the trim plate. Insert the right side of the panel in the chassis until it is correctly engaged. Press the left side of the panel and point the left hole at the left pillar. -
Page 14: Turn On
Turn on Press to turn on the unit. To turn off the unit, press seconds. Set clock Press MENU/DISP for 3 seconds. Press repeatedly until the currently time is displayed. Turn clockwise to set hour. Press Turn anti-clockwise to set minute. Press View clock Press MENU/DISP repeatedly until the... -
Page 15: Listen To Radio
4 Listen to radio Tune to a radio station Press SOURCE repeatedly to select Tuner. Press to select band: [FM1], [FM2], [FM3], [AM1], or [AM2] . Press to tune to a radio station manually. » The radio station is broadcast. »... -
Page 16: Select Program Type
Press MENU/DISP for 3 seconds. Turn to select [RDS ON]: » The RDS function is turned on. Select program type Before tuning to RDS stations, you can select program type and let the unit search only for programs of the selected category. Press SEARCH until [PTY SCH] is displayed, then press Turn... - Page 17 Turn to select a setting. announcement during enjoying music, you function. Press MENU/DISP for 3 seconds. Press repeatedly until [TA] is displayed. Turn to select a setting: [TA ON] announcement, the unit switches to the tuner mode (regardless of the current mode) and begins to broadcast the announcement on announcement is over, it returns to the previous mode.
-
Page 18: Play A Disc
5 Play audio files Note Ensure that the disc or device contains playable Play a disc Note You cannot play CDs encoded with copyright protection technologies. You can play commercially available audio CDs and these discs: CD-Recordables (CD-R) CD-Re-writables (CD-RW) MP3 CDs WMA CDs Note... -
Page 19: Control Play
Remove the USB device Press to turn off the unit. Remove the USB device. Control play To select a folder, press To skip to the previous/next track, press To search backward/forward rapidly within the current track, press for 3 seconds. To pause, press 1, To resume play, press 1, Search for an MP3/WMA... -
Page 20: Connect External Sound Source
Connect external sound source Connect the external sound source to MP3 LINK socket with a 3.5 mm cable. Press SOURCE repeatedly until [MP3 LINK] is displayed. Operate the external component (refer to the instructions supplied with the external component). -
Page 21: Adjust Sound
6 Adjust sound Adjust volume Turn clockwise/anticlockwise to increase/decrease volume. Mute You can turn off the sound of your audio. During play, press MUTE . To turn the sound back on, press MUTE again. Turn Dynamic Bass Boost (DBB) on/off Press DBB, the current setting is displayed: »... -
Page 22: Adjust System Settings
7 Adjust system settings Select blackout setting You can set the screen to turn off automatically after the unit is idle for 10 or 20 seconds. Press MENU/DISP for 3 seconds. Turn to select a setting: [BKO 10 S] : Turn off the screen automatically 10 seconds after last operation. -
Page 23: Select Shock-Protect Setting
Note If any special characters are present in the MP3 track name or album name, it may not display correctly on the screen because these characters are not supported. Some WMA is protected by Digital Rights Management (DRM), it cannot be played on the unit. -
Page 24: Additional Information
Buy a fuse that matches the voltage of the damaged fuse. Replace the fuse. Note If the new fuse gets damaged again, there may be an internal malfunction. Consult your Philips dealer. Remove the unit You can remove the unit from the dashboard. Detach the front panel. -
Page 25: Product Information
9 Product information Note Product information is subject to change without prior notice. Power supply 12 V DC (11 V - 16 V), negative ground Fuse 15 A Suitable speaker 4 - 8 impedance Maximum power 45 W x 4 channels output Continuous power 24 W x 4 RMS (4... -
Page 26: Troubleshooting
If you encounter problems when using this apparatus, check the following points before requesting service. If the problem remains unsolved, go to the Philips web site (www. philips.com/support). When you contact Philips, ensure that your apparatus is nearby and the model number and serial number are available. - Page 27 11 Glossary system. MP3 is the abbreviation of Motion Picture Experts Group 1 (or MPEG-1) Audio Layer 3. With the MP3 format, one CD-R or CD-RW can contain about 10 times more data than a regular CD. WMA (Windows Media Audio) An audio format owned by Microsoft, is a part of Microsoft Windows Media technology.
- Page 28 © 2009 Koninklijke Philips Electronics N.V. All rights reserved. Document order number: CEM210_98_UM_V1.0...