
Related Manuals for Philips SPD3200CC/05


Summary of Contents for Philips SPD3200CC/05
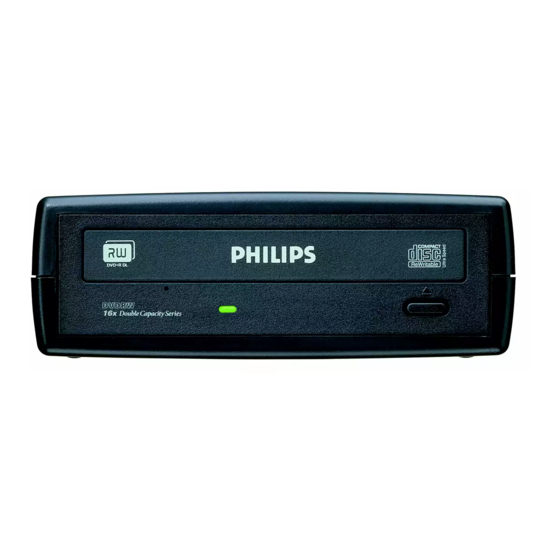
- Page 1 User Manual Benutzerhandbuch Manuel d’instructions Manuale utente Gebruikershandleiding SPD3200CC Manual del usuario Manuel do Utilizador Kurulum Kılavuzu Instrukcja montażu Använderhandbok...
-
Page 2: Table Of Contents
Contents How to connect the SPD3200CC to my computer? How to disconnect the SPD3200CC without shutting down the computer? How to print a label on a disc? How to capture video from a digital DV-camcorder? How to make a video disc from video files which are on the hard disk or a disc? How to copy a disc? How to make a Data disc? - Page 3 Índice ¿Cómo conectar SPD3200CC al ordenador? ¿Cómo desconectar SPD3200CC sin apagar el ordenador? ¿Cómo imprimir una etiqueta en un disco? ¿Cómo capturar secuencias de vídeo de una videocámara digital DV? ¿Cómo crear un disco de vídeo a partir de archivos de vídeo en el disco duro u otro disco? ¿Cómo copiar un disco? ¿Cómo crear un disco de datos?
-
Page 5: How To Connect The Spd3200Cc To My Computer
How to connect the Wie verbindet man den SPD3200CC mit einen Computer? Raccordement du SPD3200CC à mon ordinateur Come collegare il SPD3200CC al computer? Hoe sluit ik de SPD3200CC op mijn computer aan? The next pages show how to connect your new SPD3200CC to a computer. - Page 6 La confezione include una periferica SPD3200CC ed i seguenti cavi: A: Periferica SPD3200CC. B: Alimentatore (2 componenti). C: Cavo USB ad alta velocità. De retailverpakking van de SPD3200CC bevat de volgende onderdelen: A: SPD3200CC-eenheid. B: Voedingseenheid (2 onderdelen). C: HiSpeed USB-kabel. Au dos se trouvent les connecteurs requis pour brancher votre SPD3200CC à...
- Page 7 Connect the power cables together and connect them to the SPD3200CC and a power outlet. Verbinden Sie die Stromversorgungskabel miteinander und mit dem SPD3200CC und einer Steckdose. Raccordez les câbles d’alimentation l’un à l’autre puis branchez-les à l’SPD3200CC et à une prise secteur.
- Page 8 Anschluss. Wenn eine Verbindung mit dem LowSpeed USB-Anschluss (oder USB 1.x) hergestellt wird, sind die Geschwindigkeiten begrenzt (4 fach Schreiben und 6fach Lesen von CD, 0,7 fach Lesen von DVD) und ist es nicht möglich, auf DVD zu schreiben oder Videos zu sehen. Repérez le connecteur USB haut débit de votre PC.
- Page 9 Identify your Operating System by right clicking on "My Computer" and choosing "Properties". When you are using Windows 98 Second Edition, please go to step 11, otherwise continue with step 7. Identifizieren Sie Ihr Betriebssystem, indem Sie mit der rechten Maustaste auf "Arbeitsplatz" klicken und "Eigenschaften"...
- Page 10 Windows XP emetterà un avviso alla connessione dell'SPD3200CC ad una connessione USB 1 lenta. Verificate nuovamente il punto 5. Questa procedura è valida solo per Windows XP. Windows XP waarschuwt als u de SPD3200CC op een trage USB 1-connector aansluit. Controleer via stap 5 of u de juiste connector gebruikt.
- Page 11 Insert the Nero Disc in the SPD3200CC. Go to step 15! Legen Sie die Nero-CD in das SPD3200CC- Laufwerk ein. Fahren Sie mit Schritt 15 fort! Insérez le disque Nero dans l’SPD3200CC. Passez à l'étape 15. Inserite il disco di Nero nell'SPD3200CC. Procedete al punto 15! Leg de Nero-CD in de SPD3200CC.
- Page 12 Windows 98 Second Edition only! Wait until this screen pops up. Nur Windows 98 Second Edition! Warten Sie, bis diese Anzeige erscheint. Windows 98 Deuxième Édition uniquement ! Attendez que cet écran apparaisse. Solo per Windows 98 Second Edition! Attendete la comparsa di questa finestra. Alleen voor Windows 98 Tweede Edition! Wacht tot het volgende scherm verschijnt.
- Page 13 A. Fate clic su "Avanti" in "Saranno cercati i nuovi driver…:". B. Selezionate "Ricercare un driver migliore…". C. Selezionate "Specificare un percorso". D. Selezionate la cartella dei driver "Philips drivers" sul disco Nero e fate clic su Avanti. E. I driver verranno installati. F. Procedete al punto 15.
- Page 14 Pour des mises à jour : www.philips.com/storageupdates Terminata l'installazione del software, è necessario riavviare il computer. Congratulazioni. La periferica Philips è ora pronta per l'uso. I seguenti capitoli di questa guida contengono informazioni sull'uso della periferica e sul software necessario per le varie attività...
-
Page 15: How To Disconnect The Spd3200Cc Without Shutting Down The Computer
How to disconnect the down the computer? Wie kann man die Verbindung zum SPD3200CC trennen, ohne den Computer herunterzufahren? Comment débrancher l’SPD3200CC sans arrêter l’ordinateur? Come si disconnette l'SPD3200CC senza spegnere il computer? Hoe ontkoppel ik de SPD3200CC zonder de computer uit te zetten? The next pages show how to disconnect your new SPD3200CC to a computer. - Page 16 To disconnect the SPD3200CC without shutting down your computer, click on this symbol. Um die Verbindung zum SPD3200CC zu trennen, ohne den Computer herunterzufahren, klicken Sie auf dieses Symbol. Pour déconnecter l’SPD3200CC sans arrêter l’ordinateur, cliquez sur cette icône. Per disconnettere l'SPD3200CC senza spegnere il computer, fate clic su questo simbolo.
-
Page 17: How To Print A Label On A Disc
How to print a label Wie druckt man ein Disc-Label? Comment imprimer une étiquette sur le disque ? Come si stampa l'etichetta del disco? Hoe druk ik een label af op een disc? This manual will show you how to print a label on a disc using the LightScribe™... - Page 18 Start "Nero StartSmart" from the desktop. Starten Sie "Nero StartSmart" von Ihrer Oberfläche aus. Démarrez "Nero StartSmart" depuis le bureau de Windows. Aprite "Nero StartSmart" dal desktop. Start vanaf het bureaublad het programma "Nero StartSmart". Choose "Extra" and "Print LightScribe Label". Wählen Sie "Extras"...
- Page 19 Choose "Empty document" and "OK". Wählen Sie "Leeres Dokument" und "OK". Choisissez "Document vide" et "OK". Selezionate "Documento vuoto" e "OK". Kies "Leeg document" en "OK". You can import a picture to fill the complete surface of the disc by double clicking on the working area.
- Page 20 Indicate l'area in cui aggiungere il testo. Il programma curverà quest'area per accelerarne la stampa. Schets het gebied waar u de tekst wilt toevoegen. Het programma buigt de tekst om sneller te kunnen afdrukken. Click "OK". Klicken Sie auf "OK". Cliquez sur "OK".
- Page 21 Doubleclick on the text area you just created, insert the text and click "OK". Doppelklicken Sie auf den gerade erstellten Textbereich, geben Sie den Text ein und klicken Sie auf "OK". Double-cliquez sur la zone de texte que vous venez de créer, insérez le texte puis cliquez sur "OK". Fate doppio clic sull'area di test appena create, inserite il testo e fate clic su "OK".
- Page 22 Choose your image and click "Open". Wählen Sie Ihr Bild und klicken Sie auf "Öffnen". Choisissez l’image puis cliquez sur "Ouvrir". Selezionate l'immagine e fate clic su "Apri". Selecteer de afbeelding en klik op "Openen". Position the image so that it looks nice. Positionieren Sie das Bild so, dass das Ganze gut aussieht.
- Page 23 When finished designing your label, choose "File" and "Print LightScribe Label". Wenn Sie mit der Gestaltung des Labels fertig sind, wählen Sie "Datei" und "LightScribe Label drucken". Lorsque vous avez fini de concevoir l’étiquette, choisissez "Fichier" et "Imprimer l’étiquette LightScribe". Al termine, fare, selezionate "File"...
- Page 24 Per garantire sempre una buona qualità di stampa può venire richiesto di effettuare l'aggiornamento dell'applicazione LightScribe. Fate clic su "To download the latest LightScribe Host software click here". Er kan u worden gevraagd of u uw LightScribe-toepassing wilt bijwerken als dit nodig is om een goede afdrukkwaliteit te garanderen.
-
Page 25: How To Capture Video From A Digital Dv-Camcorder
How to capture video from a digital DV-camcorder? Videos von einem digitalen DV-Camcorder aufnehmen Comment acquérir les images vidéo d’une caméra numérique DV ? Come registrare un video da una DV-camcorder digitale Hoe kopieer ik de opnames van een digitale DV-camcorder This manual shows an example on how to capture video from a digital DV-camcorder which is connected via... - Page 26 Start "Nero StartSmart" from the desktop. Starten Sie "Nero StartSmart" von Ihrer Oberfläche aus. Lancez "Nero StartSmart" depuis le bureau. Aprire "Nero StartSmart" dal desktop. Start "Nero StartSmart" vanaf het bureaublad. Connect your camera to the computer and switch it on. Verbinden Sie Ihre Kamera mit dem Computer und schalten Sie sie ein.
- Page 27 Choose your DV-Camcorder and use the buttons to control your DV-camera. Press the "Record" button to record video. Wählen Sie Ihren DV-Camcorder und benutzen Sie die Tasten, um Ihre DV-Kamera zu steuern. Drücken Sie die Taste "Aufnehmen", um Videoinformationen aufzunehmen. Choisissez votre caméscope DV et utilisez les boutons de commande.
- Page 28 Now, go to step 5 of the next chapter (How to make a video disc from files…) to continue. Fahren Sie jetzt mit Schritt 5 des nächsten Kapitels fort (Herstellen einer Video-Disc aus Dateien …) Passez maintenant à l’étape 5 du chapitre suivant (Comment créer un disque vidéo à partir de fichiers…) pour continuer.
-
Page 29: How To Make A Video Disc From Video Files Which Are On The Hard Disk Or A Disc
How to make a video disc from video files which are on the hard disk or a disc? Wie erstellt man eine Video Disk von Video-Dateien,die sich auf der Festplatte Comment créer un disque vidéo à partir de fichiers vidéo enregistrés Come si crea un video disc con file video memorizzati sull'hard disk o su un disco? Hoe maak ik een videodisc met bestanden die nu op de harde schijf This manual will show you how to make... - Page 30 Start "Nero StartSmart" from the desktop. Starten Sie "Nero StartSmart" von Ihrer Oberfläche aus. Lancez "Nero StartSmart" depuis le bureau. Aprire "Nero StartSmart" dal desktop. Start "Nero StartSmart" vanaf het bureaublad. Choose "Photo and video" and "Make DVD-Video". Wählen Sie "Foto und Video" und "Eigenes DVD-Video erstellen".
- Page 31 Choose the files you want to add and click "Open". Wählen Sie die hinzuzufügenden Dateien und klicken Sie auf "Öffnen". Sélectionnez les fichiers à ajouter puis cliquez sur "Ouvrir". Selezionare i file da aggiungere e fare clic su "Apri" Kies de bestanden die u wilt toevoegen en klik op "Openen".
- Page 32 Voer de titel in het veld "Koptekst" in en klik op "Bewerken menu" om de opmaak en achtergrond van het disc-menu te wijzigen. You can also trim the recorded video. When done, choose "Next". Sie können das aufgezeichnete Videomaterial auch schneiden. Wenn Sie fertig sind, wählen Sie "Weiter".
- Page 33 You can change the layout, the background, add titles, … here. When done, choose "Next". Hier können Sie das Layout und den Hintergrund ändern, Titel hinzufügen, usw. Wenn Sie fertig sind, wählen Sie "Weiter". Cet écran vous permet de modifier la disposition, l'arrière-plan, d'ajouter des titres, etc.
- Page 34 Gefeliciteerd! Uw disc is met succes gebrand. Klik op "OK". U kunt het programma nu afsluiten. NeroVision Express is transcoding and burning your disc. NeroVision Express transcodiert und brennt Ihre Disk. NeroVision Express procède au transcodage et à la gravure de votre disque. NeroVision Express è...
-
Page 35: How To Copy A Disc
How to copy a disc? Comment copier un disque? This manual shows an example of how to copy a disc. Questo manuale contiene informazioni su come copiare un dischi. Eine Disk kopieren Come copiare un dischi? Hoe kopieer ik een disc? In diesem Handbuch wird an einem Beispiel gezeigt, wie eine Disk kopiert wird. - Page 36 Start "Nero StartSmart" from the desktop. Starten Sie "Nero StartSmart" von Ihrer Oberfläche aus. Lancez "Nero StartSmart" depuis le bureau. Aprire "Nero StartSmart" dal desktop. Start "Nero StartSmart" vanaf het bureaublad. Choose "Copy and Backup" and click "Copy CD" or "Copy DVD". Wählen Sie "Kopieren und Sichern"...
- Page 37 Choose the destination drive. Wählen Sie das Ziellaufwerk. Choisissez l’unité de destination. Selezionare drive di destinazione. Kies het doelstation. If possible, you may mark the checkbox "Quick copy" if your source drive is fast enough. Otherwise, unmark the checkbox. Click "Burn". Wenn Ihr Quelllaufwerk schnell genug ist, können Sie bei Bedarf das Kästchen "Direktkopie"...
- Page 38 Gefeliciteerd! Uw disc is met succes gebrand. Klik op "OK". U kunt het programma nu afsluiten. "Nero" will now burn your disc. "Nero" wird jetzt Ihre Disk brennen. "Nero" grave alors votre disque. "Nero" inizierà a scrivere sul disco. "Nero" zal nu uw CD branden. Congratulations, your disc has been written successfully.
-
Page 39: How To Make A Data Disc
How to make a Data disc? Comment créer un disque de données ? Come creare un dischi di dati? Hoe maak ik zelf een data-disc? This manual shows you an example of how to make a Data disc. Questo manuale contiene informazioni su come creare un dischi di dati. - Page 40 Start "Nero StartSmart" from the desktop. Starten Sie "Nero StartSmart" von Ihrer Oberfläche aus. Lancez "Nero StartSmart" depuis le bureau. Aprire "Nero StartSmart" dal desktop. Start "Nero StartSmart" vanaf het bureaublad. Choose "Data" and click "Make a data CD" or "Make a data DVD". Wählen Sie "Daten"...
- Page 41 Choose the files to burn and click "Add". Wählen Sie die zu brennenden Dateien und klicken Sie auf "Hinzufügen". Choisissez les fichiers à graver puis cliquez sur "Ajouter". Selezionare i file da scrivere e fare clic su "Aggiungi". Selecteer de bestanden die u op de disc wilt branden en klik op "Toevoegen".
- Page 42 Choose the drive you use for burning and click "Burn". Wählen Sie das Laufwerk zum Brennen der Disk und klicken Sie auf "Brennen". Choisissez le lecteur à utiliser pour la gravure puis cliquez sur "Graver". Selezionare l'unità da utilizzare per la scrittura e fare clic su "Scrivi".
- Page 43 Congratulations, your disc has been written successfully. Click "OK". You may exit the application now. Herzlichen Glückwunsch – Ihre Disk wurde erfolgreich erstellt. Klicken Sie auf "OK". Sie können jetzt die Anwendung verlassen. Félicitations, votre disque est prêt. Cliquez sur "OK".
-
Page 45: How To Make An Audio Disc
How to make an Audio disc? Comment créer un disque audio ? Come creare un dischi Audio? Hoe maak ik zelf een muziek-disc? This manual shows you an example of how to make an Audio disc which can be played in any CD-Player Questo manuale contiene informazioni su come creare un dischi Audio che potrà... - Page 46 Start "Nero StartSmart" from the desktop. Starten Sie "Nero StartSmart" von Ihrer Oberfläche aus. Lancez "Nero StartSmart" depuis le bureau. Aprire "Nero StartSmart" dal desktop. Start "Nero StartSmart" vanaf het bureaublad. Choose "Audio" and "Make Audio CD". Wählen Sie "Audio" oder "Audio CD erstellen".
- Page 47 Select the audio files (*.wav) you want to have on your new audio disc and click "Add". Wählen Sie die Audio-Dateien (*.wav), die Sie auf Ihrer neuen Audio-Disk wünschen, und klicken Sie auf "Hinzufügen". Sélectionnez les fichiers audio (*.wav) que vous souhaitez placer sur le nouveau disque puis cliquez sur "Ajouter".
- Page 48 Choose your recorder and click "Burn". Wählen Sie Ihren Recorder und klicken Sie auf "Brennen". Choisissez le périphérique d'enregistrement puis cliquez sur "Graver". Selezionare il recorder e fare clic su "Scrivi". Kies uw recorder en klik op "Branden". Insert an empty disc. Legen Sie eine leere Disk ein.
- Page 49 Congratulations, your disc has been written successfully. Click "OK". You may exit the application now. Herzlichen Glückwunsch – Ihre Disk wurde erfolgreich erstellt. Klicken Sie auf "OK". Sie können jetzt die Anwendung verlassen. Félicitations, votre disque est prêt. Cliquez sur "OK".
-
Page 51: Warranty,Environment,Safety, Frequently Asked Questions (Faq) And Specifications
"Start", "My Computer". Click with the right mouse button on the "Nero" icon and choose "Explore". Choose the "Philips Warranty" folder and you will find the warranty documents. If you do not have Adobe Acrobat Reader, you can find it in the folder "Acrobat Reader"... - Page 52 Click on "My Computer". Click on the "Nero"-logo. Click on the right mouse button and choose "Explore". Go to the directory "Philips Drivers". Copy the contents of this directory on a floppy disc. Attach your SPD3200CC to your Windows 98SE computer.
- Page 53 Check to ensure that there are no scratches or finger marks on the disc. Use a new disc and retry the writing sequence. Use a different (Philips) branded disc to check that your drive is working correctly. Question 9: I cannot read from a disc.
- Page 54 Maximum write speeds: 48x on CD-Recordable 24x on UltraSpeed CD-ReWritable 16x on DVD+R 8x on DVD+R Double Layer 8x on DVD+RW 16x on DVD-R 4x on DVD-R Dual Layer 6x on DVD-RW The actual write speed may be lower as this is disc dependent. Maximum read speeds: 48x on CD 16x on DVD...
-
Page 55: Garantie,Umwelt,Sicherheit,Häufig Gestellte Fragen (Faq) Und Technische Daten
Oberfläche oder klicken Sie auf "Start", "My Computer". Klicken Sie mit der rechten Maustaste auf das Symbol "Nero" und wählen Sie "Explore". Wählen Sie den Ordner "Philips Warranty"; hier finden Sie die Garantiedokumente. Wenn Sie keinen Adobe Acrobat Reader haben, können Sie ihn im Ordner "Acrobat Reader"... - Page 56 Klicken Sie auf "Arbeitsplatz". Klicken Sie auf das "Nero"-Logo. Klicken Sie mit der rechten Maustaste und wählen Sie "Explore". Gehen Sie zum Verzeichnis "Philips Drivers". Kopieren Sie den Inhalt dieses Verzeichnisses auf eine Diskette. Verbinden Sie Ihr SPD3200CC mit Ihrem Windows 98SE Computer.
- Page 57 Vergewissern Sie sich, dass sich keine Kratzer oder Fingerabdrücke auf der CD befinden. Legen Sie eine neue CD ein und wiederholen Sie die Schreibsequenz. Legen Sie eine andere Marken-CD (Philips) ein, um zu prüfen, ob das Laufwerk korrekt funktioniert. Frage 9: Ich kann nicht von einer CD lesen.
-
Page 58: Technische Daten
Maximale Schreibgeschwindigkeit: 48fach auf CD-Recordable 24fach auf UltraSpeed CD-ReWritable 16fach auf DVD+R 8fach auf DVD+R Double Layer 8fach auf DVD+RW 16fach auf DVD-R 4fach auf DVD-R Dual Layer 6fach auf DVD-RW Die tatsächliche Schreibgeschwindigkeit kann geringer sein, weil sie von der Disk abhängt. Maximale Lesegeschwindigkeit: 48fach von CD 16fach von DVD... -
Page 59: Garantie, Environnement, Sécurité Questions Fréquentes (Faq) Et Caractéristiques Techniques
"Démarrer" puis "Poste de travail". Cliquez avec le bouton droit sur l’icône "Nero" et choisissez "Explorer". Choisissez le dossier "Philips Warranty" : vous y trouverez les documents relatifs à la garantie. Si vous n'avez pas Adobe Acrobat Reader, vous le trouverez dans le dossier Acrobat Reader de ce disque. - Page 60 CD-ROM, mais je dispose d’un accès Internet. Comment installer les pilotes ? Démarrez l’ordinateur. Lancez Internet Explorer (ou un autre navigateur web). Accédez au site Philips : http://www.philips.com/support Choisissez "Drivers and manuals" (Pilotes et manuels). Recherchez le SPD3200CC. Téléchargez les pilotes pour Windows 98SE.
- Page 61 Assurez-vous que le disque n’est pas rayé ou ne porte pas de traces de doigts. Utilisez un nouveau disque et relancez la gravure. Utilisez un disque de marque différente (Philips) pour vous assurer que votre lecteur fonctionne correctement. Question 9 : Je ne parviens pas à lire un disque.
- Page 62 Vitesses maximales en écriture : 48x sur CD inscriptible 24x sur CD réinscriptible ultrarapide 16x sur DVD+R 8x sur DVD+R Double couche 8x sur DVD+RW 16x sur DVD-R 4x sur DVD-R Dual couche 6x sur DVD-RW La vitesse d’écriture réelle peut être inférieure selon le type de disque. Vitesses maximales en lecture : 48x sur CD 16x sur DVD...
-
Page 63: Garanzia, Ambiente, Sicurezza, Domande Frequenti (Faq) E Specifiche
"Start", "Risorse del computer". Fare un clic destro sull'icona "Nero" e selezionare "Esplora". Selezionare la cartella "Philips Warranty" che contiene i documenti relativi alla garanzia. Se non si ha Adobe Acrobat Reader, è possibile reperirlo nella cartella "Acrobat Reader" di questo disco oppure è... - Page 64 Fate clic su "Risorse del computer". Fate clic sul logo "Nero". Fate un clic destro e selezionate "Esplora". Accedete alla cartella dei driver "Philips Drivers". Copiate il contenuto di questa cartella su un dischetto. Collegate l'SPD3200CC al vostro computer Windows 98SE.
- Page 65 Verificate che sulla superficie del disco non siano presenti graffi od impronte. Utilizzate un altro disco e ripetete la sequenza di scrittura. Utilizzate un disco di marca differente (Philips) per verificare se l'unità funziona correttamente. Domanda 9: Non riesco a leggere il disco.
- Page 66 Velocità in scrittura max: 48x su CD-R 24x su CD-RW ultraveloci 16x su DVD+R 8x su DVD+R Doppio layer 8x su DVD+RW 16x su DVD-R 4x su DVD-R Dual layer 6x su DVD-RW La velocità in scrittura effettiva può risultare inferiore poiché legata alla natura del disco. Velocità...
-
Page 67: Garantie,Milieu, Veiligheid, Vaak Gestelde Vragen (Faq) En Specificaties
"Deze computer". Klik met de rechtermuisknop op het pictogram "Nero" en daarna op "Verkennen". Ga naar de map "Philips Warranty". Daar vindt u documentatie over de garantie. Als u het programma Adobe Acrobat Reader nog niet hebt, kunt u het vinden in de map "Acrobat Reader" op deze disk of gratis downloaden via http://www.adobe.com... - Page 68 Internet-verbinding. Hoe kan ik de stuurprogramma's installeren? Start de computer op. Start Internet Explorer (of een andere web browser). Ga naar de website van Philips: http://www.philips.com/support Kies daar "Drivers and manuals". Zoek naar de SPD3200CC.
- Page 69 Controleer of de disc geen krassen of vingerafdrukken bevat. Probeer het branden nog een keer met een nieuwe disc. Gebruik een ander merk disc (Philips) om na te gaan of uw brander goed werkt. Vraag 9: Een disc wordt niet gelezen.
- Page 70 Maximale schrijfsnelheid: 48x op CD-Recordable 24x op UltraSpeed CD-ReWritable 16x op DVD+R 8x op DVD+R Dubbellaags 8x op DVD+RW 16x op DVD-R 4x op DVD-R Dual Layer 6x op DVD-RW De daadwerkelijke schrijfsnelheid kan lager zijn, omdat die van de disc afhankelijk is. Maximale leessnelheid: 48x vanaf CD 16x vanaf DVD...
-
Page 71: Cómo Conectar Spd3200Cc Al Ordenador
al ordenador? Como ligar o SPD3200CC ao meu computador? Bilgisayarıma SPD3200CC’yi takma şekli? Jak mogę podłączyć napęd SPD3200CC do komputera? Hur ansluter jag SPD3200CC till min dator? En las páginas siguientes se muestra cómo conectar la nueva SPD3200CC a un ordenador. Debido a que hay muchas marcas y tipos de ordenadores en el mercado, las fotografías siguientes muestran... - Page 72 aygıtı ve aşağıdaki kablolar bulunmaktadır A: SPD3200CC aygıtı. B: Güç kaynağı (2 parça). C: HiSpeed (Yüksek hızlı) USB Kablosu. Opakowanie zawiera następujące elementy: A: Napęd SPD3200CC. B: Kabel zasilający (2 części). C: Kabel HiSpeed USB. I förpackningen finns SPD3200CC-enheten och följande kablar A: SPD3200CC-enhet.
- Page 73 Conecte los cables de alimentación entre sí y conéctelos a SPD3200CC y a una toma eléctrica. Ligue os cabos de alimentação entre si e ligue-os em conjunto ao SPD3200CC e a uma tomada eléctrica. Güç kablolarını birlikte bağlayıp SPD3200CC ve bir güç prizine onları takınız. Połącz kable zasilające i podłącz je do napędu SPD3200CC i wyjścia zasilania.
- Page 74 1.x), as velocidades são limitadas (4x para gravação e 6x para leitura com CD, 0,7x de leitura com DVD) e não é possível a gravação em DVD ou ver vídeos. PC’niz üzerindeki HiSpeed (Yüksek hızlı) USB konektörün aranması. A: Tercih edilen HiSpeed (Yüksek hızlı) USB yada konektör için logo. B: Alternatif LowSpeed (Düşük hızlı) USB konektör için logo.
- Page 75 Para identificar su sistema operativo, haga clic con el botón derecho en "Mi PC" y seleccione "Propiedades". Si utiliza Windows 98 Second Edition, vaya al paso 11; en caso contrario, vaya al paso 7. Identifique o seu sistema operativo clicando no botão direito do rato sobre "My Computer"...
- Page 76 Po podłączeniu napędu SPD3200CC do starego portu USB 1, system Windows XP wyświetli ostrzeżenie. Ponownie sprawdź punkt 5. Dotyczy to tylko systemu Windows XP. Windows XP varnar dig om du ansluter SPD3200CC till en långsam USB 1-anslutning. Kontrollera steg 5 igen. Det gäller endast Windows XP.
- Page 77 Inserte el disco de Nero en SPD3200CC. Vaya al paso 15. Introduza o disco do software Nero no SPD3200CC. Avance para o passo 15! SPD3200CC’ye Nero diskini yerleştiriniz. 15. adıma geçiniz! Włóż płytę programu Nero do napędu SPD3200CC. Przejdź do punktu 15! Sätt in Nero-skivan i SPD3200CC.
- Page 78 ¡ Sólo para Windows 98 Second Edition! Espere a que aparezca esta pantalla. Apenas para o Windows 98 Second Edition! Espere até que este ecrã seja apresentado. Sadece Windows 98 Second Edition (İkinci Sürüm)! Bu ekran açılıncaya kadar bekleyiniz. Dotyczy tylko systemu Windows 98 Second Edition! Zaczekaj, aż...
- Page 79 B. "Search for the best drivers…" (En iyi sürücüleri ara)’yı seçiniz. C. "Specify a location" (Bir konum belirt)’i seçiniz. D. Nero diski içindeki "Philips drivers" (Philips sürücüleri) dizinine göz atınız ve Next (İleri) üzerine tıklatınız. E. Sürücülerin kurulum işlemi, yapılacaktır.
- Page 80 Encontrará actualizaciones en www.philips.com/storageupdates Depois de instalar o software, deve reiniciar o seu computador. Parabéns. O seu dispositivo Philips está agora pronto a usar. O modo de operação e as aplicações de software de que irá necessitar para realizar as suas tarefas estão descritos nos capítulos seguintes deste "Manual Sobre Como…".
-
Page 81: Cómo Desconectar Spd3200Cc Sin Apagar El Ordenador
¿Cómo desconectar SPD3200CC sin apagar el ordenador? Como desligar o SPD3200CC sem desligar o computador? Bilgisayarı kapatmadan SPD3200CC’nin bağlantısını kesme şekli? Jak odłączyć napęd SPD3200CC nie wyłączając komputera? Hur kopplar jag bort SPD3200CC utan att stänga av datorn? En las páginas siguientes se explica cómo desconectar su nueva SPD3200CC de un ordenador. - Page 82 Para desconectar SPD3200CC sin apagar el ordenador, haga clic en este símbolo. Para desligar o SPD3200CC sem desligar o computador, clique neste símbolo. Bilgisayarınızı kapatmaksızın SPD3200CC’nin bağlantısını kesmek için, bu sembol üzerine tıklatınız. Aby odłączyć napęd SPD3200CC nie wyłączając komputera, kliknij ten symbol. Klicka på...
-
Page 83: Cómo Imprimir Una Etiqueta En Un Disco
¿Cómo imprimir una etiqueta en un disco? Como imprimir uma etiqueta em um disco? Bir disk üzerine bir etiket nasıl yazdırılır? Drukowanie etykiet na płytach Hur du skriver ut en etikett på en skiva En este manual se explica cómo imprimir una etiqueta en un disco mediante la función LightScribe™. - Page 84 Inicie "Nero StartSmart" en el escritorio. Inicie o "Nero StartSmart" a partir da área de trabalho. Masaüstünden "Nero StartSmart"ı başlatınız. Uruchom program "Nero StartSmart" z pulpitu. Starta "Nero StartSmart" från skrivbordet. Seleccione "Herramientas" y "Imprimir etiqueta LightScribe". Escolha "Extras" e "Imprimir etiqueta do Lightscribe".
- Page 85 Seleccione "Documento vacío" y haga clic en "OK". Escolha "Documento vazio" e clique em "OK". "Begeyi Bosalt" öğesini seçin. "OK" üzerine tıklatınız. Wybierz opcję "Pusty dokument" i kliknij "OK". Välj "Tomt dokument" och klicka på "OK". Puede importar una imagen que ocupe toda la superficie del disco haciendo doble clic en el área de trabajo.
- Page 86 Klicka på "Textboxverktyg" för att föra in text. Om du bara vill skriva ut text kommer skivan att skrivas ut snabbare. Rita området där du vill lägga till text. Programmet anpassar detta för att få en snabbare utskrift. Haga clic en "Aceptar". Clique em "OK".
- Page 87 Haga doble clic en el área de texto que acaba de crear, inserte el texto y haga clic en "Aceptar". Clique duas vezes na área do texto que acabou de criar, insira o texto e clique em "OK". Yaratmış olduğunuz metin bölgesi üzerine iki kez tıklatarak, metni yerleştiriniz ve "OK"...
- Page 88 Seleccione su imagen y haga clic en "Abrir". Escolha a sua imagem e clique em "Abrir". Kalıbınızı/Görüntünüzü seçip "Aç" üzerine tıklatınız. Wybierz obraz i kliknij "Otwórz". Välj din bild och klicka på "Öppna". Coloque la imagen para que quede bien. Posicione adequadamente a imagem.
- Page 89 Una vez que haya terminado de diseñar su etiqueta, seleccione "Archivo" y "Imprimir etiqueta LightScribe". Ao concluir a criação de sua etiqueta, escolha "Arquivo" e "Imprimir etiqueta LightScribe". Etiketinizi tasarımlama işlemini tamamladığınızda, "Dosya" ve "Lightscribe Etiketini Bastır"ı seçiniz. Po zakończeniu projektowania etykiety, kliknij "Plik"...
- Page 90 Może pojawić się monit o przeprowadzenie aktualizacji programu LightScribe, jeśli będzie to konieczne do zapewnienia dobrej jakości wydruku. Kliknij " Aby pobrać najnowszą wersję programu LightScribe Host kliknij tutaj " . Eventuellt ombeds du att uppdatera ditt LightScribe-program för att försäkra en bra utskriftskvalitet. Klicka på...
-
Page 91: Cómo Capturar Secuencias De Vídeo De Una Videocámara Digital Dv
¿Cómo capturar secuencias de vídeo de una videocámara digital DV? Como capturar vídeos de um DV camcorder digital? Bir dijital/sayısal DV-camcorder’den (DV-kaydedici kamera) Przechwytywanie obrazu wideo z kamery cyfrowej DV Hur du fångar video från en digital DV-camcorder Este manual muestra un ejemplo que explica cómo capturar una secuencia de vídeo de una videocámara digital DV conectada al ordenador mediante el... - Page 92 Inicie "Nero StartSmart" desde el escritorio. Inicie o "Nero StartSmart" a partir da área de trabalho. Masaüstünden "Nero StartSmart"ı başlatınız. Uruchom program "Nero StartSmart" z pulpitu. Starta "Nero StartSmart" från skrivbordet. Conecte la cámara al ordenador y enciéndala. Conecte a sua câmera ao computador e ligue-a. Kameranızı...
- Page 93 Seleccione su videograbadora digital y utilice los botones para controlar su cámara digital. Pulse el botón "Grabar" para grabar vídeo. Escolha o seu DV Camcorder e use os botões para controlar a sua DV câmera. Pressione o botão "Gravar" para gravar o vídeo. DV-Camcorder’ınızı...
- Page 94 Ahora pase al paso 5 del siguiente capítulo (Cómo crear vídeo a partir de archivos…) para continuar Agora, vá para a etapa 5 do próximo capítulo (Como criar DVDs de arquivos…) para continuar. Şimdi, devam etmek için bir sonraki bölümün 5. adımına geçiniz (Dosyalardan bir video diski yapma yöntemi…).
-
Page 95: Cómo Crear Un Disco De Vídeo A Partir De Archivos De Vídeo En El Disco Duro U Otro Disco
¿Cómo crear un disco de vídeo a partir de archivos de vídeo en el disco duro u otro disco? ?Como criar DVDs de arquivos de vídeo armazenados no disco rígido ou em um disco? Sabit disk ya da bir disk üzerinde bulunan video dosyalarından nasıl bir video diski yapılır? Tworzenie płyty wideo z plików wideo zapisanych na dysku twardym lub płycie Hur du gör en videoskiva från video-filer som finns på... - Page 96 Inicie "Nero StartSmart" desde el escritorio. Inicie o "Nero StartSmart" a partir da área de trabalho. Masaüstünden "Nero StartSmart"ı başlatınız. Uruchom program "Nero StartSmartv z pulpitu. Starta "Nero StartSmart" från skrivbordet. Seleccione "Foto y vídeo" y haga clic en "Crear DVD de vídeo proprio".
- Page 97 Seleccione los archivos que desea añadir y haga clic en "Abrir". Escolha os arquivos que deseja adicionar e clique em "Abrir". Eklemek istediğiniz dosyaları seçip "Aç" üzerine tıklatınız. Wybierz pliki, które chcesz dodać i kliknij "Otwórz". Välj filerna som ska läggas till och klicka på "Öppna".
- Page 98 För in titlar i fältet "Header" och klicka på "Redigera meny" för att ändra layout och bakgrund för diskmenyn. También puede recortar el vídeo grabado. Cuando termine, haga clic en "Siguiente". Também é possível fazer adaptações no vídeo gravado. Ao concluir o procedimento, escolha "Avançar".
- Page 99 Aquí puede cambiar la presentación, el fondo, añadir títulos, etc. Cuando termine, haga clic en "Siguiente". É possível alterar o layout, o plano de fundo, adicionar títulos etc. aqui. Ao finalizar o procedimento, clique em "Avançar" duas vezes. Burada…, yerleşimi, arkaplanı değiştirebilir, başlık ekleyebilirsiniz.
- Page 100 Grattis! din skiva har bränts utan fel. Klicka på "Nej". Du kan avsluta programmet nu. NeroVision Express está transcodificando y grabando el disco. O NeroVision Express irá transcodificar e gravar o seu disco. NeroVision Express; kod çevrimi yapıyor ve diskiniz yazıyor/kaydediyor. Program NeroVision Express transkoduje i nagrywa płytę.
-
Page 101: Cómo Copiar Un Disco
¿Cómo copiar un disco? Este manual muestra un ejemplo de cómo copiar un disco. Ta instrukcja prezentuje przykładowy sposób kopiowania płyty. Como copiar um disco? Bir disk nasıl kopyalanır? Kopiowanie płyt Hur du kopierar en skiva Este manual mostra um exemplo de como copiar um disco. - Page 102 Inicie "Nero StartSmart" desde el escritorio. Inicie o "Nero StartSmart" a partir da área de trabalho. Masaüstünden "Nero StartSmart"ı başlatınız. Uruchom program "Nero StartSmart" z pulpitu. Starta "Nero StartSmart" från skrivbordet. Seleccione "Copiar y copia seg." y haga clic en "Copiar CD" o "Copiar DVD". Escolha "Fazer cópia"...
- Page 103 Seleccione la unidad de destino. Escolha o drive de destino. Hedef sürücüyü seçiniz. Wybierz napęd docelowy. Välj målenheten. Si la velocidad de la unidad de origen lo permite, marque la casilla "Copia rápida". En caso contrario, deje la casilla sin marcar. Haga clic en "Copiar". Se possível, você...
- Page 104 Grattis! din skiva har bränts utan fel. Klicka på "OK". Du kan avsluta programmet nu. "Nero" grabará ahora el disco. O "Nero" irá gravar o seu disco. "Nero" artık diskinizin üzerine yazacaktır. Program "Nero" rozpocznie nagrywanie płyty. "Nero" kommer nu att bränna din skiva. Enhorabuena, su disco se ha grabado correctamente.
-
Page 105: Cómo Crear Un Disco De Datos
¿Cómo crear un disco Como criar um disco de dados? Este manual muestra un ejemplo de cómo crear un disco de datos. Ta instrukcja prezentuje przykładowy sposób nagrywania płyty z danymi. de datos? Bir disk nasıl yaratılır? Nagrywanie płyt z danymi Hur du gör en dataskiva Este manual mostra um exemplo de como criar um disco de dados. - Page 106 Inicie "Nero StartSmart" desde el escritorio. Inicie o "Nero StartSmart" a partir da área de trabalho. Masaüstünden "Nero StartSmart"ı başlatınız. Uruchom program "Nero StartSmart" z pulpitu. Starta "Nero StartSmart" från skrivbordet. Seleccione "Datos" y haga clic en "Crear CD de datos" e "Crear DVD de datos". Escolha "Dados"...
- Page 107 Seleccione los archivos que desee grabar y haga clic en "Añadir". Escolha os arquivos a serem gravados e clique em "Adicionar". Kaydedilecek/Yazdırılacak dosyaları seçip "Ekle" üzerine tıklatınız. Wybierz pliki do nagrania i kliknij "Dodaj". Välj filerna som ska brännas och klicka på "Lägg till".
- Page 108 Seleccione la unidad para la grabación y haga clic en "Grabar". Escolha a unidade utilizada para gravação e clique em "Gravar". Yazdırma/kaydetme için kullandığınız sürücüyü seçip "Yazdır" üzerine tıklatınız. Wybierz napęd używany do nagrywania i kliknij "Zapis". Välj filerna enheten som ska användas för att bränna och klicka på...
- Page 109 Enhorabuena, su disco se ha grabado correctamente. Haga clic en "Aceptar". Ahora puede cerrar la aplicación. Parabéns, o seu disco foi gravado com êxito. Clique em "OK". Agora, você poderá fechar o aplicativo. Tebrikler, diskinize başarıyla yazdırıldı. "OK" üzerine tıklatınız. Şimdi uygulamadan çıkabilirsiniz.
-
Page 111: Cómo Crear Un Disco De Audio
¿Cómo crear un disco Como criar um disco de áudio? Este manual muestra un ejemplo de cómo crear un disco de audio Ta instrukcja prezentuje przykładowy sposób nagrania płyty Audio CD, którą można będzie odtwarzać w dowolnym odtwarzaczu CD. de audio? Bir Ses diski nasıl yaratılır? Nagrywanie płyt audio Hur du gör en audioskiva... - Page 112 Inicie "Nero StartSmart" desde el escritorio. Inicie o "Nero StartSmart" a partir da área de trabalho. Masaüstünden "Nero StartSmart"ı başlatınız. Uruchom program "Nero StartSmart" z pulpitu. Starta "Nero StartSmart" från skrivbordet. Seleccione "Audio" y "Crear CD de audio". Escolha "Áudio" e "Criar CD de Áudio". "Ses"...
- Page 113 Seleccione los archivos de audio (*.wav) que desea incluir en su nuevo disco de audio y haga clic en "Añadir". Selecione os arquivos de áudio (*.wav) que deseja gravar em seu novo disco e clique em "Adicionar". Yeni ses diskiniz üzerinde olmasını istediğiniz ses dosyalarını...
- Page 114 Seleccione su grabadora y haga clic en "Grabar". Escolha o seu gravador e clique em "Gravar". Kaydedicinizi seçip "Yazdır" üzerine tıklatınız. Wybierz nagrywarkę i kliknij "Zapis". Välj din spelare klicka på "Bränn". Ponga un disco vacío. Insira um disco vazio. Boş...
- Page 115 Enhorabuena, su disco se ha grabado correctamente. Haga clic en "Aceptar". Ahora puede cerrar la aplicación. Parabéns, o seu disco foi gravado com êxito. Clique em "OK". Agora, você poderá fechar o aplicativo. Tebrikler, diskinize başarıyla yazdırıldı. "OK" üzerine tıklatınız. Şimdi uygulamadan çıkabilirsiniz.
-
Page 117: Garantía, Medioambiente, Seguridad Preguntas Frecuentes (Faq) Y Especificaciones
"Inicio" y "Mi PC". Haga clic con el botón derecho del ratón en el icono "Nero" y elija "Explorar". Seleccione la carpeta "Philips Warranty", en la que encontrará los documentos de la garantía. Si no dispone de Adobe Acrobat Reader, podrá... - Page 118 Pregunta 2: Tengo un PC con Windows 98 Second Edition que no tiene CDROM, pero tengo acceso a Internet. ¿Cómo instalo los controladores? Inicie el ordenador. Ejecute Internet Explorer (u otro explorador web). Acceda al sitio web de Philips: http://www.philips.com/support. Seleccione "Drivers and manuals". Busque SPD3200CC. Descargue los controladores para Windows 98SE.
- Page 119 Compruebe que el disco no presenta arañazos o huellas de dedos. Use un nuevo disco y reintente la secuencia de escritura. Use otro disco de marca (Philips) para comprobar que la unidad funciona correctamente. Pregunta 9: No puedo leer un disco.
- Page 120 Velocidades de escritura máximas: 48x en CD grabable 24x en CD regrabable UltraSpeed 16x en DVD+R 8x en DVD+R Doble capa 8x en DVD+RW 16x en DVD-R 4x en DVD-R Dual capa 6x en DVD-RW La velocidad de escritura real puede ser más lenta en función del disco. Velocidades de lectura máximas: 48x en CD 16x en DVD...
-
Page 121: Garantia, Ambiente,Segurança,Perguntas Mais Frequentes (Faq) E Especificações
"Iniciar", "Meu computador". Clique com o botão direito do mouse no ícone "Nero" e escolha "Explorar". Escolha a pasta "Phlips Warranty" (Garantia Philips) onde você encontrará os documentos de garantia. Caso você não tenha o Adobe Acrobat Reader, poderá... - Page 122 CD-ROM no computador mas tenho acesso à Internet. Como posso instalar os controladores? Ligue o computador. Inicie o Internet Explorer (ou outro browser da Web). Consulte o site na Web da Philips: http://www.philips.com/support Seleccione "Drivers and manuals" (Controladores e manuais). Procure o SPD3200CC. Descarregue os controladores para o Windows 98SE.
- Page 123 Verifique se não existem riscos ou impressões de dedos na superfície do disco. Utilize um disco novo e volte a tentar a sequência de gravação. Utilize um disco de marca diferente (Philips) para verificar se a sua unidade está a funcionar correctamente.
- Page 124 Velocidades máximas de gravação: 48x em CD-R 24x em CD-RW UltraSpeed 16x em DVD+R 8x em DVD+R DL 8x em DVD+RW 16x em DVD-R 4x em DVD-R DL 6x em DVD-RW A velocidade real de gravação pode ser inferior uma vez que esta depende do disco. Velocidades máximas de leitura: 48x em CD 16x em DVD-ROM...
-
Page 125: Garanti, Çevre, Güvenlik
Masaüstünüzde "Bilgisayarım" ikonu/simgesi üzerine tıklatınız ya da "Başlat", "Bilgisayarım" üzerine tıklatınız. "Nero" ikonu/simgesi üzerine sağ fare düğmesi ile tıklatıp "Araştır"ıı seçiniz. "Philips Garanti" klasörünü seçtiğinizde garanti belgelerini bulacaksınız. Adobe Acrobat Reader yazılımınız yok ise, bu disk üzerindeki "Acrobat Reader" klasöründe onu bulabilirsiniz ya da http://www.adobe.com web... - Page 126 "My Computer" (Bilgisayarım) üzerine tıklatınız. "Nero"-logosu üzerine tıklatınız. "Explore" (Araştır) üzerine sağ fare tuşu ile tıklatıp seçiniz. "Philips Drivers" (Philips Sürücüleri) dizinine gidiniz. Bu dizin içeriğini bir disket sürücüye kopyalayınız. SPD3200CC’nizi Windows 98SE bilgisayarınıza takınız. 10. Windows, sürücüleri istediğinde; 8. adımdan disketi yerleştirip Windows’u bu diskete yönlendiriniz.
- Page 127 Soru 8: Bir diski yazdırmak istedim ancak başarısız oldu. Neden oldu? Disk üzerinde çizik yada parmak izi olmadığından emin olunuz. Yeni bir disk kullanıp yazdırma sırasını yeniden deneyiniz. Diskinizin doğru şekilde çalışıp çalışmadığını kontrol etmek için farklı bir (Philips) markalı disk kullanınız. Soru 9: Bir diskten okuma yapamıyorum.
- Page 128 Maksimum yazma hızları: Kaydedilebilir CD üzerinde 48x Aşırı Hızlı Yeniden Yazdırılabilir CD üzerinde 24x DVD+R üzerinde 16x DVD+R Double Layer (İki Katman) üzerinde 8x DVD+RW üzerinde 8x DVD-R üzerinde 16x DVD-R Dual Layer (İkili Katman) üzerinde 4x DVD-RW üzerinde 6x Gerçek yazma hızı, bu diske bağlı...
-
Page 129: Gwarancja, Środowisko, Bezpieczeństwo, Często Zadawane Pytania (Faq) Oraz Specyfikacje
Kliknij ikonę "Mój komputer" na pulpicie lub kliknij "Start", "Mój komputer". Kliknij prawym przyciskiem myszy ikonę "Nero" i wybierz "Eksploruj". Otwórz folder "Philips Warranty", w którym znajdziesz dokumentację gwarancyjną. Jeśli nie masz programu Adobe Acrobat Reader, możesz go znaleźć w folderze "Acrobat Reader" na tej płycie lub pobrać... - Page 130 Kliknij "My Computer" (Mój Komputer). Kliknij na logo "Nero". Kliknij prawy przycisk myszy i wybierz "Explore" (Eksploruj). Przejdź do katalogu "Philips Drivers" (Sterowniki Philips). Skopiuj zawartość katalogu na dyskietkę. Podłącz SPD3200CC do komputera z Windows 98SE. 10. Gdy Windows zapyta o sterowniki, włóż dyskietkę stworzoną w kroku 8 i wskaż ją w oknie dialogowym.
- Page 131 Sprawdź czy płyta nie jest zadrapana lub nie ma na niej odcisków palców. Użyj nowej płyty i spróbuj ponownie. Użyj innej, markowej płyty (Philips), aby sprawdzić czy napęd działa prawidłowo. Pytanie 9: Nie można odczytać płyty. Sprawdź, czy płyta nie jest zadrapana lub nie ma na niej odcisków palców.
- Page 132 Maksymalna prędkość zapisu: 48x dla CD-Recordable 24x dla UltraSpeed CD-ReWritable 16x dla DVD+R 8x dla DVD+R Double Layer 8x dla DVD+RW 16x dla DVD-R 4x dla DVD-R Dual Layer 6x dla DVD-RW Uzyskana prędkość może być niższa i zależy ona od płyty. Maksymalna prędkość...
-
Page 133: Garanti,Miljö,Säkerhet,Vanliga Frågor (Faq) Och Specifikationer
Garanti,miljö,säkerhet,vanliga frågor (FAQ) och specifikationer Visa garantiinformation Sätt i Nero-skivan igen och klicka på "avsluta". Klicka på ikonen "Den här datorn" på skrivbordet eller klicka på "Start", "Den här datorn". Högerklicka på "Nero"-ikonen och välj "Utforska". Välj mappen "Phlips Warranty" där du hittar alla garantidokument. - Page 134 Klicka på "My Computer" (Den här datorn). Klicka på "Nero"-logotypen. Klicka på höger musknapp och välj "Explore" (Utforska). Gå till katalogen "Philips Drivers" (Philips-drivrutiner). Kopiera katalogens innehåll på en diskett. Anslut SPD3200CC till Windows 98SE-datorn. 10. När Windows ber om drivrutinerna sätter du i disketten från steg 8 och styr Windows till den.
- Page 135 Kontrollera om det förekommer repor eller fingeravtryck på skivan. Använd en ny skiva och utför skrivsekvensen igen. Använd en skiva av en annan typ (Philips) för att kontrollera att enheten fungerar på rätt sätt. Fråga 9: Jag kan inte läsa från en skiva.
- Page 136 Maximal skrivhastighet: 48x på CD-Recordable 24x på UltraSpeed CD-ReWritable 16x på DVD+R 8x på DVD+R Double Layer 8x på DVD+RW 16x på DVD-R 4x på DVD-R Dual Layer 6x på DVD-RW Den verkliga skrivhastigheten kan vara lägre beroende på vilken skiva som används. Maximal läshastighet: 48x på...
-
Page 137: Safety Precautions
USA/Canada: This player is for use only with IBM compatible UL listed Personal Computers or Macintosh UL listed workstations, weighing less than 18 kg. This unit employs a laser. Do not remove the cover or attempt to service this device when connected due to the possibility of eye damage. - Page 138 Notes...
- Page 139 Notes...
- Page 140 All dimensions shown are approximate. © 2005 Koninklijke Philips Electronics N.V. All rights reserved. Reproduction, copying, usage, modifying, hiring, renting, public performance, transmission and/or broadcasting in whole or part is prohibited without the written consent of Philips Electronics N.V. 9305 125 2004.6...