Table of Contents
Advertisement
Advertisement
Table of Contents

Related Manuals for Husqvarna X-COM R


Summary of Contents for Husqvarna X-COM R
- Page 1 Workshop manual X-COM R English 893 - 001 -...
-
Page 2: Table Of Contents
Contents 1 Introduction 1.1 Product information..........3 1.2 Document description..........3 1.3 Revisions..............3 1.4 Safety..............3 1.5 Servicing tools............3 2 Safety 2.1 Safety definitions............4 2.2 General safety instructions........4 2.3 Symbols on the product......... 4 2.4 Special safety instructions........4 3 Prepare and do servicing on the product 3.1 Life cycle and battery discharge......5 3.2 To replace the hygiene kit........ -
Page 3: Introduction
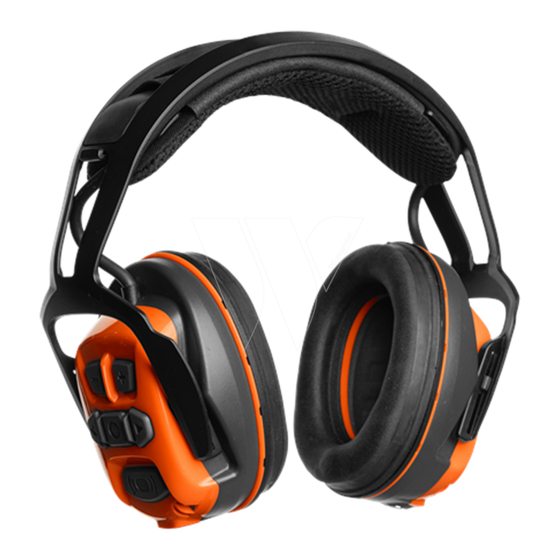
1 Introduction 1.1 Product information X-COM R is available with headband or with a helmet. 1.2 Document description This manual gives a full description of how to do maintenance and repair on the product. It also gives safety instructions that the personnel must obey. -
Page 4: Safety
WARNING: Apply a new warning label if a warning symbol on the product is damaged or missing. 2.3 Symbols on the product Only use Husqvarna battery. Obey the safety instructions that are given for the battery and charger cable. The product agrees with the applicable EC directives. -
Page 5: Prepare And Do Servicing On The Product
3.2 To replace the hygiene kit Hygiene kit must be replaced when necessary or minimum each 6 months. Use the correct hygiene kit from Husqvarna . 1. Loosen the sealing ring (A) and foam rubber insert (B). 3.3 The boom microphone 3.3.1 To disassemble the boom microphone... - Page 6 3.3.2 To assemble the boom microphone 1. Push the boom microphone (A) into 3.5mm microphone input (B) to attach it to the headset. 6 - Prepare and do servicing on the product 893 - 001 -...
-
Page 7: Servicing Data
4 Servicing data 4.1 Servicing data Tightening torque 0.3-0.5 NM T7 893 - 001 - Servicing data - 7... -
Page 8: Servicing Data
4.2 Servicing data Tightening torque 0.3-0.5 NM T7 8 - Servicing data 893 - 001 -... -
Page 9: Servicing Tools
5 Servicing tools 5.1 Servicing tools Item Description Use for Screw driver, Flat Headband T-handle (or screw driver) Screws with torx head torx T7 USB to TTL Serial Cable For Bluetooth Headset 597 37 31-01 (3,3V) HP310 893 - 001 - Servicing tools - 9... -
Page 10: Function Overview
6 Function overview 6.1 Product serial number • Serial number is given by scannable code on label (A) behind foam rubber insert on left earmuff on the battery side. • Type plate is given on right earmuff (B). 10 - Function overview 893 - 001 -... -
Page 11: Repair Instructions
7 Repair instructions 7.1 To clean and examine the product parts 3. Disassemble the headband (B) from the pin (C). • Clean and examine all parts fully. You find more instructions in the chapter for each part if special tools or procedures are necessary. •... -
Page 12: The Cable Clip
7.3 The cable clip 7.3.2 To assemble the cable clip 1. Attach the cable clip (B) to the headband (C). 7.3.1 To disassemble the cable clip 1. Remove the cable clip (A). 2. Push the clip (D) until you hear a click sound and the cable clip locks in position. - Page 13 6. Disconnect the connectors to the strain relief (G), CAUTION: Be careful when you do work with microphone (H), microphone connector (I) and the wires. The wires can easily be damaged. loudspeaker (J). 1. Remove the earmuff from the headband. Refer to disassemble the headband on page 11 .
- Page 14 4. Loosen the strain relief (C) and DC connector (D). 7.4.3 To assemble the right earmuff 1. Connect the connectors to the strain relief cable (G), microphone (H), microphone connector (I) and loudspeaker (J). 5. Disconnect the connectors to the strain relief cable (E), loudspeaker (F), microphone (G), power connector (H) and battery (I).
- Page 15 4. Assemble the inner earmuff (B) and attach the 4 7.4.4 To assemble the left earmuff screws (A). 1. Connect the connectors for strain relief cable (E), loudspeaker (F), microphone (G), power connector (H) and battery (I). 2. Assemble the strain relief (C) and DC connector (D). 5.
-
Page 16: The Strain Relief Cable
4. Assemble the foam rubber insert (B) and attach the • The side (D) is for the left earmuff. (D = 9 sealing ring (A). wires) 1. Connect the strain relief (A) to the circuit boards. 5. Assemble the earmuff to the headband. Refer to assemble the headband on page 11 . -
Page 17: The Dc Connector
7.7 The DC connector 7.6.2 To assemble the microphone connector 1. Connect the microphone connector cable to the 7.7.1 To disassemble the DC connector circuit board in position B. Put the cable in a loop according to the illustration. 1. Disassemble the left earmuff. Refer to step 1-4 in disassemble the left earmuff on page 13 . - Page 18 3. Remove the loudspeaker (A) from the circuit board. 7.8.2 To assemble the loudspeaker CAUTION: Make sure that the wires are not damaged when you assemble the loudspeaker. 1. Right earmuff: Assemble the loudspeaker on the circuit board according to the illustration. Connect the loudspeaker cable to position B.
-
Page 19: The Microphone
5. Make sure that the loudspeaker and the sealing is in 3. Right earmuff: Disconnect the microphone cable its correct position (G). from the circuit board at position F. 4. Left earmuff: Disconnect the microphone cable from the circuit board at position H. CAUTION: The rubber sealing is not symmetrical. - Page 20 7.9.2 To assemble the microphone 4. Right earmuff: Connect the microphone cable to position F. Put the cable according to the illustration. 1. Assemble the wind filter (C). 2. Put the rubber sealing boot (D) over the microphone. 5. Left earmuff: Connect the microphone cable to position H.
-
Page 21: The Battery
7.10 The battery 4. Remove the battery (C) and foam sheet (D). 7.10.1 To disassemble the battery 1. Disassemble the left earmuff. Refer to step 1-4 in disassemble the left earmuff on page 13 . 2. Disconnect the battery cable from the circuit board in position E. -
Page 22: The Push Button Adapter
7.11 The push button adapter 3. Attach the battery cable to the circuit board in position E. Make sure that you put the cable (F) according to the illustration. 7.11.1 To disassemble the push button adapter 1. Disassemble the right earmuff. Refer to step 1-4 in To disassemble the right earmuff on page 12 . -
Page 23: The Wind Screen
7.12 The wind screen 4. Choose the correct product in the drop down menu "Product category". 7.12.1 To disassemble the wind screen 1. Remove the O-ring (A). Searching for product... Is your product connected? BluetoothHeadphoneConnection Product category 2. Remove the wind screen (B) from the boom microphone (C). -
Page 24: Troubleshooting
8 Troubleshooting 8.1 Troubleshooting of the product Symptom Possible causes Recommended step Battery out of power. Charge the product for minimum 1h. The cables are not connected cor- Use the wiring diagram to make sure rectly. that the cables connected correctly. Replace defective cables. - Page 25 Symptom Possible causes Recommended step Loud work environment. Use the boom microphone (accesso- ry) in loud environment. Defective microphone. Replace microphone. Low / unclear sound from micro- The cables are not connected cor- Use the wiring diagram to make sure phone.
-
Page 26: Wiring Diagram
9 Wiring diagram 9.1 Wiring diagram 26 - Wiring diagram 893 - 001 -... - Page 27 893 - 001 - Wiring diagram - 27...
- Page 28 114 11 51-26 2019-03-04...