Advertisement
3-IN-1 LIGHTWEIGHT STICK
VACUUM CLEANER
INSTRUCTION MANUAL
MODEL NUMBERS
BDST1600 Series
Thank you for choosing BLACK+DECKER!
PLEASE READ BEFORE RETURNING THIS PRODUCT FOR
ANY REASON.
If you have a question or experience a problem with your BLACK+DECKER
purchase, call 1-800-524-6716 from 9 a.m. to 5 p.m. EST Mon. - Fri. to speak
with an agent.
Please have the model number available when you call.
SAVE THIS MANUAL FOR FUTURE REFERENCE.
To register your new product, visit
www.BlackandDecker.com
Advertisement
Table of Contents

Summary of Contents for Black & Decker BDST1600 Series
- Page 1 3-IN-1 LIGHTWEIGHT STICK VACUUM CLEANER INSTRUCTION MANUAL MODEL NUMBERS BDST1600 Series Thank you for choosing BLACK+DECKER! PLEASE READ BEFORE RETURNING THIS PRODUCT FOR ANY REASON. If you have a question or experience a problem with your BLACK+DECKER purchase, call 1-800-524-6716 from 9 a.m. to 5 p.m. EST Mon. - Fri. to speak with an agent.
-
Page 2: Important Safety Instruction
IMPORTANT SAFETY INSTRUCTION SAFETY GUIDELINES - DEFINITIONS It is important for you to read and understand this manual. The information it contains relates to protecting YOUR SAFETY and PREVENTING PROBLEMS. The symbols below are used to help you recognize this information. DANGER: Indicates an imminently hazardous situation which, if not avoided, will result in death or serious injury. - Page 3 DO NOT use vacuum cleaner with blocked DO disconnect the appliance from the power supply when not in use, before filters. Clean or replace filters before changing the filters, cleaning the continuing. (refer to User Maintenance section). filters or connecting/disconnecting the accessories.
-
Page 4: Transporting Your Vacuum
IMPORTANT SAFETY INSTRUCTION CONT. READ AND SAVE THESE INSTRUCTIONS Symbols • The labels on your tool may include the following symbols. The symbols and their definitions are as follows: V .......volts A .......amperes Hz .....hertz W ......watts min ....minutes or AC ....alternating current or DC ..direct current n o ......no load speed ......Class I Construction... -
Page 5: Product View
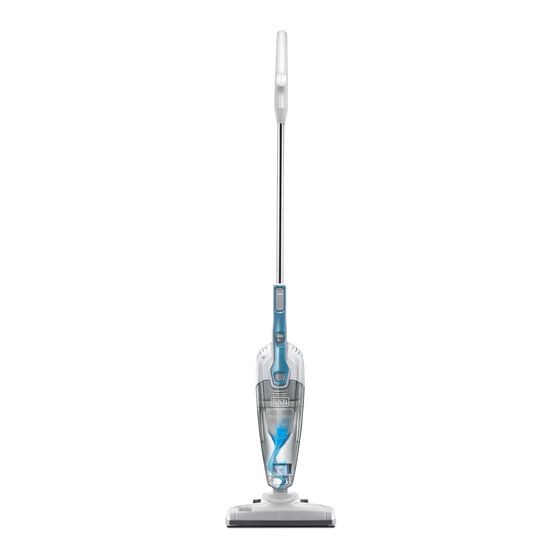
Product View 1. Hand Grip 8. Dust Cup Latch 2. Cord Wrap 9. Filter 3. Power Cord 10. Dust Cup 4. Handle 11. Removable Floor Nozzle 5. Quick Release Button 12. Crevice Tool 6. Hand Vacuum Grip 7. Power On/Off CAUTION: Do not plug in your vacuum cleaner until you are familiar with all instructions and operating procedures. -
Page 6: Assembly/Operation
Assembly/Operation WARNING: Do not operate cleaner with damp or wet filters or without vacuum bags and all filters in place. Press the quick release button at the Attach the floor nozzle by inserting it into base of the hand vacuum grip and insert the opening at the bottom of the dust cup. -
Page 7: Crevice Tool
Assembly/Operation Power cord storage 1. Turn vacuum off (O). 2. Unplug power cord by grasping the polarized plug, NOT the cord, and disconnect from outlet. 3. Loop power cord around cord wrap on the handle. 4. Clip molded plug to power cord to secure. WARNING: To avoid injury, turn vacuum OFF and unplug cord from wall when not in use. - Page 8 Maintenance And Care - Emptying and Cleaning 1. Turn Vacuum off (O). Then, unplug 2. To remove dirt from the dust cup vacuum. and filter, hold the vacuum vertically. Depress and hold button on top of the vacuum to release the dust cup as the shown.
- Page 9 Maintenance And Care - Cleaning Vacuum And Tools DO NOT clean the vacuum cleaner, components or accessories using petroleum or any other flammable liquid or solvents, etc. Clean only the outside of the vacuum cleaner. Use only a moist cloth and mild detergent for cleaning the vacuum cleaner, components and accessories.
-
Page 10: Troubleshooting
Troubleshooting WARNING: To reduce the risk of electric shock, turn power OFF and disconnect plug from electrical outlet before performing maintenance or troubleshooting to the vacuum cleaner. Vacuum cleaner won’t run: Possible causes Remedies 1. Vacuum cleaner is not plugged in firmly 1. -
Page 11: One-Year Limited Warranty
WARRANTY ONE-YEAR LIMITED policy regarding time limits for returns or WARRANTY exchanges. Midea USA Inc. warranties this product The second option is to take or send the to be free from defects in material or product (prepaid) to a MIDEA authorized workmanship for a period of one(1) year service agent for repair or replacement at following the date of purchase, provided...


