Toro Greensmaster eTriFlex 3360 Service Manual
Hide thumbs
Also See for Greensmaster eTriFlex 3360:
- Service manual (331 pages) ,
- Operator's manual (60 pages)
Chapters
Table of Contents
Troubleshooting

Related Manuals for Toro Greensmaster eTriFlex 3360


Summary of Contents for Toro Greensmaster eTriFlex 3360
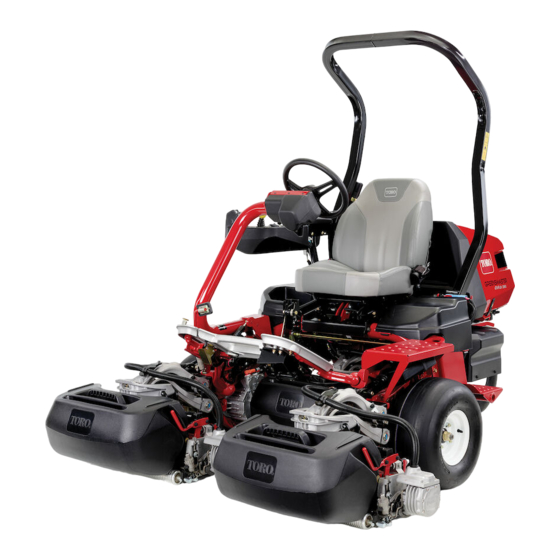
- Page 1 Form No. 19239SL Rev B Greensmaster ® eTriFlex 3360 and 3370 (Model 04580 and 04590) © 2019—The Toro® Company Original Instructions (EN) 8111 Lyndale Avenue South Contact us at www.Toro.com. Bloomington, MN 55420 All Rights Reserved...
- Page 2 Revision History Revision Date Description Initial Issue 06/2019 12/2019 Model 04590 information added Revision History Page 2 Greensmaster® eTriFlex 3360 and 3370 19239SL Rev B...
- Page 3 Reader Comments The Toro Company Technical Assistance Center maintains a continuous effort to improve the quality and usefulness of its publications. To do this effectively, we encourage user feedback. Please comment on the completeness, accuracy, organization, usability, and readability of this manual by an e-mail servicemanuals@toro.com...
- Page 4 Reader Comments Page 4 Greensmaster® eTriFlex 3360 and 3370 19239SL Rev B...
- Page 5 Service Manual for reference. Additional copies of the Operator’s Manuals, Installation Instructions and Parts Catalogs are available at www.toro.com. The Toro Company reserves the right to change the product specifications or this publication without notice. Greensmaster® eTriFlex 3360 and 3370...
- Page 6 Service Procedure Icons The following icons appear throughout this Service Manual to bring attention to specific important details of a service procedure. Critical Process This icon is used to highlight: • installing safety equipment (shields, guards, seat belts, brakes and R.O.P.S. components) that may have been removed •...
-
Page 7: Table Of Contents
Table of Contents Preface ........................ 5 Chapter 1: Safety .................... 1–1 Safety Instructions ..................1–2 Jacking Instructions ..................1–6 Safety and Instructional Decals ..............1–7 Chapter 2: Specifications and Maintenance ............ 2–1 Specifications ....................2–2 Torque Specifications ................... 2–5 Shop Supplies .................... 2–11 Special Tools .................... -
Page 8: Preface
Wire Harness Diagram – 3370 ..............A–10 Wire Harness Diagram – 3370 (continued)..........A–11 Additional Reference Materials Kawasaki FS481V Service Manual Preface Page 8 Greensmaster® eTriFlex 3360 and 3370 19239SL Rev B... -
Page 9: Chapter 1: Safety
Chapter 1 Safety Table of Contents Safety Instructions ..........................1–2 Think Safety First ..........................1–3 Jacking Instructions ..........................1–6 Safety and Instructional Decals ......................1–7 Greensmaster® eTriFlex 3360 and 3370 Page 1–1 Safety 19239SL Rev B... -
Page 10: Safety Instructions
Safety Instructions DANGER This safety symbol means danger. When you see this symbol, carefully read the instructions that follow. Failure to obey the instructions could kill or cause serious permanent injury or disability. WARNING This safety symbol means warning. When you see this symbol, carefully read the instructions that follow. -
Page 11: Think Safety First
Think Safety First Toro Products are tested and certified for compliance with existing safety standards and specifications. Although hazard control and accident prevention are partially dependent upon the design and configuration of the machine, hazard control and accident prevention are also dependent upon the awareness, concern and proper training of the personnel involved in the operation, transport, maintenance, and storage of the machine. - Page 12 Think Safety First (continued) • Avoid injury to bystanders… Always clear the area of bystanders before starting or testing powered equipment. • Avoid injury due to projectiles… Always clear the area of sticks, rocks or any other debris that could be picked up and thrown by the powered equipment.
- Page 13 Think Safety First (continued) – Class B fire extinguishers are for fires that involve flammable or combustible liquids such as gasoline, kerosene, grease and oil. The numerical rating for class B extinguishers indicates the approximate number of square feet of fire it can extinguish. Geometric symbol (red square).
-
Page 14: Jacking Instructions
Jacking Instructions DANGER Mechanical or hydraulic jacks may fail to support the machine and cause a serious injury. • Use jack stands to support the raised machine. • Use only mechanical or hydraulic jacks to lift the machine. 1. Park the machine on a level surface, lower the cutting units, shut off the engine, remove the key from the key switch and unplug the 48V battery disconnect. -
Page 15: Safety And Instructional Decals
Greensmaster 3360/3370. If any decal becomes illegible or damaged, replace it with a new decal. Part numbers are listed in your Parts Catalog and Operator’s Manual. Order replacement decals from your Authorized Toro Distributor Greensmaster® eTriFlex 3360 and 3370 Page 1–7... - Page 16 Safety: Safety and Instructional Decals Page 1–8 Greensmaster® eTriFlex 3360 and 3370 19239SL Rev B...
-
Page 17: Chapter 2: Specifications And Maintenance
Chapter 2 Specifications and Maintenance Table of Contents Specifications ............................2–2 Overall Dimensions..........................2–2 Engine (Model 04580 only) ........................ 2–2 Chassis .............................. 2–3 DPA Cutting Units ..........................2–3 Universal Groomer (Optional) ......................2–4 Torque Specifications ........................... 2–5 Calculating the Torque Values When Using a Drive-Adapter Wrench ..........2–6 Identifying the Fastener........................ -
Page 18: Specifications
Specifications Overall Dimensions g287052 Figure 3 Engine (Model 04580 only) Item Description Make/Designation Kawasaki, 4-cycle, V-Twin Cylinder, OHV, Air Cooled, Gasoline Engine - Model FS481V. Bore x Stroke 73 x 72 mm (2.87 x 2.83 inches) Total displacement 603 cc (36.8 in Governor Mechanical... -
Page 19: Chassis
Chassis Item Description Front and Rear tire Standard = 19 x 10.50 x 8, 4 ply Smooth Optional = 20 x 10 x 8, 4 ply Turf Tread 83 to 110 kPa (12 to 16 psi) Wheel lug nut torque 95 to 122 N∙m (70 to 90 ft-lb) DPA Cutting Units Item... -
Page 20: Universal Groomer (Optional)
14 blade* = 35 kg (78 lb) *Cutting unit weights do not include a front roller. Options Refer to the Cutting Unit Parts Catalog or contact your local Authorized Toro Distributor for available cutting unit options. Universal Groomer (Optional) Item... -
Page 21: Torque Specifications
Torque Specifications The recommended fastener torque values are listed in the following tables. For critical applications, as determined by Toro, either the recommended torque or a torque that is unique to the application is clearly identified and specified in this Service Manual. -
Page 22: Calculating The Torque Values When Using A Drive-Adapter Wrench
Calculating the Torque Values When Using a Drive-Adapter Wrench g205924 Figure 4 Torque Conversion Factor = A / B Torque wrench A (effective length of torque wrench) Drive-adapter wrench (crowsfoot) B (effective length of torque wrench and drive-adapter wrench) Using a drive-adapter wrench (e.g., crowfoot wrench) in any position other than 90°... -
Page 23: Identifying The Fastener
Toro recommends replacing fasteners with a locking feature once they have been removed because the effectiveness of the locking feature diminishes with each reuse. If it is necessary to reuse a fastener with a locking feature; apply a thread locking compound (Loctite for example) to the fastener during installation. -
Page 24: Standard Torque For Dry, Zinc Plated, And Steel Fasteners (Inch Series)
Standard Torque for Dry, Zinc Plated, and Steel Fasteners (Inch Series) Thread Size Grade 1, 5 SAE Grade 1 Bolts, Screws, SAE Grade 5 Bolts, Screws, SAE Grade 8 Bolts, Screws, and 8 with Studs, and Sems with Studs, and Sems with Studs, and Sems with Thin Height Regular Height Nuts... -
Page 25: Standard Torque For Dry, Zinc Plated, And Steel Fasteners (Metric Fasteners)
Standard Torque for Dry, Zinc Plated, and Steel Fasteners (Metric Fasteners) Class 8.8 Bolts, Screws, and Class 10.9 Bolts, Screws, and Thread Size Studs with Regular Height Nuts Studs with Regular Height Nuts (Class 8 or Stronger Nuts) (Class 10 or Stronger Nuts) M5 X 0.8 57 ±... -
Page 26: Other Torque Specifications
Other Torque Specifications SAE Grade 8 Steel Set Screws Recommended Torque Thread Size Square Head Hex Socket 1/4 - 20 UNC 140 ± 20 in-lb 73 ± 12 in-lb 5/16 - 18 UNC 215 ± 35 in-lb 145 ± 20 in-lb 3/8 - 16 UNC 35 ±... -
Page 27: Shop Supplies
Shop Supplies The procedures found in this Service Manual may recommend the use of commonly used shop supplies (lubricants, sealants, and adhesives). A symbol denoting the use of a shop supply may appear in figures that support a procedure. Always refer to the written procedure for specific information regarding the type and the application of a shop supply. - Page 28 Shop Supplies (continued) GASKET COMPOUND Used to create a seal between mating parts. Gasket compounds may be used with or without the presence of a pre-formed gasket. Gasket compounds may be solvent or silicone based, and cure when exposed to air or designed to cure in an air-less environment (anaerobic). Most gasket compounds are designed to be applied to clean surfaces free of oil, chemical residue and previously used gaskets or gasket compounds.
-
Page 29: Special Tools
Special tools for servicing Toro Commercial Products are available from your Toro Distributor. Some of these tools may have been supplied with your machine, are available as Toro parts, or may also be available from a local tool supplier. Multimeter... - Page 30 The tool includes the base plate, threaded shaft and handle. 3WD Motor Rotor Tool Toro Part No. 139–8420 The 3WD motor rotor tool is recommended to remove and install the rotor from the optional 3WD motor housing. The tool includes the puller hub, threaded shaft, handle and four screws.
- Page 31 Cutting Performance Paper Toro Part No. 125–5610 (300 strips) Cutting performance paper is used to test the cutting reel performance after adjusting the reel to bedknife clearance.
- Page 32 Components for the brush assembly are also available individually. Brush 36-4310 Handle 29-9080 Handle cap 2410-18 Angle Indicator and Magnetic Mount Angle Indicator: Toro Part No. 131–6828 Magnetic Mount: Toro Part No. 131–6829 Because the top grind angle on bedknives is critical for edge retention, and therefore after−...
- Page 33 Bedknife Screw Tool K-Line Part No. TOR510880A This screwdriver-type bit is made to fit Toro bedknife attaching screws. Use this bit with a torque wrench to secure the bedknife to the bedbar. IMPORTANT Important: To prevent damage to the bedbar,...
- Page 34 This tool should be used with the Toro Guide to Evaluation Reel Mower Performance and Using the Turf Evaluator (Toro part no. 97931SL) available from an local authorized Toro Distributor.
- Page 35 Syringe – 50cc (2 ounce) Toro Part No. 137-0872 Aids in accurately filling the optional Universal Groomer gear box with oil. Greensmaster® eTriFlex 3360 and 3370 Page 2–19 Specifications and Maintenance: Special Tools 19239SL Rev B...
- Page 36 Specifications and Maintenance: Special Tools Page 2–20 Greensmaster® eTriFlex 3360 and 3370 19239SL Rev B...
-
Page 37: Chapter 3: Troubleshooting
Chapter 3 Troubleshooting Table of Contents GEARS – The Systematic Approach to Defining, Diagnosing and Solving Problems ......3–2 Operator Advisories..........................3–3 Dialogue Messages ..........................3–5 Machine Faults ............................3–7 Using the InfoCenter Display for Troubleshooting................3–39 TRACTION (example):........................3–39 Troubleshooting........................... -
Page 38: Gears - The Systematic Approach To Defining, Diagnosing And Solving Problems
GEARS – The Systematic Approach to Defining, Diagnosing and Solving Problems 1. Gather Information • Information reported by the customer • Information observed by you • Establish the what, where and when of the issue 2. Evaluate Potential Causes • Consider possible causes of the problem to develop a hypothesis •... -
Page 39: Operator Advisories
Operator Advisories Operator advisories are automatically displayed by the InfoCenter when a machine function is prevented and additional action is required. Typically, an advisory can be eliminated with a change in machine controls by the operator. For example; if the operator attempts to drive the machine when the manual parking brake is engaged, an advisory is identified on the InfoCenter Display that the manual parking brake needs to be in disengaged. - Page 40 CHANGED Note: If “Unknown Cause” appears as an advisory description, a controller software issue may exist. If you are unable to clear this type of advisory, contact an Authorized Toro Distributor. Troubleshooting: Battery Charger Error and Fault Codes Page 3–4 Greensmaster®...
-
Page 41: Dialogue Messages
Dialogue Messages When the machine is being calibrated, dialog messages appear in the InfoCenter. These messages are intended to instruct you through the calibration process. Refer to the following table for a list of each dialog message: Message Number InfoCenter Message Return pedal to neutral Move pedal to max forward and hold Max forward calibration passed... - Page 42 Message Number InfoCenter Message Is the Cutting Unit installed? Continue? 1100 Traction diagnostic messages enabled 1101 Steering diagnostic messages enabled Troubleshooting: Battery Charger Error and Fault Codes Page 3–6 Greensmaster® eTriFlex 3360 and 3370 (Model 04590) 19239SL Rev B...
-
Page 43: Machine Faults
P43, pins the Function 1, 3, and 6. Control Switch Swap the T1: Primary controller with a known-good unit (contact an Authorized Toro Distributor for assistance). C0051 Steering Input The steering Traction is Use the InfoCenter Diagnostics >... - Page 44 (+) (+) state. source. Test the engine relay and fuel solenoid. Swap the T1: Primary controller with a known-good unit (contact an Authorized Toro Distributor for assistance). C1014 Engine Run Overcurrent Check the engine run output circuit Output –...
- Page 45 (+) Test the brake actuator relay and the source. brake actuator. Swap the T1: Primary controller with a known-good unit (contact an Authorized Toro Distributor for assistance). C1024 Parking Brake Overcurrent Check the parking brake disengage Disengage...
- Page 46 Test the steering feedback output circuit wiring. Test the steering input device brake coil. Swap the T1: Primary controller with a known-good unit (contact an Authorized Toro Distributor for assistance). C10E3 48V Logic Low current The short could Check the logic relay output circuit...
- Page 47 Test the 48V ground to the motor. (266 °F). Swap cutting reel motors between cutting units. Replace and reprogram the motor if the fault moves to the new position (contact an Authorized Toro Distributor for assistance). C1811 Cutting Unit T2, T3, T4 The motor PTO is disabled.
- Page 48 Try spinning the motor without a load. If it doesn't spin, replace and program the motor (contact an Authorized Toro Distributor for assistance). C1831 Cutting Unit T2, T3, T4 The internal Cycle the key switch.
- Page 49 Note: If more Voltage - High measures the motor if the fault moves to the new than one Bus greater than position (contact an Authorized Toro Voltage - High 67.5V in the Distributor for assistance). fault is reported, indicated cutting...
- Page 50 Use the InfoCenter to calibrate the actuator. actuator. Replace and program the actuator (contact an Authorized Toro Distributor for assistance). Cycle the key switch. Use the InfoCenter to calibrate the actuator. C1919 Lift/Lower Motor...
- Page 51 Bus the indicated Voltage - Low actuator. Replace and program the actuator faults are (contact an Authorized Toro Distributor reported, go to for assistance). fault U1512 and follow the listed Cycle the key switch. service actions. Use the InfoCenter to calibrate the actuator.
- Page 52 A sensor inside Traction and Replace and program the steering Speed Sensor - the motor fails. steering is motor (contact an Authorized Toro Out of Range disabled. Distributor for assistance). Cycle the key switch. Use the InfoCenter to calibrate the steering system –...
- Page 53 48V circuit on motor battery. phase U. Replace and program the steering motor (contact an Authorized Toro Distributor for assistance). Cycle the key switch. Use the InfoCenter to calibrate the steering system – center first, then the steering system –...
- Page 54 Service Actions Affected Description C1A7D Steering An unexpected Traction and Replace and program the steering Controller steering motor steering is motor (contact an Authorized Toro - Internal controller disabled. Distributor for assistance). Software software error Cycle the key switch. Failure occurs.
- Page 55 (contact an Authorized Toro Distributor for assistance). P0A36 Starter/Generator PTO and Replace and program the starter/generator - Temperature starter/generator starter/generator (contact an Authorized Toro Distributor for Sensor Failure FET and the is disabled. assistance). motor sensor fail. P0A3B Starter/Generator Starter/Generator...
- Page 56 Replace and program the traction 90°C (194° F) motor controller (contact an Authorized or exceeds 100° Toro Distributor for assistance). The T5 C (212° F). controller is part of the motor assembly and is not replaceable separately. Cycle the key switch.
- Page 57 The Li-ion battery is likely damaged. Internal battery internal in Li-ion battery Forward a copy of the battery output Hardware hardware controller is file (.BDS) to Toro Service (contact an Failure component has opened. Authorized Toro Distributor for assistance). failed. P0AA1 Battery The battery...
- Page 58 If the fault occurred when the Li-ion battery state of charge is less than 90%, forward a copy of the battery output file (.BDS) to Toro Service (contact an Authorized Toro Distributor for assistance). Troubleshooting: Battery Charger Error and Fault Codes Page 3–22...
- Page 59 (sin-cos) is wired correctly. the indicated traction motor. Use the InfoCenter to calibrate the traction motors. Contact an Authorized Toro Distributor or the Toro Technical Assistance Center and report that this fault occurred. P0D2F Traction Motor SC5, SC6,...
- Page 60 Inspect the wiring to the motor. Replace the traction motor. For SC5 and SC6, use the InfoCenter to calibrate the traction motors. For T5, program the traction motor (contact an Authorized Toro Distributor for assistance). P0E8F Traction Motor SC5, SC6, The traction...
- Page 61 Replace the traction motor. traction motor. For SC5 and SC6, use the InfoCenter to calibrate the traction motors. For T5, program the traction motor (contact an Authorized Toro Distributor for assistance). P1522 Traction Motor SC5, SC6, The speed Traction is Inspect the wiring and connectors.
- Page 62 Check the 48V logic relay and Voltage High 15V. connections. Inspect the battery terminals. Replace and program the traction motor (contact an Authorized Toro Distributor for assistance). P1532 Traction The internal 3WD Traction is Inspect the wiring and connectors Motor Internal regulator voltage disabled.
- Page 63 Inspect the motor power cables connections. Replace and program the traction motor controller (contact an Authorized Toro Distributor for assistance). Cycle the key switch. Use the InfoCenter to calibrate the traction motor controller. For SC5, calibrate the traction pedal first, then the traction motors.
- Page 64 Replace and program the traction Controller component of disabled. motor controller (contact an Authorized - Internal the controller Toro Distributor for assistance). Hardware fails in the Cycle the key switch. Failure indicated traction motor Use the InfoCenter to calibrate the controller.
- Page 65 Check battery and charger harnesses between 5° (41° for corrosion or damage. F) and 45° C Forward a copy of the battery output (113° F), or file (.BDS) to Toro Service (contact greater than an Authorized Toro Distributor for 6.25A when assistance). the battery temperature less than 5°...
- Page 66 Inspect the 6-wire harness between the controller and motor. Replace and program the starter/generator controller (contact an Authorized Toro Distributor for assistance). P1B31 Starter/Generator The internal PTO and Make sure the connections are all regulator voltage good.
- Page 67 If the fault repeats, replace and Phase Over current indicates is disabled. program the starter/generator Current an internal short. controller (contact an Authorized Toro Distributor for assistance). P1B6C Starter/Generator The hardware PTO and Cycle the key switch. Internal phase...
- Page 68 Verify power to the controller. Battery or loses communication controller Replace and program the Li-ion battery with the Li-ion controller (contact an Authorized Toro battery controller Distributor for assistance). (SC8). U0120 CAN Bus The primary PTO and Test the wiring from the controller to...
- Page 69 Controller communication Swap the T6: precharge controller with the with a known-good unit (contact precharge an Authorized Toro Distributor for controller (T6). assistance). U0131 CAN Bus The primary Traction is Test the wiring from the controller to Communication controller never disabled.
- Page 70 (P68). U110C Model Number The model Engine is Update machine software (contact an Unknown number not disabled. Authorized Toro Distributor for assistance). recognized. U1117 Source Address The primary Machine is Update machine software (contact an Contention controller disabled.
- Page 71 Swap cutting reel motors between with cutting unit cutting units. Replace and program 2 (left). the motor if the fault moves to the new position (contact an Authorized Toro Distributor for assistance). U1124 CAN Bus The T1: Primary PTO is disabled.
- Page 72 Description U1301 Software The cutting Engine is Update machine software (contact your Version unit 1 (center) disabled. Authorized Toro Distributor for assistance) Incompatibility - software is CU Motor 1 incompatible. U1302 Software The cutting unit Engine is Update machine software (contact your 2 (left) software disabled.
- Page 73 Description U130E Software SC5, SC6, The software is Traction is Update machine software (contact an Version incompatible in disabled. Authorized Toro Distributor for assistance). Incompatibility the component - Processor indicated. Mismatch U130F Software The T1: Primary Machine is Update machine software (contact an...
- Page 74 Test the ground at the controller. controller are not working Swap the T6: precharge controller correctly. with a known-good unit (contact an Authorized Toro Distributor for assistance). U1701 Board Internal Inputs or Machine is Test the 12V battery voltage. Error - IPE...
-
Page 75: Using The Infocenter Display For Troubleshooting
(circuit wiring or fuse) may exist, or the controller software may require reloading or replacement. Contact your Authorized Toro Distributor for assistance. A faulty output component will not be identified by the Output screen. The Output screen reflects the actions of the controller, not the component(s) involved in the operation. - Page 76 Using the Outputs Screen Note: An inappropriate output reading may indicate an issue with the controller. Contact your Authorized Toro Distributor for assistance with controller reprogramming or replacement. • Once the required conditions are satisfied (operator in the seat and manual...
-
Page 77: Troubleshooting
Troubleshooting CAUTION Remove all jewelry, especially rings and watches, before doing any electrical troubleshooting or testing. Disconnect the battery cables unless the test requires battery voltage. Model 04580 machines have a separate batteries for the 12 VDC system and the 48 VDC system. For effective troubleshooting and repairs, you must have a good understanding of the electrical circuits and components that are used on this machine;... -
Page 78: General Operation Problems (Model 04580)
General Operation Problems (Model 04580) Many aspects of machine and component operation are visible using the InfoCenter; refer to Using the InfoCenter Display for Troubleshooting (page 3–39). Machine faults may also appear on the InfoCenter display to assist in troubleshooting. Problem Possible Cause Corrective Action... -
Page 79: General Operation Problems (Model 04590)
General Operation Problems (Model 04590) For eTriFlex 3370 (model 04590) machines, a series of events occur to power up the machine prior to operating the machine steering, traction, lift/lower, and cutting unit functions. The events are explained here to assist with troubleshooting a machine that does not power up correctly. Many aspects of machine operation are visible for troubleshooting using the InfoCenter;... - Page 80 General Operation Problems (Model 04590) (continued) Note: With the exception of 12V power to the T1: primary controller Logic input, 12V control system power is made available to the machine through the shutdown delay relay. • 12V should pass through the 2A fuse in 12V fuse holder 2 under the right side cover and be available at the telematics connector (connector P71 pin 2).
- Page 81 The SC8: lithium-ion battery controller Replace and reprogram the lithium-ion (BMS) is damaged. battery controller (contact an Authorized Toro Distributor for assistance). Greensmaster® eTriFlex 3360 and 3370 Page 3–45 Troubleshooting: General Operation Problems (Model 04590) 19239SL Rev B...
-
Page 82: Aftercut Appearance
Note: For additional information regarding cutting unit troubleshooting, a number of Reel Mower and Aftercut Appearance General Training Books can be found on the Service Reference Set available from your Authorized Toro Distributor. Factors That Can Affect Quality of Cut... - Page 83 A variety of cutting unit rollers are available. Refer to the Cutting Unit Parts Manual for a listing of available accessories, or contact your local Authorized Toro Distributor for additional information. Ensure that the rollers rotate freely. Repair the roller bearings if necessary;...
-
Page 84: Grooming Performance
Grooming Performance There are a number of factors that can affect the performance of grooming. These factors vary for different golf courses and from green to green. It is important to inspect the turf frequently and vary the grooming practice with turf needs. -
Page 85: Universal Groomer Problems (Optional)
Universal Groomer Problems (Optional) Problem Possible Cause Corrective Action The groomer reel does not rotate. The groomer drive is in neutral. Engage the groomer drive to forward or reverse. The groomer drive gears are damaged Repair the groomer drive. or seized. The drive between the groomer and the Repair the groomer drive. -
Page 86: Battery Charger Error And Fault Codes (Model 04590)
Code E-0-0-4 Lithium-ion battery controller (BMS) or Forward a copy of the battery output battery fault detected file (.BDS) to Toro Service (contact an Authorized Toro Distributor for assistance). Code E-0-0-7 Battery amp hour limit exceeded Check all battery cable connections for corrosion or damage. -
Page 87: Chapter 4: Engine (Model 04580)
Chapter 4 Engine (Model 04580) Table of Contents General Information ..........................4–2 Traction Unit Operator’s Manual ......................4–2 Kawasaki Owner’s Manual......................... 4–2 Kawasaki Service Manual ........................4–2 Service and Repairs ..........................4–3 Fuel Tank ............................4–3 Evaporative Control System....................... 4–6 Cooling System.......................... -
Page 88: General Information
Service and repair parts for Kawasaki FS481V engines are supplied through your local Toro Distributor. If no parts list is available, be sure to provide your distributor with the Toro model and serial number along with the engine model and serial number. -
Page 89: Service And Repairs
Service and Repairs Fuel Tank g286303 Figure 9 Clamp (4 each) Stand pipe Carriage bolt (4 each) Flange nut (4 each) Cap screw Foam pad (4 each) Fuel tank Fuel cap Carbon canister assembly Bushing (2 each) Fuel supply hose Fuel vent hose Vent fitting Hose clamp (2 each) - Page 90 DANGER Gasoline is highly flammable and explosive. A fire or an explosion from the fuel can burn you, burn other people, and damage property. • Use caution whenever you store or handle gasoline. • Do not smoke while handling gasoline. •...
- Page 91 Installing the Fuel Tank (continued) 5. Check the fuel tank position and adjust if necessary: A. Install and lower the hood. B. The fuel tank should be aligned (square) with the front edge of the hood. C. Loosen the fuel tank clamps and adjust the tank position if necessary. D.
-
Page 92: Evaporative Control System
Evaporative Control System g286481 Figure 11 Hose clamp (2 each) Vent hose (valve to intake manifold) 11. Hose clamp (2 each) Hose clamp Vent hose (valve to intake tube) Vent hose (fresh air filter) Vent hose (tank to canister) Cap screw Carbon canister Vent hose (canister to valve) Clamp... - Page 93 Evaporative Control System (continued) 4. Test the operation of the vacuum control valve. The valve should open (allow flow between ports A and B) when 21 to 29 mm Hg (0.8 to 1.1 inch Hg) vacuum is applied to port C. 5.
-
Page 94: Cooling System
Cooling System g286401 Figure 12 Screen guard Air ducts (in hood) Rotating screen (under screen guard) Air duct screen (in hood) Blower housing IMPORTANT The engine that powers the eTriFlex model 04580 machine is air- cooled. Operating the engine with dirty or plugged cooling fins, a blocked screen guard or rotating screen, a plugged or dirty blower housing, or plugged intake screens or ducts in the hood may result in the engine overheating and cause engine damage. - Page 95 Cooling System (continued) CAUTION The engine and exhaust system may be hot. To avoid possible burns, allow the engine and exhaust system to cool before working on the engine. IMPORTANT Never clean engine with pressurized water. Water could enter and contaminate the fuel system.
-
Page 96: Exhaust System
Exhaust System g286389 Figure 13 Exhaust gasket (2 each) Shoulder screw (2 each) Lock washer (4 each) Conical washer (2 each) Hex nut (4 each) Flange nut (2 each) Exhaust pipe – LH Muffler Exhaust pipe – RH Heat shield Muffler clamp (2 each) Removing the Exhaust System CAUTION... - Page 97 Removing the Exhaust System (continued) 2. Remove the hood and rear wheel assembly for additional clearance if desired; refer to Removing and Installing the Hood Assembly (page 6–43) Removing and Installing the Wheels (page 6–9). 3. Remove the fasteners securing the muffler to the engine frame. 4.
-
Page 98: Engine
Engine g286719 Figure 15 Engine assembly Cap screw (4 each) Wire harness connector Choke cable Pulley cover Cap screw (ground) Flange nut (2 each) Cap screw (2 each) Cap screw (2 each) Wire harness ground wire (at engine block) Removing the Engine Refer to Figure 15 for this procedure. - Page 99 Removing the Engine (continued) 6. Disconnect the electrical system wiring from the engine: • The engine wire harness connector at the main wire harness (left side of engine). Check the engine and the harness connector for damage or corrosion and clean or repair as necessary. •...
- Page 100 Removing the Engine (continued) g286730 Figure 16 Engine frame assembly Cap screw Isolating mount – front (2 each) Cap screw Clamp Cap screw (4 each) Cap screw ( 2 each) Lock nut Flat washer (3 each) Isolating mount – rear Flange nut (4 each) Cap screw (2 each) Lock nut (3 each)
- Page 101 Removing the Engine (continued) CAUTION The engine frame assembly weighs approximately 68 kg (150 lb). Use an appropriate lift to remove the engine frame assembly. C. Remove the engine frame assembly from the machine. 10. Remove the fasteners securing the drip pan to the engine frame (item 3 and 4 in Figure 15).
- Page 102 Removing the Engine (continued) g308239 Figure 18 Cap screw Front engine lift lug CAUTION The engine assembly weighs approximately 42 kg (92 lb). Use an appropriate lift to remove the engine assembly. 13. Remove the 4 fasteners securing the engine to the engine frame and lift the engine from the machine.
- Page 103 Installing the Engine (continued) g286602 Figure 19 Engine Set screw (2 each) Engine pulley Square key CAUTION The engine assembly weighs approximately 42 kg (92 lb). Use an appropriate lift to install the engine assembly. IMPORTANT Make sure to not damage the engine, fuel or vent hoses, oil drain hose, electrical harnesses, control cables or other parts while installing the engine.
- Page 104 Installing the Engine (continued) 6. If the engine was removed from the machine separately, proceed to step of this procedure. If the entire engine frame assembly (including the starter/generator) was removed: A. Secure the 3 engine frame assembly isolation mounts to the machine with the fasteners previously removed.
-
Page 105: Chapter 5: Electrical System
Chapter 5 Electrical System Table of Contents General Information ..........................5–3 Traction Unit Operator’s Manual and Accessory Installation Instructions..........5–3 Kawasaki Engine Electrical Components................... 5–3 Electrical Drawings ..........................5–3 Electrical System Operation ........................5–4 Traction Subsystem ........................... 5–4 Steering Subsystem........................... 5–5 Lift/Lower Subsystem......................... - Page 106 Cutting Unit Lift/Lower Switches....................... 5–79 Lift/Lower Actuators ........................5–81 Engine Oil Pressure Switch (Model 04580) ..................5–84 Traction Pedal Position Sensor ......................5–86 Steering Position Sensor........................5–89 Relays .............................. 5–92 Contactors............................5–97 Diode Assemblies ..........................5–99 CAN bus Terminator Resistors ....................... 5–101 Batteries (Model 04580) ........................
-
Page 107: General Information
Kawasaki Engine Electrical Components When servicing or troubleshooting the engine electrical components, use the correct engine service manual. Kawasaki engine service manuals are available online, on the Toro Service Reference flash drive, and in print from your authorized Toro Distributor. Electrical Drawings... -
Page 108: Electrical System Operation
Electrical System Operation The eTriFlex machines have 4 different functional subsystems. Each subsystem has components that operate on 12 VDC, and components that operate on 48 VDC. Many of the machine control functions operate on a typical 12 VDC system. The electric traction motors, electric steering motor, electric cutting unit lift/lower actuators, and the electric cutting unit motors operate on an 48 VDC electrical system. -
Page 109: Steering Subsystem
Steering Subsystem The steering subsystem components work together to coordinate the position of the steering wheel with the position of the rear caster fork. The Radius Dependant Speed System (RDS) uses steering position information from the steering subsystem to control the traction and cutting unit drive subsystems. The steering subsystem and traction subsystem work together to steer the machine. -
Page 110: Lift/Lower Subsystem
Lift/Lower Subsystem The T1: Primary controller receives an input signal from the lift/lower switches and sends a CAN message to the lift/lower actuator controllers to lift or lower the cutting unit lift arms. The lift/lower subsystem consists of the following components: •... - Page 111 48 VDC System Components The eTriFlex 48 VDC system includes a 48 VDC battery pack, an engine driven starter/generator (model 04580), two front traction motors, a steering input device and a steering motor, three cutting unit lift/lower actuators, three cutting unit motors, a main contactor and a traction motor contactor.
- Page 112 48 VDC System Components (continued) Control for the components in the 48 VDC system is handled by the front traction motor controllers (SC5: Traction 1 and SC6: Traction 2), a controller in the optional rear traction motor (T5: Traction 3), a controller in the steering motor (SC7: Steering), a controller in each lift/lower actuator (SC1: Lift/Lower 1, SC2: Lift/Lower 2, SC3: Lift/Lower 3), a controller in each cutting unit motor (T2: Cutting Unit 1, T2: Cutting Unit 2, T3: Cutting Unit 3), along with direction...
-
Page 113: 48V Battery Disconnect
48V Battery Disconnect CAUTION Before installing, removing or servicing components in the 48 VDC system (e.g. cutting unit motors, starter/generator), separate the 48V battery disconnect. This will prevent unexpected operation of 48V system components. The 48V battery disconnect is attached to a bracket behind the left side cover. Unplug the disconnect to make sure that 48 VDC components do not operate unexpectedly. -
Page 114: Infocenter
5–12) for additional information. Note: If the InfoCenter display (SC1) is replaced for any reason, the machine software must be updated; contact an Authorized Toro Distributor for assistance. Electrical System: Electrical System Operation Page 5–10 Greensmaster® eTriFlex 3360 and 3370... - Page 115 InfoCenter (continued) g288412 Figure 22 InfoCenter Screens – Greensmaster 3360 eTriFlex Greensmaster® eTriFlex 3360 and 3370 Page 5–11 Electrical System: Electrical System Operation 19239SL Rev B...
-
Page 116: Can Bus Communications
The Toro DIAG electronic control diagnostics service system is available to Authorized Toro Distributors to support machine fault diagnosis and maintenance services of the machine electrical control devices. The Toro DIAG connector is part of the CAN bus and is located at the rear of the console armrest. - Page 117 CAN bus Communications (continued) g287505 Figure 24 CAN bus isolation module T6: Pre–charge controller (model 03590 only) CAN A – 12V side SC2: Lift/Lower 1 actuator controller (center) CAN B– 48V side SC2: Lift/Lower 2 actuator controller (left) CAN bus terminator resistor (4 each) SC2: Lift/Lower 3 actuator controller (right) T1: Primary controller SC5: Traction 1 motor controller (right)
-
Page 118: T1: Primary Controller
(page 5–12) for additional information. Note: If the T1: Primary controller is replaced for any reason, the machine software must be updated; contact an Authorized Toro Distributor for assistance. Electrical System: Electrical System Operation Page 5–14 Greensmaster® eTriFlex 3360 and 3370... -
Page 119: Sc8: Lithium-Ion Battery Controller (Model 04590)
SC8: Lithium-Ion Battery Controller (Model 04590) g311711 Figure 26 (shown with hood removed) SC8: Lithium–ion battery controller The eTriFlex 3370 uses a Lithium–ion battery controller or Battery Management System (BMS) to manage the lithium-ion batteries. Each of the eight lithium-ion batteries communicates with the BMS through a sub-net via the battery interface harness. - Page 120 The controller is protected by tamper-alerting devices. Note: If the SC8: Lithium-Ion Battery Controller is replaced for any reason, the machine software must be updated; contact an Authorized Toro Distributor for assistance. Electrical System: Electrical System Operation Page 5–16...
-
Page 121: T6: Precharge Controller (Model 04590)
(page 5–12) for additional information. Note: If the precharge controller (T6) is replaced for any reason, the machine software must be updated; contact an Authorized Toro Distributor for assistance. Greensmaster® eTriFlex 3360 and 3370 Page 5–17 Electrical System: Electrical System Operation... -
Page 122: Electrical System Quick Checks
Electrical System Quick Checks Testing the 12V Charging System (Model 04580) Battery Voltage Table At least 0.50 VDC over the initial battery voltage. Initial battery voltage = 12.30 VDC Battery voltage after 3 minutes charge = 12.85 VDC Difference = +0.55 VDC This is a simple test that determines if the 12V charging system is functioning. -
Page 123: Checking The Interlock System Operation
Testing the 12V Charging System (Model 04580) (continued) Note: Depending upon the condition of the battery, its current charge and the battery temperature, the battery voltage increases at different rates as the battery charges. Refer to the Battery Voltage Table (page 5–18) for an example of a charging system that is functioning. -
Page 124: Adjustments
Adjustments Adjusting the Starter/Generator Drive Belt Tension (Model 04580) For additional starter/generator service information; refer to Generator Assembly (Model 04580) (page 5–120). 1. Remove the fuel tank; refer to Removing the Fuel Tank (page 4–4). 2. Tilt the operator seat forward and remove the starter/generator pulley cover. 3. -
Page 125: Adjusting The Steering Position Sensor
Adjusting the Steering Position Sensor g290691 Figure 30 Steering position sensor Slot in magnet bolt Magnetic bolt Flat on caster fork shaft Jam nut The steering position sensor is a two–piece assembly located on top of the rear wheel caster fork shaft. The sensor portion includes 2 analog hall effect sensors. The second piece of the assembly is a bolt with a magnetic head threaded into the caster fork shaft. -
Page 126: Adjusting The Manual Parking Brake Switch
Adjusting the Manual Parking Brake Switch g290133 Figure 31 Manual parking brake switch Latch Brake pedal support Jam nut (2 each) The manual parking brake switch is located directly under the brake pedal assembly. The manual parking brake switch is an input to the T1: primary controller. -
Page 127: Testing The Electrical Components
Testing the Electrical Components The Greensmaster eTriFlex 3360 and 3370 machines have isolated electrical systems; they do not use the machine frame as ground. Use an unpainted surface of the engine block or an unpainted engine fastener as a ground for testing 12V components unless instructed otherwise. - Page 128 Identifying the 12 VDC System Fuses and their Functions A group of fuses used to protect the 12 VDC system are located in 2 covered fuse holders under the right side cover. These are mini blade style fuses. g287311 Figure 33 (right side cover removed) 10A fuse –...
- Page 129 Identifying the 48 VDC System Fuses and their Functions A group of fuses used to protect the 48 VDC system are located in an open fuse block under the operator’s seat. These are standard blade ATO style fuses. g287256 Figure 34 (seat raised) 10A 80V fuse –...
- Page 130 Identifying the 48 VDC System Fuses and their Functions (continued) g291449 Figure 35 (model 04590 only) Fuse holder 3A 80V fuse – T6:Precharge controller (model 04590) Electrical System: Testing the Electrical Components Page 5–26 Greensmaster® eTriFlex 3360 and 3370 19239SL Rev B...
- Page 131 Identifying the 48 VDC System Fuses and their Functions (continued) Three fuses are used to protect the 48 VDC cutting unit motors. An additional fuse is used to protect the optional 48 VDC 3WD (rear) traction motor. These are Maxi blade fuses located in a covered fuse block under the left side cover. g287313 Figure 36 (left side cover removed)
- Page 132 If a MIDI or BF1 style fuse is removed: 1. Tighten the hex nuts that secure the fuse from 2.3 to 2.8 N·m (20 to 25 in-lb). 2. Coat the terminals with battery terminal protector Toro Part No. 107-0392 to reduce corrosion.
- Page 133 If a Mega style fuse is removed, tighten the hex nuts that secure the fuse from 12 to 17 N·m (9 to 13 ft-lb), then coat the terminals with battery terminal protector Toro Part No. 107-0392 to reduce corrosion. g287325...
-
Page 134: Can Bus
CAN bus The machine controllers communicate with each other on a Controller Area Network (CAN) bus system; refer to CAN bus Communications (page 5–12) CAN bus operation notes. Controllers that operate on 12 VDC connect to the 12V side of the CAN bus (CAN A), while controllers that operate on 48 VDC connect to the 48V side of the CAN bus (CAN B). - Page 135 Testing the CAN bus (continued) 3. Locate the CAN bus isolation module and disconnect it from the machine wire harness. Check the module and the harness connector for damage or corrosion and clean or repair as necessary. g287575 Figure 40 (right side cover removed) Machine wire harness connector CAN bus isolation module...
- Page 136 Testing the CAN bus (continued) • A reading of more than 500k ohms indicates damage to the wiring of the CAN side being tested; refer to Appendix A (page A–1). 8. Connect the CAN bus isolation module to the machine wire harness after testing.
-
Page 137: Can Bus Isolation Module
There is no additional testing procedure available for the InfoCenter display. Note: If the InfoCenter display is replaced for any reason, the machine software must be updated; contact an Authorized Toro Distributor for assistance. Greensmaster® eTriFlex 3360 and 3370 Page 5–33... -
Page 138: T1: Primary Controller
ON or START position. A 7.5 Amp fuse protects all of the key switched circuits, including the primary controller output circuits. Note: If the primary controller (T1) is replaced for any reason, the machine software must be updated; contact an Authorized Toro Distributor for assistance. Electrical System: Testing the Electrical Components Page 5–34 Greensmaster®... - Page 139 T1: Primary Controller (continued) T1: Primary Controller Inputs INPUT NUMBER DESCRIPTION INPUT NUMBER DESCRIPTION IN 1 Not Used IN 11 Not Used IN 2 Cutting Unit Raise IN 12 Not Used Switch IN 3 Cutting Unit Lower IN 13 Not Used Switch IN 4 Manual Parking...
- Page 140 T1: Primary Controller (continued) IMPORTANT When testing for wire harness continuity at the connector for the controller, take care to not damage the connector pins with multimeter test leads. If connector pins are enlarged or damaged during testing, connector repair may be necessary for proper machine operation.
-
Page 141: Starter/Generator (Model 04580)
InfoCenter display as described in the following test procedure. Refer to Appendix A (page A–1) for circuit wiring information. Note: If the starter/generator controller is replaced for any reason, the machine software must be updated; contact an Authorized Toro Distributor for assistance. g292613 Figure 44 Engine Generator Testing the Starter/Generator 1. - Page 142 Testing the Starter/Generator (continued) 4. Access the InfoCenter Diagnostics > Generator > Inputs screen. g292336 Figure 45 48V system voltage should be present at the starter/generator logic circuit Gen Logic V and at the starter/generator power bus circuit Gen Bus V. •...
- Page 143 Generator Assembly (Model 04580) (page 5–120). If the starter/generator controller is replaced, update the machine software; contact an Authorized Toro Distributor. Greensmaster® eTriFlex 3360 and 3370 Page 5–39 Electrical System: Testing the Electrical Components 19239SL Rev B...
-
Page 144: Sc8: Lithium-Ion Battery Controller (Model 04590)
The BMS is located under the hood attached to the back of the center mounted batteries. Note: If the SC8: Lithium-Ion Battery Controller is replaced for any reason, the machine software must be updated; contact an Authorized Toro Distributor for assistance. Testing the SC8: Lithium-Ion Battery Controller (Model 04590) - Page 145 Testing the SC8: Lithium-Ion Battery Controller (Model 04590) (continued) g312559 Figure 48 Lithium-Ion battery controller (BMS) 4. M-S terminal (battery interface COM terminal (machine wire harness) harness) Positive (+) terminal (power supply B- terminal (negative (-) battery Controller wire harness connector positive (+) cable) cable) B+ terminal (positive (+) battery...
- Page 146 Removing and Installing the SC8: Lithium-Ion Battery Controller (Model 04590) (continued) g312564 Figure 49 Battery cable terminal (typical) 1/2 inch ID rubber hose IMPORTANT Do not open the lithium-Ion battery controller. There are no serviceable parts on or in the controller. If you open the controller, you will void the warranty.
- Page 147 Removing and Installing the SC8: Lithium-Ion Battery Controller (Model 04590) (continued) g312581 Figure 50 Power supply positive (+) cable SC8: lithium-ion battery controller Negative (-) battery cable (BMS) Machine wire harness positive (+) Controller bracket and T6: Power supply negative (-) cable cable precharge controller assembly Positive (+) battery cable...
- Page 148 11. Tighten the power supply and battery cable fasteners from 8.5 to 9.5 N·m (75 to 85 in-lb), then apply battery terminal protector Toro Part No. 107-0392 or a light layer of grease to the battery terminals and cable connectors to reduce corrosion.
-
Page 149: T6: Precharge Controller (Model 04590)
Note: If the precharge controller (T6) is replaced for any reason, the machine software must be updated; contact an Authorized Toro Distributor for assistance. Testing the T6: Precharge Controller (Model 04590) - Page 150 Testing the T6: Precharge Controller (Model 04590) (continued) 4. Access the InfoCenter Diagnostics > Precharge > Inputs screen. g311218 Figure 52 Logic V • If 48V system voltage is present, the T1: primary controller has energized the logic relay and power is being supplied to the precharge controller precharge input (connector P02 pin 6).
- Page 151 Testing the T6: Precharge Controller (Model 04590) (continued) T6: Precharge Controller Inputs (continued) INPUT NUMBER DESCRIPTION INPUT NUMBER DESCRIPTION Precharge IN 5 Not Used Logic Relay Switch IN 1 Not Used IN 6 Not Used IN 2 Not Used IN 7 Not Used IN 3 Not Used...
- Page 152 Testing the T6: Precharge Controller (Model 04590) (continued) g311294 Figure 53 Machine wire harness connector P02 T6: Precharge controller (gray) Machine wire harness connector P03 (black) Two 12 pin wire harness connectors are attached to the controller. The connection terminal function for the controller and the wire harness connector pins are shown above.
-
Page 153: Vdc/12 Vdc Converter (Model 04590)
48 VDC/12 VDC Converter (Model 04590) g307998 Figure 54 48 VDC/12 VDC Converter T1: Primary Controller The 48V battery pack and the 48 VDC/12 VDC converter are used to supply the 12 VDC electrical system with power. The 48 VDC/12 VDC converter is located under the right side cover below the T1: primary controller. - Page 154 Testing the 48 VDC/12 VDC Converter (continued) Wire Expected Location Harness Connector Connector Graphic Color Reading Main Black 12 VDC (nominal) Main 5. If testing determines the converter is faulty, replace the converter. 6. If the converter tests correctly and a circuit problem still exists, check the wire harnesses;...
-
Page 155: Front Traction Motor Controllers
Note: If a front traction motor controller (SC5 or SC6) is replaced for any reason, the machine software must be updated and the front traction motors must be calibrated; contact an Authorized Toro Distributor for assistance. g292865 Figure 55... - Page 156 Testing the Front Traction Motor Controllers (continued) 1. Park the machine on a level surface, lower the cutting units and set the key switch to the O position. 2. Set the function control switch to the N position. EUTRAL 3. Sit in the operator seat and set the key switch on the O position.
- Page 157 Testing the Front Traction Motor Controllers (continued) g309126 Figure 57 Front traction motor controller (SC5: Cable – battery positive (-) Traction 1 shown) Multi-pin wire harness connector Cable – motor phase (W) Cable – motor phase (U) Washer (5 each) Cable –...
- Page 158 G. Lift the rubber boots from the cable terminals and coat the terminals with battery terminal protector Toro Part No. 107-0392 to reduce corrosion. Fit the rubber boots securely over the terminals. H. Update the machine software; contact an Authorized Toro Distributor for assistance.
-
Page 159: Front Traction Motor
Front Traction Motor The two front traction motors are brushless permanent magnet motors located directly behind the front wheels. Each motor is attached to an oil filled gear box with an internal disc brake. Each motor includes a rotary encoder to recognize the motor speed. - Page 160 Testing the Front Traction Motors (continued) Refer to Figure 58 for this procedure. 1. Park the machine on a level surface, lower the cutting units and set the key switch to the O position. 2. Set the function control switch to the N position.
-
Page 161: Rear Wheel Traction Motor (Optional 3Wd)
Note: If the rear wheel traction motor is replaced for any reason, the machine software must be updated; contact an Authorized Toro Distributor for assistance. Testing the Rear Wheel Traction Motor The InfoCenter Display can also be used to monitor the current draw for the traction motors during machine operation. - Page 162 Testing the Rear Wheel Traction Motor (continued) If logic voltage is present at the controller, and CAN bus communication is suspect, the CAN bus circuit is damaged. The CAN bus wiring should be checked for corrosion or damage and cleaned or repaired as necessary.
-
Page 163: Steering Input Device
Steering Input Device g293846 Figure 61 Button head screw (6 each) Roll pin Screw Flange head screw (4 each) Steering mount Hex nut Steering input device Washer Lock nut (4 each) Steering wheel Cover Set screw (2 each) Device wire harness connector Shaft adapter The steering input device is mounted to the steering arm behind the steering wheel. - Page 164 Testing the Steering Input Device (continued) 3. Sit in the operator seat and set the key switch to the O position. 4. Access the InfoCenter Diagnostics > Steering > Inputs screen. g293809 Figure 62 The steering input device sensor signal voltage characteristics are: •...
- Page 165 Testing the Steering Input Device (continued) 7. St Wheel Feel is the amount of current being sent by the T1: Primary controller to the steering input device brake coil, and not necessarily what is being received by the coil. The steering input device brake coil amperage characteristics are: •...
-
Page 166: Steering Motor
Note: If the steering motor (SC7) is replaced for any reason, the machine software must be updated; contact an Authorized Toro Distributor for assistance. If the steering motor is replaced or removed for any reason, the steering system must be calibrated. - Page 167 Testing the Steering Motor (continued) g293903 Figure 65 5. 48V system voltage should be present at the steering motor controller logic circuit Logic Voltage. • If – – – appears, the controller is not communicating on the CAN bus. Voltage must be present at the controller logic circuit before communication can occur on the CAN bus.
- Page 168 D. Use a new steering motor gasket, orient the steering motor as previously recorded, and install the steering motor. E. Update the machine software; contact an Authorized Toro Distributor. 10. Calibrate the steering system. Calibrate the steering system – center first, then calibrate the steering system –...
-
Page 169: Location Id Module
Location ID Module The location ID module is part of the 48 VDC electrical circuit, and is used to identify the 3 cutting unit motors and the optional rear wheel traction motor individually. The ID module enables machine operation features such as starting and stopping the center cutting unit slightly later than the front cutting units. - Page 170 Testing the Location ID Module (continued) 7. If the ID module tests correctly and a circuit problem still exists, check the wire harness: A. Use a multimeter (ohms setting) to measure and record the resistance across the disconnected machine wire harness connector terminals. g287900 Figure 68 Machine wire harness connector...
-
Page 171: Cutting Unit Motors
Note: If a cutting unit motor is replaced for any reason, the machine software must be updated; contact an Authorized Toro Distributor for assistance. Testing the Cutting Unit Motors The InfoCenter Display can be used to monitor the speed and current draw for the cutting unit motors during machine operation;... - Page 172 Testing the Cutting Unit Motors (continued) • If – – – appears, the controller is not communicating on the CAN bus. Voltage must be present at the controller logic circuit before communication can occur on the CAN bus. If voltage is not present at the logic circuit, the logic circuit is damaged. The circuit wiring should be checked for corrosion or damage and cleaned or repaired as necessary.
-
Page 173: Key Switch (Model 04580)
Key Switch (Model 04580) POSITION CLOSED CIRCUITS 1 + 6, 4 + 5 1 + 3 + 4 + 5 + 6 START 1 + 2 + 4 + 5 + 6 The key switch on the console has three (3) positions − OFF, RUN and START. The key switch is an input used by the T1: Primary controller to manage various machine functions. -
Page 174: Key Switch (Model 04590)
Key Switch (Model 04590) POSITION CLOSED CIRCUITS NONE B + C + F, D + E START A + B + C The key switch on the console has three (3) positions − O and S TART The S position is not used on this machine. The key switch is used to TART energize the T6: Precharge controller and the SC8: 48V Battery Controller. -
Page 175: Function Control Switch
Function Control Switch POSITION CLOSED CIRCUITS NEUTRAL 1 + 2, 4 + 5 2 + 3, 4 + 5 TRANSPORT 2 + 3, 5 + 6 The function control switch is located on the operator console. The function control switch allows the operator to select between N (also used for EUTRAL backlapping), M... -
Page 176: Light Switch (Optional)
Light Switch (Optional) POSITION CLOSED CIRCUITS 1 + 2, 4 + 5 FRONT AND REAR FACING LIGHTS ON NONE REAR 2 + 3, 5 + 6 FACING LIGHT ON The light switch is located on the operator console. Pushing down on the right side of the switch energizes the front and rear facing lights. -
Page 177: Seat Switch
Seat Switch g289941 Figure 71 Seat assembly Seat switch Seat switch wire harness The seat switch is a normally open switch that closes when the operator is on the seat. The seat switch and its electrical connector are located directly under the seat. - Page 178 Testing the Seat Switch (continued) B. Access the top of the switch by slipping between the seat frame and the seat base foam. C. Release the switch from underneath and remove the switch. D. Install the seat switch in the reverse order. If the seat switch and seat switch harness tests correctly and a circuit problem still exists, check the main wire harness;...
-
Page 179: Brake Actuator
Brake Actuator The eTriFlex machines use a single mechanical brake assembly that can be used as a service brake, a manual parking brake, and an automatic parking brake. The service brake and manual parking brake are controlled by a cable connected to pedals at the operator’s left foot, while the automatic parking brake is controlled by an 12 VDC electric brake actuator. - Page 180 Testing the Brake Actuator (continued) 4. Disconnect the brake actuator from the machine harness. Check the actuator and the harness connector for damage or corrosion and clean or repair as necessary. 5. Remove the actuator from the machine. 6. Use the cylinder pin to clamp the body of the actuator securely in a vise, and manually extend and retract the actuator rod.
-
Page 181: Manual Parking Brake Switch
Manual Parking Brake Switch g290079 Figure 73 (view from under foot panel) Manual parking brake switch Latch The switch is located directly under the brake pedal assembly. The manual parking brake switch is an input to the T1: primary controller. The switch is a normally open proximity switch that closes when the foot actuated parking brake is disengaged (the parking brake latch is in close proximity to the switch). - Page 182 Testing the Manual Parking Brake Switch (continued) B. Disconnect the machine wire harness from the parking brake switch. Check the switch and the harness connector for damage or corrosion and clean or repair as necessary. C. Set the key switch to the O position (do not start the engine) and use a multimeter (DC voltage setting) to verify that the machine wire harness pink wire has system voltage (12 VDC) present.
-
Page 183: Cutting Unit Lift/Lower Switches
Cutting Unit Lift/Lower Switches g290159 Figure 74 Console Lower switch Knob Lift switch Jam nut (2 each) Cap screw (2 each) Stem Hex nut (2 each) Joystick assembly Raise/Lower Switch Testing Reference JOYSTICK POSITION RAISE SWITCH CIRCUIT LOWER SWITCH CIRCUIT LIFT 1 + 2 1 + 3... - Page 184 Testing the Cutting Unit Lift/Lower Switches (continued) 2. Disconnect the battery negative (-) cable at the 12V system battery (model 04580); refer to Removing and Installing the 12V System Battery (Model 04580) (page 5–105), or unplug the 48V battery disconnect (model 04590); refer to 48V Battery Disconnect (page 5–9).
-
Page 185: Lift/Lower Actuators
Note: If a lift/lower actuator (SC2, SC3, or SC4) is replaced for any reason, the machine software must be updated; contact an Authorized Toro Distributor for assistance. If the lift/lower actuator is removed for any reason, the lift/lower actuator must be calibrated;... - Page 186 Testing the Lift/Lower Actuators 1. Park the machine on a level surface, lower the cutting units and set the key switch to the O position. 2. Engage the manual parking brake and set the function control switch to the position. EUTRAL 3.
- Page 187 7. If the InfoCenter diagnostics inputs and outputs report normally and the actuator does not function properly, replace the actuator and update the machine software; contact an Authorized Toro Distributor. 8. Calibrate the lift/lower actuator: refer to Calibrating the Lift/Lower Actuators (page 5–83).
-
Page 188: Engine Oil Pressure Switch (Model 04580)
Engine Oil Pressure Switch (Model 04580) g289630 Figure 78 The engine oil pressure switch is located on the right side of the engine near the oil filter. The oil pressure switch is a normally open switch that closes under engine oil pressure. The condition of the engine oil pressure switch is monitored by the T1: Primary controller. - Page 189 Testing the Engine Oil Pressure Switch (continued) 4. Replace the switch as necessary. 5. If the switch tests correctly and a circuit problem still exists, check the machine wire harness; refer to Appendix A (page A–1). 6. After testing, connect the engine wire harness to the switch before returning the machine to service.
-
Page 190: Traction Pedal Position Sensor
Traction Pedal Position Sensor g290223 Figure 79 Traction pedal position sensor Shield Wire harness connector Screw (2 each) The traction pedal position sensor is a separate component in the traction pedal assembly. The sensor includes 2 analog hall effect sensors. The traction pedal sensor follows the traction pedal movement. - Page 191 Testing the Traction Pedal Position Sensor (continued) 2. Ensure the traction pedal assembly is able to move from full forward stop to full rearward stop. 3. Use the InfoCenter to view the sensor signal voltage: A. Sit in the operator seat and set the key switch to the O position.
- Page 192 Testing the Traction Pedal Position Sensor (continued) 5. Replace the traction pedal position sensor if necessary. Ensure the sensor drive is aligned with the tab on the pedal shaft before tightening the mounting fasteners. 6. If the traction pedal position sensor tests correctly and a circuit problem still exists, check the machine wire harness;...
-
Page 193: Steering Position Sensor
Steering Position Sensor g290696 Figure 81 Steering position sensor Caster fork shaft Magnetic bolt Sensor harness connector The steering position sensor is a two–piece assembly located on top of the rear wheel caster fork shaft. The sensor portion includes 2 analog hall effect sensors. The second piece of the assembly is a bolt with a magnetic head threaded into the caster fork shaft. - Page 194 Testing the Steering Position Sensor (continued) 1. Park the machine on a level surface, lower the cutting units, set the key switch to the O position and remove the key. 2. Raise and support the rear of the machine; refer to Jacking Instructions (page 1–6).
- Page 195 Testing the Steering Position Sensor (continued) C. Turn the caster fork by hand until it is square with the machine (straight). Using a multimeter (DC voltage setting), 2.0 – 3.0 VDC should be present at both sensor connector pins 3 and 6. D.
-
Page 196: Relays
Relays Greensmaster eTriFlex machines use a number of electrical relays. Some of the relays have four (4) terminals and some have five (5) terminals. The number of terminals the relay has determines how the relay should be tested. A tag near the wire harness relay connector can be used to identify each relay. - Page 197 g291276 Figure 84 eTriFlex 3370 Model 04590 Logic relay Shutdown delay relay (model 04590) Brake actuator relay The relays are located under the right side cover: • The logic relay is a 4 terminal relay with a 12V coil. • The brake actuator relay is a 5 terminal relay with a 12V coil.
- Page 198 Identifying the Relays and their Functions (continued) Shutdown Delay Relay (Model 04590) The shutdown delay relay is energized when the key switch is set to the R position. When energized, the shutdown delay relay supplies power to the 12V control circuits (manual parking brake switch, T1: primary controller outputs, InfoCenter display, CAN bus isolation module, brake actuator relay switch terminal).
- Page 199 Testing Relays with 4 Terminals (continued) relay should make and break continuity between terminals 30 and 87 as +voltage is applied and removed from terminal 85. 8. Replace the relay as necessary. 9. If the relay tests correctly and a circuit problem still exists, check the wire harnesses;...
- Page 200 Testing Relays with 5 Terminals (continued) 7. Connect multimeter (ohms setting) leads to relay terminals 30 and 87. Ground terminal 86 and apply +12 VDC to terminal 85. The relay should make and break continuity between terminals 30 and 87 as +voltage is applied and removed from terminal 85.
-
Page 201: Contactors
Contactors Two contactors are used on eTriFlex machines. Both contactors are located under the left side cover. The main contactor connects the 48V batteries to the 48V power bus for the lift/lower actuators, cutting unit motors, the optional 3WD traction motor, and the starter/generator (model 04580). The steering motor is connected to the 48V power bus at all times and is not controlled by the main contactor. - Page 202 4.5 to 5.6 N·m (40 to 50 in-lb). Secure the coil terminal connectors with keps nuts and tighten the nuts from 1.5 to 1.7 N·m (13 to 15 in-lb). Apply battery terminal protector Toro Part No. 107-0392 or a light layer of grease to the contactor terminals and cable connectors to reduce corrosion.
-
Page 203: Diode Assemblies
Diode Assemblies Multimeter Multimeter Resistance Red (+) Lead Black (-) Lead DIODE DIODE VERY LOW TERMINAL A TERMINAL B DIODE DIODE VERY HIGH TERMINAL B TERMINAL A Two different diodes are used on the eTriFlex machines. The maximum current allowed through any of the diodes is 6 amps. The diodes can be identified by their black color and diode symbol on the end of the diode body. - Page 204 Testing the Diode Assemblies (continued) 4. If the diode tests correctly and a circuit problem still exists, check the wire harnesses; refer to Appendix A (page A–1). Electrical System: Testing the Electrical Components Page 5–100 Greensmaster® eTriFlex 3360 and 3370 19239SL Rev B...
-
Page 205: Can Bus Terminator Resistors
CAN bus Terminator Resistors The machine controllers communicate with each other on a Controller Area Network (CAN) bus system. Controllers that operate on 12 VDC connect to the 12V side of the CAN bus (CAN A), while controllers that operate on 48 VDC connect to the 48V side of the CAN bus (CAN B). - Page 206 7. If the resistors test correctly and a circuit problem still exists, check the remainder of the CAN–bus; refer to Testing the CAN bus (page 5–30), Appendix A (page A–1), or contact an Authorized Toro Distributor for assistance. Electrical System: Testing the Electrical Components Page 5–102 Greensmaster® eTriFlex 3360 and 3370...
-
Page 207: Batteries (Model 04580)
3. Tighten the battery cables on the battery terminals to provide a good electrical contact. Apply a coating of Toro Part No. 107-0392 battery terminal protector or a light coat of grease to the terminals to reduce corrosion after you make the connections;... -
Page 208: Storing The Batteries (Model 04580)
Storing the Batteries (Model 04580) If you store the machine for more than 30 days: 1. Ensure that the key switch is in the O position. 2. Unplug the 48V battery disconnect; refer to 48V Battery Disconnect (page 5–9). 3. Disconnect the ground (-) cable from the 12V battery; refer to Removing and Installing the 12V System Battery (Model 04580) (page 5–105). -
Page 209: Servicing The Batteries (Model 04580)
Servicing the Batteries (Model 04580) Battery Specifications 12V system battery Type: absorbed glass mat (AGM), valve regulated lead acid (VRLA) Nominal voltage: 12 AH rating: 16.5 Length: 15.0 cm (5.9 inches) Width: 6.6 cm (2.6 inches) Height including terminal posts: 10.7 cm (4.2 inches) 48V system batteries –... - Page 210 6. Tighten the battery terminal fasteners from 3.8 to 4.1 N·m (34 to 37 in-lb), then apply battery terminal protector Toro Part No. 107-0392 or a light layer of grease to the battery terminals and cable connectors to reduce corrosion.
- Page 211 Removing and Installing the 48V System Batteries (Model 04580) g291925 Figure 92 Battery (4 each) Push nut (2 each) Retaining ring Battery cover – RH Battery hold down (2 each) Clamp (10 each) Battery cover – LH Lock nut (2 each) Flat washer Flat washer (4 each) Jumper cable (2 each)
- Page 212 11. Tighten the battery terminal fasteners from 5.2 to 6.1 N·m (46 to 54 in-lb), then apply battery terminal protector Toro Part No. 107-0392 or a light layer of grease to the battery terminals and cable connectors to reduce corrosion.
- Page 213 Tighten the battery terminal cap screws from 5.2 to 4.5 N·m (46 to 54 in-lb). 15. After you make the connections, apply battery terminal protector Toro Part No. 107-0392 or a light layer of grease to the battery terminals and cable connectors to reduce corrosion;...
- Page 214 Inspecting, Maintaining, and Testing the Batteries (Model 04580) (continued) IMPORTANT Many locally available battery load testers do not, have any adjustment on the load that is put on the battery. Results received from using load testers should follow the recommendations of the load tester manufacturer.
-
Page 215: Batteries (Model 04590)
Ensure that the battery pack is charged with the Toro lithium-ion battery charger that is specially designed for the batteries. For best battery life, connect the machine to the battery charger any time the machine is not in use. -
Page 216: Storing The Lithium-Ion Batteries (Model 04590)
Caring for the Lithium-Ion Batteries (Model 04590) (continued) Keep the battery covers clean. A dirty battery cover will increase the heat in the battery and will reduce the energy capacity and life of the battery. Storing the Lithium-Ion Batteries (Model 04590) If the mower will be stored for more than 10 days, ensure that the machine is connected to the lithium-ion battery charger. -
Page 217: Charging The Lithium-Ion Batteries (Model 04590)
Note: A record of battery charger operation data can be downloaded by inserting a flash drive into the USB port on the battery charger. Forward a copy of the battery charger data file to Toro Service (contact an Authorized Toro Distributor for assistance). - Page 218 Removing and Installing the Lithium-Ion Batteries (Model 04590) (continued) g309819 Figure 94 Positive (+) battery cable – center Hex nut Positive (+) battery cable – right side Washer Positive (+) battery cable – left side Electrical System: Batteries (Model 04590) Page 5–114 Greensmaster®...
- Page 219 Removing and Installing the Lithium-Ion Batteries (Model 04590) (continued) g310213 Figure 95 Right side mounted battery Washer Carriage bolt (8 each) assembly Left side mounted battery assembly 5. Battery interface harness Hex nut Battery clamp nut (8 each) 5. To remove the side mounted batteries: A.
- Page 220 Removing and Installing the Lithium-Ion Batteries (Model 04590) (continued) g310864 Figure 96 Center battery cover Lock nut (2 each) Positive (+) wire harness terminal Battery cover clamp (4 each) Center mounted battery assembly 10. Washer (4 each) Battery interface harness Flange head screw (2 each) Negative (–) wire harness terminal Flange head screw (2 each)
- Page 221 Removing and Installing the Lithium-Ion Batteries (Model 04590) (continued) F. Label and disconnect the machine wire harness connectors from the T6: precharge controller. G. Remove the 4 fasteners securing the center mounted battery try to the machine. CAUTION The center mounted battery assembly weighs approximately 67 kg (148 lbs).
- Page 222 Removing and Installing the Lithium-Ion Batteries (Model 04590) (continued) g310850 Figure 97 Lock nut (6 each) Carriage bolt (4 each) Battery support (2 each) Battery clamp rod (2 each) Controller bracket Negative (-) battery cable (3 each) Flat washer (2 each) Lock nut (3 each) Carriage bolt (3 each) Jam nut (4 each)
- Page 223 10. Tighten the battery cable fasteners from 8.5 to 9.5 N·m (75 to 85 in-lb), then apply battery terminal protector Toro Part No. 107-0392 or a light layer of grease to the battery terminals and cable connectors to reduce corrosion.
-
Page 224: Service And Repairs
Service and Repairs Generator Assembly (Model 04580) Note: If the starter/generator controller is replaced for any reason, the machine software must be updated; contact an Authorized Toro Distributor for assistance. Replacing the Starter/Generator Drive Belt 1. Remove the fuel tank; refer to Removing the Fuel Tank (page 4–4). - Page 225 Removing the Starter/Generator Assembly g286730 Figure 99 Engine frame assembly Cap screw Isolating mount – front (2 each) Cap screw Clamp Cap screw (4 each) Lock nut Cap screw ( 2 each) Flat washer (3 each) Isolating mount – rear Flange nut (4 each) Cap screw (2 each) Lock nut (3 each)
- Page 226 Removing the Starter/Generator Assembly (continued) 5. Remove the fuel tank; refer to Removing the Fuel Tank (page 4–4). 6. Remove the evaporative control system carbon canister from the machine. 7. Disconnect the electrical system wiring from the engine: • The engine wire harness connector at the main wire harness (left side of engine).
- Page 227 Removing the Starter/Generator Assembly (continued) 15. Loosen the 4 cap screws (item 8) securing the starter/generator to the engine frame, then rotate the starter/generator clockwise to loosen the starter/generator drive belt. 16. Remove the fasteners and the starter/generator from the engine frame. Greensmaster®...
- Page 228 Disassembling the Starter/Generator g288750 Figure 101 Generator assembly Washer head screw (2 each) Woodruff key Plug (2 each) Flange head screw (3 each) O−ring Cap screw (2 each) Collar Square key Flat washer (2 each) Flange head screw Generator pulley Washer Washer head screw (6 each) Generator cover...
- Page 229 Internal controller components are not available separately. If the starter/generator controller is replaced, the machine software must be updated; contact an Authorized Toro Distributor for assistance. 7. Remove the starter/generator fan: A. Remove the flange head screw and the collar from the starter/generator shaft.
- Page 230 Disassembling the Starter/Generator (continued) 9. Remove the spring bracket from the starter/generator housing. Note: If the starter/generator housing/stator requires replacement, the starter/generator assembly must be replaced. The starter/generator housing/stator is not available separately. 10. Continue to disassemble the starter/generator if necessary: g288751 Figure 103 Housing/stator assembly...
- Page 231 Disassembling the Starter/Generator (continued) A. Remove the six flange head screws that secure the cover to the housing/stator assembly. Do not remove the cover at this time. B. Secure the base plate of the starter/generator rotor tool (part number TOR6029) to the drive side of the starter/generator housing/stator with three 3/8–16 X 3 inch cap screws.
- Page 232 Assembling the Starter/Generator Refer to Figure 101 for this procedure. 1. Make sure that all the starter/generator components are clean before assembly. 2. Assembly the starter/generator internal components: A. If the bearings were removed from the rotor assembly, install new bearings onto the rotor shaft.
- Page 233 10. Install the starter/generator cover and tighten the cover screws from 8 to 9 N·m (70 to 80 in−lb). Installing the Starter/Generator Assembly Note: If the starter/generator controller (T6) is replaced for any reason, system software needs to be reloaded; contact an Authorized Toro Distributor for assistance. Refer to Figure 99 for this procedure.
- Page 234 Manual. 16. If the starter/generator controller is new, update the machine software; contact an Authorized Toro Distributor for assistance. 17. Operate the machine. Check for proper starter/generator operation. Check for fuel leaks and correct any issues before returning the machine to service.
-
Page 235: Front Traction Motor
Front Traction Motor The front traction motors can be replaced separate from the front traction gear box. The front traction gear box can be removed or installed before or after the motor is removed from the machine; refer to Front Traction Gear Box (page 6–11). - Page 236 Removing and Installing the Front Traction Motor (continued) 4. Remove the cotter pin and clevis pin securing the brake linkage to the brake lever. Discard the cotter pin. 5. Remove the extension spring from the brake lever. 6. Remove the brake lever from the taction motor assembly. 7.
-
Page 237: Rear Traction Motor (Optional)
The rear wheel gear box must be removed and disassembled to access the motor mounting fasteners. If the rear traction motor is replaced for any reason, the machine software must be updated; contact an Authorized Toro Distributor for assistance. g293227 Figure 106... - Page 238 3. Remove the six cap screws that secure the motor cover to rear of motor housing. Do not remove the motor cover at this time. 4. Secure the base plate of the motor rotor tool (Toro part number 139–8420) to the housing with four M6 – 1.0 X 50 cap screws.
- Page 239 Disassembling the Rear Traction Motor (continued) g295018 Figure 108 3WD traction motor housing Motor rotor tool shaft Motor rotor tool base plate 5. Install the rotor tool shaft into the base plate and turn it in against the rotor shaft. CAUTION The rotor magnets are very powerful and can cause the rotor to shift position very rapidly during removal.
- Page 240 Rear Wheel Gear Box (Optional 3WD) (page 6–19). 5. If the 3WD traction motor was replaced, update the machine software; contact an Authorized Toro Distributor for assistance. Electrical System: Service and Repairs Page 5–136 Greensmaster® eTriFlex 3360 and 3370 19239SL Rev B...
-
Page 241: Cutting Unit Motor
Cutting Unit Motor If a cutting unit motor is replaced for any reason, the machine software must be updated; contact an Authorized Toro Distributor for assistance. Removing the Cutting Unit Motor 1. Park the machine on a level surface, lower the cutting units, set the key switch to the O position and remove key from the key switch. - Page 242 Disassembling the Cutting Unit Motor g289205 Figure 109 Cap screw (12 each) Rotor Output gear Motor cover Bearing (2 each) Gear box cover O-ring O-ring (2 each) Lip seal Wave washer (2 each) Housing assembly O-ring Bearing (2 each) O-ring Note: If the motor housing, stator, controller or cable is damaged, cutting reel motor replacement is necessary as these components are not available separately.
- Page 243 Disassembling the Cutting Unit Motor (continued) 1. Inspect the cutting unit motor cable for wear or damage. replace cable components or complete cutting unit motor assembly if necessary. g289220 Figure 110 O-ring Ferrule nut Barb fitting Connector – 2 pin Hose Wedge –...
- Page 244 Disassembling the Cutting Unit Motor (continued) g289233 Figure 111 Cutting unit motor housing (gear box side) 3. Motor rotor tool shaft Motor rotor tool base plate 9. Install the rotor tool shaft into the base plate and turn it in against the rotor shaft.
- Page 245 Assembling the Cutting Unit Motor (continued) 5. Secure the base plate of the cutting unit motor rotor tool to the gear box side of the housing with four M6 – 1.0 X 16 cap screws. 6. Install the rotor tool shaft into the base plate and turn it in so the end of the shaft prevents the rotor body from entering the housing assembly.
- Page 246 5. Connect the two cutting unit motor cable connectors to the machine wire harness and connect the 48V battery . 6. If the cutting unit motor is new, update the machine software; contact an Authorized Toro Distributor for assistance. Electrical System: Service and Repairs Page 5–142 Greensmaster®...
- Page 247 Chapter 6 Chassis Table of Contents General Information ..........................6–2 Adjustments ............................6–3 Adjusting the Brakes .......................... 6–3 Aligning the Rear Wheel Caster Fork ....................6–8 Service and Repairs ..........................6–9 Wheels and Tires ..........................6–9 Front Wheel Hubs ..........................6–10 Front Traction Gear Box........................
-
Page 248: General Information
General Information The traction unit Operator’s Manual and optional accessory Installation Instructions provide information regarding the operation, general maintenance procedures, and maintenance intervals for your machine. Refer to the traction unit Operator’s Manual and optional accessory Installation Instructions for additional information when servicing the machine. Chassis: General Information Page 6–2 Greensmaster®... -
Page 249: Adjustments
Adjustments Adjusting the Brakes The eTriFlex machines use a single mechanical brake assembly that can be used as a service brake, a manual parking brake, and an automatic parking brake. The service brake and manual parking brake are controlled by a cable connected to pedals at the operator’s left foot, while the automatic parking brake is controlled by an 12 VDC electric brake actuator. - Page 250 Checking the Brake Adjustment (continued) parking brake. If the gaps do not increase when the manual parking brake is engaged, adjust the brake cable: refer to Adjusting the Brake Cable (page 6–6). Adjusting the Brake Linkage 1. Park the machine on a level surface, set the key switch to the O position and remove the key.
- Page 251 Adjusting the Brake Linkage (continued) g283626 Figure 115 Brake rod Clevis nut Brake rod spring Washer Jam nut (2 each) Lower brake rod clevis Upper brake rod clevis Clevis pin D. Use new cotter pins and install the brake rod assembly to the upper brake arms only.
- Page 252 Adjusting the Brake Linkage (continued) 7. Ensure the flat side of the lower brake rod clevis is toward the traction motor and install the clevis pin with a new cotter pin. 8. Adjust the brake cable; refer to Adjusting the Brake Cable (page 6–6).
- Page 253 Adjusting the Brake Cable (continued) 5. Use the 3/8 inch square drive hole in the right side upper brake arm to fully extend the brake actuator. 6. The gap between the brake actuator rod nut and the actuator clevis nut should be 3.3 to 3.8 mm (0.13 to 0.15 inch) and the clevis pin holes should be parallel to the ground.
-
Page 254: Aligning The Rear Wheel Caster Fork
Aligning the Rear Wheel Caster Fork g291172 Figure 119 Rear caster fork Straight edge Wheel Hub Center (rear) cutting unit suspension mount plate 1. Remove the rear wheel; refer to Removing and Installing the Wheels (page 6–9). 2. Clamp a straight edge to the rear wheel hub flange. 3. -
Page 255: Service And Repairs
Service and Repairs Wheels and Tires g282533 Figure 120 Front wheel assembly (2 each) Rear wheel assembly Lug nut (4 each wheel) Removing and Installing the Wheels 1. Raise the machine off the ground; refer to Jacking Instructions (page 1–6). 2. -
Page 256: Front Wheel Hubs
Front Wheel Hubs Removing and Installing the Front Wheel Hubs g282531 Figure 121 Lock nut Drive stud (4 each hub) Hardened washer Woodruff key 1. Loosen but do not remove the front hub nut. 2. Raise the machine and remove the front wheel; refer to Jacking Instructions (page 1–6). -
Page 257: Front Traction Gear Box
Front Traction Gear Box g282714 Figure 122 Front traction gear box assembly Gasket Front traction motor assembly Countershaft assembly Plug Brake caliper O-ring Drain plug Cap screw Barb fitting Washer Hose Cap screw (10 each) Vent Dowel pin (2 each) Removing the Front Traction Gear Box Refer to Figure 122... - Page 258 Removing the Front Traction Gear Box (continued) 7. Locate and retrieve the 2 dowel pins. 8. Use a new O-ring and install the drain plug. Installing the Front Traction Gear Box Refer to Figure 122 for this procedure. 1. Remove any residual gasket material from the gear box and wheel motor gasket surfaces.
-
Page 259: Front Traction Gear Box Service
Front Traction Gear Box Service g282826 Figure 123 Gear box housing Jam nut (2 each) Countershaft assembly Nose cover Tab washer (2 each) O-ring Cap screw (4 each) Bearing cone (2 each) Output shaft assembly Lip seal Bearing cup (2 each) Wheel hub lock nut O-ring Roller bearing (2 each) - Page 260 Servicing the Front Traction Gear Box (continued) 10. Press a new inner bearing cone onto the output shaft. Ensure the bearing cone is flush against the output gear. 11. Press a new roller bearing onto the countershaft assembly behind the countershaft gear.
-
Page 261: Rear Wheel Hub (Standard)
Rear Wheel Hub (Standard) g282532 Figure 124 Dust cap Bearing cone (2 each hub) Cotter pin Bearing cup (2 each hub) Nut retainer Hub assembly Drive stud (4 each hub) Spindle washer Lip seal Disassembling the Rear Wheel Hub and Bearings (Standard) Refer to Figure 124 for the following procedure. - Page 262 Disassembling the Rear Wheel Hub and Bearings (Standard) (continued) 6. Clean and inspect the axle spindle for wear or damage. Replace the spindle if necessary. Assembling the Rear Wheel Hub and Bearings (Standard) Refer toFigure 124 for the following procedure. 1.
-
Page 263: Rear Wheel Hub (Optional 3Wd)
Rear Wheel Hub (Optional 3WD) g293602 Figure 125 Dust plug Thrust bearing (2 each) Drive stud (4 each) Wave washer O-ring Roller clutch (3 each) Retaining ring Lip seal Thrust washer (4 each) Grease fitting Removing and Installing the Rear Wheel Hub 1. - Page 264 Servicing the Rear Wheel Hub (continued) g293603 Figure 126 Dust cap (outside of hub) Lip seal (inside of hub) Grease fitting and passage Roller clutch – white roller cage A. Press the old roller clutches from the hub. B. Press one new roller clutch from the inside of the hub. The white roller cage of the roller clutch must be toward the inside (lip seal) of the hub.
-
Page 265: Rear Wheel Gear Box (Optional 3Wd)
Rear Wheel Gear Box (Optional 3WD) g293226 Figure 127 Rear wheel gear box and motor assembly Flange nut (2 each) Rear wheel hub assembly Spacer (2 each) Vent hose Harness bracket Vent fitting Flat washer (2 each) O-ring Cap screw (2 each) Flange head screw (4 each) Removing and Installing the Rear Wheel Gear Box Refer to... - Page 266 Servicing the Rear Wheel Gear Box g293710 Figure 128 Rear traction motor Axle shaft Gasket Spur gear Plug – drain Wave washer Gear 133 T Plug – level Dowel pin (2 each) Washer O-ring Gear box housing Set screw Socket head screw (17 each) Plug –...
- Page 267 Servicing the Rear Wheel Gear Box (continued) 7. Remove the rear traction motor if necessary; refer to Rear Traction Motor (Optional) (page 5–133). 8. Inspect and replace all of the gear box components as necessary. Ensure all bearings are pressed fully against their respective shoulders. 9.
-
Page 268: Traction Pedal Assembly
Traction Pedal Assembly g283959 Figure 129 Flange nut (2 each) Flange head screw (2 each) Flange head screw (2 each) Washer (4 each) Motion control bracket Pedal shaft Connecting link Screw (2 each) Flange nut (2 each) Bearing spacer (4 each) Sensor shield Traction pedal Bearing (2 each) -
Page 269: Brake Assembly
Brake Assembly The eTriFlex machines use a single mechanical brake assembly that can be used as a service brake, a manual parking brake, and an automatic parking brake. The service brake and manual parking brake are controlled by a cable connected to pedals at the operator’s left foot, while the automatic parking brake is controlled by a 12 VDC electric brake actuator. - Page 270 Replacing the Brake Cable (continued) 4. Loosen the 2 adjuster jam nuts at the brake adjuster and remove the cable from the adjuster bracket. 5. Disconnect the brake cable from the left side brake arm. 6. Install the new cable in the reverse order. 7.
- Page 271 Removing and Installing the Brake Linkage (continued) 1. Park the machine on a level surface, set the key switch to the O position and remove the key. 2. Loosen the hex nuts and adjust the eye bolt as far as possible to relax the extension spring.
- Page 272 Removing and Installing the Brake Pedals g283330 Figure 132 Cap screw (3 each) Adjuster jam nut (2 each) Clevis pin Manual parking brake switch Brake pawl Cotter pin (2 each) Pedal support Rod – pawl Cap screw (2 each) Flange nut Flange nut (3 each) Nylon bushing (2 each) Retaining ring...
- Page 273 Removing and Installing the Brake Pedals (continued) 2. Disconnect the brake cable from the brake pedal and pedal support (remove 2 retaining rings). Note: Record the location of any cable ties securing the wire harness to the machine, and replace them during assembly. 3.
- Page 274 Servicing the Brake Caliper g282974 Figure 133 Support link Brake lever and shaft Brake rotor Washer (2 each) Clevis pin Brake caliper Cap screw (2 each) Shoulder bolt Brake pad (2 each) Return spring Clevis Brake block Cotter pin Lip seal 1.
- Page 275 Servicing the Brake Caliper (continued) • The minimum brake rotor thickness is 4.6 mm (0.180 inch). 11. Inspect the lever shaft seal (item 10) and replace it if necessary. Apply a coating of grease to the seal lip. 12. Assemble and install the brake caliper and rotor into the motor housing as an assembly.
-
Page 276: Rear Wheel Caster Fork
Rear Wheel Caster Fork g282282 Figure 134 Cap screw (2 each) Upper steering housing Steering position sensor and bracket Sector gear Magnetic carrier bolt Gasket Jam nut Dowel pin (2 each) Castle nut Lower steering housing Tang washer Lip seal Washer Caster fork Bearing cone (2 each) - Page 277 Removing the Rear Wheel Caster Fork Refer to Figure 134 for this procedure. 1. Park the machine on a level surface, set the key switch to the O position and remove the key. 2. Remove the rear wheel; refer to Removing and Installing the Wheels (page 6–9).
- Page 278 11. Secure the castle nut by bending the washer tang into the castle nut. 12. Remove plug (item 10) from upper steering housing and install a grease fitting (Toro part 302−5 or equivalent). Lubricate the steering housing until grease is seen at the upper bearing. Wipe up any excess grease.
-
Page 279: Steering Housing
Steering Housing g282340 Figure 135 Steering motor Sector gear Flange head screw (13 each) Gasket Cap screw Dowel pin (2 each) Washer Lower steering housing Bracket – harness Lip seal Upper steering housing Lock nut Flange head screw (8 each) Engine mount Gasket Washer... - Page 280 Removing and Installing the Steering Gear Box (continued) 3. Remove the lock nut, cap screw (item 20) and washer from the center of the rear engine frame mount. 4. Support the rear of the engine frame and remove the upper steering housing from the machine frame.
-
Page 281: Steering Arm Assembly
Steering Arm Assembly g284711 Figure 136 Flange nut Hex nut Gas cylinder Spacer Screw Jam nut Cap screw Retaining ring Flat washer Washer Bushing Retaining ring Speed nut (6 each) Steering wheel Steering mount Set screw (2 each) Flange head screw (3 each) Steering arm Flange head screw (4 each) Platform support –... - Page 282 Removing the Steering Arm (continued) 1. Park the machine on a level surface, set the key switch to the O position and remove the key. 2. Remove the cover (item 21) and disconnect the steering input device from the machine wire harness. Check the steering input device and the harness connector for damage or corrosion and clean or repair as necessary.
- Page 283 Installing the Steering Arm (continued) CAUTION The gas cylinder is under high pressure at all times. Avoid pressing the gas cylinder release pin while either end of the cylinder is not secured to the machine. Do not open the gas cylinder. 3.
-
Page 284: Control Console
Control Console g283981 Figure 137 Key switch Panel nut Console cover Joystick assembly Jam nut Arm rest Lock nut (2 each) Button head screw (10 each) Console Jam nut (2 each) Collar Flange nut (2 each) Joystick stem InfoCenter display Flange nut (2 each) Flange head screw (4 each) Boot... - Page 285 Removing and Installing the Control Console (continued) Check the InfoCenter, switches, and the harness connectors for damage or corrosion and clean or repair as necessary. 4. Record the location of any cable ties and disconnect the choke control cable at the engine. Remove the choke control knob before removing the choke control.
-
Page 286: Platform Assembly
Platform Assembly g283802 Figure 138 Platform – RH Flange head screw (3 each) Thrust washer Spacer Flange head screw (3 each) Flange bushing (2 each) Pedal stop screw Platform – LH Washer Flange head screw (3 each) Cap screw Cap screw Rubber bumper (2 each) Flange nut (4 each) Platform support –... -
Page 287: Operator's Seat
Figure 139 A standard seat (model 04508) and a premium seat (model 04729) is available for the Greensmaster 3360/3370 machines. Refer to the specific seat Installation Instructions and Parts Catalog available at www.Toro.com for additional information. Greensmaster® eTriFlex 3360 and 3370 Page 6–41... -
Page 288: Frame Assembly
Frame Assembly g308072 Figure 140 Side casting – RH Step Jack bracket Step bracket Bushing (2 each) Side casting – LH Cap screw (8 each) Bushing (2 each) If the side castings were removed from the machine, tighten the cap screws (Item 4) from 102 to 115 N·m (75 to 85 ft-lb). -
Page 289: Hood Assembly
Hood Assembly g281771 Figure 141 Hood Shoulder screw (2 each) Screen (2 each) Hood bracket (2 each) Panel fastener (8 each) Shoulder bolt (2 each) Foam strip Lock nut (2 each) Flange nut (6 each) Hinge bracket (2 each) Lock nut (2 each) Flange head screw (4 each) Hinge bracket Flange head screw (4 each) - Page 290 Removing and Installing the Hood Assembly (continued) C. Open the hood and align the brackets with the markings made during removal, or, adjust the hood brackets as needed to allow the hood to rest squarely along the top and sides of the fuel tank. D.
-
Page 291: Cutting Unit Suspension Assembly
Cutting Unit Suspension Assembly g281457 Figure 142 Suspension assembly (3 each) Motor cable bulkhead (3 each) Flange head screw (6 each) Flange screw (3 each suspension) Spring retainer – left (3 each) Spring retainer – right (3 each) Cotter pin (3 each) Stabilizer spring –... - Page 292 Removing the Cutting Unit Suspension Assembly (continued) 4. If a front suspension assembly will be removed from the machine, remove the front wheel; refer to Wheels and Tires (page 6–9). 5. Loosen the bulkhead nut that secures the cutting unit motor cable to the bracket on the suspension assembly, and separate the cable from the bracket.
- Page 293 Servicing the Cutting Unit Suspension Assembly g281479 Figure 143 Pivot mount Ball joint clamp (6 each) Steering head Lower A−arm Flange head screw (8 each) Grommet Ball joint (6 each) Upper A−arm Counterbalance bracket Retaining ring (6 each) Lift plate Counterbalance spring (3 each) Striker plate Flange head screw (2 each)
- Page 294 Servicing the Cutting Unit Suspension Assembly (continued) CAUTION Be careful when disassembling the counterbalance mechanism. The counterbalance springs are under heavy load and may cause personal injury. 4. Remove tension from the counterbalance mechanism: A. Use 3/8 inch drive breaker bar in the square hole of the counterbalance tensioner to hold tensioner in place.
- Page 295 Servicing the Cutting Unit Suspension Assembly (continued) g286889 Figure 144 Lower A arm Counterbalance tensioner Counterbalance bracket Clevis pin 7. Install the cutting unit; refer to the traction unit Operators Manual. 8. Install the grass basket. Installing the Cutting Unit Suspension Assembly Refer to Figure 142 for this procedure.
- Page 296 Installing the Cutting Unit Suspension Assembly (continued) g281602 Figure 145 Stabilizer spring Rear of pivot mount Spring bracket Note: To reduce the chance of turf damage when the cutting unit is lowered, properly adjusted stabilizer springs should square the cutting unit with the machine as the cutting unit is raised.
-
Page 297: Cutting Unit Suspension Crossarm Assembly
Cutting Unit Suspension Crossarm Assembly g281280 Figure 146 RH crossarm mount Crossarm Socket head screw (8 each) Flange bushing (8 each) Pivot pin (2 each) Basket horn (2 each) Link (4 each) Lever (2 each) Flange head screw (4 each) Lock nut (4 each) Spring (2 each) Suspension steering head... - Page 298 Chassis: Service and Repairs Page 6–52 Greensmaster® eTriFlex 3360 and 3370 19239SL Rev B...
-
Page 299: Chapter 7: Dpa Cutting Units
Chapter 7 DPA Cutting Units Table of Contents General Information ..........................7–2 Cutting Unit Operator's Manual ......................7–2 Supporting the Cutting Unit when Servicing ..................7–2 Adjustments ............................7–3 DPA Cutting Unit Characteristics......................7–3 Leveling the Rear Roller........................7–4 Service and Repairs ..........................7–6 Bedbar Assembly.......................... -
Page 300: General Information
General Information Cutting Unit Operator's Manual The Cutting Unit Operator’s Manual provides information regarding the operation, general maintenance, and maintenance intervals for the cutting units on your machine. Additionally, if optional kits have been installed on the cutting units (e.g. groomer or rear roller brush), the Installation Instructions for the kit includes set-up, operation and maintenance information. -
Page 301: Adjustments
Adjustments DPA Cutting Unit Characteristics CAUTION Never install or work on or near a cutting unit or cutting unit suspension with the engine running. Always set the key switch to the O position and remove the key before working on or near a cutting unit. -
Page 302: Leveling The Rear Roller
Leveling the Rear Roller The precision machined components of the cutting unit frame keep the rear roller and cutting reel in alignment (parallel). If the side plates are disassembled a limited amount of side plate adjustment is possible to make sure that the rear roller and cutting reel remain parallel. - Page 303 Leveling the Rear Roller (continued) g284061 Figure 149 Side plate Rear roller Shoulder bolt (2 each) 5. Adjust the position of the side plate so the rear roller contacts the bench plate at both ends, making the rear roller parallel to the reel. Tighten the shoulder bolts from 24 to 27 N∙m (210 to 240 in-lb).
-
Page 304: Service And Repairs
Service and Repairs Bedbar Assembly g285020 Figure 150 Bedbar assembly Plastic washer (4 each) Nylon bushing (2 each) Washer (2 each) Bedbar pivot bolt (2 each) Rubber bushing (2 each) Compression spring (2 each) Lock nut (2 each) Lock nut (2 each) Metal washer (2 each) Removing the Bedbar Refer to... - Page 305 Removing the Bedbar (continued) 3. Tip the cutting unit to expose the bedknife and support the rear of the cutting unit; refer to Supporting the Cutting Unit when Servicing (page 7–2). 4. Loosen the lock nuts (item 7) on each bedbar pivot bolt. 5.
- Page 306 Installing the Bedbar (continued) CAUTION Contact with the reel, bedknife or other cutting unit parts can result in personal injury. Use heavy gloves when handling the bedbar. Note: If a new bedknife is attached to the bedbar, there may be interference between the bedknife and the reel when installing the bedbar.
- Page 307 Removing the Bedbar Adjuster g285044 Figure 152 Lock nut Wave washer Compression spring Flange bushing (2 each) Washer Bedbar adjuster shaft Bedbar adjuster screw Detent Retaining ring Cap screw 1. Remove bedbar; refer to Removing the Bedbar (page 7–6). 2. Remove the lock nut, compression spring and washer from the bedbar adjuster screw.
- Page 308 Installing the Bedbar Adjuster (continued) 5. Install the washer, spring and lock nut onto the adjuster screw. 6. Install the bedbar; refer to Installing the Bedbar (page 7–7). DPA Cutting Units: Service and Repairs Page 7–10 Greensmaster® eTriFlex 3360 and 3370 19239SL Rev B...
-
Page 309: Bedknife
Bedknife Removing the Bedknife g227001 Figure 153 Bedknife screw (13 used) Bedknife Bedbar 1. Remove the bedbar from the cutting unit; refer to Removing the Bedbar (page 7–6). 2. Remove screws from bedbar using a socket wrench and bedknife screw tool; refer to Bedknife Screw Tool (page 2–17). - Page 310 Installing the Bedknife (continued) g226894 Figure 154 6. Working from the center of the bedknife toward each end, tighten screws from 23 to 28 N-m (200 to 250 in-lb). 7. After installing the bedknife to bedbar, grind the bedknife. Grinding the Bedknife Bedknife Grinding Specifications Standard Bedknife Relief Angle 3°...
- Page 311 Angle Indicator and Magnetic Mount (page 2–16). 1. Use Toro General Service Training Book, Reel Mower Basics (part no. 09168SL) and grinder manufacturer's instructions for bedknife grinding information. fter grinding the bedknife, install the bedbar assembly in the cutting unit;...
-
Page 312: Reel Assembly
Reel Assembly g285181 Figure 157 Crossmember Cap screw (2 each) Crosslink Electric motor adapter Side plate – LH Side plate – RH Flange head screw (2 each) Counterweight Socket head screw (2 each) Shoulder bolt (4 each) Hex nut (4 each) Motor clamp Flange nut (4 each) O-ring (2 each) - Page 313 Removing the Reel Assembly (continued) 2. If the cutting unit is equipped with an optional groomer or rear roller brush, remove the drive components for those options from cutting unit. Refer to Removing the Gear Box Assembly (page 8–4), and/or Rear Roller Brush (Optional) (page 7–30) for additional information.
- Page 314 Removing the Reel Assembly (continued) B. Insert a long-handled pry bar (3/8 x 12 inch with screwdriver handle recommended) through the bottom of the cutting unit. The pry bar should pass between the top of the reel shaft and the backs of the reel blades so that the reel will not move.
- Page 315 Note: Reels+™ is a line of replacement reels (with the seals and bearings pre-assembled) that arrive ready for installation into the cutting unit. Contact your local Toro Distributor for additional information. 2. Press the bearings and slide the seals from the reel shaft. Discard the seals and inspect the reel bearings to insure that they spin freely and have a minimal amount of axial play.
- Page 316 Inspecting the Reel Assembly (continued) IMPORTANT The seal must be installed with the flocked side of the seal toward the bearing. 4. Slide the new flocked seals and press the bearings onto the reel shaft until they contact the shoulder of the reel shaft. Note: The reel nut on the left end of the cutting reel has a black finish and has left-hand threads.
- Page 317 Installing the Reel Assembly (continued) IMPORTANT To avoid grinding the reel, do not contact the cutting edge of any blade with the pry bar as this may damage the cutting edge and/or cause a high blade. g285246 Figure 160 Reel nut (right end shown) Weld side of reel support plate Reel shaft Pry bar...
- Page 318 Reel Grinding Specifications (page 7–20). Additional reel grinding information can be found in the Cutting Unit Operator’s Manual. An additional resource is the Toro Basics Series Training Book, Reel Mower DPA Cutting Units: Service and Repairs Page 7–20 Greensmaster® eTriFlex 3360 and 3370...
- Page 319 Preparing the Reel for Grinding (continued) Basics (part no. 09168SL) found on the Service Reference Set available from your Authorized Toro Distributor. Relief grind the reel blades to the minimum blade land width if the reel blade land width exceeds the service limit. Spin grind the reel to establish the specified blade land width or to restore the reel’s cylindrical shape.
-
Page 320: Electric Cutting Unit Motor Adapter
Electric Cutting Unit Motor Adapter g285260 Figure 162 Motor clamp Hex nut (2 each) Motor adapter O-ring Socket head screw (2 each) O-ring (2 each) Removing and Installing the Cutting Unit Motor Adapter Refer to Figure 162 for this procedure. 1. -
Page 321: Roller Assemblies
Roller Assemblies Removing the Front Roller g285300 Figure 163 Front roller assembly Height-of-cut arm (2 each) Height-of-cut screw (2 each) Pinch bolt (2 each) Lock nut (2 each) Plow bolt (2 each) Refer to Figure 163 for this procedure. 1. Remove the cutting unit from the machine and place it on a level work surface. Use an appropriate support to raise the front roller off of the work surface. - Page 322 Installing the Front Roller (continued) 3. Secure one of the height-of-cut arms to the side plate with a plow bolt, height-of-cut washer and lock nut. The tab on the height-of-cut washer should be oriented downward and fit into the slot of the height-of-cut arm. 4.
- Page 323 Removing the Rear Roller (continued) 2. Loosen the flange nuts that secure the rear roller retainer assemblies (flange nuts, socket head screws, shaft retainer, spacer and shims) to the cutting unit. Note: On cutting units equipped with the optional High Height-of-Cut Kit, there will be additional roller shims installed between the rear roller and the cutting unit side plate.
- Page 324 Disassembling the Roller g206889 Figure 165 Bearing lock nut Wiehle roller V-ring Smooth roller Seal Roller shaft Ball bearing 1. To hold the roller shaft stationary while removing the bearing lock nut, install a 3/8-24 UNF 2B screw with a jam nut into the threaded end of the roller shaft and tighten the jam nut against the roller shaft.
- Page 325 Assembling the Roller g206890 Figure 166 Roller V-ring Ball bearing Bearing lock nut Seal Roller shaft Note: Special tools are required to assemble the rollers; refer to Roller Rebuilding Tools (page 2–17). The following procedure describes the assembling the rollers using the set of assembly washers and spacers. 1.
- Page 326 Assembling the Roller (continued) IMPORTANT Failure to grease bearing lock nut before seal installation may result in seal damage. 5. Fill the seal 75 to 90% full with #2 grease and apply a coating of grease to the underside of the bearing lock nut to prevent damaging the seal damage during installation.
- Page 327 Assembling the Roller (continued) g206894 Figure 170 Seal Yellow assembly washer Assembly spacer Bearing lock nut 8. Tighten the bearing lock nuts until the yellow assembly washers bottom out against the roller housing. Remove the bearing lock nuts, assembly washers, and assembly spacers.
-
Page 328: Rear Roller Brush (Optional)
Rear Roller Brush (Optional) g285302 Figure 172 (shown with Universal Groomer installed) Rear roller brush assembly Note: The Installation Instructions for the rear roller brush kit has detailed information regarding assembly and adjustment. Use the Installation Instructions along with this Service Manual when servicing the rear roller brush. For eTriFlex machines, the drive components for the rear roller brush are located on the right side of the cutting unit (opposite from the electric cutting unit motor). - Page 329 g285393 Figure 173 (shown without Universal Groomer installed) Lock nut (2 each) Bearing bracket LH Drive pulley Brush shaft Drive housing Retaining ring J-bolt (2 each) Spacer (as required) Flange nut (4 each) Brush element Driven pulley Flange head screw (4 each) Lock nut Flange head screw O-ring (2 each)
- Page 330 CAUTION Contact with the reel or other cutting unit parts can result in personal injury. Use heavy gloves when handling the cutting reel. Replacing the Roller Brush Element Refer to Figure 173 for this procedure. 1. Remove the cutting unit from the machine and place it on a level work surface. 2.
- Page 331 Drive and Support Components (continued) g285506 Figure 174 Drive shaft assembly Weld side of reel support plate Reel shaft Pry bar B. Insert a long-handled pry bar (3/8 x 12 inch with screwdriver handle recommended) through the bottom of the cutting unit. The pry bar should pass between the top of the reel shaft and the backs of the reel blades so that the reel will not move.
- Page 332 Drive and Support Components (continued) G. Assemble the drive shaft and drive adapter (machines without a universal groomer) with a medium strength thread locking compound (Loctite 243 or equivalent) and tighten from 150 to 163 N∙m (110 to 120 ft-lb). H.
- Page 333 Drive and Support Components (continued) IMPORTANT The brush drive belt may fail prematurely if the pulleys are not properly aligned. 10. Using a straight edge, determine the number of spacers necessary under the driven pulley to align the pulleys. Tighten the lock nut securing the driven pulley from 20 to 26 N∙m (15 to 19 ft-lb).
- Page 334 DPA Cutting Units: Service and Repairs Page 7–36 Greensmaster® eTriFlex 3360 and 3370 19239SL Rev B...
- Page 335 Chapter 8 Universal Groomer (Optional) Table of Contents General Information ..........................8–2 Installation Instructions ........................8–2 Service and Repairs ..........................8–3 The Gear Box Assembly ........................8–4 The Idler Assembly .......................... 8–12 The Groomer Reel ........................... 8–14 The Height Adjuster Assembly ......................8–17 The Grooming Brush (Optional) .......................
-
Page 336: General Information
General Information Installation Instructions The Installation Instructions for the groomer provides information regarding the set-up, operation, general maintenance procedures, and maintenance intervals for the groomer assembly on your Greensmaster machine. Refer to the Installation Instructions for additional information when servicing the groomer assembly. -
Page 337: Service And Repairs
Service and Repairs g285612 Figure 177 Gear box assembly Groomer reel Counterweight assembly Idler assembly Height adjuster assembly (2 each) Flat head screw (2 each) CAUTION Never work on the groomer with the key switch in the R or S TART position. -
Page 338: The Gear Box Assembly
Rear Roller Brush (Optional) (page 7–30). 4. Install a 5/16–18 X 5/8 inch square head set screw (Toro p/n 1-803022) in the end of the drive shaft and tighten to 13 N·m (120 in-lb); refer to Figure 179. - Page 339 Removing the Gear Box Assembly (continued) g285819 Figure 179 5/16–18 X 5/8 inch square head set screw 4. Reel shaft Input shaft assembly Weld side of reel support plate Groomer gear box assembly Pry bar 7. Insert a long-handled pry bar (3/8 x 12 inch with screwdriver handle recommended) through the bottom of the cutting unit.
- Page 340 Removing the Gear Box Assembly (continued) 9. Rest the handle of the pry bar against the front roller and turn the drive shaft counterclockwise to loosen it from the reel. Continue to unscrew the drive shaft and remove the gear box from the cutting unit. 10.
- Page 341 Removing the Gear Box Assembly (continued) g285909 Figure 181 Damaged input shaft assembly Weld side of reel support plate Drive shaft removal tool Pry bar Reel shaft H. Insert a long-handled pry bar (3/8 x 12 inch with screwdriver handle recommended) through the bottom of the cutting unit.
- Page 342 Servicing the Gear Box g285711 Figure 182 Drive adapter – silver Detent ball Input shaft Detent spring O-ring (3 each) Oil seal V-ring Socket-head screw (4 each) Oil seal Groomer cover Groomer housing Cover gasket Ball bearing (2 each) Thrust washer Retaining ring Ball bearing Driven gear...
- Page 343 Servicing the Gear Box (continued) 1. Remove the drain/fill plug and drain the oil from the gear box. 2. Remove the 4 socket-head screws and separate the gear box cover and housing. Remove and discard the cover gasket. 3. Slide the sun gear, ring gear, and planet gears from the pins on the gear box housing.
- Page 344 Installing the Gear Box Assembly Refer to Figure 178 for this procedure. 1. Apply medium strength thread locking compound (Loctite 243 or equivalent) to the threads in the reel and allow the thread locking compound to cure for 15 minutes before continuing this procedure. 2.
- Page 345 Installing the Gear Box Assembly (continued) 8. Apply a retaining compound (Loctite 609 or equivalent) to the lip of the drive housing and install the drive shield, or, if the cutting unit is equipped with an optional powered rear roller brush, install the rear roller brush drive assembly; refer to Rear Roller Brush (Optional) (page 7–30).
-
Page 346: The Idler Assembly
The Idler Assembly g285713 Figure 184 Socket-head screw (2 each) Stub shaft Flocked seal (2 each) Motor adapter Bearing Bushing Retaining ring Idler arm Flange nut O-ring Clevis pin Lock nut (2 each) Cotter pin Shield Collar The groomer idler assembly is located on the opposite side of the groomer gear box. - Page 347 Installing the Idler Assembly (continued) B. Press the bearing into the idler arm so that the bearing contacts the shoulder in idler arm bore and install the bearing retaining ring. C. Install the bearing shields with the flocked side of the shield toward the bearing.
-
Page 348: The Groomer Reel
The Groomer Reel g285715 Figure 185 Shaft clamp (4 each) Bolt (4 each) Jam nut (4 each) Groomer reel Remove the groomer reel to replace individual groomer blades or replace the shaft. The groomer reel can be reversed to provide additional blade life. Removing the Groomer Reel 1. - Page 349 Servicing the Groomer Reel (continued) blades to put the sharpest blade edge forward. The blades that are rounded to the midpoint of the blade tip must be reversed or replaced for best groomer performance. g285716 Figure 186 Groomer reel shaft Rounded edge Groomer blade (40 each) Midpoint...
- Page 350 Servicing the Groomer Reel (continued) tightening the lock nut, spacers should not be free to rotate and the groomer blades should be centered on the shaft. 7. Install the groomer reel back onto the cutting unit; refer to Installing the Groomer Reel (page 8–16).
-
Page 351: The Height Adjuster Assembly
The Height Adjuster Assembly g285728 Figure 187 Clevis pin Flange nut Quick up cover Cotter pin Washer (2 each) Detent spring Tabbed washer Compression spring Button-head screw Lock nut Pinch bolt Height adjuster knob Bumper Height adjustment bolt Height-of-cut bracket Plow bolt Quick up lever Height adjustment rod... - Page 352 Assembling the Height Adjuster (continued) 2. If both the height adjusters are removed, fit 1 height adjuster assembly to the cutting unit side plate and secure it with a plow bolt, tabbed washer and lock nut. Tighten the lock nut finger tight. 3.
-
Page 353: The Grooming Brush (Optional)
The Grooming Brush (Optional) g285731 Figure 189 Spiral brush Lock nut (2 each) Brush shaft Grooming brush J-bolt (2 each) Roll pin (2 each) The optional grooming brush attaches to the groomer in place of the groomer reel. The grooming brush is removed and installed from the groomer in the same manner as the groomer reel;... - Page 354 Universal Groomer (Optional): Service and Repairs Page 8–20 Greensmaster® eTriFlex 3360 and 3370 19239SL Rev B...
-
Page 355: Appendix A
Appendix A Foldout Drawings Table of Contents Electrical Drawing Designations......................A–2 Electrical Schematic – 3360.......................A–3 Electrical Schematic – 3370.......................A–4 Electrical Schematic – 3370 (continued) ....................A–5 Wire Harness Drawing – 3360 ......................A–6 Wire Harness Diagram – 3360 ......................A–7 Wire Harness Diagram – 3360 (continued) ..................A–8 Wire Harness Drawing –... -
Page 356: Electrical Drawing Designations
Y or YE YELLOW Numerous harness wires used on the Toro machines include a line with an alternate color. These wires are identified with the wire color and line color with either a / or _ separating the color abbreviations listed above (e.g., R/BK is a red wire with a black line, OR_BK is an orange wire with a black line). -
Page 357: Electrical Schematic - 3360
Electrical Schematic – 3360 g291901 Model 04580, Drawing 122-0142 Rev A, Sheet 1 of 1 19239SL Rev B Page A–3... -
Page 358: Electrical Schematic - 3370
Electrical Schematic – 3370 g309035 Page A–4 19239SL Rev B Model 04590, Drawing 122-1618 Rev A, Sheet 1 of 2... -
Page 359: Electrical Schematic - 3370 (Continued
Electrical Schematic – 3370 (continued) g309036 Model 04590, Drawing 122-1618 Rev A, Sheet 2 of 2 19239SL Rev B Page A–5... -
Page 360: Wire Harness Drawing - 3360
Wire Harness Drawing – 3360 g287361 Page A–6 19239SL Rev B Model 04580, Drawing 122-1619 Rev D, Sheet 1 of 1... -
Page 361: Wire Harness Diagram - 3360
Wire Harness Diagram – 3360 g293957 Model 04580, Drawing 122-1619 Rev D, Sheet 1 of 2 19239SL Rev B Page A–7... -
Page 362: Wire Harness Diagram - 3360 (Continued
Wire Harness Diagram – 3360 (continued) g293958 Page A–8 19239SL Rev B Model 04580, Drawing 122-1619 Rev D, Sheet 2 of 2... -
Page 363: Wire Harness Drawing - 3370
Wire Harness Drawing – 3370 g309034 Model 04580, Drawing 122-1620 Rev D, Sheet 1 of 1 19239SL Rev B Page A–9... -
Page 364: Wire Harness Diagram - 3370
Wire Harness Diagram – 3370 g309032 Page A–10 19239SL Rev B Model 04590, Drawing 122-1620 Rev D, Sheet 1 of 2... -
Page 365: Wire Harness Diagram - 3370 (Continued
Wire Harness Diagram – 3370 (continued) g309033 Model 04590, Drawing 122-1620 Rev D, Sheet 2 of 2 19239SL Rev B Page A–11...