
Related Manuals for Sharp DX-B351PL


Summary of Contents for Sharp DX-B351PL
- Page 1 User Guide SHARP DX-B351PL Monochrome Laser Printer It is recommended that you read this Guide carefully before using the printer.
- Page 2 Preface This manual explains how to use the SHARP DX-B351PL laser printer. Please read and understand the manual in order to use the product correctly. Keep this manual in a convenient location for reference whenever needed. Legal Notice Trademark ®...
- Page 3 Safety Precautions Laser Safety Laser radiation is harmful to the human body. Since laser components are completely sealed in the printer, laser radiation will not leak. To avoid laser radiation, please do not randomly disassemble the printer! The printer follows the provisions of Class 1 laser products under CFR standard. The printer has a Class III b laser diode, which has no laser radiation leakage among laser components.
- Page 4 10. Do not allow pets to chew on the AC power cord or the computer interface cable. 11. To avoid contact with the high voltage errors that may result in fire or electric shock, do not allow sharp objects to pierce the equipment power supply. Do not spill liquids onto the equipment.
- Page 5 SHARP Service Center. 23. This product is sold as a complete machine. The consumers can go to SHARP Service Center to purchase parts they need. If the product sold is inconsistent with the package list, please go to the specified Service Center to solve the problem.
- Page 6 Supplier’s Declaration of Conformity 47 CFR § 2.1077 Compliance Information Unique Identifier: Trade Name: Sharp, Model No.: DX-B352P Responsible Party - U.S. Contact Information Sharp Electronics Corporation 100 Paragon Drive, Montvale, New Jersey, United States 07645...
-
Page 7: Table Of Contents
Table of Contents 1.Before Using the Printer ..........................1 1.1. Product series introduction........................1 1.2. Supplied Accessories ..........................2 1.3. Product View ............................3 1.4. Laser Toner Cartridge ..........................5 1.5. Control Panel ............................6 1.5.1.0 verview of control panel ........................ 6 1.5.2.Indicator function of control panel ...................... - Page 8 6.6. Fine mode printing ..........................32 6.7. Mute printing ............................33 6.8. Auto shut-off setting ..........................34 6.9. Open Help Document ..........................35 7.General Settings ............................36 7.1. System Setting ............................36 7.1.1. Language Setting ..........................36 7.1.2. Sleep Time Setting ........................... 37 7.1.3.
-
Page 9: Before Using The Printer
1.Before Using the Printer Product series introduction 1.1. Product series parameters • Interface Type • Print • Language Control • Panel • 33ppm Print Speed • Letter 35ppm • Automatic Two-Sided Printing • Mute Printing (●: Support; Blank: Unsupport) This product series is subject to additions or changes without prior notice. -
Page 10: Supplied Accessories
Supplied Accessories 1.2. Name Parts Toner cartridge Drum component USB Interface Cable Power Cord CD-ROM... -
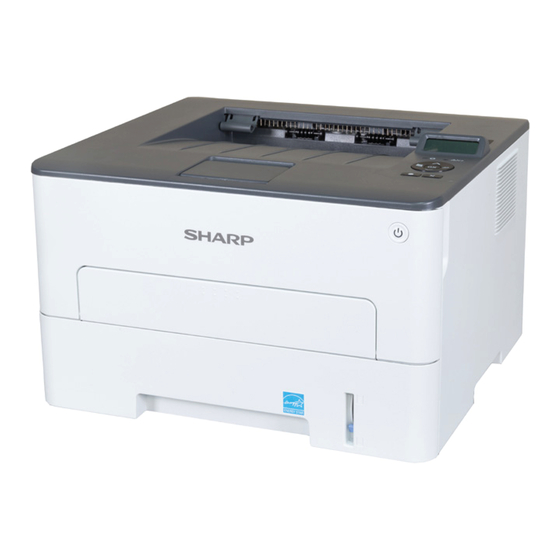
Page 11: Product View
Product View 1.3. Side view Output Bin Stores the printed paper. Control Panel Indicate printer status to conduct set operation. Output Tray Prevents the printed paper from falling. Front Cover Open the front cover to take out the laser toner cartridge. Manual feed tray Place mediums to be printed in manual feed tray. - Page 12 Paper width deflector of auto feed tray Slide paper width deflector to adapt to paper width. Paper length deflector of auto feed tray Slide paper length deflector to adapt to paper length. Clip of extended tray of auto feed tray Adjustment of length extension of the tray.
-
Page 13: Laser Toner Cartridge
High-volume toner About 3000 Pages cartridge (Based on ISO 19752 standard) • SHARP does not recommend using consumables other than the original consumables provided, as any damages caused by non-original consumables are not covered by the scope of warranty. •... -
Page 14: Control Panel
Control Panel 1.5. Overview of control panel 1.5.1.0 The layout of the printer control panel is shown below: LCD control panel Name Functions 1 LCD Display Display operation interface and product information Save toner Indicate the on/off of save toner function(Please refer 2 indicator Chapter 1.5.2). - Page 15 Scroll down through the menus and options. Shift the entry positions from left to right, for example, to input IP Down address entry. Back Return to the previous menu. save toner key Open save toner function. Exit operation. 10 Cancel...
-
Page 16: Indicator Function Of Control Panel
1.5.2. Indicator function of control panel Display meanings of save toner indicator are as follows: Save Status Status description toner indicator Turn save toner state function and Die out sleep mode Blue indicator None blinks Blue indicator Turn on save normally on toner function Display meanings of toner cartridge / status indicator are as follows:... - Page 17 Low toner warning Orange indicator blinks Toner cartridge error (uninstalled ink cartridge, Orange indicator non-matching ink cartridge, normally on invalid toner cartridge) Printer errors such as paper error (paper out, Red indicator normally on paper jam, paper feed failure), opened front cover...
-
Page 18: Paper And Print Media
2.Paper and Print Media Paper Specification 2.1. Media Plain paper (19-28 lb. bond), thin paper (16-19 lb. bond) Type A4, Letter, A5, Legal, Statement, JIS B5, Folio, Oficio, Executive, Media size ISO B5, A6, B6, 16K, Big 16K, 32K, Big 32K, Custom Automatic Feeder Tray... -
Page 19: Special Paper
This may be due to incorrect operation, inappropriate temperature and humidity, or other factors beyond the control of SHARP. Before purchasing large quantities of print media, make sure that the print media meets the specifications specified in this User Guide. -
Page 20: Loading Paper
Loading Paper 2.3. Loading into the Automatic Feeder Tray 2.3.1. 1. Slide out the automatic feeder tray from the printer. 2. Slide the clip of extended tray of auto feed tray, paper length deflector and paper width deflector to the slot suitable for paper size, in order to match paper length and width. •... -
Page 21: Install Manual Feed Tray
4. Raise the output tray to avoid the printed paper from slipping and falling, or immediately remove the printed document after the printing is complete. Note: • If more than 250 pages (21 lb. bond) are put inside the auto feed tray at one time, may cause paper jam or paper feed failure. - Page 22 3. Slide the paper deflector of manual feed tray to match the two sides of paper. Do not use excessive force; otherwise, paper will be made jammed or skewed. 4. Put a flat printing medium into the manual feed tray with both hands. •...
-
Page 23: Non-Printable Area
Non-printable Area 2.4. The shaded area indicates the non-printable area. Usage Paper Size Top and bottom margins (A) Left and right margins (B) 5mm(0.197inch) 5mm(0.197inch) Printing 5mm(0.197inch) 5mm(0.197inch) Letter Paper application rules 2.5. • Rough textured, uneven, oil stained and extremely smooth paper will make printing effect poor. -
Page 24: Driver Installation And Uninstallation
Driver installation and uninstallation Driver installation based on Windows system 3.1. • Before installing the drive, you need to learn about printer model by printing the printer information page out and checking the product name (please refer to Chapter 7.4 printing methods). -
Page 25: Installation Via Wired Network Connection
Installation via wired network connection 3.1.2. 1. Turn the on the power on the printer and computer. 2. Connect the computer to wired network. 3. Connect network cable to the network interface of printer, to make sure the printer is connected to computer network (please refer to Chapter 4 for network setup). -
Page 26: Driver Uninstallation
1. Turn on the power on for the printer and computer. 2. Insert the CD accompanying the printer in the CD driver of your computer, and double click SHARP XXX installation package. (XXX in SHARP XXX represents product model.) - Page 27 3. Click “Continue”. 4. Read licensing agreement and then click “Continue”. 5. Click “Agree” on the prompt window popping out to accept the licensing agreement. 6. Click “Install”. 7. Input computer password and click “Install Software”. 8. Click “Continue Installation” on the prompt window popping out. 9.
-
Page 28: Add Printer To Mac System
Add printer to Mac system 3.3. Add in USB connection mode 3.3.1. 1. Connect the printer to computer with USB cable and then turn power on. 2. Enter the “System Preferences” – “Printers & Scanners” of computer. button to select “Add Printer or Scanner”. 3. -
Page 29: Wired Network Setup
4. Wired network setup In case printers support wired network printing, they can be connected to network to control printer to print in wired network mode. Set IP Address 4.1. The IP address of the printer may be automatically obtained through DHCP function or set manually. -
Page 30: Web Server
5.Web server You can manage printer setup via the embedded Web server. Visit the embedded Web server 5.1. 1. Turn on the power for the printer and computer. 2. Connect the printer to network to ensure that the printer is connected to the network where the computer is connected to (please refer to Chapter 4 for network setup method). -
Page 31: Ip Address Setup
5.2.1.IP address setup You need to connect your printer to network before IP address setup. 1. In case of wired network model, connect the printer to wired network by connecting to its network interface with network cable. IPv4 setup 5.2.1.1. IPv4 address of the printer is divided into DHCP auto assignment and manual setting, and the DHCP auto assignment function is on by default. -
Page 32: Ipv6 Setup
IPv6 setup 5.2.1.2. 1. Turn on printer power to connect printer to network. 2. Log into the embedded Web server (please refer to Chapter 5.1 for login method). 3. Click “Settings” – “Network settings” – “Protocol Settings” – “IPv6”. 4. Click “Enable IPv6 protocol” and “Enable DHCPv6” (clicked by default) and then click “Apply”. Refresh the browser and view the “IPv6 Local Link Address”... -
Page 33: Sleep Time Setup
Sleep time setup 5.2.2.2. The default sleep time of printer is 1 minute and it can be changed via the embedded Web server (the printer installed via network connection). 1. Log into the embedded Web server (please refer to Chapter 5.1 for login method). -
Page 34: Print
Print Print Function 6.1. You can set the print function through "Start" - "Devices and Printers" - select corresponding printer- right click – set print function in "Printing preferences". Some functions are as follows: Functions Diagram • Windows 7 is taken as example in the above description. Note:... -
Page 35: Print Settings
Print Settings 6.2. You can set up printing parameters with the following two methods before sending work to printer (such as paper type, paper size and paper source). Temporary printing Permanent default Operating setup change setup change system 1. Click “Start” menu- “Control Panel” 1.Click “File”... -
Page 36: Printing With Manual Feed Tray
• For the type of media to be printed with the automatic feeder tray,see Chapter 2.1. Printing with manual feed tray 6.4.2. When you put papers in the manual feed tray, the printer will enter manual feed mode. • Manual feed mode means that papers will be fed from the manual feed tray Note:... -
Page 37: Automatic Two-Sided Printing
Automatic Two-Sided Printing 6.5. The printer supports automatic two-sided printing of plain paper. Paper size supported by the automatic two-sided printing: A4,Letter, Legal, Oficio/Folio (8 ½” x 13”), 16K. • Trying the automatic two-sided printing may damage the printer if some paper media Note:... -
Page 38: How To Carry Out Auto Duplex Printing
Adjust paper size slide to A4 or Letter position to finish setting up. Install the duplex unit in the printer. How to carry out auto duplex printing 6.5.2. 1.Open the print job to be printed from the application (such as a Notepad). 2.Select Print from the File menu. - Page 39 Select printer of the corresponding model. Single click “Preferences” for printing setup. Select the “Duplex” in “Basic” tab and then select “Long Edge” or “Short Edge”. Single click “OK” to finish printing setup. Click “Print” to realize auto duplex printing.
-
Page 40: Fine Mode Printing
Fine mode printing 6.6. The Fine mode is applicable to engineering drawings and fine lines printing. Set up fine mode in the basic page of printer preferences After setup, fine printing mode can be realized. -
Page 41: Mute Printing
Mute printing 6.7. If the Mute Printing is set, the printing noise will be reduced but the printing will slow down to some extent. The operating steps of mute printing are as follows (applicable to printers that are installed via USB connection) Windows 7 is taken as the example in the following operation. -
Page 42: Auto Shut-Off Setting
Auto shut-off setting 6.8. “Auto shut-off setting” to set shut-off delay for the printer. 1. Enter computer “Start Menu” – “Control Panel” – View “Devices and Printers”. 2. Right click printer, select “Printer properties” in the drop-down list. 3. Enter “Secondary Settings” option and set “Auto shut-off setting”. 4. -
Page 43: Open Help Document
Open Help Document 6.9. You can open the "Printing preferences" and click "Help" button (for Windows Operation System only). The help document contains the user guide where you can find the information on print settings. -
Page 44: General Settings
7.General Settings This Chapter mainly introduces some general settings. System Setting 7.1. Language Setting 7.1.1. "Language Setting" is used to select the language to be displayed on the control panel. 1) Press "Menu" to enter the Menu Settings interface. 2) Press "OK" to select the "1. System Setting" option. 3) Press “OK”... -
Page 45: Sleep Time Setting
Sleep Time Setting 7.1.2. Sleep mode can reduce the energy consumption of the printer and “Sleep time setting” is used in the idle time before the device enters sleep mode. 1) Press "Menu" to enter the Menu Settings interface. 2) Press "OK" to select the "1. System Setting" option. 3) Press direction key “▲”... -
Page 46: Mute Printing
Mute printing 7.1.4. Set mute mode to establish low speed printing with low noise. When mute mode is “on”, printing will be in a low speed. This mode is “off” by default. 1) Press "Menu" to enter the Menu Settings interface. 2) Press "OK"... -
Page 47: Restore Factory Settings
Restore Factory Settings 7.1.5. “Recover factor settings” is used to recover the default settings of the printer. The printer will restart itself automatically after recovering factory settings. 1) Press "Menu" to enter the Menu Settings interface. 2) Press "OK" to select the "1. System Setting" option. 3) Press direction key "▲"... -
Page 48: Network Settings
Note: Set auto off condition: • Shutdown under no-port state (default configuration): no port is connected, printer is under standby or sleep mode. • Shutdown under idle state: the printer is under standby or sleep mode. • If auto off condition is satisfied, printer will be off at the preset time. •... -
Page 49: Network Information
Network Information 7.3. You can check the network status through Network Information. 1) Press "Menu" to enter the Menu Settings interface. 2) Press direction key “▲” or “▼” and select “4. Network Info” option and press “OK” key to view “wired network information”. -
Page 50: Print Information Report
Print information report 7.4. You can print information report by operating control panel. These pages can help you to learn about product information and diagnose and solve product failures. 1) Press "Menu" to enter the Menu Settings interface. 2) Press direction key “▲” or “▼” and select “5. Prt Info Rept” option. 3) Press the “OK”... -
Page 51: Routine Maintenance
8.Routine Maintenance Cleaning the Printer 8.1. • Please use mild detergents. Note: • Some parts of the printer may still be hot for a short period after use. When opening the front cover or rear cover to clean the parts inside the printer, please do not touch the parts in the shaded area as shown in the following picture. - Page 52 • When removing the toner cartridge, put the toner cartridge in a protective Note: bag or wrap it with thick paper to avoid direct light damaging the toner cartridge. Clean the inside of the printer by gently wiping the shaded area, as shown in picture, with a dry and lint-free cloth.
-
Page 53: Toner Cartridge And Drum Component Maintenance
Toner cartridge and drum component maintenance 8.2. About toner cartridge and drum component 8.2.1. 1. Application and maintenance of toner cartridge Please use the original toner cartridge for better printing quality. Please pay attention to the following items while using the toner cartridge: •... - Page 54 Toner cartridge replacement steps: Power off the printer. Open the front cover and take the laser toner cartridge out along the track. Press the blue button on the left side of drum component with left hand and lift the toner cartridge handle with right hand at the same time to take the toner cartridge out.
- Page 55 Pull the seal out and take the toner protection cover out. Install the drum component along the inner track to finish installing toner cartridge. Take the drum component with toner cartridge installed and install it inside the printer along the inner track of printer to finish installing. Close the front cover.
- Page 56 Press the blue button on the left side of drum component with left hand and lift the toner cartridge handle with right hand at the same time to take the toner cartridge out. Open the package of new drum component, take the protection device of drum component, and put the drum component on a horizontal table.
-
Page 57: Troubleshooting
9. Troubleshooting Please read this section carefully. It may help you to solve common problems encountered during the printing process. If the problems persist, please contact Aftersales Service Centre. Prior to handling common problems, first check that: • The power cord is connected correctly, and the printer is powered on. •... -
Page 58: Paper Jam Of Manual Feed Tray
3. After taking papers jammed out, please reinstall the paper tray inside the printer and close the front cover, then the printer will recover printing automatically. Paper jam of manual feed tray 9.1.2. 1. Gently pull the jammed paper out. 2. -
Page 59: Middle Jam
Middle jam 9.1.3. • When papers jammed in the middle are taken out, please pay attention Note: and do not touch the shaded area shown below, in order to avoid burn. 1. Pull paper tray out. 2. Gently pull the jammed paper out. 3. - Page 60 4. Open the front cover. 5. Take the laser toner cartridge out along the track. (For the purpose of preventing printing quality from affecting by the exposure of photosensitive drum, please put the laser toner cartridge inside the protection bag or warp it with thick paper). 6.
-
Page 61: Paper Jam In The Fuser Unit
Paper Jam in the Fuser Unit 9.1.4. do not touch the shaded area shown below in order to avoid burns. 1. Open the rear cover. 2. Open the fuser door using the handles on both sides. 3. Gently pull the jammed paper out. -
Page 62: Duplex Unit Jam
4. After taking papers jammed out, close the back cover and open the front cover and then the printer will recover printing. Duplex Unit Jam 9.1.5. Remove the duplex printing unit from the back of the printer. Remove the jammed paper from the duplex unit. If the paper does not come out along with the duplex unit, open the tray and remove the jammed paper directly from the bottom. -
Page 63: Software Failure
• If you cannot remove the jammed paper yourself, please contact your local SHARP authorized repair center or send the printer to the nearest SHARP authorized service center for repair. • Printer appearance may differ because of various models and functions, so the schematic diagram is only for your reference. -
Page 64: Common Troubleshooting
Common Troubleshooting 9.3. Common Problems 9.3.1. Problem Cause Solution Problems with the Printer The printer The cable between the computer Disconnect and then reconnect does not and the printer is not connected the printer cable. work properly. Check the Windows printer settings to Error in specifying the print port. -
Page 65: Image Defects
Too many papers in paper tray. Take the excessive papers out from paper tray; please print with manual The print media is out of the feed tray if using special print supported media range. medium. There is foreign matter in the paper path. Paper Take the excessive papers out from The feed roller is dirty. - Page 66 • The print media does not meet • Please use the print media the usage specifications, for within the specification range. example the media is damp or • Clean the paper path. too rough, or has been used previously. • It is suggested to replace the original toner cartridge.
- Page 67 The print media has been • Ensure the correct loading of loaded incorrectly. the print media. • The paper path of the printer is dirty. • Clean the paper path inside the printer. Skewed pages • Ensure the correct loading •...
-
Page 68: Menu Structure
1O. Menu Structure With the help of the structure of this printer on the panel menu, you can view and set the following functions: 1) Press "Menu" to enter the menu setting interface. 2) Press "▲" or "▼" to select "Prt Info Rept". 3) Press "OK"... -
Page 69: Product Specifications
11.Product Specifications • Specification values vary slightly from printers with different models with different Note: functions, and product specifications vary from different countries and regions. • These values are based on the initial data. For more information about the latest specifications, please visit: www.sharpusa.com. - Page 70 Microsoft Windows XP/ Windows Vista/ Windows 7/ Windows 8/ Windows 8.1/ Windows 10/ Windows Server 2003/ Windows Server Operating 2008/ Windows Server 2012(32/64 Bit) system Mac OS 10.7/10.8/10.9/10.10/10.11 USB 2.0(High Speed) Communication interface IEEE802.3 10Base-T/100Base-Tx Print Time of ≤8.5 sec First Page Monthly Maximum...