Table of Contents
Advertisement
Operating Instructions
Bedienungsanleitung
Gebruiksaanwijzing
Mode d'emploi
Manuale di istruzioni
Instrucciones de funcionamiento
Steam / Convection / Grill / Microwave Oven
Dampfgarer / Heißluft / Grill / Mikrowelle (Schwarz)
Stoom / Hetelucht / Grill / Magnetron (Zwart)
Vapeur / Chaleur tournante / Grill / Micro-ondes (Noir)
Vapore / Convezione / Grill / Microonde (Nero)
Vapor / Conveccion / Grill / Microondas (Negro)
For Household Use Only
Nur für den privaten Gebrauch
Uitsluitend voor huishoudelijk gebruik
À un usage domestique uniquement
Per uso domestico
Solo para uso doméstico
NN-CS88LB
Model No.
NN-CS88LB
Advertisement
Table of Contents

Related Manuals for Panasonic NN-CS88LB


Summary of Contents for Panasonic NN-CS88LB
- Page 1 Vapore / Convezione / Grill / Microonde (Nero) Vapor / Conveccion / Grill / Microondas (Negro) For Household Use Only Nur für den privaten Gebrauch Uitsluitend voor huishoudelijk gebruik À un usage domestique uniquement Per uso domestico Solo para uso doméstico NN-CS88LB Model No. NN-CS88LB...
- Page 2 IMPORTANT SAFETY INSTRUCTIONS: Before operating this oven, please read these instructions carefully and keep for future reference. WICHTIGE SICHERHEITSANWEISUNGEN. Bitte sorgfältig durchlesen und zur weiteren Bezugnahme aufbewahren. BELANGRIJKE VEILIGHEIDSINSTRUCTIES. Lees ze a.u.b. zorgvuldig door en bewaar ze zodat u ze opnieuw kunt raadplegen wanneer nodig. INSTRUCTIONS DE SÛRETÉ...
-
Page 3: Table Of Contents
Thank you for purchasing this Panasonic appliance. Contents Safety Instructions......2-7 Combination Cooking with Steam...........31-32 Disposal of Old Equipment....7 Combination Cooking without Steam...........33-34 Installation and Connection....8 Using the Timer......35-36 Placement of Your Oven......8 Using the Add Time Function....36 Important Safety Instructions..9-12 Multi-stage Cooking......37... -
Page 4: Safety Instructions
Safety Instructions Important safety instructions. Before operating this oven, „ please read these instructions carefully and keep for future reference. This appliance can be used by children aged from 8 „ years and above and persons with reduced physical, sensory and mental capabilities or lack of experience and knowledge if they have been given supervision or instruction by a person responsible for their safety concerning the use of the appliance in a safe way and... - Page 5 Safety Instructions Warning! Do not attempt to tamper with or make any „ adjustments or repairs to the door, control panel housing, safety interlock switches or any other part of the oven. Do not remove the outer panel from the oven which gives protection against exposure to microwave energy.
- Page 6 Safety Instructions If smoke is emitted or a fire occurs in the oven, touch „ Stop/Cancel and leave the door closed in order to stifle any flames. Disconnect the power cord, or shut off power at fuse or circuit breaker panel. This appliance is intended to be used in household „...
- Page 7 Safety Instructions Failure to maintain the oven in a clean condition could „ lead to deterioration of surfaces that could affect the life of the appliance and possibly result in a hazardous situation. Warning! The accessible parts may become hot in grill, „...
- Page 8 Safety Instructions Please refer to pages 13-14 for correct installation of the „ shelf accessories. The oven has heating elements situated in top of the „ oven, a steamer boiler situated in the left side of the oven and a convection heater situated in the back of the oven.
-
Page 9: Disposal Of Old Equipment
Safety Instructions Do not use the water tank if it is cracked or broken, as „ leaking water could result in electrical failure and danger of electric shock. If the water tank becomes damaged, please contact your dealer. The appliance must not be installed behind a decorative „... -
Page 10: Installation And Connection
Installation and Connection Examine your Oven Earthing Instructions Unpack the oven, remove all packing If your AC outlet is not grounded, it material, and examine the oven for any is the personal responsibility of the damage such as dents, broken door customer to have it replaced with a latches or cracks in the door. -
Page 11: Important Safety Instructions
Important Safety Instructions Read carefully and keep for future reference 6. Only allow children to use the oven Warning! without supervision when adequate Important safety instructions. instructions have been given so that the child is able to use the oven in 1. - Page 12 Important Safety Instructions opening the door as steam may Use of your Oven cause injury. 1. Do not use the oven for any reason other than the preparation of food. Caution! This oven is specifically designed to Steam may billow out when you heat or cook food.
- Page 13 Important Safety Instructions Important! Caution! Hot Surfaces If the recommended cooking After cooking by these modes, times are exceeded the food the oven accessories will be will be spoiled and in extreme very hot. circumstances could catch fire and possibly damage the 4.
- Page 14 Important Safety Instructions Liquids Utensils/Foil When heating liquids, e.g. soup, Do not heat any closed cans or bottles sauces and beverages in your because they might explode. microwave oven, overheating the liquid beyond boiling point can occur without Metal containers or dishes with evidence of bubbling.
-
Page 15: Oven Accessories
Oven Accessories Accessories Wire Shelf The oven comes equipped with a 1. The wire shelf can be used in the variety of accessories. Always follow upper or middle shelf position for grilling or steaming foods. It can the directions given for use of the accessories. - Page 16 Oven Accessories Glass Tray Wire Rack 1. The glass tray can be used on the 1. The wire rack is placed inside the enamel shelf to cook on steam, base of the oven for cooking on microwave only. grill, convection or combination without microwave mode.
-
Page 17: Parts Of Your Oven
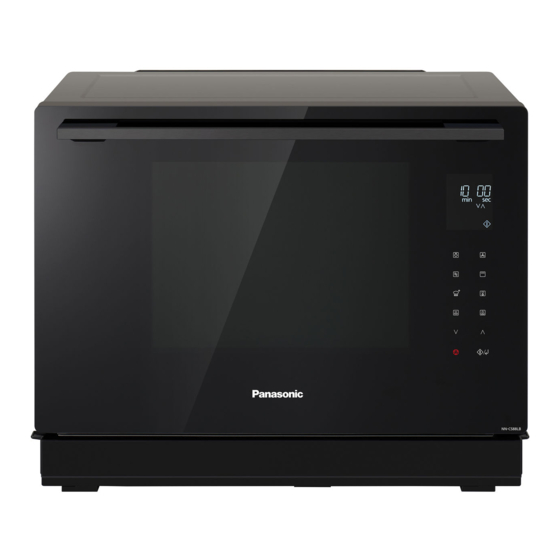
Parts of Your Oven 1 Door handle 7 Steam outlets Pull the door handle downwards 8 Warning label 9 Grill elements to open. When you open the oven 10 Convection heater door during cooking, the cooking 11 LED lights is stopped temporarily without clearing the programmed settings. - Page 18 Parts of Your Oven 1 Control panel 2 Drip tray 3 Water tank (behind drip tray) 4 Air vent exhaust (do not remove) 5 Identification label 6 Warning label Rear view Front view Drip Tray 1. Before using the oven, the drip tray must be fitted as it collects excess water during cooking.
-
Page 19: Control Panel
Control Panel NN-CS88LB 1 Display Window 2 Steam (pages 28-30) 3 Convection (pages 26-27) 4 Microwave (page 23) 5 Grill (pages 24-25) 6 Combination (pages 31-34) 7 Timer/Clock (page 22, 35-36) 8 Auto Cook (pages 38-55) 9 Auto Steam (pages 57-60) -
Page 20: Display Window
Display Window Preheating (Convection) System Cleaning Temperature Display Child Lock Setting Number/Character Time Display (Minute/Second) Wire Shelf Weight Display Wire Rack More/Less Display Accessory Placement Multistage Enamel Shelf Display Glass Tray Convection Junior Menu Program Steam Grill Microwave Start/Confirmation Auto Sensor Program Defrost/Frozen mark Auto Cook Program Auto Beverage... - Page 21 Cooking Modes Accessories Cooking modes Uses Containers to use Grill Wire shelf or enamel • Grilling of meat or fish. shelf. If • Toast grilling. using wire Heatproof, • Browning of gratin dishes shelf, glass metal tin can or meringue pies. tray can be be used.
-
Page 22: Combination Cooking Modes
Combination Cooking Modes Accessories Cooking modes Uses Containers to use Steam + Microwave • Cooking fish, vegetables, Glass tray on (Combi 1) chicken, rice, and potatoes. wire shelf or Microwaveable. glass tray on base. No Preheating Grill + Steam (Combi 2) •... -
Page 23: Word Prompting
Word Prompting Word Prompting Plug-in “88:88” No Word "FRANCAIS" In French "ITALIANO" In Italian "DEUTSCH" In German "NEDERLANDS" In Dutch "ESPANOL" In Spanish "ENGLISH" In English These models have a unique function “Word Prompting” which guides you through the operation of your microwave. After plugging in the oven tap Start/Confirmation until you locate your language. -
Page 24: Setting The Clock
Setting the Clock When the oven is first plugged in “88:88” appears in display window. Select the time by Touch Timer/Clock. Tap Timer/Clock tapping . The The colon stops twice. time appears in the blinking and time of display and the colon day is now locked blinks. -
Page 25: Defrosting
Microwave Cooking and Defrosting There are 7 different microwave power levels available (see the chart below). Tap Microwave to Select the cooking time by Touch Start/ tapping Confirmation. select desired power The cooking level. program will Taps Power Wattage Max time start and the 1 tap 1000 Watts 30 mins... -
Page 26: Grilling
Grilling There are 3 different Grill settings available. 1 tap Grill 1 (high) 2 taps Grill 2 (medium) 3 taps Grill 3 (low) Tap Grill once, twice or three times Touch Start/Confirmation to to select the desired grill power. preheat. A “P” will appear in the display window. - Page 27 Grilling Note 1. Never cover foods when grilling. 2. The grill will only operate with the oven door closed. 3. There is no microwave power on the grill only program. 4. Most foods require turning halfway during cooking. When turning food, open oven door and carefully remove accessories using oven gloves.
-
Page 28: Convection Cooking
Convection Cooking This key offers a choice of convection temperatures 30-230 °C in 10 °C increments. For quick selection of the most commonly used cooking temperatures, the temperatures start at 150 °C and count up to 230 °C then 30 °C. The oven can not preheat at 30-60 °C. - Page 29 Convection Cooking Note on Preheating 1. Do not open the door during preheating. After preheating 3 beeps will be heard and the “P” will flash in the display window. If the oven door is not opened after preheating, the oven will maintain the selected temperature.
-
Page 30: Steam Cooking
Steam Cooking The oven can be programmed as a steamer to cook vegetables, fish, chicken and rice. There are 2 different steam settings available. Touch Power Level 1 tap Steam 1 (Maximum) 2 taps Steam 2 (Low) Tap Steam until the power you require Select the cooking time by appears in the display window. - Page 31 Steam Cooking Caution! The accessories and surrounding oven will get very hot. Use oven gloves. When removing the food or cooking accessories, hot water may drip from the oven top. Steam may billow out when you open the door. If there is steam in the oven, do not reach in with your bare hands! Risk of burns! Use oven gloves.
-
Page 32: Steam Shot
Steam Shot This feature allows you to add steam during cooking (up to 3 minutes). The following modes can use steam shot - microwave, grill, convection and combination levels 4-12. Adding steam during cooking enhances the heat distribution and aids the rising process of breads, cakes and pastries. Set and operate the desired program. -
Page 33: Combination Cooking With Steam
Combination Cooking with Steam Steam can be used to cook foods simultaneously with microwave, grill or convection mode. This can often reduce traditional oven cooking times and keep the food moist. Use of Accessory: Combi 1 Combi 2 or Combi 3 Glass tray on wire shelf in Wire rack inside enamel shelf in lower middle shelf position... - Page 34 Combination Cooking with Steam Note 1. The maximum time for cooking in this mode is 30 minutes. If required to cook for longer than this time, re-fill the water tank and repeat the above operation for the remaining time. 2. If during operation the water tank becomes empty, the oven will stop operation.
-
Page 35: Combination Cooking Without Steam
Combination Cooking without Steam There are 9 combinations settings without steam. Combination cooking is ideal for many foods. The microwave power cooks them quickly, whilst the convection or grill gives traditional browning and crispness. All this happens simultaneously resulting in most foods being cooked in 1/2 - 2/3 of the conventional cooking time. - Page 36 Combination Cooking without Steam Note on Preheating The oven can be preheated on Combination with Convection or Grill/ Convection cooking. Touch Start/Confirmation before setting the cooking time and follow the note on preheating on page 27. No microwaves are emitted during combination preheating. Note 1.
-
Page 37: Using The Timer
Using the Timer This feature allows you to program the oven as a kitchen timer. It can be also used to program a standing time after cooking is completed or to program a delay start. 1. Delay Start Cooking By using the Timer, you are able to program Delay Start cooking. Set the desired cooking program and cooking time (up to 2 stages). -
Page 38: Using The Add Time Function
Using the Timer 3. Kitchen Timer Touch Set the time by Touch Timer/ tapping Start/ (up to Clock Confirmation. 9 hours). once. Time will count down. Using the Add Time Function This feature allows you to add cooking time at the end of previous cooking. After cooking, tap to select Touch Start/Confirmation. -
Page 39: Multi-Stage Cooking
Multi-stage Cooking 2 or 3 Stage Cooking Select Select desired desired power power level. level. Set the cooking Set the cooking Touch Start/ time by tapping time by tapping Confirmation. The cooking program will start and the time in the display will count down. -
Page 40: Sensor Reheat Programs
Sensor Reheat Programs This unique feature ‘the Genius’ built in sensor allows you to simply reheat a chilled or frozen meal. It is not necessary to select the power level, weight or cooking time. The built-in sensor measures the humidity of the food and calculates the microwave power level together with a cooking time. - Page 41 Sensor Reheat Programs How it works much longer the food needs to reheat. Once the Sensor Reheat Programs has The remaining cooking time will appear been selected and Start/Confirmation in the display window after two beeps. is touched the food is heating up. Whilst the Sensor program is still in the As food begins to get hot, steam is display window the oven door should...
-
Page 42: Turbo Defrost
Turbo Defrost With this feature you can defrost frozen food according to the weight. The weight is programmed in grams. The weight starts from the minimum weight for each category. Select desired Touch to Tap Auto Select the weight of menu by tapping confirm the the food by tapping... - Page 43 Turbo Defrost Note 1. When the defrosting time is longer than 60 minutes, the time will appear in hours and minutes. 2. The shape and size of the food will determine the maximum weight the oven can accommodate. 3. Allow standing time to ensure the food is completely defrosted. 4.
-
Page 44: Auto Beverage Programs
Auto Beverage Programs Tap Auto Select desired Touch to Select the weight of menu by tapping Cook pad confirm the the food by tapping once program. Touch Start/Confirmation. The display reminds you which cooking modes are in use. Remember to stir the beverage before and after heating. -
Page 45: Re-Bake Bread Programs
Re-Bake Bread Programs Tap Auto Select desired Touch to Select the weight of menu by tapping Cook pad confirm the the food by tapping . The weight once program. will count up in 10 g steps. Touch Start/Confirmation. The display reminds you which accessory to use and which cooking modes are in use. -
Page 46: Auto Cook Programs
Auto Cook Programs Tap Auto Select desired Touch to Select the weight menu by tapping Cook pad confirm the of the food by tapping once (refer to program. (Skip The weight will pages 44-51) this step for count up in 10 g programs steps except No. - Page 47 Auto Cook Programs Program Weight* Accessories Instructions 13. Beef For cooking fresh roast beef, well Well Done done (topside, rump or silverside). Place on enamel shelf in lower shelf position. Select program 500 g - number 13, Beef Well Done. Touch 2000 g Start/Confirmation to confirm the program.
- Page 48 Auto Cook Programs Program Weight* Accessories Instructions 15. Homebake For cooking Homebake Quiche, Quiche prepare as in the following recipe. Select program number 15, Homebake Quiche. Touch Start/ Confirmation. Homebake Quiche ingredients 1. Cut the bacon into small pieces. Heat in a covered small 100 g back, smoked bacon dish on 1000 W for 1 minute.
- Page 49 Auto Cook Programs Program Weight* Accessories Instructions For proving bread dough. Prepare the 17. Bread- bread dough as recipes pages 63, 73- Dough Rise 74, in cook book. Place on enamel shelf in lower shelf position. Select program number 17, Bread Dough Rise. Touch Start/Confirmation to start the program.
-
Page 50: Junior Menu Programs
Junior Menu Programs The Junior Menu offers a range of programs catering for babies, toddlers and older children - great for time saving and convenience. The fruit and vegetable purées are ideal first foods for weaning babies. Homemade purées taste like real food and cost less than jars or packets. - Page 51 Junior Menu Programs Program Weight* Accessories Instructions 23. Junior For cooking fresh pasta bake using fresh Pasta Bake pasta (penne, spaghetti, fusilli), cheese or tomato based sauce and grated mild cheddar cheese. Use a suitable square, shallow Pyrex container. Use the ®...
- Page 52 Junior Menu Programs Program Weight* Accessories Instructions For preparing fresh vegetable fries such 25. Fresh as sweet potato, white potato, carrots, Vegetable parsnips and courgettes. Peel and cut Fries the vegetables into baton shapes. Toss in a tablespoon of vegetable oil. Place the vegetables on the glass tray and place on 100 g - wire shelf in middle shelf position.
- Page 53 Junior Menu Programs Program Weight* Accessories Instructions 27. Fruit This program is suitable for cooking apples, pears, peaches, papaya and Purée mango. The cooked fruit is then puréed and suitable when weaning babies. Peel and chop the fruit into even sized pieces. Place in a Pyrex dish on the base of ®...
-
Page 54: Auto Sensor Programs
Auto Sensor Programs A variety of food may be cooked without having to enter the cooking time, weight or the power level. Select desired Tap Auto Touch Start/Confirmation menu by tapping Cook pad to start the program. once More / Less Control Preferences for degree of cooking vary for each individual. - Page 55 Auto Sensor Programs Program Weight* Accessories Instructions For re-heating and browning pre- 28. Chilled Quiche cooked, fresh quiche. Remove all packaging and place the quiche on wire shelf in lower shelf position. Select program number 28, Chilled Quiche. Touch Start/Confirmation. 350 g - Transfer the quiche onto a cooling 450 g...
-
Page 56: Cleaning Programs
Cleaning Programs F1. Drain Water Water is pumped through the system to clean the pipes. The water is drained into the drip tray. Add 100 ml of Tap Auto Select F1 (Drain Touch Start/ water to the water Cook pad Water) by tapping Confirmation. - Page 57 Cleaning Programs Note 1. When is displayed, run the ‘system cleaning’ program. 2. If the system cleaning program is not used regularly, the pipe will get blocked and the steaming performance will be less effective. 3. Do not remove the drip tray during the drain program. 4.
-
Page 58: Cleaning The Water Tank
Cleaning the Water Tank Clean with a soft sponge in water. Remove the water tank and clean the Open the water supply cap, remove the compartment where the water tank is lid and pipe cap and clean. inserted. Pipe cap Ensure it faces downwards If the pipe cap is difficult to remove, wiggle from side to side. -
Page 59: Auto Steam Programs
Auto Steam Programs This feature allows you to steam some of your favourite foods by setting the weight only. The oven determines the steam level and the cooking time automatically. Select the category and set the weight of the food. The weight is programmed in grams. - Page 60 Auto Steam Programs Program Weight* Accessories Instructions To steam fresh vegetables up to 30. Fresh 500 g. Fill water tank. Place prepared Vegetables vegetables onto wire rack. Place wire rack inside enamel shelf in the middle 1 Level shelf position. For small vegetables 200 g - place on glass tray on wire rack 500 g...
- Page 61 Auto Steam Programs Program Weight* Accessories Instructions To steam potatoes up to 650 g. Fill water tank. Peel potatoes and cut into Steamed even sized pieces. Place prepared Potatoes potatoes onto wire rack. Place wire 1 Level rack inside enamel shelf in the middle 200 g - shelf position.
- Page 62 Auto Steam Programs Program Weight* Accessories Instructions 34. Whole To steam fresh whole fish (Sea Fish and bass or Mackerel) and green Green vegetables (broccoli, green beans Vegetables or asparagus) at the same time. Fill approx. the water tank. Oil the wire rack to 200-300 g prevent the fish sticking.
-
Page 63: Questions And Answers
Questions and Answers Q: Why won’t my oven turn on? Q: I can’t set an auto program and A: When the oven does not turn on, ‘HOT’ appears in the display. Why? check the following: A: If ‘HOT’ appears in the display 1. - Page 64 Questions and Answers Q: The fan continues to rotate after Q. The control panel keys do not cooking. Why? respond when touched. Why? A: After using oven, the fan motor A: Ensure the oven is plugged in. may rotate to cool the electrical The oven may be in stand-by components.
-
Page 65: Care Of Your Oven
Care of your Oven 1. Turn the oven off before cleaning. 7. The base of the oven should be cleaned regularly. Simply wipe the 2. Clean the inside of the oven, door bottom surface of the oven with seals and door seal areas regularly. mild detergent and hot water, then When food splatters or spilled dry with a clean cloth. -
Page 66: Technical Specifications
Class B means that this product may be used in normal household areas. Manufactured by: Panasonic Appliances Microwave Oven (Shanghai) Co., Ltd. 888, 898 Longdong Road. Pudong, Shanghai, 201203, China. - Page 67 Panasonic Corporation F0003CH10EP http://www.panasonic.com PA0320-0 Printed in P.R.C. © Panasonic Corporation 2020...