Advertisement
Advertisement

Related Manuals for Huawei PT500

Summary of Contents for Huawei PT500
- Page 1 PT500 500Mbps Powerline Adapter User Guide...
- Page 2 PT500 500Mbps Powerline Adapter V100R001 User Guide 202593_04 Huawei Technologies Co., Ltd. provides customers with comprehensive technical support and service. Please feel free to contact our local office or company headquarters. Huawei Technologies Co., Ltd. Address: Huawei Industrial Base Bantian, Longgang...
- Page 3 Thus the descriptions herein may not exactly match the product or its accessories you purchase. Huawei Technologies Co., Ltd reserves the right to change or modify any information or specifications contained in this manual without prior notice or obligation.
- Page 4 THE MAXIMUM LIABILITY (THIS LIMITATION SHALL NOT APPLY TO LIABILITY FOR PERSONAL INJURY TO THE EXTENT APPLICABLE LAW PROHIBITS SUCH A LIMITATION) OF HUAWEI ARISING FROM THE USE OF THE PRODUCT DESCRIBED IN THIS MANUAL SHALL BE LIMITED TO THE AMOUNT PAID BY CUSTOMERS FOR THE PURCHASE OF THIS PRODUCT.
-
Page 5: Table Of Contents
Contents About PT500 ............1 PT500 Installation ..........4 Advanced Configuration ........6 Tab Pages on the PCU User Interface....12 FAQs ..............16 Technical Specifications ........18... -
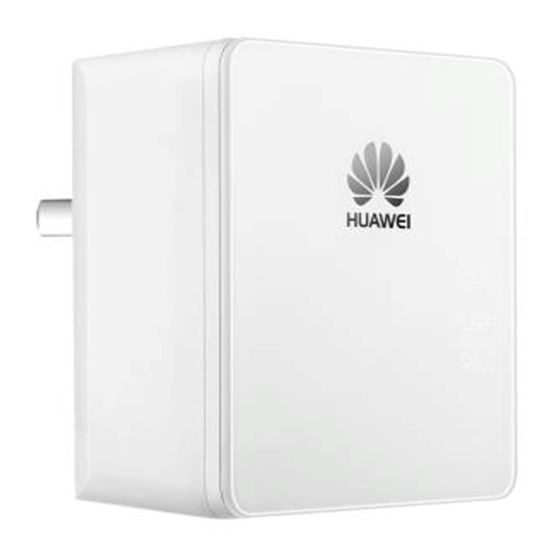
Page 6: About Pt500
You can connect to your network directly by connecting the PT500 to a power socket. The PT500 is sleek and convenient, and can transmit data to a 300-meter distance at a rate of 200 Mbit/s on the power line network. - Page 7 Connects the PT500 to a safety network or restores the PT500 to its default settings. Press and hold the Pair button on a PT500 (no more than 4 seconds), and repeat the operation on the other PT500 within 2 minutes. The two adapters are then connected and a LAN is set up.
- Page 8 The PT500 is powered off. Steady on The PT500 is connected to the network. The PT500 is not connected to the network or is running in energy saving mode. Steady on The PT500 is connected to a device of the same type.
-
Page 9: Pt500 Installation
Figure 2-1 shows how to use the power line adapter to set up a network. Figure 2-1 Using the power line adapter to set up a network Use a network cable to connect a PT500 and network device, such as a gateway. - Page 10 Pair button to quickly set up a network with multiple PT500 adapters to ensure secure data transmission. To quickly set up a network with multiple PT500 adapters: Press and hold the Pair button on a PT500 no more than 4 seconds, and then release it. The PWR indicator starts to blink.
-
Page 11: Advanced Configuration
Configuring a Private Network To implement power line communication, connect at least one pair of PT500 adapters. A power line network can be divided by network names. Each PT500 powerline adapter is preset with a network name. PT500 powerline adapters with the same network name can connect to each other in the same power line network. - Page 12 To configure your private network: Check that the PWR indicator on the PT500 is steady on. Install PCU software. Please run PCU software in Windows XP, Windows Vista or Windows 7. After the setup is complete, running the PT500 Configuration Utility software...
- Page 13 Click a device (such as 500Mbps Powerline Adapter) to configure the device, as shown in Figure 3-3. Figure 3-3 Search results 1) On the Main tab page, click Connect.
- Page 14 The system displays the information about all devices on the LAN, such as the device name, model, and software version in the Remote Device area. 2) Click Device 2. Click Enter Password to enter device’s password. Display the Network Name tab page to configure the network shown in Figure 3-4.
- Page 15 Update the PT500 Firmware 1) On the Main tab page, click Upgrade Firmware. The Enter PIB & NVM files dialog box is displayed, as shown in Figure 3-5. Figure 3-5 Enter PIB & NVM files dialog box 2) In the Enter PIB & NVM files dialog box, click Browse to specify the path for storing the PIB and NVM.
- Page 16 To restore the PT500 to its default settings, press and hold the Pair button for 6 seconds after it is powered on.
-
Page 17: Tab Pages On The Pcu User Interface
Tab Pages on the PCU User Interface For more information about the PCU software functions, please refer to the following details. Main Tab Page Main Tab Page includes two areas. The Local Device area shows the information of device which connects your current PC and the Remote Device area show the information of other device which in your network. - Page 18 Enter Password Set password for a specified device. When you manage a remote power line adapter through the PCU software, you must match the password first. Add New Device Add a device. Network Name Tab Page Figure 4-2 shows the Network Name tab page. Figure 4-2 Privacy tab page To rename a private network, display the Network Name tab page on the PCU, enter a new name in the Network Name text box, and click Set All Devices.
- Page 19 The Diagnostics tab page displays the information about the system and remote devices. The System Information area displays the system information. The Remote Device History area displays the remote device information. About Tab Page Figure 4-4 shows the About tab page. Figure 4-4 About tab page...
- Page 20 The About tab page displays the PCU software information, such as the version and release date.
-
Page 21: Faqs
What Can I Do If the PLC Indicator Is Off If the PLC indicator didn't blink after you press the Pair button, the device may be running in energy saving mode. Please plug the PT500 into the socket again and repeat this operation until the indicator blinks. - Page 22 Press and hold the Pair button on a PT500 more than 1 second and less than 4 seconds, and repeat the operation on the other PT500 within 2 minutes. If the PLC indicators are still off, consult your local ISP for help.
-
Page 23: Technical Specifications
Technical Specifications Item Specifications Power supply 100V ~240V AC, 50/60Hz Power consumption < 3W Working temperature 0℃~40℃ Working humidity 5% ~ 95% RH (non-condensing) Dimensions (H x W x D) CN: About 71 mm × 62 mm × 48 mm UK: About 71 mm ×...