Husqvarna 525LST Operator's Manual
Hide thumbs
Also See for 525LST:
- Operator's manual (84 pages) ,
- Workshop manual (71 pages) ,
- Operator's manual (76 pages)
Advertisement
Advertisement
Table of Contents

Related Manuals for Husqvarna 525LST


Summary of Contents for Husqvarna 525LST
- Page 1 525LST, 525RS, 525RJD Operator's manual 2-26...
-
Page 2: Table Of Contents
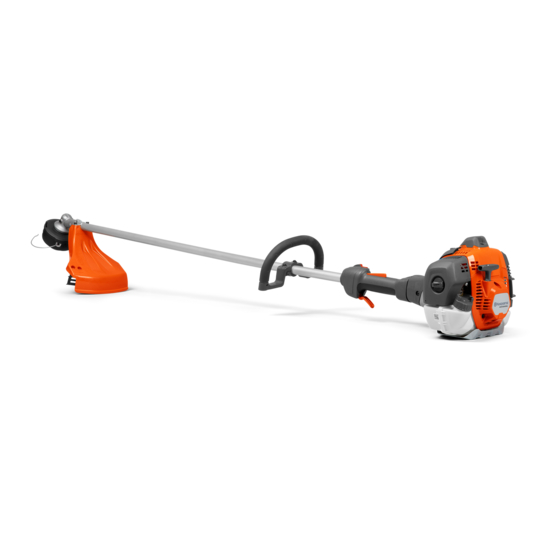
Product overview 1. Trimmer head 5. Shaft 2. Grease filler cap 6. Loop handle (525LST, 525RJD) 3. Bevel gear 7. Throttle trigger 4. Cutting attachment guard 8. Stop switch 1363 - 001 - 25.10.2019... - Page 3 23. Operator's manual body parts. 24. Support cup 25. Blade 26. Shaft coupling (525RJD) 27. J-handle (525LST, 525RJD ) Only use flexible cutting wire. Do not use 28. Handle adjustment metal cutting attachments. 29. Suspension ring (525RS) 30. Throttle wire adjustment (525RS) 31.
-
Page 4: Safety
Product liability • the product has an accessory that is not from the manufacturer or not approved by the manufacturer. As referred to in the product liability laws, we are not • the product is not repaired at an approved service liable for damages that our product causes if: center or by an approved authority. - Page 5 • The complete clutch cover and shaft must be fitted • Watch out for thrown objects. Always wear approved before the product is started, otherwise the clutch eye protection. Never lean over the cutting can come loose and cause personal injury. attachment guard.
- Page 6 • Use approved hearing protection that provides • Keep first aid equipment close at hand. adequate noise reduction. Long-term exposure to noise can result in permanent hearing impairment. Safety devices on the product WARNING: Read the warning instructions • Use approved eye protection. If you use a visor, you that follow before you use the product.
- Page 7 1. Press the throttle trigger lockout (A) and make sure 6. Release the throttle and make sure that the cutting that the throttle control is released (B). When you attachment stops and remains at a standstill. If the release the handle the throttle control and the throttle cutting attachment rotates with the throttle in the idle trigger lockout both move back to their initial position the carburettor idle setting must be checked.
- Page 8 prevents injuries that occur if you touch the cutting 3. Make sure that the vibration damping units are attachment. attached correctly. 1. Make sure that the cutting attachment guard is not damaged or cracked. 2. Replace the guard if it has been exposed to impact To do a check of the muffler or is cracked.
- Page 9 Cutting equipment Trimmer head • Use the blades and grass knives to cut coarse grass. WARNING: Always make sure the trimmer line is wound tightly and evenly around the drum to prevent harmful vibration. • Use the trimmer head to cut grass. •...
-
Page 10: Assembly
1. Attach the J-handle to the loop handle with 3 screws. from the spark plug before you assemble the Do not tighten the screws fully. product. To assemble the loop handle (525LST, 525RJD) 1. Attach the loop handle onto the shaft between the arrows. - Page 11 To install the suspension ring (525LST, 4. Tighten the knob fully. 525RJD) 1. Install the suspension ring to the shaft between the rear handle and the loop handle. To disassemble the two-piece shaft (525RJD) 1. Turn the knob 3 turns or more to loosen the 2.
- Page 12 3. Attach with the bolt (L). 4. Loosen the bolt(L) from the cutting attachment guard-fitting on the shaft. 4. Install the drive disc (B) on the output shaft. 5. Remove the cutting attachment guard (A). 5. Turn the output shaft until one of the holes in the drive disc aligns with the related hole in the gear To attach and remove the locknut housing.
- Page 13 • To loose and tighten the locknut, use a socket 4. Attach the handlebar between the arrows on the spanner with a long shaft. The arrow in the picture shaft. Tighten the screw. shows the area where you should operate the socket spanner.
- Page 14 6. Attach the nut (G). 3. Adjust the side straps until the weight is equally applied across your shoulders. 7. Tighten the nut to the support flange with the socket wrench. Hold the shaft of the socket wrench near the blade guard.
-
Page 15: Operation
This extends the life of the engine. Husqvarna alkylate fuel is Gasoline not available in all markets. CAUTION: Always use a quality gasoline/oil Two-stroke oil mixture of at least 90 octane (RON). - Page 16 0.30 0.40 To mix gasoline and two-stroke oil CAUTION: There is a risk that small errors influence the ratio of the mixture drastically when you mix small quantities of fuel. Carefully measure the quantity of oil to be CAUTION: Contamination in the tanks mixed to make sure that you get the correct causes malfunction.
- Page 17 • Make sure that the locknut can not be removed by 2. Move the choke control up into choke position. hand. If you can remove it by hand, it does not lock the cutting attachment sufficiently and you must replace it. •...
- Page 18 • Move the stop switch to the stop position to stop the engine. 525RS 525LST, 525RJD • Angle the grass blade to the left to make the grass fall in a line. This makes it easy to collect the grass.
-
Page 19: Maintenance
Grass trimming with a trimmer head 2. Do not push the trimmer head to the ground. This can cause damage to the product. To trim the grass 3. Move the product from side to side when you cut grass. Use full speed. 1. - Page 20 Do a check of the bevel gear to make sure that it is filled ¾ with grease. Fill the bevel gear with Husqvarna special grease if it is necessary. Clean or replace the spark arrestor mesh on the muffler (only applies to mufflers without a catalytic converter).
- Page 21 Technical data on page 25 for the Note: Refer to recommended idle speed. To adjust the start throttle speed (525RS) 1. Apply idle speed. Product 2. Push the start throttle lock. Refer to overview on page 2 . 3. If the start throttle speed is less than 4000 rpm, turn the adjuster screw (A) clockwise until the cutting attachment rotates.
- Page 22 6. Muffler plate. CAUTION: The spark arrestor mesh must be replaced if it is damaged. Do not use a product if the spark arrestor mesh on the muffler is missing or defective. CAUTION: If the spark arrestor mesh is frequently blocked it can be a sign that performance of the catalytic converter is decreased.
-
Page 23: Troubleshooting
3/4 full with grease. Use If you use an air filter for a long time it cannot be fully Husqvarna special grease. cleaned. Replace the air filter with a new one at regular intervals. -
Page 24: Transportation, Storage And Disposal
• When the product is no longer in use, send it to a • Ensure that the product is cleaned and that a Husqvarna dealer or discard it at a recycling complete service is carried out before long-term location. storage. -
Page 25: Technical Data
Technical data Technical data 525LST 525RJD 525RS Engine Cylinder displacement, cm 25.4 25.4 25.4 Idle speed, rpm 3000 3000 3000 Recommended max. speed, rpm 10500 9500 9500 Speed of output shaft, rpm 5500 6500 6500 Max. engine output, according to 1.0 @ 8500... -
Page 26: Accessories
525LST 525RJD 525RS Equivalent vibration levels (a 5.8/3.3 4.5/3.9 3.6/2.4 hv,eq at handles, measured according to EN ISO 11806 and ISO 22867, :Equipped with trimmer head (original), left/right Accessories Accessories The accessories are recommended for use in requirement standards by the Swedish Machinery combination with the specified power heads and have Testing Institute. - Page 27 Super Auto II Super Auto II 1 " 4,0 m 15 cm ~2,0 m 6 " 6,5 ' 15 cm 6 "...
- Page 29 8,5 m 10 cm 4" 4,2 m "Clic" 15 cm 6"...
- Page 30 4,25 m 4,25 m 15 cm 6" 15 cm 6"...
- Page 31 T35, T35x 8,5 m 10 cm 4" 4,3 m "Clic" 15 cm 6"...
- Page 32 Alloy ø 2,0 - 2,4 mm/ .080-.095" ø 2,0 - 3,3 mm/ .080- .130" 550 mm/ 22"...
- Page 36 Original instructions 1159916-28 2019-10-25...