Advertisement
Quick Links
Advertisement

Related Manuals for Dell Streak SoftBank 001DL


Summary of Contents for Dell Streak SoftBank 001DL
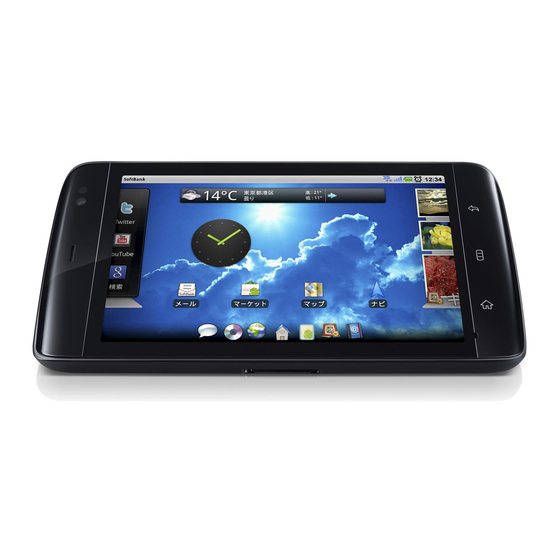
- Page 1 SoftBank 001DL クイックスタートガイド...
- Page 2 ________________ この文書の情報は、事前の通知なく変更されることがあります。 すべての著作権は にあります。 © 2010 Dell Inc. および のロゴは の商標です。 Dell DELL Dell Inc. 年 月 2010 P/N 1F5NP Rev. A00...
- Page 3 はじめに 背面カバーを取り外す カードを挿入する 電池パックを取り付ける...
- Page 4 はじめに カードを挿入する 背面カバーを取り付ける 電池パックを充電する microSD 背面カバーは隙間がないよう 最後まで押し込んでください。...
- Page 5 各部の名称 戻るボタン レシーバー ボリュームダウンボタン メニューボタン 前面カメラレンズ 電源およびスリープ ウェイクボタン ホームボタン 環境照明センサー カメラボタン マイク イヤホン端子 近接センサー ボリュームアップボタン...
- Page 6 各部の名称 カメラレンズ 外部接続端子 カメラフラッシュ スピーカ...
- Page 7 電源を入れる 電源ボタンを押し続ける メモ デバイスがオンの時に背面カバーを外すと、デバイスは自動的にオフになります。...
- Page 8 接続 Wi-Fi をオンにしてネットワークに接続 Wi-Fi Wi-Fi → → 設定→ 無線とネットワーク→ Wi-Fi Wi-Fi 設定 ネットワーク Wi-Fi Wi-Fi ネットワーク Wi-Fi Wi-Fi 接続 Wi-Fi メモ お使いのデバイスがワイヤレスネットワークに接続されると、シグナルの強度を示す アイコン がステータスバーに表 示されます。...
- Page 9 マイクロフォン付きイヤホンの接続 マイクロフォン付きイヤホンをイヤホン端子に接続する...
- Page 10 コンピュータへの接続(オプション) デバイスの カードに音楽、写真、およびビデオファイルをコピーする microSD microSD...
- Page 11 連絡先のロード から連絡先をコピーする → → 連絡先 → 連絡先 → インポート エクスポート→ カードからインポート → すべてをインポート から連絡先を追加する Gmail → → 設定→ アカウント 同期化 アカウント 同期化設定 & & Google アカウントの追加→ Google アカウント 同期化設定 自動同期化 & Gmail 連絡先の同期化 → → 連絡先 → 連絡先 → 表示オプション Gmail その他すべての連絡先...
- Page 12 詳細情報 QuickOffice 詳細に関しては、 で取扱説明書を参照してください。または、 を起動し、メ support.jp.dell.com/manuals モリカードを選択することで、お使いのデバイスで取扱説明書を表示することもできます。 (http://www.softbank.jp/) ご利用いただけるサービスおよび詳細については、ソフトバンクモバイルホームページ をご確 認ください。 取扱説明書の最新版は、ソフトバンクモバイルのホームページよりダウンロードできます。 http://www.softbank.jp/mb/r/support/001dl/...
- Page 13 SoftBank 001DL Quick Start Guide...
- Page 14 ________________ Information in this document is subject to change without notice. © 2010 Dell Inc. All rights reserved. and the logo are trademarks of Dell Inc. October 2010 P/N 1F5NP Rev. A00...
- Page 15 Getting Started Remove the back cover Insert the SIM card Insert the battery...
- Page 16 Getting Started Insert the microSD card Replace the back cover Charge the battery...
- Page 17 Overview Volume down button 1. Back button 6. Earpiece 2. Menu button 7. Front-facing camera lens 12. Power and Sleep/Wake button 3. Home button 8. Ambient light sensor 13. Camera button 4. Microphone 9. Headphone connector 5. Proximity sensors Volume up button...
- Page 18 Overview 1. Camera lens 3. 30-pin connector 2. Camera flash 4. Speaker...
-
Page 19: Turn On Your Device
Turn On Your Device Press and hold the power button NOTE: The device will turn off automatically if you remove the back cover while the device is on. -
Page 20: Connect To A Network
Connect to a Network Turn on Wi-Fi and connect to a network 1 Touch the Home button → Menu button → Settings→ Wireless & networks→ Wi-Fi to select the Wi-Fi check box. The device scans for available wireless networks. 2 Touch Wi-Fi settings. The names and security settings of discovered Wi-Fi networks will be displayed in the Wi-Fi networks list. - Page 21 Connect Headphones Connect the 3.5 mm headphones to the headphone connector...
- Page 22 Connect to a Computer (Optional) Copying music, photo, and video files to the microSD card in your device 1 Connect the 30-pin-to-USB cable to your device and a computer. Wait for your computer to automatically install the driver. 2 Once the installation is complete, a new “Removable Disk” will become available on your computer. This will allow you to view the contents of the microSD card from your computer.
- Page 23 Loading My Contacts Copying contacts from SIM 1 Touch the Home button → the Launcher button → Contacts , or touch the Phone button → Contacts 2 Touch the Menu button → Import/Export→ Import from SIM card. 3 Touch the contact to add to your device, or touch the Menu button →...
- Page 24 For More Information For more information, see the User's Manual at support.dell.com/manuals. Or, you can view the User's Manual on your device by launching QuickOffice, then selecting Memory card.