Table of Contents
Advertisement
Advertisement
Table of Contents

Related Manuals for JVC Dolby Atmos TH-D689B


Summary of Contents for JVC Dolby Atmos TH-D689B
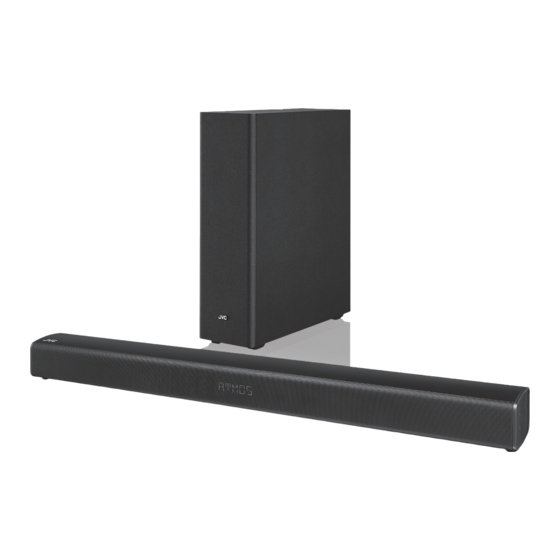
- Page 1 Instruction Manual Dolby Atmos soundbar with wireless subwoofer TH-D689B...
-
Page 3: Table Of Contents
Contents Safety Warnings ........................4 Unpacking ..........................6 Product Overview ........................7 Main Unit .................................7 Rear View of Subwoofer ..........................8 Remote Control ............................9 Preparation .........................10 First-time Use of Remote Control ....................... 10 Battery Replacement for the Remote Control ................10 Remote Control Operation Range ...................... 10 Speaker Placement ............................11 Wall Mounting .............................12 Connections ........................14... -
Page 4: Safety Warnings
Safety Warnings • Read all the instructions carefully before Ventilation using the unit and keep them for future • To prevent the risk of electric shock or reference. fire hazard due to overheating, ensure • Retain the manual. If you pass the unit that curtains and other materials do not onto a third party make sure to include this obstruct the ventilation vents. - Page 5 • Keep loose batteries away from young To prevent the children and make sure that the battery holder tray is secure in the remote control. spread of fire, Seek medical advice if you believe a cell keep candles has been swallowed. •...
-
Page 6: Unpacking
Thank you for purchasing your new product. We recommend that you spend some time reading this instruction manual in order that you fully understand all the operational features it offers. You will also find some hints and tips to help you resolve any issues. Read all the safety instructions carefully before use and keep this instruction manual for future reference. -
Page 7: Product Overview
Product Overview Main Unit Front View 1. Display Show the current status. 2. Remote Control Sensor Receive signal from the remote control. Side View ON/OFF Button Switch the unit between ON and STANDBY mode. SOURCE Button Select the input source. 3. -
Page 8: Rear View Of Subwoofer
Rear View HDMI OUT (ARC) HDMI 1 HDMI 2 COAXIAL OPTICAL HDMI OUT (ARC) HDMI 1 HDMI 2 COAXIAL OPTICAL 1. AC~ Socket 5. AUX Socket 2. COAXIAL Socket 6. HDMI OUT (ARC) Socket 3. OPTICAL Socket 7. HDMI 1 / HDMI 2 Socket 4. -
Page 9: Remote Control
Remote Control Button Switch the unit between On and Standby mode. 2. VOL+ Button • Press to increase the volume level. • Press to increase Treble/Bass level after entering Treble/Bass settings. /PAIR Button • Play / pause / resume playback in BT and USB mode. -
Page 10: Preparation
Preparation First-time Use of Remote Control The unit has a pre-installed lithium CR2025 battery. Remove the protective tab to activate the remote control battery. Battery Replacement for the Remote Control 1. Gently push the tab of the battery tray in and slide it free from the remote control. -
Page 11: Speaker Placement
Speaker Placement SOUNDBAR • The subwoofer should be within 6 metres of the soundbar in an SUBWOOFER open area (the closer the better). • Do not put anything on the top of the subwoofer. Soundbar Soundbar carries most of the dialog as well as music and effects. •... -
Page 12: Wall Mounting
Wall Mounting • Installation must be carried out by qualified personnel only. Incorrect assembly can result in severe personal injury and property damage (if you intend to install this product yourself, you must check for installations such as electrical wiring and plumbing that may be buried inside the wall). It is the installer’s responsibility to verify that the wall will safely support the total load of the Soundbar and wall brackets. - Page 13 3. Remove the screws at the back of the unit. 720 mm HDMI OUT (ARC) HDMI 1 HDMI 2 COAXIAL OPTICAL Remove the screws 4. Install the wall mounting screws into the back of the unit. 5. Lift the unit onto the wall mount brackets and slot into place.
-
Page 14: Connections
Connections This section involves various methods of connecting the product to other external components. Ensure all audio connections of the unit are connected before connecting to the mains power socket. Dolby Atmos® Dolby Atmos gives you amazing experience you shave never before by overhead sound, and all the richness, clarity, and power of Dolby sound. -
Page 15: Method 1: Hdmi Hub Connection
Method 1: HDMI Hub Connection Some 4K HDR TVs require the HDMI input or picture settings to be set for HDR content reception. For further setup details on HDR display, please refer to the instruction manual of your TV. Using your Soundbar as a hub Use this method to connect all your devices into your soundbar. - Page 16 Using Your TV as a hub • Ensure to use an HDMI cables that can support the ARC function. • HDMI-CEC will be called different names by different manufacturers – please refer to your owner’s manual for details on setting up HDMI-CEC and ARC. •...
-
Page 17: Method 2: Optical / Coaxial Connection
Method 2: Optical / Coaxial Connection Use an optical cable (not included) / coaxial cable (included) to connect the soundbar’s OPTICAL / COAXIAL socket to the OPTICAL OUT / COAXIAL OUT socket of the external device. The simplest option is to connect your soundbar directly to your TV. If you connect the soundbar to another external device (e.g. -
Page 18: Method 3: Aux Connection
Method 3: AUX Connection 1. Use a 3.5 mm to RCA stereo audio cable (not included) to connect the soundbar’s AUX socket to the AUDIO OUT sockets of the external device. 2. After connection, press button on the unit or on the remote control to switch the unit 3. -
Page 19: Connecting To The Mains Supply
• To switch the unit off completely, remove the mains plug from the mains socket. • Please turn the unit off completely to save energy when not in use. • The mains cables are designed for this JVC soundbar only. DO NOT use the mains cable for other purposes. -
Page 20: Pairing The Wireless Subwoofer With The Soundbar
Pairing the Wireless Subwoofer with the Soundbar Automatic Pairing 1. Plug the soundbar and the subwoofer into the mains sockets. 2. Press on the unit or on the remote control to switch the unit to On mode. The subwoofer and soundbar will automatically paired within 30 seconds. Do not press PAIR on the rear of the subwoofer, except for manual pairing. -
Page 21: General Operation
This instruction manual explains the basic instructions for operating this unit. Unless otherwise stated, all operations described are based on remote control use. General Operation Standby / ON When you first connect the unit to the mains socket, the unit will be in Standby mode. •... -
Page 22: Aux / Coaxial / Optical / Hdmi Arc Operation
Adjusting the Bass/Treble Level in Custom EQ mode 1. Make sure that the EQ is set to CUSTOM mode. The display will show SELECT BASS / TREBLE. 2. Press BASS/TREBLE button on the remote control. The display will show BASS/TREB. Press VOL+/VOL–... -
Page 23: Using The Usb
Using the USB By connecting a USB mass storage device (including USB flash memory, USB flash players or memory cards) to this unit, you can enjoy the device’s stored music through the unit. 1. Press SOURCE button on the unit or on Rear view of the soundbar the remote control repeatedly to select the USB source. -
Page 24: Bluetooth® Operation
Bluetooth® Operation ® Pairing the unit with a Bluetooth device to listen to music: First time pairing 1. During On mode, press SOURCE on the unit or on the remote control repeatedly to select Bluetooth® mode. The display will show BT and then NO BT. 2. -
Page 25: Maintenance
Maintenance Cleaning the Unit Ensure the unit is fully unplugged from the mains socket before cleaning. • To clean the units, wipe the case with a slightly moist, lint-free cloth. • Do not use any cleaning fluids containing alcohol, ammonia or abrasives. •... -
Page 26: Hints And Tips
Hints and Tips If a problem does occur, it may often be due to something very minor. The following table contains various tips. If you require additional assistance please click on the link for Support Centre: For UK, please call our UK Call Centre on 0344 561 1234. •... - Page 27 Problem Solution TV has display problem • Some 4K HDR TVs require the HDMI input or picture while viewing HDR settings to be set for HDR content reception. For further content from HDMI setup details on HDR display, please refer to the instruction source.
-
Page 28: Product Fiche And Specifications
Product Fiche and Specifications Model TH-D689B Soundbar Main Unit Main Unit Input AC 220-240 V ~50/60 Hz Bluetooth® Bluetooth® Version Bluetooth® 4.2 Maximum 5 dBm transmitted power (with production deviation) Frequency bands 2402 MHz ~ 2480 MHz Power Consumption 30 W 0.5 A Ecodesign Information (Soundbar) Information on... - Page 29 Time interval for power management function switches the unit automatically into standby Power consumption in network standby if all wireless network ports are activated How to activate wireless network port: • Connect the unit with power • Switch to wireless mode (e.g. Bluetooth, wifi, etc.) How to deactivate wireless network port: •...
-
Page 30: Other Information And Licences
Other Information and Licences For general information about appliances, and handy hints and tips check out Kit Guides at teamknowhow.com or call UK: 0344 561 1234 Ireland: 1890 818 575 Visit Partmaster.co.uk today for the easiest way to buy electrical spares and accessories. - Page 32 3rd Floor Office Suite, Omni Park SC Santry, Dublin 9, Republic of Ireland The product is distributed and warranted exclusive by DSG Retail Ltd. “JVC” is the trademark of JVC KENWOOD Corporation, used by DSG Retail Ltd. under license. (IB-TH-D689B-190520V1)