Yamaha CDR-HD1500 Owner's Manual
Hdd/cd recorder
Hide thumbs
Also See for CDR-HD1500:
- Service manual (63 pages) ,
- Quick start manual (36 pages) ,
- Owner's manual (90 pages)
Table of Contents
Advertisement
Quick Links
Download this manual
See also:
Service Manual
Advertisement
Table of Contents

Related Manuals for Yamaha CDR-HD1500


Summary of Contents for Yamaha CDR-HD1500
- Page 1 "_, OWNER'S MANUAL MODE D'EMPLOI...
- Page 2 Since hearing dmnage from loud sounds is often uudetectable until it is too late, YAMAHA attd the Electronic htdustries Association's you to avoid prolonged exposure from excessive vohtme levels. Read these instructions.
- Page 3 If you can not locate the appropriate retailer, please contact Y_Jmaha Electronics Corporation. Orangethorpe The above statmnents apply ONLY to those products distributed by Yamaha Corporation of America or its subsidiaries. PROCEDURE) U.S.A. Avmme will not occur in all installations.
- Page 4 • Only voltage specified on this unit must be used. Using this unit with a higher voltage than specified is dangerous and may cause fire. damage to this unit, and/or personal injury. YAMAHA will not be held responsible for any damage resulting from use of this unit with a voltage other than specified.
- Page 5 As a precaution, it is recommended that the discs are tested after they have been recorded on. Furthermure, under no circumstances do Yamaha and suppliers guarantee the reliability of the discs. • Discs that can be played back...
- Page 6 • Handling of discs Heed the following notes on handling of discs not to create cause for a recording failure, a loss of the recorded malfunction of this unit. • This compact disc recorder is designed lot use with CDs (including 8cm [3"] discs) bearing the fl)llowing marks only.
-
Page 7: Table Of Contents
FEATURES ... ABOUT THIS MANUAL Structure ... About this manual ... SUPPLIED ACCESSORIES NAMES OF BUTTONS AND CONTROLS Front panel ... Remote control ... Display ... Rear panel ... CONNECTIONS PREPARING THE REMOTE CONTROL Installing batteries ... Remote control operation range ... BASIC OPERATIONAL FLOW ... -
Page 8: Features
• Beautiful design and easily-viewable • Supporting 10x speed HDD recording, • Supporting high-capacity HDD (up to 400 GB HDD) • Long continuous recording of external • Digital (coaxial and optical) and analog input jacks • Copying high-quality sounds with Audio Master Quality •... -
Page 9: Supplied Accessories
Make sure I he following items are i ncluded • Remote Conlrol _ACE eD0_K MOaE ... 6_5 _YAMAHA inyour package. • Balteries (size AA, UM-3, • Audio Pin Cables (2) • Optical Cable • Video Pin Cable • Power Cable (lur U.S.A. model) or R6) (2) I'rl -"t... -
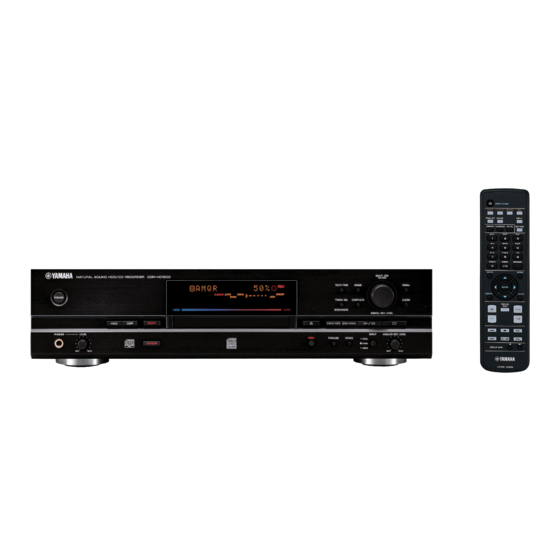
Page 10: Names Of Buttons And Controls
• Front panel POWER Turns on/off this unit (R 14). Sets the unit to the HDD operation mode (P.14). Sets the unit to the C'DR drive operation mode (P. ]4). (]) COPY Sets the unit to the copy standby mode. Front panel display Displays information on the current playback or recording. - Page 11 ERASE Select items tu be erased when erasing data (track data or TOC) frun/a CD-RW disc (R48). _>/_ (Search/Skip) Press to skip to a next track and press and huhl to fast- forward the current playback (R 19). INPUT Switches input sources (OPTICAL, ANALOG) (R31).
-
Page 12: Remote Control
_r,__LVjl : :(_,"[o] ;li :tlJi I I_o]_ 6"ff,__ _ I i][o,,io] _ i / ;{o] _ • Remote control O[i_ oq_i F_E_ o... ® ] _YAMAHA _]_ /-" OPEN/CLOSE COPY _]) A.M.Q.R. _]) FINALIZE i_ I q[_ ERASE REPEAT RANDOM _]) Alphabetical/numeric •... - Page 13 _/== (Play/Pause) Starts pla5 back of the currm_tly selected group or track. Pressing the button during playback stops the playback temporarily (R 19). In the copy or recording standby mode, press the button to start recording. Sets the unit to the recording standby mode. TIMER REC Press the button when configuring the time [or timer recording (P.32).
-
Page 14: Display
• Display ® HDD mark Lights when the unit is in the HDD operation mode. TOTAL indicator Lights when the total time (elapsed or remaining time) is displayed. DUPLCT indicator Lights when the unit is in the copy standhy mode or copying process when duplicating a CD. -
Page 15: Rearpanel
RS-232C terminal This terminal is lkwconnecting a personal computer. hlformalion about the PC software (English version only) is to be announced on the YAMAHA Wcbsile (htlp://www.yanmha.co.jp/english/product/av/). _ F:q LV_l::l,,'-[e] =i :llll n i[o]_ _'-]F:q_I e][_o] _ / iI;{e] _; (U,S,A. model) -
Page 16: Connections
Audio pin cable Amplifier or receiver * This terminal is for connection of the personal computer. Information about the PC software (English version only) is to be announced on theYAMAHA Website (http://www.yamaha.co.jp/english/product]av/), and unplug them from Ihe wall outlet cables. -
Page 17: Preparing The Remote Control
Connecting a monitor You can display the list of groups or tracks to be played, copying/recoMing the monitor to this unit. Connect the S VIDEO.jack Connecting the power cable [U.S.A. model] Phlg tim power cable into tim AC inlet when all connections [Europe, U.K. -
Page 18: Basic Operational Flow
Once you have fi_'dshed all connections (RI0) from a CD Io the HDD and listen to il! (In this procedure, we use a remote control POWER Disc tray Place a CD properly as aligned in the recess wilh its label side facing up. - Page 19 °LI ..,i ,,,1 ,,,= ,:,,= ,:,,= & o = o,,= o,,= Now, please try various features of this unit! •To enjoy playback with Repeat Play, Random Play, Intro Play features "USEFUL PLAYBACK OPERATIONS" •To start playback automatically using external timer "Starting playhack automatically (Auto Play)"...
-
Page 20: Turning On/Off The Unit
CDR drive operation mode. TO YAMAHA • Do not turn off the unit during playback or recording. Doing so may damage the HDD or data. • If the message "Wait" appears in the display li}r 20 seconds or more alter turning on the unit, the HDD may not be installed properly. -
Page 21: Selecting The Group Or Track Mode
When starling playback or recording, you need to select operate. The lypes of group you can select (R 16) and "Data on CDs" (R 17). 1 • Press the MULTI JOG knob (ENTER on the remote control) to switch between the group and track mode. When the group mode is selected, GROUP indicator lights. -
Page 22: Data Oil The Hdd
• Data on the HDD The data recorded onto the built-in HDD of this trait will be numbered and organized based on the following concept: Group A collection of disc(s), alhum(s), and a hookmark are generically called "group". Disc One consequent recording is counted and uumhered as one unit of disc. -
Page 23: Data Oil Cds
• Data on CDs You can operate CDs (including CD-R and CD-RW) set in the CDR drive by group (disc or bookmark) or track. Group When operating CDs (including CD-R and CD-RW), _ou cm] select disc or bookmark as a group. Since the unit can only read one disc at a time. - Page 24 The display located in the center of this unit provides the information about the drive (HDD or CDR drive) selected. Each time TEXT_IME is pressed, the display changes according to the operation. Display while playing the data on the HDD Group number, track number and elapsed time of the track being played ...I...
- Page 25 Follow the procedure below to carry out basic playback operations. This unit also provides various useful functions for playback. For details, refer to "USEFUL PLAYBACK OPERATIONS" (P.20-23). K_/_ To start playback Alter selecting a group or track (P. 15), press _>/uu. To stop playback Press D.
-
Page 26: Searchingby Elapsedtime (Time Search)
You can enjoy playback wilh various useful • Searchingby elapsedtime (Time Search) You can search the desired parl by' setting the time. 1 • Press MODE to enter the playback mode setting. "Time Search" appears on the display. a,.,, .-,. ,...-,. -
Page 27: Repeating Playback Ol A Track (Single Repeat)
• When random play is set, all tracks that belong to the selected group category are played in a random sequence. • When full repeat play is set, all tracks that belong to the selected group catego U are repeatedly played. •... -
Page 28: Repeatingplaybackof The Selected Group(Full Repeat)
|ll,.'-I :l dll HI ".,I W ;Vd :T;I_] [4[o] ".J:1 ;tr;'t a[o] __ • Repeatingplaybackof the selected group(Full Repeat) You can repeatedly listen to all tracks recorded in a group (or a CD) or group category. 1 • Press MODE to enter the playback mode setting, then rotate the MULTI JOG knob (press +/-, •... -
Page 29: Playingbackonlythe Beginning Partsof Tracks(Intro Play)
• Playingbackonlythe beginning partsof tracks(Intro Play) You can listen to the beginnings ol the tracks for a sel amount of alter time 0,notller. 1 • Press MODE to enter the playback mode setting, then rotate the MULTI JOG knob (press +/-, • or • on the remote control) to display "lntros Scan". -
Page 30: Using The Bookmark List
You can easily listen to a group of desired • Adding tracks to the bookmark list Press TRACK NO./BOOKMARK on the remote during playback of the desired track indicator turns MARK • When the track with a bookmark is selected, lights on the display regardless of whether... -
Page 31: Using On-Screen Display (Osd)
You can display' the list of groups or tracks C(IlIleC iIl& n/oi]l his/lilit. The unil does not output video signals when List of groups or tracks The numbers and titles ol groups, or the numbers tracks are displayed. Press the MULTI JOG knob to switch displayed. -
Page 32: Copying From A Cd Onto The Hdd
• Copying all tracksona CD You can copy all Iracks on a CD onto tile HDD. COPY 1 • Set the CD in the disc tray. This unil starts reading tile inlormation file CD) when Ihe CD is loaded. Tile Iollowing message appears during... -
Page 33: Copying Selected Tracks Oil A Cd
• Copyingselected tracks on a CD You can copy your lavorile tracks on a CD onto the HDD. COPY TRACK NO./BOOKMARK BOOKMARK 1 • Set the CD in the disc tray, then add bookmarks to favorite tracks (P.24). Tracks are listed and slored in order that the hooknmrks have been placed. -
Page 34: Selectinga Targetdisc
iZ'_o] ".,,11,'I I _[=']1;I ;[o] Lv_ Nr,_Io.]00Xs] _ II I_o]l II; I=11 _ IH n • Selectinga targetdisc While this unit is in the HDD copy standby mode, rotate the MULTI JOG knob (press +/-, GROUP SKIP buttons, • or •) to select the disc number to where the data is copied. -
Page 35: Settingthe Hddcopymenu
Press the MULTI JOG knob (ENTER on the remote control) to confirm the copying mode selected. If "All Syuchro" is confirmed, this unit returns to the HDD cupy standby mode. If "Multi Synchro" is confirmed, the tbllowing message appears on the display. Go to step 4. u = H= ,-,i u g -,m... - Page 36 I'o,lo] "x'dI _[cl =1 ;[o] Lv_ Nr,_la0,] 00Xe] _ Ii i_o]l /; I=i _ IH n Copy Method Setting of the cop>ing method. Cop_ing may fail if the setting for "Copy Method" is not correctly made. "'. u..g Initial setting: Digital Copy Digital Copy This method always makes digital copies.
-
Page 37: Recording From An External Component Onto The Hdd
• Recording input audio source You can m0.ke recordings fi'om Ihe component This unil cannot inpul digilal signals other Recording onto tire HDD is made in tire unil called "disc". The maximum lenglh of one disc on life HDD is 179 minutes 59 seconds. If tire recording has been made exceeding Ihe maximum lenglh, the recording will be made continuously 1. -
Page 38: Using An External Timer To Record
_1_ _ i |s] _i_s| / :11 :lo]l Time to be set on the external timer (2 minutes + recording time + 3 minutes or longer) Recording time to be set on the CDR-HD1500 Time flow External timer turns off Program ending time CDR-HD1500... - Page 39 Setting for a timer recording • You cannot set a timer recording lot CD-R and CD-RW copying. • You can skip to step 3 in the lollowing procedure by pressing TIMER REC on the remote conlroh 1. Carry out steps 1 and 2 in "Recording source"...
-
Page 40: Adjusting The Recording Level
;t ::[o[e];t m] I _[e]l '_;{o] Lv_ |,_1_ I ::).'q | _ ;I _ V,_I l[o[o] LT_I _O] _ I_ _ i |e] _ i (O| /: 11: I O] I • Adjusting the recording level There is an adjusting procedure for each inpul source to be recorded as explained below. Choose Ihe one for your input source and lollow Ihe steps. -
Page 41: Setting The Hdd Recording Mode
• Setting the HDD recording mode This unit provides various recording modes. Choose the mode that suits your needs. lnitial setting: Track Synchro MODE- 1. Press MODE while this unit is in the HDD recording standby mode (P.31, 33). The recording mode can he selected. Rotate the MULTI JOG knob (press +/-, •... - Page 42 Setting a condition for synchronized recording This unit automatically detects track intervals when recording is made in track-synchronized recording mode, multi-synchronized recording mode, or all-synchronized recording mode. You can set the condition for detecting track intervals. Setting items are as follows.
-
Page 43: Adding Track Markers During Recording (Manual Track Marking)
• Adding track markers during recording (Manual track marking) TRACK NO,/BOOKMARK This unit can automatically place track markers. However you can also manually place track markers during recoMing. (Manual track marking) Press TRACK NO./BOOKMARK (TRACK NO. WRITE on the remote control) during your recording. •... - Page 44 • Copyingall tracks in a groupto a disc You can copy all tracks in a whole group ol discs, COPY FINALIZE 1 • Set a new or not finalized CD-R (or CD-RW) disc in the disc tray. This unit starts reading tile information (type and capacity of a CD-R or a CD-RW disc) when a CD-R or a CD-RW disc is loaded.
- Page 45 When a disc is selected: /" "_' 'J ' :::i h,i ,y _ u,, When an album is selected: • ]h,i "_' u, _ , '_' & & When a bookmark is selected: Pl F" & M Rt< Press _/DDto start copying. The progress of the copy process is shown in the display.
- Page 46 • Copyingselected tracks on the HDD Yuu can copy lavurite tracks on the HDD lu a CD-R COPY FINALIZE '1. Set a new or not finalized CD-R (or CD-RW) disc in the disc tray, then select the HDD and add book- marks to favorite tracks (P.24).
- Page 47 • Copyinghigh quality sounds (Audio Master Quality Recording) You can make your own CD ;i 11high quah y sound wi h he Audio Maser Quali y Recording feature. • Audio Master Quality Recording can be used only for copying lhom the HDD on a new CD-R disc. •...
- Page 48 • Setting the CDR copy mode In the CDR copy mode, you can specil)' the mnnber ul tracks tu be copied un the HDD ur enable/disable Initial setting: All Synchro 1 • Press MODE while this unit is in the CDR copy standby mode (P.38, 40).
- Page 49 • Setting the CDR copy menu In the CDR copy menu. you can set the copy method, copy speed, and imaging speed. MULTI JOG 1 • Press MENU while this unit is in the CDR copy standby mode (P.38, 40). 2.
- Page 50 Eo.lo] "..,]k'l I _[€-ll ;I ;[o] Lv_ II II -"I =11 - "100] ml[o] _ III_o1_|_ ml ;_L_ ml ;_v_v|H _o Copy Level Setting of the sound level for So/uld level adjustment is cop_ing. not normally necessary. However it is possible to adjust the copying sound level to suit you needs.
- Page 51 This unil equips the Duplicale leamre flint enables lu creale a copy CD easily and quickly. Duplication may nul cerreclly made on a CD-R ilrst, then perform "Digital Muve" un a CD-R COPY 1. Set the original CD in the disc tray. This unit slarls reading the iuformatiun (lype and CD) when a CD is loaded.
- Page 52 New recordings cannot be added to a CD-R or CD-RW disc on which some tracks have heen previously recorded. r "I _:::= " ..="'=,=1= "1 .".." .". h". ,"a h", The copying conditions are as follows: • Copy Method: "Digital Move"...
- Page 53 Finalization is the process that concludes recoMing, and allows a CD-R disc to be played on a standard CD player or a CD-RW disc to be phlyed on a CD-RW-compatible phlyer. FINALIZE 1 • Set a not-finalized CD-R or CD-RW disc in the disc tray.
- Page 54 You can erase the data recorded on a CD-RW disc. New recordings can be made in tile space created by erasing. Tile fi)llowing four lypes of erasing are possible with this unit. ERASE • Erasing last tracks This operation erases the last track on a disc. "Last Track Erase" cannot be perfornled if a CD-RW disc has been finalized, or only one track has been recorded on the disc.
- Page 55 • Initializing a CD-RW disc This operation inilializes a CD-RW disc. 1 • Set a CD-RW disc in the disc tray, then press and hold ERASE for about two seconds, "Erase Disc ?" appears on the display. E7 h-. -..- F', 4 .- .- To cancel erasing, press D.
-
Page 56: Cursor Button Operations In The Edit Menu
In the edit menu. you can edit album, track, and disc data stored in the HDD. Please select the me]m listed below for any purpose. Also, the Undo ligature enables to cancel the last edit operation. Edit menu Alhum New To create a new al/mm Edit Stored To edit an already created album... - Page 57 • Enteringcharacters in the edit menu Entering the title characters by using the MULTI JOG knob Rotate the MULTI JOG knob. When the MULTI JOG knob is rotated clockwise, characters appear in the order of alphabetical capital letters, alphabetical lower case letters, numbers, and symbols. 2.
-
Page 58: Editing Albums
You can select the desired tracks from among tile ones recoMed on tile HDD and store them as an album in this unit's memory. You can also edit the album afterwards. COMPLETE 1 • Press MENU while the HDD is selected (P.14). Tile display changes for tile menu item selection. - Page 59 • You can switch the display by pressing TEXT/TIME an album is being enade: If the title is assigned to the suurce disc ur track, the title appears. By pressing TEXT/TIME while the title is being displayed, the total time of the album being enade appears fur approximately one second, and the display returns to the one in step 1.
- Page 60 m ::i|] / ill _ [€'IF,_1 ill :tlJ LT_ [_ Album Copy You can copy the entire disc. alhun/, or bookmark to a new alhun/. If "Album Copy" is selected (P.52), the following screen appears. =., \,,., c.,F::' ...'' ' :" Group to be copied from Rotate the MULTI JOG knob (press +/- on the remote control) to select the group to be copied from,...
- Page 61 Album Delete You can delete an existing album. 1 • If "Album Delete" is selected (P.52), the following screen appears. Album to be deleted 11 the edit menu is selected during playback, the unit aulomatically selecls the item to be edited. In this case, skip tu step 4 since yuu do not need tu select an item.
- Page 62 =i |] / ill _ [€tF,_I ill :ill iM_ Track Shuffle You can change tire oMer of tracks in an alhum. 1 • If "Track Shuffle" is selected (P.52), the following screen appears. Track number Album to change its tracks' order If the edit menu is selected during playback, tire unit automatically selects the ilem to be ediled.
- Page 63 • The level may change slightly out of the point that the track itself changes during the playback of the album with its tracks' level a{[justed. In this case, add the l-to-2 second interval using the "Tr. Interval" flmction (at right). •...
-
Page 64: Editing Tracks
You can do various editing operations (1i/the tracks COMPLETE 1 • Press MENU while the HDD is selected The display changes lor the menu item seleclion. Rotate the MULTI JOG knob (press +/-, • or • on the remote control) to select "Track Edit" h,,. - Page 65 Rotate the MULTI JOG knob (press +/- on the remote control) to select the new track number. Press the MULTI JOG knob (ENTER on the remote control) to confirm the new track number. Press CLEAR to cancel the conlirn/ed selection. Press COMPLETE.
- Page 66 d I1 / i I _ [ill I ;F:lo] [_.: Track Erase You can erase a selected track. 1 • If "Track Erase" is selected (P.58), the following screen appears. Disc that contains the track to be erased Im"_f'g :iii. u:::, /=:..= i"...
- Page 67 Press MULTI JOG knob (ENTER on the remote control) to confirm the beginning point of the partial erase. The passage helween the temporary ending point of Ihe partial erase (the point that is l0 seconds after the begioning point) and the point that is 5 seconds after the temporary ending point is repeatedly played.
- Page 68 II d I| / i I _ [ill I :F:To] [_.: Track Combine YOU can comhine a series of trocks into 1 • If "Track Combine" is selected (P.58), the following screen appears. Disc that contains the first track to be combined I?._u::_.(I .i .":, = = ' =...= i'I k.= _=...
- Page 69 Rotate the MULTI JOG knob (press +/- on the remote control) to specify the dividing point. The dividing point can he set hy "minute: second: lrmne'. The unit to be set is flashing. Move the flash to the unit to be set by pressing K</<:<...
- Page 70 II d II / i I _ [t'i I ;F:To] [_.: Add Fade In Yoa can add fade-in at the begimling ol a track. The beginning of the track is played with gradually rising level when fadedn has been added. If "Add Fade In"...
- Page 71 Rotate MULTI JOG knob (+/- on the remote control) to set the fade-out length. Tile fade-out length can be sel in the I to 10 second range hy l- second steps. If you stop totaling the MULTI JOG knob, this unit starts repeated playback of the ending ol the track with a fade<mr of the length sel in above step, with extra portion for further 5 seconds.
-
Page 72: Editing Discs
You can do various editing operations on the discs Ihal have been recorded COMPLETE 1 • Press MENU while the HDD is selected (P.14). The display changes for the menu item selection. Rotate the MULTI JOG knob (press +/-, • or • on the remote control) to select "Disc Edit". - Page 73 Disc Rename Y_)u can move a disc and assign a new nmnber. 1 • If "Disc Rename" is selected (P.66), the following screen appears. ,..., j.,. 0" 0:2' i i '::a m'I 0:2' 0:..= 0:..= .i. l 11 the edit menu is selected during playback, the unit automatically selects the item to be edited.
- Page 74 Disc Combine YOII can combine a series of discs hllo one. 1 • If "Disc Combine" is selected (P.66), the following screen appears. Disc to be the first in the combination If the edit menu is selected during playhack, the unit automalically selecls the ilem to be edited.
- Page 75 Disc Pack _/L)/1 c_lnre-organize the disc numbers hy eliminating unused disc numbers thai have been created by, changing disc numbers or erasing discs. l • If "Disc Pack" is selected (P.66), the following appears. • " ,,,, ,"_ =,,,, D, 2.
- Page 76 You can cancel 0.n operation and the result 1 • Press MENU while this unit is in the stop mode. Rotate the MULTI JOG knob (press +/-, • or • on the remote control) to select "Undo". _' _ n,i Press the MULTI JOG knob (ENTER on the remote control) to display "Undo?".
- Page 77 This unil has Ihe digilal-analog com/erler fron/the input jacks) fi'om the bolh digital COMPLETE MULTI JOG INPUT 1 • Press MENU while this unit is in the stop mode. The display changes for the menu item selection. Rotate the MULTI JOG knob (press remote control) to select "DAC Mode", =1=1= L"...
- Page 78 • CheckingHDDinformation (HDD Info.) You can check the HDD utility (capacity, usage, and available space) of lhis unit. 1 • Press MENU while this unit is in the stop mode. The display changes lot the metal item selection. Rotate the MULTI JOG knob (press +/-, • or • on the remote control) to select "HDD Utility".
- Page 79 • Checking the firmwareversion (Firm. Version) Soflware that is called "firmware" is built inlo this unit. This firmware controls Ihe operation. The following firmware version check procedures. Press MENU while this unit is in the The display changes R)r the menu item Rotate MULTI JOG knob...
- Page 80 • Setting thedisplay brightness (DimmerSetup) You can change Ihe brightness of the display. 1 • Carry out steps 1 to 3 in "Checking version (Firm. Version)" (P.73). The display changes lor the system ulili U item selection. Rotate the MULTI JOG knob (press +/-, • or • on the remote control) to select "Dimmer =.,,, =,,,, ,..., h.,, =:2' i...
- Page 81 • Startingplaybackautomatically (AutoPlay) You can set the auto play fuucti(m which autonmtically playback when the power of tiffs mill is turned uu. Using an external timer with this feature enables timer playback. 1. Carry out steps 1 to 3 in "Checking version (Firm.
- Page 82 If they cannot be corrected, orifthe l imit i snot listed inthe SYMPTOM authorized YAMAHA dealer orservice center lorassistance. SYMPTOM This unit does not turn on The power cable is not completely connected. when POWER is pressed.
- Page 83 SYMPTOM This unit does not operate The internal microcomputer has hecu frozen. properly, There is rotation noise of The tmnperature inside this unit rises. the l_m. A noise occurs at the A very low fi'equency component mnong the change of the tracks that wow and flutter of the analog record is being has been recorded from the output as a m)ise.
- Page 84 Drive Check Some kind of error has heen occurred in tile HDD or tile CDR drive. Contact the nearest authorized YAMAHA dealer or service center. Or HDD is not set to "slave" precisely. Refer to the "HDD Installation Manual" and set the HDD to "shwe".
- Page 85 Reading This unit reads the lbrmat of the CD, CD-R, or CD-RW disc loaded on the disc tray. Approximately 10 to 20 seconds may be required to complete this automatic adjustment. However, this time length may change according tu the type uf the CD, CD-R, or CD-RW disc that has been loaded.
- Page 86 The following explains key terms used in this manuah Album An album is a unit used while playing back or recording audio signals on this unit. For detailed inlormation, HDD" (RI6). Audio Master Quality Recording Audio Master Quality Recording is a high quality used to create an audio CD with...
- Page 87 You can make the lk311owingoperations on this tmit's system menu according to your needs. Menu Album New Edit Stored Album Copy Album Rename Album Delete Album Edit '_ Album Pack Album Title Track Shuffle Track Level Tr. Interval Track Rename Track A@lst Track Erase Part Erase...
- Page 88 • Rules of digital recording SCMS (Serial Copy Management System) As u digital umlio componmlt, this unit conlorms with tile Serial Copy Management Systmn (SCMS) standards. The Serial Copy Mauagelnent Systmn restricts copies made by recording digital signals to first-generation copies only.
- Page 89 Audio Performance Frequenc_ response ... 5 to 20,000 Hz, +0.5 dB S/N ratio (EIAJ) Playback ... Recording ... Total harmonic distortion (1 kHz) Playback ... Recording ... Dynamic range Playback ... Recording ... Laser Diode Properties Material ... Wavelength ... Pulse durations and max.
- Page 90 ADVA_EL K_SSE38 US_LIG _E_T_LI_G VED ABNITqG UfqUG_ UD_LBE FOR ST_LITqG VORSICHTBEICEO_FNETER ABDB3KUNG 1ST U NBICHTSARE LASERSTRAHLUNG DERKLASSE S B IM GERATEINNEREN VORHANDEN A UGEN NIDHT DEMLASERSTRAHL @2005 YAMAHA CORPORATION All rights reserved. CEDEX02, PRANCE ENGLAND YAMAHA Printed in Malaysia AUSSEFZEN_ CORPORATION WE86090-1...