
Related Manuals for Whirlpool AKTT600/IX


Summary of Contents for Whirlpool AKTT600/IX
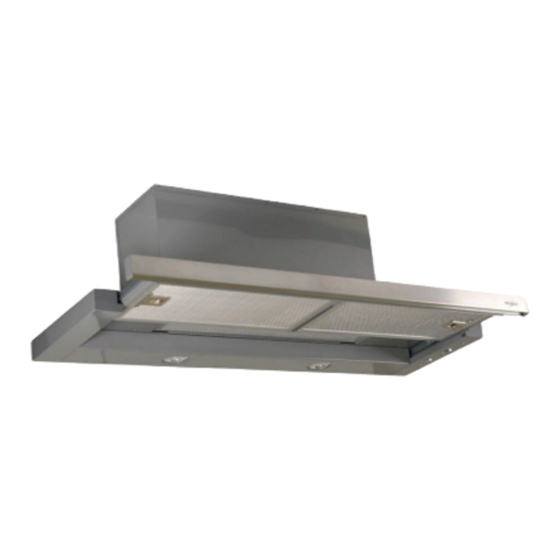
- Page 1 Health & Safety, Use & Care, Installation Guide and Online Warranty Registration Information Model...
-
Page 2: Table Of Contents
CONTENTS Important safety instructions Before using the hood Installation Mounting method Hood operation Maintenance & Cleaning Hood measurement Replacing lamps Wiring diagram 吊 掛 安裝 XP022560 2... -
Page 3: Important Safety Instructions
These instructions shall also be available on website: www.whirlpool.com.hk KEEP THIS INSTRUCTION MANUAL FOR FUTURE REFERENCE. YOUR SAFETY AND THAT OF OTHERS IS HIGHLY IMPORTANT. This manual and the appliance itself provide important safety warnings, to be read and observed at all times. - Page 4 mportant afety nstructions Do not ame under the range hood. Do not leave frying pans unattended when frying, as the frying oil may catch re. Failure to observe the instructions for cleaning the hood and replacing the lters may result in a re. The fume extractor hood must never be opened without the grease lters installed.
-
Page 5: Before Using The Hood
After unpacking the appliance, check for any transport damage. Do not install the appliance if it has been damaged. In the event of problems, contact Whirlpool Customer Service. To prevent any damage, only remove the appliance from its polystyrene foam packaging at the time of installation. -
Page 6: Mounting Method
ounting ounting ethod ethod this appliance must be connected with earth wire. this appliance must be connected with earth wire. Supply cord must be disconnected from power source before connection (to Supply cord must be disconnected from power source before connection (to the appliance). -
Page 7: Hood Operation
Hood Operation Fan Speed Lights On/Off I I I Fan Speed Lights On/Off NOTE: 1. Pull out the lter and turn on fan and light button to switch on the hood. Fan and light will shut o when slide the lter in. Fan and light will not operate when slide the lter in. -
Page 8: Maintenance & Cleaning
& C aintenance leaning Always disconnect from power supply before cleaning. A. Hood Surface Maintenance 1. Please clean the hood surface regularly with mild detergent and wipe with a cotton cloth to prevent grease from accumulating. 2. Please do not use abrasive or corrosive cleaning agent to clean the surface because this will damage the surface. -
Page 9: Hood Measurement
Model AKTT600/IX AKTT900/IX Net Weights 12.2Kg 14.2Kg Gross Weights 14.3Kg 16.6Kg Hood Size W x D x H 598 x 315-480 x 410.8mm 898 x 315-480 x 410.8mm 682x374x420mm 980x374x420mm Packing Size W x D x H Voltage 220V,50Hz... -
Page 10: Replacing Lamps
Never dismantle, repair or modify the appliance by yourself. for anyone other than the above mentioned people to perform repair service. Please contact Whirlpool Customer Service to purchase new LED light for replacement. Remove by turning bulb counter-clockwise. Note: Bulb does not unscrew; it turns 60 degrees, stops and falls out. -
Page 11: Wiring Diagram
iring agram... - Page 12 (除本手冊有提供指引外,請勿擅自對抽油煙機進 行修理或拆卸任何機器內的部件。) 別說 10 . 。...
- Page 13 20. 在抽油煙機下方使用氣體煮食爐時,必須同時使用煮食器皿。 。 不 應室外或作商業用途使用此電器。...
- Page 14 ( ) a.塑膠風管圈1個 b.保證卡1張、說明書一份 c.安裝配件包1包 (M4x8螺絲2個+3/16x5/8華司頭螺絲4個+3/16x40mm螺絲4個+#6x1"木螺絲8個) (AKTT600/IX:上安裝固定片2個+下安裝固定片2個) 安裝指引 油煙 上 升至2 50 毫米 以上,抽油煙機始能充 分 發揮 抽 油煙效果。 ‧ 氣體 煮 食爐最 低 安裝高度為650毫米最高安裝高 度 為7 50 毫米 。( 圖2 ) ( )...
-
Page 15: 吊 掛 安裝
吊 掛 安 裝 產品 產品 圖1 正面 1.根據圖一所示的尺寸在櫥櫃底部開孔。 2.將油煙機的濾網拆下。 3.使用(2)M4x8螺絲將塑膠風管圈安裝至機器上方。 4.如圖2,將機器放置廚櫃並確認固定彈片確實固定 圖 2 在正確位置。 5.如圖3,使用(4)3/16x5/8"螺絲將上安裝固定片 鎖在機箱兩側,並確認固定螺母孔方向朝下。(只 適用於600mm機型) 6.將下安裝固定片放至左右兩側的上固定片下方。 註:下安裝固定片較寬的部分應該在底部 圖 3 (只適用於600mm機型) 7.如圖4,使用(4)3/16x40螺絲鎖緊在兩側上安裝固 定片的固定螺母上,廚櫃與機器前方不應有縫隙 才是鎖緊的狀態。(只適用於600mm機型) 8.如圖5,使用(8)#6x1"螺絲將機器固定在櫥櫃上。 圖 4 (只適用於900mm機型) 圖 5... - Page 16 功能簡 介 風速 照明 I I I 風速: 0為靜止,l 為低速,ll為中速,lll為高速。 照明: 0為關閉照明,l 為開啟照明。 注意: 1. 拉出濾網,開啟風扇及燈鍵啟動機器,推進濾網則可關閉機器。推進 濾網後,則無法啟動機器。 2. 請依照指示將風扇及燈鍵推到正確位置,如沒有推到正確位置,機器 將無法正確啟動。...
- Page 17 , ) 將把網扣微拉出取出濾網。...
- Page 18 AKTT600/IX AKTT900/IX 12.2Kg 14.2Kg 14.3Kg 16.6Kg 598 x 315-480 x 410.8mm 898 x 315-480 x 410.8mm 682x374x420mm 980x374x420mm 220V,50Hz 6 inches LED 6W x2 (GU10,220V 50Hz) 產品尺 寸 Unit mm :...
- Page 19 更換 照明燈 LED燈珠/燈泡 燈珠/燈泡 逆 時針移除燈泡。 ( 註 : 燈 泡 未 鎖 螺 絲 , 旋轉 6 0 度 , 停 止 並 取 下 燈 泡 ) 如 果燈泡因長期使 用 變 的 難 以 取 下 , 將 燈 泡 移除 吸 盤 吸 附 在 燈 泡 兩 側 或 是 戴 上 塑...
- Page 22 Register your product online Save the planet and register your product warranty online! Enjoy extra 1-month free warranty upon online registration. https://rebrand.ly/WPwarranty...