Table of Contents
Advertisement
Quick Links
Projector
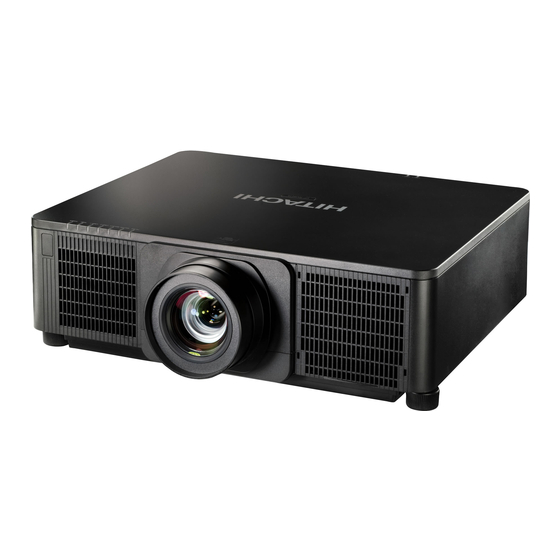
CP-WU9100/CP-HD9950
User's Manual - Network
Quick Setup Guide
Thank you for purchasing this product.
This manual is intended to explain only how to setup this product. For proper use
of this product, refer to this manual and the other manuals for this product.
See the corresponding pages for quick setup.
・Connection Setup (&7)
・System Requirements for Applications (&13)
1. Features
1.1 Web Control
Connecting the projector and the computer using the network, remote control and
status monitoring of the projector can be performed by Web browser.
Two types of interface, Projector Web Control and Crestron e-Control, are
available for this projector.
Projector Web Control
Crestron e-Control
1
Advertisement
Table of Contents

Summary of Contents for Hitachi CP-WU9100
- Page 1 Projector CP-WU9100/CP-HD9950 User's Manual - Network Quick Setup Guide Thank you for purchasing this product. This manual is intended to explain only how to setup this product. For proper use of this product, refer to this manual and the other manuals for this product.
-
Page 2: Network Presentation
1.2 Network Presentation The projector can display the computer screen images transmitted through the network. To use Network Presentation, an exclusive application, LiveViewer is required. The following application is required to use Network Presentation. Application Windows ® LiveViewer Mac OSX LiveViewer iOS(iPhone/iPad) Projector Quick Connection... -
Page 3: My Image Function
1.3 My Image Function The projector can display still images transferred using the network. You can allocate up to four image files. MY IMAGE transmission requires an exclusive application for your computer. Use the application to transfer the image data. Transfer image data Display image data (ex. -
Page 4: Messenger Function
1.4 Messenger Function The projector can display text data transferred using the network on the screen. Up to 12 text data can be stored. Transfer text data Display text data (ex. -
Page 5: Network Bridge Function
1.5 Network Bridge Function This projector is equipped with the NETWORK BRIDGE function to perform mutual conversion of a network protocol and a serial interface. By using the NETWORK BRIDGE function, a computer connected to the projector using wireless or wired LAN can control an external device using RS-232C communication using the projector as a network terminal. -
Page 6: Event Scheduling
1.6.3 Event Scheduling The scheduling function sets up scheduled events including power on / power off. It allows the projector to be self-managing. The schedule can be set in Projector Web Control or OPTION-SCHEDULE menu in the projector. 1.6.4 Command Control using the Network You can configure and control the projector using the network using RS-232C commands. -
Page 7: Connection Using Wired Lan
3. Connection Setup Refer to System Requirements for Applications (&13) first before setting up the connection. 3.1 Connection using Wired LAN The connection using wired LAN is available. Set wired LAN for the projector by following the instructions of your network administrator when connecting to the existing network. - Page 8 [About IP address] ■ Setting manually The Network address portion of the IP address setting on your computer must be the same as the setting on the projector. Also, the entire IP address on the computer must not overlap with that of the other devices on the same network, including the projector.
-
Page 9: Connection Using Wireless Lan
3.3 Connection using Wireless LAN Connection using wireless LAN is available with option parts, USB wireless adapter (USB-WL-11N). Wireless LAN has two types of connection, Simple Access Point and Infrastructure. Fig. 3.3.a Without an access point communication (Simple Access Point)) Fig. -
Page 10: Connection In Simple Access Point Mode
3.3.1 Connection in Simple Access Point Mode Set the following when connecting the projector and the computer in Simple Access Point mode. Projector setting [Restriction on plugging and unplugging the USB wireless adapter] Before you insert or pull out the USB wireless adapter from the projector, turn off the power of the projector and pull out the power cord’s plug from the outlet. -
Page 11: Connection In Infrastructure Mode
3.3.2 Connection in Infrastructure Mode Set the following when connecting the projector and the computer in Infrastructure mode. Projector setting [Restriction on plugging and unplugging the USB wireless adapter] Before you insert or pull out the USB wireless adapter from the projector, turn off the power of the projector and pull out the power cord’s plug from the outlet. - Page 12 SSID SCAN LIST function The connection can be set up by selecting from SSID SCAN LIST without setting SSID and ENCRYPTION in WIRELESS SETUP. The procedure of connecting by SSID SCAN LIST is as follows. 1) Select SSID SCAN LIST in WIRELESS SETUP on NETWORK menu. The list of SSID in wireless network is displayed.
- Page 13 4. Applications 4.1 Applications Download the latest version of the software from the Hitachi website below. http://www.hitachi-america.us/projectors http://www.hitachidigitalmedia.com/ http://www.hitachi-dm.cn/ http://www.hitachi.co.jp/proj/ For iOS/Android Network Presentation software, refer to the URL below for details and downloads of Projector Quick Connection. http://www.hitachi.co.jp/Prod/vims/proj/en/ http://www.hitachi.co.jp/proj/...
- Page 14 Application Hardware and Software LiveViewer [Mac] Mac OSX 10.5 Mac OSX 10.6 Mac OSX 10.7 Mac OSX 10.8 Hard disk space: 15MB or higher NOTE • Only for Intel version. Power Mac is not supported. • LiveViewer for MAC is not included in the bundled CD-ROM.
-
Page 15: Troubleshooting
5. Troubleshooting Check the following web address where you may find the latest information for this projector. http://www.hitachi-america.us/projectors http://www.hitachiserviceeu.com/support/guides/userguides.htm NOTE • The information in this manual is subject to change without notice. • The illustrations in this manual are for illustrative purposes. They may differ slightly from your projector.


