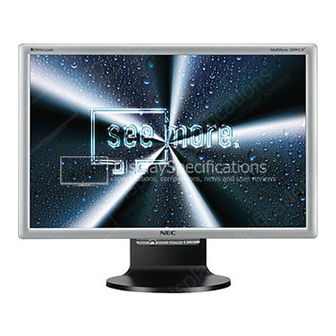
NEC MultiSync 20WGX2 Series Service Manual
Color monitor
Hide thumbs
Also See for MultiSync 20WGX2 Series:
- Service manual (143 pages) ,
- User manual (132 pages)
Table of Contents
Advertisement
Quick Links
SERVICE MANUAL
MultiSync 20WGX
MODEL ID : 20WGX
VERY IMPORTANT!
This Equipment is compatible with RoHS Directive and Lead-Free.
Since the equipment is compatible with RoHS Directive, use components in which the use
of specific chemically noxious substances is restricted; use only designated spare parts
when it is necessary to replace such parts with new parts.
Use lead-free solder for the equipment compatible with ones with substrates on which
lead-free components are mounted. For the details, refer to "Caution for Lead-Free Solder-
ing Work" given in the next page.
NEC DISPLAY SOLUTIONS, LTD.
COLOR MONITOR
®
1st Edition
DECEMBER 2005
2
-BK(B)
2
PART NO : 599910796
200603
08GJ5LBG
Advertisement
Chapters
Table of Contents

Related Manuals for NEC MultiSync 20WGX2 Series


Summary of Contents for NEC MultiSync 20WGX2 Series
- Page 1 Use lead-free solder for the equipment compatible with ones with substrates on which lead-free components are mounted. For the details, refer to “Caution for Lead-Free Solder- ing Work” given in the next page. 1st Edition NEC DISPLAY SOLUTIONS, LTD. DECEMBER 2005 200603 08GJ5LBG...
- Page 2 1. Safety guideline in servicing Never touch the portions with the marking ( Serious injury or even death may result. Do not expose the set to rain or water. A risk of fire or electric shock can result. Use an adequate power cord. A risk of fire or electric shock can result.
- Page 3 Product Specifications Specification Item Analog Input Digital Input LPL LM201WE2-SLA1 Size 20.1" (51.1133cm) Active Display Area 433.44 (H) x 270.90 (V) mm Resolution 1680x1050 dots (WSXGA+) Pixel Pitch 0.258mm Color Depth 16,77 M color (8-bits) Luminance 470cd/m (Typ.) *1) Viewing CR>10 Up 89 / Down 89 / Left 89 / Right 89 (Typ.) Angle(Typ.)
- Page 4 CONTENTS Page No. USER’S MANUAL ....................1-1 SERIAL NUMBER INFORMATION ................2-1 DISASSEMBLY ......................3-1 ADJUSTMENT PROCEDURES ................4-1 INSPECTION ......................5-1 TROUBLE SHOOTING .................... 6-1 CIRCUIT DESCRIPTION ..................7-1 REPLACEMENT PARTS LIST ................8-1 BLOCK DIAGRAM ....................9-1 SCHEMATIC DIAGRAMS ..................10-1 PACKING SPECIFICATION ...................
- Page 5 MultiSync 20WGX User’s Manual...
- Page 6 Index Warning, Caution ........................English-1 Declaration ..........................English-1 Canadian Department of Communications Compliance Statement ........... English-2 Declaration of Conformity ......................English-2 Contents ............................English-3 Quick Start ..........................English-4 Controls ............................English-8 Recommended use ........................English-11 Specifications ..........................English-13 Features ............................English-14 Troubleshooting ...........................
- Page 7 NaViSet is a trademark of NEC Display Solutions Europe GmbH in the countries of EU and Switzerland. MultiSync is a registered trademark of NEC Display Solutions, Ltd. in the countries of U.K., Italy, Austria, Netherlands, Switzerland, Sweden, Spain, Denmark, Germany, Norway and Finland.
- Page 8 This device complies with Part 15 of FCC Rules. Operation is subject to the following two conditions. (1) This device may not cause harmful interference, and (2) this device must accept any interference received, including interference that may cause undesired operation. U.S. Responsible Party: NEC Display Solutions of America, Inc. Address: 500 Park Blvd, Suite 1100 Itasca, Illinois 60143 Tel.
- Page 9 Contents Your new NEC MultiSync LCD monitor box* should contain the following: • MultiSync 20WGX monitor with tilt/swivel adjust stand • Power Cord • Video Signal Cable (15-pin mini D-SUB male to 15-pin mini D-SUB male) • Video Signal Cable (DVI-D to DVI-D) •...
- Page 10 Quick Start To attach the MultiSync LCD monitor to your system, follow these instructions: 1. Turn off the power to your computer. 2. For the PC or MAC with DVI digital output: Connect the DVI signal cable to the connector of the display card in your system (Figure A.1).
- Page 11 6. Place the connector cover onto the back cabinet (Figure C.4). 7. Place all cables into the hooks (Figure C.5). 8. Place hands on each side if the monitor to tilt the LCD panel back 5° (Figure C.6). Figure C.4 Figure C.5 9.
- Page 12 Tilt and Swivel Grasp both sides of the monitor screen with your hands and adjust the tilt and swivel as desired (Figure TS.1). NOTE: Handle with care when tilting and swivelling the monitor screen. Figure TS.1 Remove Monitor Stand for Mounting To prepare the monitor for alternate mounting purposes: 1.
- Page 13 5. Lift up the stand to unlatch the upper hooks and remove the stand (Figure M.4). 6. Remove the 2 screws on the top of the monitor (Figure M.5). The monitor is now ready for mounting in an alternate manner. 7.
- Page 14 Controls OSM (On-Screen Manager) control buttons on the front of the monitor function as follows: To access OSM menu, press any of the control buttons (MENU/EXIT, Left, Right, Down, Up). To change signal input, press the SELECT button. To change DV MODE, press the RESET/DV MODE button. NOTE: OSM must be closed in order to change signal input.
- Page 15 Image Controls (Analog input only) LEFT / RIGHT Controls Horizontal Image Position within the display area of the LCD. DOWN / UP Controls Vertical Image Position within the display area of the LCD. H.SIZE Adjusts the horizontal size by increasing or decreasing this setting. FINE Improves focus, clarity and image stability by increasing or decreasing this setting.
- Page 16 Information The Information menu indicates the current input, display resolution, horizontal and vertical frequency, and polarity settings of the monitor. The model and serial numbers of your monitor are also indicated. OSM Warning OSM Warning menus disappear with Exit button. NO SIGNAL: This function gives a warning when there is no Horizontal or Vertical Sync.
- Page 17 NOTE: As with all personal display devices, NEC DISPLAY SOLUTIONS recommends displaying moving images and using a moving screen saver at regular intervals whenever the screen is idle or turning off the monitor when not in use.
- Page 18 CORRECT PLACEMENT AND ADJUSTMENT OF THE MONITOR CAN REDUCE EYE, SHOULDER AND NECK FATIGUE. CHECK THE FOLLOWING WHEN YOU POSITION THE MONITOR: • For optimum performance, allow 20 minutes for warm-up. • Adjust the monitor height so that the top of the screen is at or slightly below eye level. Your eyes should look slightly downward when viewing the middle of the screen.
- Page 19 Specifications Monitor Specifications MultiSync 20WGX Monitor Notes LCD Module Diagonal: 43.3 cm/20.1 inches Active matrix; thin film transistor (TFT) Viewable Image Size: 43.3 cm/20.1 inches liquid crystal display (LCD); 0.258 mm dot Native Resolution (Pixel Count): 1680 x 1050 pitch; 470 cd/m white luminance;...
- Page 20 Features Thin-frame design creates more desktop space for you to work and play, while the flat screen’s crisp, bright images and crystal- clear text deliver a comfortable viewing experience. Xtra View technology allows for wide -angle viewing. No Touch Auto Adjust automatically adjusts your optimal image settings upon initial power-on. Colour Control System allows you to change between six colour settings on your display to match your personal preference.
- Page 21 NOTE: As with all personal display devices, NEC DISPLAY SOLUTIONS recommend displaying moving images and using a moving screen saver at regular intervals whenever the screen is idle or turning off the monitor when not in use.
- Page 22 TCO’03 Congratulations! The display you have just purchased carries the TCO’03 Displays label. This means that your display is designed, manufactured and tested according to some of the strictest quality and environmental requirements in the world. This makes for a high performance product, designed with the user in focus that also minimizes the impact on our natural environment.
- Page 23 Manufacturer’s Recycling and Energy Information NEC DISPLAY SOLUTIONS is strongly committed to environmental protection and sees recycling as one of the company’s top priorities in trying to minimize the burden placed on the environment. We are engaged in developing environmentally- friendly products, and always strive to help define and comply with the latest independent standards from agencies such as ISO (International Organisation for Standardization) and TCO (Swedish Trades Union).
- Page 24 Serial Number Information Refer to the serial number information shown below. EX.) SERIAL NUMBER LABEL MODEL : 20WGX – BK SERIAL NO. : g g g g g g g g g g Manufactured Year : (Last digit : 2005 5, 2006 6, 2007 →...
- Page 25 DISASSEMBLY Before you disassemble the set, turn off power and pull out the power plug. ■ Use the proper screwdriver. If oversize or undersize screwdriver is used, screws may be damaged. ■ Assembly is the opposite process of disassembly. ■ Step 1 : Symbol For Europe...
- Page 26 Step 2 : Symbol ForEurope. Description Cabinet Model (Liteon Part Number) Color 7110340102P0A SCREW_MACHINE_NON Black E_FLAT HEAD_M4_10_N Step 3 : Symbol For Europe Description Cabinet Model (Liteon Part Number) Color 7742611931P0A COVER_TERMINAL Black BOTTOM COVER_#6700_PC+ABS Take over the terminal cover 3- 2...
- Page 27 Step 4 : Symbol For Europe Description Cabinet Model (Liteon Part Number) Color 7110340102P0A SCREW_MACHINE_NON Black E_FLAT HEAD_M4_10_N Take off these 2 screws to remove the rear cover Step 5 : Symbol For Europe Description Cabinet Model (Liteon Part Number) Color 7140226122P0A SCREW FOR CONTROL...
- Page 28 Step 6 : Symbol For Europe Description Cabinet Model (Liteon Part Number) Color 6711130002P90 HARNESS_KEY WIRE Black _13P/11P_210mm_1571# FUNCTION KEY A'ssy Black 5113800416P Unplug the key wire Step 7 : Symbol For Europe Description Cabinet Model (Liteon Part Number) Color 7737512857P0A FC ASSY_NMV_ White...
- Page 29 Step 8 : Symbol For Europe. Description Cabinet Model (Liteon Part Number) Color 7737609551P0A RC ASSY_KAMA 20 Black WS_#6700_PC+ABS UL-94V0 Take off the rear cover 3- 5...
- Page 30 Step 9 : Symbol For Europe Description Cabinet Model (Liteon Part Number) Color 7110330062P0A SCREW-MACHINE-FLAT Black HEAD-M3-6 3- 6...
- Page 31 Step 10 : Symbol For Europe. Description Cabinet Model (Liteon Part Number) Color 67110300001P00 HARNESS_LVDS_30P/30 Black P_220mm_1589#30 6711140240P00 HARNESS_POWER_14P/ Black 9P_300mm_1007#24 Unplug the LVDS harness and inverter harness Step 11 : Symbol For Europe Description Cabinet Model (NECDS Part Number) Color TFT LM201WE2-SLA1 Black...
- Page 32 Step 12 : Symbol For Europe Description Cabinet Model (Liteon Part Number) Color 7110630042P0A SCREW M3_4 Black 7746204170P0A USB SHIELD COVER Black Step 13 : Symbol For Europe Description Cabinet Model (Liteon Part Number) Color 7110330062P0A SCREW MACHINE-FLAT Black HEAD-M3-6-NI 5113700055P U20BNL(03)_NECDS_ Black...
- Page 33 Step 14 : Symbol For Europe Description Cabinet Model (Liteon Part Number) Color 7140330103P0A SCREW DOUBLE Black THREAD FLAT M3 10L Step 15 : Symbol For Europe Description Cabinet Model (Liteon Part Number) Color 7740200890P NON-STANDARD Black SCREW-SCREW-CU-N 3- 9...
- Page 34 Step 16 : Symbol For Europe Description Cabinet Model (Liteon Part Number) Color 7140330082P0A SCREW-MACHINE-NON Black E-FLAT HEAD-M3-8-NI Step 17 : Unplug the signal harness 3- 10...
- Page 35 Step 18 : Symbol For Europe Description Cabinet Model (Liteon Part Number) Color 7740201240P0A SCREW_MACHINE_FLAT Black WASER_PAN_M3_6L_Z Step 19 : Symbol For Europe. Description Cabinet Model (Liteon Part Number) Color 7116240081P0A SCREW-MACHINE-STAR Black WASHER-PAN-M4-8-Zn 3- 11...
- Page 36 Step 20 : Symbol For Europe Description Cabinet Model (Liteon Part Number) Color 7740201240P0A SCREW_MACHINE_FLAT Black WASER_PAN_M3_6L_Z Step 21 : Symbol For Europe Description Cabinet Model (Liteon Part Number) Color 5114300385P U20BNL(03)_NECDS_ Black POWER BD 5113301255P U20BNL(03)_NECDS_ Black INTERFACE BD Unplug the switch harness 3- 12...
- Page 37 Step 22 : Symbol For Europe Description Cabinet Model (Liteon Part Number) Color 7746204162P0B SHIELD_SHIELD Black COVER_AL ALLOY1100 T=1.0 6711030003P91 HARNESS_3P/SWITCH Black BLK_150mm_1007#22_E Spring for EMI (Reef Spring) Raise the reef spring to contact a metallic chassis of the LCD panel when you attach the LCD Attention: panel to the chassis base.
-
Page 38: Table Of Contents
ADJUSTMENT PROCEDURES TABLE OF CONTENTS Page Application ............................4-2 Default Setting ..........................4-2 Basic Operation ..........................4-3 3.1 Basic Key Function ........................4-3 3.2 Hot Key for Factory Adjust ......................4-4 3.3 Hot Key for Burn-in Mode ....................... 4-5 3.4 How to use Factory Mode ....................... 4-5 Adjustment ............................. -
Page 39: Application
1. Application This adjustment specification should be applied to the 20WGX monitor . 2. Default Setting Default Setting Item Analog Digital Volume Mute Brightness 100% 100% Contrast Advanced DV Mode DV mode Standard Standard H/V position : optimal value H. Position ---- for the signals, which is stated in the VESA standard or close... -
Page 40: Basic Operation
Default Setting For NEC model NECDISPLAYSOLUTIONS.COM *4 : OSD/OSM Setting Destination Factory Setting For NEC model at B version 3. Basic Operation 3.1 Basic Key Function Function MENU / EXIT Enter OSM / Exit OSM / Exit sub menu Direction Key... - Page 41 3.2 Enter Factory Mode a) Press “MENU/EXITt” button then open OSM menu. MENU / EXIT No OSD b) OSM select to “INFORMATION” menu by “RIGHT or “LEFT” button. RIGHT or LEFT 1680x1050 c) Press “RESET” + ”SELECT” button then into Factory mode. RESET + SELECT 1680x1050 4- 4...
-
Page 42: How To Use Factory Mode
3.3 Enter Burn-in Mode a) No signal input. b) Press “RESET” + “SELECT” button then into Burn-in mode. RESET + SELECT 3.4 How to use Factory Mode Page 1 ■ HOURS RUNNING Indicate the “monitor power ON time” and “power save time” counted from factory shipment. Hours Running function has four kinds of timer. - Page 43 ■ F/W VER : Firmware version ■ F/W ID : Frimware ID ■ FACTORY PRESET : Reset all items of Factory preset in user mode. Clear Reset-able Hours Running. Clear Auto Adjust count. Clear First auto flag. Change OSD design to “Normal”. Change Resolution Notifier to Enable. Page 2 This page is used to adjust RGB offset and gain.
- Page 44 Page 4 OSM DESIGN BAR/Value 0 : Normal 1 : Debug mode OSM SELECT OSD/OSM 0 : OSM 1 : OSD 0/1/2 0 : Not indicate URL 1 : MECDISPLAYSOLUTIONS.COM 2 : Not indicate URL HOT KEY 0 : OFF 1 : ON 0 or 1 LANGUAGE...
- Page 45 Page 5 ■ LCD panel type. Page 6 ■ Each Color Temperature Data. (Adjustment needed) 4- 8...
-
Page 46: Adjustment
4. Adjustment 4.1 Measuring Instruments, Jigs and Tools The measuring instruments, jigs, and tools required at the time of the adjustment of the unit to be adjusted are as specified below. a. A signal generator that can generate an output of signal timing produced by the adjusted (*). In this case, however, this signal generator should be capable of displaying all white and all black as a screen display pattern. -
Page 47: Panel Brightness Check
4.5 Panel Brightness Check 1) Enter the input signal of 1680x1050 @ 60Hz, in Full white pattern. 2) Proceed “Factory Preset” function of tool menu. 3) OSM setting “BRIGHTNESS” to Max. (100%) and “CONTRAST” to 100%. 4) Color temperature setting to “NATIVE”. 5) Check the center luminance should ≧... -
Page 48: Reference Signal Timing
5. Reference Signal Timing Item Abbreviation VESA 1680x1050@60Hz VESA 1024x768@60Hz Pixel frequency 146.25MHz 65.000MHz Horizontal frequency 65.29kHz 48.36kHz Line Time total 15.316us 2240CLK 20.68us 1344CLK Horizontal active display 11.487us 1680CLK 15.75us 1024CLK Horizontal sync pulse 1.203us 176CLK 2.09us 136CLK Horizontal back porch 0.711us 104CLK 2.46us... - Page 49 INSPECTION TABLE OF CONTENTS Page 1. General Description ....................... 5-3 2. Electrical Characteristics ....................5-4 2.1 Input Signals ........................5-4 2.2 Power Supply ........................ 5-6 2.3 Power Management ....................... 5-7 2.4 Others ........................... 5-8 2.5 Touch Panel Capability ....................5-9 2.6 White Color Temperature....................
- Page 50 Page 8. Safety ..........................5-20 8.1Insulation Resistance Test ..................5-20 8.2Dielectric Strength Test .....................5-20 8.3Leakage Current Test ....................5-21 8.4Ground Continuity ......................5-21 8.5CTI Value of PCB......................5-21 8.6Others .........................5-21 9. Inspection of PLUG & PLAY Communication and OSM “MONITOR INFORMATION” for Model Name/ Serial Number Inspection ..............5-22 9.1 System Connection .......................
-
Page 51: General Description
1. General Description Product Specifications Specification Item Analog Input Digital Input LPL LM201WE2-SLA1 Size 20.1" (51.1133cm) Active Display Area 433.44 (H) x 270.90 (V) mm Resolution 1680x1050 dots (WSXGA+) Pixel Pitch 0.258mm Color Depth 16,77 M color (8-bits) Luminance 470cd/m (Typ.) *1) Viewing CR>10... -
Page 52: Electrical Characteristics
2. Electrical Characteristics 2.1 Input signals 2.1.1 Signals Video signal Analog RGB / Digital RGB (TMDS) Sync signal Separate Sync (Negative / Positive) Composite Sync (Negative / Positive) Sync on green : 0.3Vp-p (Negative) 2.1.2 Analog Input Spec typical Video Analog Video 0.55V 0.70V... - Page 53 White Level Video Swing Black Level Setup Blank Level Sync Sync Level Sync On Green Wave Form Composite Sync Type This figure shows only positive sync waveform. Monitor should support negative sync waveform too. Hsync Type 1P Vsync Type 1P Composite Sync (Type1P) Composite Sync (Type2P) Composite Sync (Type20P)
-
Page 54: Power Supply
2.2 Power Supply AC100 - 240V +/- 10% Input Voltage Input Current (*1) 1.0 A@AC100V / 0.52 A@AC240V Frequency 50 / 60 Hz +/-3Hz Power Consumption 84 W (Max) with USB no load condition (*1) < 3.5mA (AC120V/240V) AC Leakage current <... -
Page 55: Power Management
2.3 Power Management This function conforms DPMS of VESA, and International Energy Star Office Equipment program. Power Management condition and status for ANALOG Input mode Signals Power Power Recovery Consumption State LED status Time (sec) Horizontal Vertical Video (W) Active Refer to 3.2 Blue <... -
Page 56: Others
2.4 Others 2.4.1 Scaler NEC-DS prefers Genesis OAK chipset. HDCP Lead Free Faroudja Output Resolution Gm5861 WSXGA+ 2.4.2 Audio System None 2.4.3 USB Self Powered Hub Version 2.0 Downstream port : 4ports x 500mA, Connector A type (2 ports left side of monitor. 2 ports backside of monitor.) Up Stream port : 1port, Connector B type @ back side of monitor. -
Page 57: Touch Panel Capability
2.4.4 Dimming Control Range Bright ness shall be controlled by OSM less than 25% to 100%. PWM frequency should be adjusted by MPU, and default frequency should be 3.5 times by Vsync. 2.5 Touch Panel Capability None 2.5.1 Touch Panel Power Output Connector None 2.6 White Color Temperature White color temperature is 6 preset as 9300, 8200, 7500, sRGB (6500), 5000, Native. -
Page 58: Visual Ergonomic Requirement Of Tco'03 Standard
2.7 Visual Ergonomic Requirement of TCO’03 Standard Following items should be meet for Visual Ergonomic of TCO’03 standard. A2.1.1 Pixel array requirement A2.3.1 Luminance Level A2.3.2 Luminance uniformity A2.3.4 Luminance uniformity - angular dependence A2.4.2 Luminance Contrast - angular dependence A2.4.3 Luminance contrast - characters A2.6.1 Color Temp Variation (*) A2.6.2 Color uniformity... -
Page 59: Connector Pin Assignment
3. Connector Pin Assignment 3.1 Analog Video Input: Mini D-SUB 15 Pin Pin assignment for analog video input connector Pin No Signal Red Video Green Video / Sync on Green Blue Video DDC-GND Red Video GND Green Video GND Blue Video GND +5VDC (from PC) Sync. -
Page 60: Digital Inter Face Signals
3.2 Digital Inter Face Signals Pin assignment for DVI-D (24pin) connector Pin-Assignment of DVI-D connector : TX2- TX1- TX0+ TX2+ TX1+ TX0- Shield (TX2 / TX4) Shield (TX1 / TX3) Shield (TX0 / TX5) DCC-Serial Clock +5V power(*) Shield (TXC) DCC-Serial Data Ground (+5V) TXC+... -
Page 61: Support Video Modes
4. Support Video Modes Monitor shall judge the received signal timing by following table. Monitor shall support all signal timings within the following frequency range. H-Sync range: from 24.7KHz to 81.2KHz [Analog] H-Sync range: from 31.5KHz to 81.2KHz [Digital] V-Sync range: from 49 Hz to 76 Hz @Dot clock : under 165MHz H sync V total V sync (Hz) - Page 62 H sync V total V sync (Hz) Type H POL V POL Signal Name (KHz) 921≦V 1440*900@60 fV≦62.9Hz Total≦929 Reduced Blanking fV≦62.9Hz 1440*900@60 63.0≦fV≦67.9Hz 1152*900@66 930≦V 1440*900@75 68.0≦fV≦77.9Hz Total≦960 Out of range 1440*900@85 78.0Hz≦fV Out of range fV≦54.9Hz 1280*960@50 961≦V 55.0≦fV≦67.9Hz 1280*960@60 Total≦1024...
-
Page 63: Ddc Function
5. DDC Function 5.1 Plug & Play This monitor abides by VESA DDC2B. See page 5-29 for EDID data. Monitor can output EDID data, although PC+5V from PC is inactive. 5.2 Remote Control This monitor abides by VESA DDC/CI. 6. Other Function 6.1 Full Scan Capacity In case the input video mode is not native resolution, the image area shall be expanded to native resolu- tion smoothly with the function of scaling engine. -
Page 64: 85Hz Refresh Rate Support
6.2 85Hz Refresh Rate Support Monitor should display 85Hz refresh rate mode as emergency mode. Monitor should display “Out of Range” warning menu at this mode. 6.3 50Hz Refresh Rate Support In 50Hz refresh rate signal (Following signals), the display should be smooth at “Moving character”. It should be taken care of the influence by “Frame buffer mode”. -
Page 65: External Inspection On The Lcd Module
7. External Inspection on the LCD Module 7.1 Inspection Condition 7.1.1 Conditions Ambient conditions : a. Temperature : 20~25 b. Humidity : 65 +/- 5 % RH c. Illumination : Single 20W fluorescent lamp non-directive (Appearance - 300 to 700 Lux , Display – 180 to 200 Lux) Viewing distance : The distance between the LCM and the inspector’s eyes shall be at least 35cm. -
Page 66: Polarizer Defects
7.2 Polarizer Defects Items Criteria 0.1≦W≦0.2 , 0.3≦W≦2.0 , N≦3 Scratches Linear D≦0.5 , N≦3 Dent Circular Where, W :Width L : Length D : Average diameter =(a+b)/2 Note) a. Average Diameter D= a+b b. Linear : a >2b , Circular : a ≦... -
Page 67: Foreign Material
7.3 Foreign Material Items Criteria W≦0.1 , 0.3≦L≦2.0 , N≦3 Foreign Linear 0.2≦D≦0.5 , N≦3 Material Circular L : the line of apsides (Long distance) - Linear : W <= 0.1 - Circular : W > 0.1 W : Width L : Length 7.4 Line Defect All kinds of line defects such as vertical, horizontal or cross are not allowed. -
Page 68: Safety
Safety Destination : All over the world ● Applicable standards : UL60950/C-UL/EN60950 ● Unit class : Class I units (the units protected against electric shocks by protective grounding, or those ● equipped with 3-core power cords) Ratings : AC100 - 240V 50/60Hz 1.3-0.7A ●... -
Page 69: Leakage Current Test
Leakage Current Test A leakage current should be measured under the conditions specified below, in order to confirm that the requirements of the judgment standard are met. 1) Measuring conditions Measuring instrument : Leakage current meter (A 1500 resistor should be incorporated, Ω... -
Page 70: System Connection
9. PLUG & PLAY Communication and OSM “MONITOR INFORMATION” for Model Name / Serial Number Inspection 9.1 System Connection This system should be connected as shown below. Fig 9.1.1 D-SUB connector connection Fig 9.1.2 DVI connector connection 5-22... -
Page 71: Input Signal
Modify the Modify the connector end connector end by by removing the five (5) removing the five analog pins. (5) analog pins. Fig 9.1.3 DVI to D-SUB Signal Cable (Special) Fig 9.1.4 DDC Communication I/F Board (Part No.: 599910541) Input Signal Horizontal synchronization frequency : 31kHz (Negative) Vertical synchronization frequency : 42Hz (Negative) Program... -
Page 72: Operation
9.4 Operation 9.4.1 EDID Data Inspection and Writing to the D-SUB Connector (Analog) 1) Connect the EDID data writing unit. 2) Create a unique directory in the PC, and copy all the files of service tool (Ver. 3.40) into that directory. 3) Start the service tool with file [Service2.EXE]. - Page 73 5) When the screen (as shown below), move the cursor to [20WGX2 D-SUB] and double click. 6) When the screen as shown below appears, select [EDID_READ] and press the [OK] button. 5-25...
- Page 74 7) When the screen as shown below appears, confirm that the correct data are displayed in the columns of EDID DATA CONTENTS and Serial information. If all the displayed data are [FF] or the like, or if the serial number is different from that of the corresponding unit, then EDID data writing should be carried out.
- Page 75 10) Equipment is set as Factory mode. <How to Factory mode> 10-1) Press “MENU/EXIT” button then open OSM menu. 10-2) OSM select to “INFORMATION” menu by “RIGHT” or “LEFT” button. 10-3) Press “RESET” + “SELECT” button then into Factory mode. 11) When the [WRITE EDID] button is pressed, writing of the EDID data only is carried out.
- Page 76 12) Display “MONITOR INFORMATION” of the OSM, and confirm that the model name (20WGX ) and serial number have been correctly written. (Check that it is also in agreement with the written-in serial number.) Model name and Serial number writing for the OSM “MONITOR INFORMATION”. 9.4.2 EDID Data Inspection and Writing to the DVI-PC Connector 1) Connect the EDID data writing unit with jigs, etc.
-
Page 77: Edid Data File
9.5 EDID Data File EDID Data: 20WGX _A.edi (ANALOG) Note1 Note2 Note3 Note3 Note3 Note3 Note3 Note3 Note3 Note3 Note3 Note3 Note3 Note3 Note3 Note4 EDID Data: 20WGX _D.edi (DIGITAL) Note1 Note2 Note3 Note3 Note3 Note3 Note3 Note3 Note3 Note3 Note3 Note3 Note3 Note3 Note3 Note4 Note 1: address 10h Week of manufacture... -
Page 78: Appendix Reference Signal Timings
Appendix Reference Signal Timings H active Horizontal H pluse H back H front H total V-Video V active Vertical V pluse V back V front V total 5-30... - Page 79 MODE MODE Item Abbreviation MAC 640×480 MAC 832×624 Pixel frequency 30.24MHz 57.28MHz Horizontal frequency 35.00kHz 49.73kHz Line Time total 28.57us 864CLK 20.11us 1152CLK Horizontal active display 21.16us 640CLK 14.52us 832CLK Horizontal sync pulse 2.12us 64CLK 1.12us 64CLK Horizontal back porch 3.17us 96CLK 3.91us...
- Page 80 MODE MODE Item Abbreviation VGA 720×400 70Hz VGA 640×480 60Hz Pixel frequency 28.322MHz 25.175MHz Horizontal frequency 31.47kHz 31.47kHz Line Time total 31.78us 900CLK 31.78us 800CLK Horizontal active display 25.42us 720CLK 25.42us 640CLK Horizontal sync pulse 3.81us 108CLK 3.81us 96CLK Horizontal back porch 1.91us 54CLK 1.91us...
- Page 81 MODE MODE Item Abbreviation VESA 800×600 56Hz VESA 800×600 60Hz Pixel frequency 36.00MHz 40.00MHz Horizontal frequency 35.16kHz 37.88kHz Line Time total 28.44us 1024CLK 26.40us 1056CLK Horizontal active display 22.22us 800CLK 20.00us 800CLK Horizontal sync pulse 2.00us 72CLK 3.20us 128CLK Horizontal back porch 3.56us 128CLK 2.20us...
- Page 82 MODE MODE Item Abbreviation VESA 1024×768 60Hz VESA 1024×768 70Hz Pixel frequency 65.000MHz 75.000MHz Horizontal frequency 48.36kHz 56.48kHz Line Time total 20.68us 1344CLK 17.71us 1328CLK Horizontal active display 15.75us 1024CLK 13.65us 1024CLK Horizontal sync pulse 2.09us 136CLK 1.81us 136CLK Horizontal back porch 2.46us 160CLK 1.92us...
- Page 83 MODE MODE Item Abbreviation SUN 1152×900 66Hz VESA 1280×960 60Hz Pixel frequency 94.50MHz 108.00MHz Horizontal frequency 61.85kHz 60.00kHz Line Time total 16.17us 1528CLK 16.67us 1800CLK Horizontal active display 12.19us 1152CLK 11.85us 1280CLK Horizontal sync pulse 1.35us 128CLK 1.04us 112CLK Horizontal back porch 2.20us 208CLK 2.89us...
- Page 84 MODE MODE Item Abbreviation VESA 1280×1024 75Hz SUN 1280×1024 76Hz Pixel frequency 135.00MHz 135.00MHz Horizontal frequency 79.98kHz 81.13kHz Line Time total 12.50us 1688CLK 12.33us 1664CLK Horizontal active display 9.48us 1280CLK 9.48us 1280CLK Horizontal sync pulse 1.07us 144CLK 0.47us 64CLK Horizontal back porch 1.84us 248CLK 2.13us...
- Page 85 MODE MODE Item Abbreviation VESA 1152x864 70Hz VESA 1280x960 75Hz Pixel frequency 94.50MHz 129.60MHz Horizontal frequency 63.851kHz 75.000kHz Line Time total 15.661us 1480CLK 13.333us 1728CLK Horizontal active display 12.190us 1152CLK 9.877us 1280CLK Horizontal sync pulse 1.016us 96CLK 0.988us 128CLK Horizontal back porch 2.116us 200CLK 1.975us...
- Page 86 MODE MODE Item Mac 1024x768 75Hz Abbreviation Mac 1280x960 75Hz Pixel frequency 80.00MHz 126.00MHz Horizontal frequency 60.241kHz 74.64kHz Line Time total 16.600us 1328CLK 13.400us 1688CLK Horizontal active display 12.800us 1024CLK 10.160us 1280CLK Horizontal sync pulse 1.200us 96CLK 1.210us 152CLK Horizontal back porch 2.200us 176CLK 1.840us...
- Page 87 Non-interlaced PAL Non-interlaced PAL Item GTF1024x768 50Hz Abbreviation GTF1280x720 50Hz Pixel frequency 51.89MHz 60.47MHz Horizontal frequency 39.55kHz 37.05kHz Line Time total 25.28us 1312CLK 26.99us 1632CLK Horizontal active display 19.73us 1024CLK 21.17us 1280CLK Horizontal sync pulse 2.00us 104CLK 2.12us 128CLK Horizontal back porch 2.78us 144CLK 2.91us...
- Page 88 Non-interlaced PAL Non-interlaced PAL Item Abbreviation GTF640x480 50Hz GTF800x600 50Hz Pixel frequency 19.40MHz 31.15MHz 24.75kHz 30.90kHz Horizontal frequency 40.40us 784CLK 32.36us 1008CLK Line Time total Horizontal active display 32.98us 640CLK 25.68us 800CLK Horizontal sync pulse 3.30us 64CLK 2.57us 80CLK 3.71us 72CLK 3.34us 104CLK...
- Page 89 Mode Mode 1400x1050 60Hz Item Abbreviation 1440X900 75Hz Reduced Blanking 136.750MHz 101.000MHz Pixel frequency 70.635KHz 64.744KHz Horizontal frequency Line Time total 14.157us 1936CLK 15.446us 1560CLK 10.530us 1440CLK 13.861us 1400CLK Horizontal active display 1.112us 152CLK 0.317us 32CLK Horizontal sync pulse 1.814us 248CLK 0.792us 80CLK...
- Page 90 Mode Mode Abbreviation 1280X768 60Hz Item VESA 1680X1050 60Hz 146.25MHz 79.5MHz Pixel frequency Horizontal frequency 65.290kHz 47.776kHz 15.316us 2240CLK 20.931us 1664CLK Line Time total 11.487us 1680CLK 16.101us 1280CLK Horizontal active display 1.203us 176CLK 1.610us 128CLK Horizontal sync pulse Horizontal back porch 0.711us 104CLK 2.415us...
- Page 91 MODE Abbreviation Item 1280X720 60Hz (CVT) 74.50MHz Pixel frequency Horizontal frequency 44.772kHz 22.36us 1664CLK Line Time total 17.181us 1280CLK Horizontal active display 1.718us 128CLK Horizontal sync pulse Horizontal back porch 2.577us 192CLK 0.859us 64CLK Horizontal front porch Horizontal sync polarity NEG (/POS) 59.855Hz Vertical Frequency...
- Page 92 TROUBLE SHOOTING TABLE OF CONTENTS Page 1. No Display on Screen (Screen is Black, Color of LED is Amber) ........6-2 2. Nothing Display on Screen (Screen is Black, Color of LED is Blue) ......6-3 3. Checking the Back Light Unit ..................6-5 4.
-
Page 93: No Display On Screen (Screen Is Black, Color Of Led Is Amber)
1. No Display of Screen (Screen is Black, Color of LED is Amber) Does OSM display when you push Proceed "5. Abnormal OSM "MENU" button. Display"section. Check if the sync signal from Input the sync signal of computer, or Computer is output and if the video change the cable. -
Page 94: Nothing Display On Screen (Screen Is Black, Color Of Led Is Blue)
2. Nothing Display on Screen (Screen is Black, Color of LED is Blue) Is backlight turned on? Refer "3. Checking the backlight unit" section 1) Change pattern of video signal output on the host. Does computer output RGB video signals? 2) Reconnect the video cable. - Page 95 Continue Failure point Check the 3.3 V power are supplied on Check if the voltage on I307, I307 pin 2, the 1.8V power are supplied on I306 pin 3 that is high level 1) Printed wire broke between P302 pin I306 pin 2 DC at 5V.
-
Page 96: Checking The Back Light Unit
3. Checking the Back Light Unit Failure point Check the BKLT_EN signal of the Is a "H" level being output in the TTL level rectangle input P303 pin 13 at TTL high from I308 pin 59 Printed wire broke between I308 level Or, is BKLT_EN signal of the rectangle pin 59 and P303. -
Page 97: Abnormal Screen
4. Abnormal Screen Failure point Check the R, G, B video signal from computer input on D-Sub R, G, B 1) No R, G and B video signal output from connector. host computer. Check computer 2) Video signal cable disconnection. Failure point Check the R, G, B input signals on I308 In the case of the Red signal. -
Page 98: Abnormal Osm Display
5. Abnormal OSM Display 5.1 OSD Adjust Problem Failure Point Check the input TTL level whether was changed 1) Printed wire broke between P307 pin 8,11 and I308 pin 168. when pressed function keys. 2) Printed wire broke between P307 pin 8,11 and I308 pin 169. 3) Printed wire broke between P307 pin 8,11 and I308 pin 200. -
Page 99: Abnormal Plug And Play Operation
6. Abnormal Plug and Play Operation 6.1 Abnormal DDC2 (D-SUB) Failure point Confirm the output of serial data on I303 pin 5 synchronize SCLK at TTL level. I303 failure. Failure point 1) The host machine isn't communicating in DDC2 mode. 2) The video cable may have failed or may not to have connections for DDC. -
Page 100: Checking The Interface Circuit Of Sync Signal
7. Checking the Interface Circuit of Sync Signal 7.1 Checking the Control Circuit of Horizontal Sync Pulse Failure point Check the horizontal sync signal on I308 pin 132 TTL level. 1) Video cable may have failed. 2) Printed wire broke between P301 pin 13 and I308 pin 132. -
Page 101: Checking The Resolution Change Ic Movement
8. Checking the Resolution Change IC Movement Proceed "9. Checking the DC/DC converter circuit" Is there +3.3V supply on I307 3V3 power pins section. Proceed "9. Checking the DC/DC converter circuit" Is there +3.3V supply on I306 1V8 power pins section. -
Page 102: Checking The Dc/Dc Converter Circuit
9. Checking the DC/DC Converter Circuit Printed wire broke between P303 pin 3, 4, 5 and Check if the 5V is output from P303 pin 3, 4, 5 to I307, I306 pin 3. I307, I306 pin 3. Failure point Check the output of 3.3V, 1.8V line voltage from I307, I306 failure I307, I306 pin 2. -
Page 103: No Power On
10. Power Board - No Power ON Check output voltage +5V is right or not It is not power board problem. Check power cord (P801), signal cable, P802, Connect it right. P803 are connected right or not. Check C801 is about DC140V-330V or not. Check F801, D802, P801 and repair them Check D813, L810, I808, C853, ZD802 Check C853 is over 16V or not. -
Page 104: Check The Usb Hub Circuit
11. Check the USB Hub Circuit 11.1 HUB is not Recongnize Failure point Is a cable with the host PC connected USB cable disconnection Failure point Is a USB cable connected with the monitor? USB cable disconnection Failure point Doesn't I306 open Is a 3.3V supplied to I319 Vcc Pin 3, 7, 11, I306 15, 19, 23, 27, 33, 39, 45, 55 ? -
Page 105: Connection Apparatus Is Not Recognize
11.2 Connection Apparatus is not Recognize Is it aware of the USB hub in Proceed section 12.1 "HUB isn't recognize" the host PC? Failure point Is apparatus connected to the down stream port ? The un-connection of the down stream port cable. -
Page 106: Connection Apparatus Does Not Work
11.3 Connection Apparatus does not Work Is it aware of the USB hub in Proceed “12.1 HUB isn't recognize" section . the host PC ? Is a host PC aware Proceed of the peripheral which doesn't " 12.2 Connection apparatus isn't recognize " section . work ? Failure point Is the program which is... -
Page 107: Check The Usb Ic
11.4 Check the USB IC Is 3.3V supplied to I319 Vcc pin Proceed "9. Check the DC/DC 3,7,11,15,19,23,27,33,39,45,55? converter circuit" section. Does the output of Failure point X302 satisfy a threshold Does X302 oscillate level ( High:more than (24 MHz) ? X302 failure 2.2V,Low:less than 0.8V) ? - Page 108 CIRCUIT DESCRIPTION TABLE OF CONTENTS Page 1. Interface Board and Panel Power Supply ..............7-2 2. Video Input Circuit ......................7-2 3. System reset, LED Control Circuit ................7-2 4. E PROM for EDID ......................7-2 5. E PROM ........................7-2 6.
-
Page 109: Interface Board And Panel Power Supply
1. Interface Board and Panel Power Supply 1.1 P303 connector A 5V power supply for LCD module, scaler, and logic is generated from the P303 connector. A12V power supply for LCD module. 1.2 I307 , I306, I317 terminal regulator I307 : A 3.3V power supply for Scaler IC I308 and SDRAM IC I311/I312 are generated from the 5V. I306 : A 1.8V power supply for Video IC I901 and AScaler IC I308 are generated from the 3.3V. -
Page 110: Mcu Circuit
6. MCU Circuit The source voltage for I325 is 5V, and the system clock frequency is 11.0529MHz. 6.1 Detection of POWER Status Power key and RC IR can on/off the system. 6.2 Display Mode Identification 6.2.1Functions (1) Display mode identification The display mode of input signal is identified based on Table 1. - Page 111 If there is no horizontal sync signal input. ● ● If there is no vertical sync signal input. ● If the horizontal sync signal is outside the measuring range. If the vertical sync signal is outside the measuring range. ● Resolution V-freq.
- Page 112 6.3 User Control 6.3.1Control Keys Action MENU/EXIT Enter or Exit item SELECT Select or Set RESET/DV MODE Reset POWER Power on/off 7- 5...
-
Page 113: Power Supply (Circuit Daigrams Main Pwb)
7. Power Supply (Circuit daigrams MAIN PWB) Line filter consists of C802, T802, C808, C805, C836, T803. It eliminates high frequency interference to meet EMI’s requirement. Rec & Filter : Bridge diode D802 converts AC source into pulsed DC. This pulsed DC is smoothed and filtered by C801. - Page 114 Power Board Block Diagram Rec. Line Power & 24V for Inverter Filter Circuit Output Rec. & Filter Transformer Filter Power 5V for Main Board Transformer Output Rec. & Filter Driver Output Rec. & Filter Regulator for Audio for Panel 7- 7...
-
Page 115: Usb 2.0 Hub Circuit
8. USB 2.0 HUB Circuit 8.1 Block Diagram Upperstream port Downstream ports USB 2.0 HUB controller over current limiter receptacle receptacles To Host Power On Reset 5-3.3V regular To USB devices 8.2 Features . Compliant with Universal Serial Bus specification revision 2.0 (Data rate 1.5/12/480 Mbps). . - Page 116 REPLACEMENT PARTS LIST TABLE OF CONTENTS Page Model 20WGX (B) (For Europe) ......................8-2 8- 1...
- Page 117 REPLACEMENT PARTS LIST(For Europe) The components specified for Model 20WGX For Europe SYMBOL DESCRIPTION (Lite-on Part Number) PWB ASSYS 0 5113301255P U20BNL(03)_NECDS_INTERFACE BD 0 5114300385P U20BNL(03)_NECDS_POWER BD 0 5113700055P U20BNL(03)_NECDS_USB BD 0 5113800416P U20BNL(99)_NECDS_FUNCTION KEY BD LCD CAPACITOR : C842 6311310245P70 CAP.
- Page 118 For Europe SYMBOL DESCRIPTION (Lite-on Part Number) C604 6371150956P CAP. MC_pF_5_50V_J_NPO_SMD 0603 C605 6371150956P CAP. MC_pF_5_50V_J_NPO_SMD 0603 C517 6371156156P03 CAP. MC_pF_560_50V_J_NPO C304 6371210356P CAP. MC_uF_0.01_50V_J_X7R_ C330 6371210356P CAP. MC_uF_0.01_50V_J_X7R_ C407 6371210356P CAP. MC_uF_0.01_50V_J_X7R_ C408 6371210356P CAP. MC_uF_0.01_50V_J_X7R_ C409 6371210356P CAP. MC_uF_0.01_50V_J_X7R_ C410 6371210356P CAP.
- Page 119 For Europe SYMBOL DESCRIPTION (Lite-on Part Number) C376 6371210416P CAP. MC_uF_0.1_50V_K_X7R_SMD 0603 PB C377 6371210416P CAP. MC_uF_0.1_50V_K_X7R_SMD 0603 PB C378 6371210416P CAP. MC_uF_0.1_50V_K_X7R_SMD 0603 PB C379 6371210416P CAP. MC_uF_0.1_50V_K_X7R_SMD 0603 PB C380 6371210416P CAP. MC_uF_0.1_50V_K_X7R_SMD 0603 PB C384 6371210416P CAP. MC_uF_0.1_50V_K_X7R_SMD 0603 PB C385 6371210416P CAP.
- Page 120 For Europe SYMBOL DESCRIPTION (Lite-on Part Number) C476 6371210416P CAP. MC_uF_0.1_50V_K_X7R_SMD 0603 PB C477 6371210416P CAP. MC_uF_0.1_50V_K_X7R_SMD 0603 PB C478 6371210416P CAP. MC_uF_0.1_50V_K_X7R_SMD 0603 PB C490 6371210416P CAP. MC_uF_0.1_50V_K_X7R_SMD 0603 PB C491 6371210416P CAP. MC_uF_0.1_50V_K_X7R_SMD 0603 PB C493 6371210416P CAP. MC_uF_0.1_50V_K_X7R_SMD 0603 PB C495 6371210416P CAP.
- Page 121 For Europe SYMBOL DESCRIPTION (Lite-on Part Number) C846 6311210245P72 CAP.ALU_uF_1000_16V_T_105C_10x20_PW/NICH C356 6311122142P60 CAP.ALU_uF_220_10V_L3.5P2.5_105C_6.3x11_ C360 6311122142P60 CAP.ALU_uF_220_10V_L3.5P2.5_105C_6.3x11_ C362 6311122142P60 CAP.ALU_uF_220_10V_L3.5P2.5_105C_6.3x11_ C454 6311122142P60 CAP.ALU_uF_220_10V_L3.5P2.5_105C_6.3x11_ C461 6311122142P60 CAP.ALU_uF_220_10V_L3.5P2.5_105C_6.3x11_ C463 6311122142P60 CAP.ALU_uF_220_10V_L3.5P2.5_105C_6.3x11_ C492 6311122142P60 CAP.ALU_uF_220_10V_L3.5P2.5_105C_6.3x11_ C494 6311122142P60 CAP.ALU_uF_220_10V_L3.5P2.5_105C_6.3x11_ C347 6311322142P60 CAP.ALU_uF_220_25V_L3.5P3.5_105C_8x11.5_ C416 6311322142P60 CAP.ALU_uF_220_25V_L3.5P3.5_105C_8x11.5_ C820 6311547945P60 CAP.ALU_uF_4.7_50V_T_105C_5x11_...
- Page 122 For Europe SYMBOL DESCRIPTION (Lite-on Part Number) FB327 6881102178P CORE_BEAD_PBY201209T_300Y_S_CHILISIN FB330 6881102178P CORE_BEAD_PBY201209T_300Y_S_CHILISIN FB331 6881102178P CORE_BEAD_PBY201209T_300Y_S_CHILISIN FB335 6881102178P CORE_BEAD_PBY201209T_300Y_S_CHILISIN FB336 6881102178P CORE_BEAD_PBY201209T_300Y_S_CHILISIN FB341 6881102178P CORE_BEAD_PBY201209T_300Y_S_CHILISIN FB307 6881603978P CORE_BEAD_SBK160808T_060Y_S_SMD_CHILISIN FB309 6881603978P CORE_BEAD_SBK160808T_060Y_S_SMD_CHILISIN FB311 6881603978P CORE_BEAD_SBK160808T_060Y_S_SMD_CHILISIN FB306 6881602878P CORE_BEAD_SBK160808T_101Y_S_SMD_CHILISIN FB308 6881602878P CORE_BEAD_SBK160808T_101Y_S_SMD_CHILISIN FB310 6881602878P CORE_BEAD_SBK160808T_101Y_S_SMD_CHILISIN...
- Page 123 For Europe SYMBOL DESCRIPTION (Lite-on Part Number) D881 6412001738P DIODE_RLS4148 LL_34_SMD_ROHM D817 6413060020P DIODE_SCHOTTKY_FCQ20A06_20A/60V_B_NICE D801 6413180007P DIODE_SCHOTTKY_P6KE180A_1 mA/180V_T52 D812 6413180007P DIODE_SCHOTTKY_P6KE180A_1 mA/180V_T52 D815 6412015220P DIODE_SWITCHING_ER1002F_10A/200V_35NS D805 6412000010P20 DIODE_SWITCHING_ER1004FCT_10A/400V_50nS_ D330 6412001778P DIODE_SWITCHING_MM4148_0.15A/75 D331 6412001778P DIODE_SWITCHING_MM4148_0.15A/75 D316 6412019518P DIODE_SWITCHING_MMBD7000_7_75V_SOT23_4nS D318 6412019518P DIODE_SWITCHING_MMBD7000_7_75V_SOT23_4nS D319 6412019518P DIODE_SWITCHING_MMBD7000_7_75V_SOT23_4nS...
- Page 124 For Europe SYMBOL DESCRIPTION (Lite-on Part Number) Q316 6422000018P20 TRANSISTOR_NPN_PMBS3904_SOT23_PHILIPS Q320 6422000018P20 TRANSISTOR_NPN_PMBS3904_SOT23_PHILIPS Q321 6422000018P20 TRANSISTOR_NPN_PMBS3904_SOT23_PHILIPS Q323 6422000018P20 TRANSISTOR_NPN_PMBS3904_SOT23_PHILIPS Q326 6422000018P20 TRANSISTOR_NPN_PMBS3904_SOT23_PHILIPS Q808 6423000225P TRANSISTOR_PNP_2SA733P_T0_92_B/ Q808 6423000215P TRANSISTOR_PNP_KTA733_P_AT_TO Q303 6423000018P20 TRANSISTOR_PNP_PMBS3906_SOT23_PHILIPS Q304 6423000018P20 TRANSISTOR_PNP_PMBS3906_SOT23_PHILIPS Q317 6423000018P20 TRANSISTOR_PNP_PMBS3906_SOT23_PHILIPS Q318 6423000018P20 TRANSISTOR_PNP_PMBS3906_SOT23_PHILIPS Q319 6423000018P20 TRANSISTOR_PNP_PMBS3906_SOT23_PHILIPS...
- Page 125 For Europe SYMBOL DESCRIPTION (Lite-on Part Number) R809 6253107242P00 RES. CHIP_R_KOHM_10.7_1/8W_F_0805_COMPO R494 6252100246P RES. CHIP_R_KOHM_10_1/10W_F_603 R495 6252100246P RES. CHIP_R_KOHM_10_1/10W_F_603 R496 6252100246P RES. CHIP_R_KOHM_10_1/10W_F_603 R497 6252100246P RES. CHIP_R_KOHM_10_1/10W_F_603 R510 6252100246P RES. CHIP_R_KOHM_10_1/10W_F_603 R323 6252100256P RES. CHIP_R_KOHM_10_1/10W_J_603 R328 6252100256P RES. CHIP_R_KOHM_10_1/10W_J_603 R330 6252100256P RES.
- Page 126 For Europe SYMBOL DESCRIPTION (Lite-on Part Number) R437 6252150256P RES. CHIP_R_KOHM_15_1/10W_J_603 R439 6252150256P RES. CHIP_R_KOHM_15_1/10W_J_603 R811 6253160242P RES. CHIP_R_KOHM_16_1/8W_F_805 R822 6253180242P RES. CHIP_R_KOHM_18_1/8W_F_805 R308 6252220156P RES. CHIP_R_KOHM_2.2_1/10W_J_603 R309 6252220156P RES. CHIP_R_KOHM_2.2_1/10W_J_603 R352 6252220156P RES. CHIP_R_KOHM_2.2_1/10W_J_603 R353 6252220156P RES. CHIP_R_KOHM_2.2_1/10W_J_603 R414 6252220156P RES.
- Page 127 For Europe SYMBOL DESCRIPTION (Lite-on Part Number) R823 6253649142P00 RES. CHIP_R_KOHM_6.49_1/8W_F_0805_COMPO R825 6252649342P RES. CHIP_R_KOHM_649_1/10W_F_805 R396 6252820356P RES. CHIP_R_KOHM_820_0.1W_J_TAPING R397 6252820356P RES. CHIP_R_KOHM_820_0.1W_J_TAPING R421 6252100456P RES. CHIP_R_MOHM_1_1/10W_J_603 R477 6252100456P RES. CHIP_R_MOHM_1_1/10W_J_603 R821 6254100443P00 RES. CHIP_R_MOHM_1_1/4W_F_1206_COMPOSTA R867 6254100443P00 RES. CHIP_R_MOHM_1_1/4W_F_1206_COMPOSTA R350 6252000056P RES.
- Page 128 For Europe SYMBOL DESCRIPTION (Lite-on Part Number) R339 6252470056P RES. CHIP_R_OHM_470_1/10W_J_603 R355 6252560946P RES. CHIP_R_OHM_56_1/10W_F_603 R356 6252560946P RES. CHIP_R_OHM_56_1/10W_F_603 R357 6252560946P RES. CHIP_R_OHM_56_1/10W_F_603 R484 6252560946P RES. CHIP_R_OHM_56_1/10W_F_603 R394 6252560956P RES. CHIP_R_OHM_56_1/10W_J_603 R604 6252681946P RES. CHIP_R_OHM_68.1_1/10W_F_0603 R325 6252750946P RES. CHIP_R_OHM_75_1/10W_F_603 R327 6252750946P RES.
- Page 129 For Europe SYMBOL DESCRIPTION (Lite-on Part Number) R839 6221020157P RES. MOF_OHM_200_1/4W_J_AT52 R814 6221022057P RES. MOF_OHM_22_1/4W_J_AT52 R857 6221022057P RES. MOF_OHM_22_1/4W_J_AT52 R851 6221047057P RES. MOF_OHM_47_1/4W_J_AT52 R807 6212133957P00 RES.CF_OHM_3.3_1/4W_J_T52MINI_NEWSIN VR801 6245103010P RES. VR_KOHM_10_0.3W_TA_B_6D_+/_20%(META R882 6253127342P00 RES.CHIP-R_KOHM_127_1/8W_F_0805_COMPOSTA R808 6253294242P00 RES.CHIP-R_KOHM_29.4_1/8W_F_0805_COMPOST R801 6201100061P THERMISTOR_OHM_10_5A_P7.5/L21_SCK15105MJ ELECTRICAL PARTS & MISCELLANEOUR PARTS P801 6621030151P AC INLET_3P_DLK_CDJ_3_GS/A...
- Page 130 For Europe SYMBOL DESCRIPTION (Lite-on Part Number) J030 6700060000P JUMPER WIRE J031 6700060000P JUMPER WIRE J032 6700060000P JUMPER WIRE J033 6700060000P JUMPER WIRE J034 6700060000P JUMPER WIRE C801A 7740200690P0B RIVET_EYELET_1.6_FOR NE C801B 7740200690P0B RIVET_EYELET_1.6_FOR NE C855A 7740200690P0B RIVET_EYELET_1.6_FOR NE C855B 7740200690P0B RIVET_EYELET_1.6_FOR NE C856A...
- Page 131 RC_NMV_KAMA 20 WS_#6700_PC+ABS 94V0_ 6BB1 7742611921P0A RAIL_CENTER CABINET_#6700_PC+ABS 94V0_ 6BC1 7140130061P0A SCREW_MACHINE_WITHOUT_NINDING_M3_6L_BLA 6BD1 7748711550P0A BRACKET_SPEAKER BRACKETL_NEC_C20MTL_2(0 6BE1 7748711560P0A BRACKET_SPEAKER BRACKETR_NEC_C20MTL_2)0 6BF1 7140330082P0A SCREW-MACHINE-NONE-FLAT HEAD-M3-8-NI 8C01 7737710453P0A BASE ASSY_#6700_PC+ABS 94V0_NMV_U20BNL 8CA1 7738000861P0A HINGE_HINGE TILT ASSY_NMV_20_SECC_ 8CB1 7742612111P0A COVER_HINGE COVER(NEC)_#6700_PC+ABS 94V0 8- 16...
- Page 132 For Europe SYMBOL DESCRIPTION (Lite-on Part Number) 8CC1 7748711700P0A BRACKET_VESA BRACKET_NEC_T17BNU(03)~U1( 8CD1 7748711731P0A BRACKET_HINGE CASTING_DIE CAST AL ALLOY_ 8CE1 7742611971P0A COVER_STAND COVER-FC_#6700_PC+ABS 94V0 8CF1 7742611981P0A COVER_CABLE MANAGEMENT_#6700_PC+ABS 94V0 8CG1 7740412101P0A BASE_STAND BASE COVER_#6700_PC+ABS 94V0 8CH1 7740412151P0A BASE_TURN COVER_NMV_#6700_PC+ABS 94V0 8CI1 7742612031P0A COVER_STAND COVER-REAR_#6700_PC+ABS 94V0 8CJ1...
- Page 133 For Europe SYMBOL DESCRIPTION (Lite-on Part Number) PACKING ASSY 1P11 7749205948P0A CARTON_NEC_U20BN_20WGX2(B-BK)_720SETS 1P21 7749105560P0A CUSHION FOAM_EPS_KAMA-20SV_720SETS_T&B_ 1P31 7749002100P0A BAG_LDPE+EPE_ORDINARY_FOR HP_850(l)*650 1P33 7749001360P0B BAG_LLDPE_ORDINARY_ALL MODEL_W500mm*H0. 1P34 7749001370P0A BAG_LLDPE_FILM STRETCH WRAP_ALL MODEL_W 1P42 7749600470P0A TAPE_PACKING_914Mx76mmx0.066mm_FOR DELL 1P43 7749600200P0A TAPE_MASKING_PACKING_25mm(w)x45m_LITEON 1P44 7749600650P0A TAPE_PACKING_250Mx15mmx0.95mm_ALL MODEL 1P51 7749402250P0A BOARD_CORNER PAPER_1200*50*3mm_H...
- Page 134 NEC-20WGX Block Diagram 12VDC PTB-1621 PANEL 20" LPL LM201WE2-SLA1 Power Board PTB-1680 I325 CPU 5V ON/OFF for <1W I328 AO4407 5VDC Switch I311 I311 SDRAM SDRAM 1M*16 1M*16 I307 3.3VDC Regulator LVDS OUTPUT Display Scaler AI-DCR I331/332/323 I310 NVRAM GENESIS...
- Page 135 MODEL LCD 20WGX SCHEMATIC DIAGRAM - InputsPWR - Dsub/DVI (1/5) source select multiplexer for LPL panel only. R488 R489 tage. INV_ENA 4K7F 6K8F TP204 AI_ENABLE: Q322 6374210512P MMBT3906 SET LOW: Select DIM_OUT(Panel control) --MP s C511 R490 I331 1uF/16V SET HIGH: Select PWM_BRI(Scaler control) MMDT3904 R492 R491...
- Page 136 MODEL LCD 20WGX SCHEMATIC DIAGRAM - Scaler FLI5961H/gm5861 (2/5) +1_8DVDD +3_3RVDD +3_3DVDD +1_8AVDD FB327 +1_8DVDD +3_3DVDD 2,4 +1_8AVDD C366 C367 C368 C369 C370 C371 C372 C373 C374 C375 C376 C377 C378 C379 C380 C382 PBY201209T-300Y-S C383 C384 C385 C386 C387 C388 C365 47uF/25V...
- Page 137 PBY170 A[0..10] A[0..10] 2,3,5 C414 MCLK 0.1uF R383 1st.K4S161622H-UC55, 183MHz, Samsung 12V for LG panel C415 FB332 0.56uF 2nd.HY57V161610ETP-55,183MHz, Hynix NEC-C20MTL--6814200500P R384 3th.M12L16161A-5.5T, 183MHz, ESMT 5V for Samsung FB333 R385 panel DPWON DPWON 3 MTS-C19MTS--6814902001P C423 1uF/10V R386 330pF P311...
- Page 138 MODEL LCD 20WGX SCHEMATIC DIAGRAM - USB (4/5) I327 FB343 AO4407 +U5V +U3V3P +U5V FB344 I317 PBY201209T-170Y-S PBY201209T-170Y-S VBUS1 +U3V3 VOUT I318 2,3,4 PWR2 VBUS2 R406 ADJ(GND) CTL2 OUT2 C454 C455 C457 C458 C459 C460 R405 R407 OVR2 R408 FLG2 220uF/10V C456 0.1u...
- Page 139 MODEL LCD 20WGX SCHEMATIC DIAGRAM - Power (5/5) A3963WV2-A3P ER2819 D807 L801 R801 R868 C811 C814 P801 C806 T803 470U/35V 470U/35V SCK105 D805 +24V F801 280uH 0.22 1W 0.47U/275V RING CHOHE ER306 ER1004FCT D802 T802 T801 GBU4K R821 3.15AH250V C804 ET-24 Q803 D801...
- Page 140 PACKING SPECIFICATION TABLE OF CONTENTS Page B Version ............................11-2 11- 1...
- Page 141 11- 2...
- Page 142 Liteon Item Description Ver. Cabinet Color Part Number CARTON_NEC_U20BN_20WGX2(B-BK)_720 7749205948P0A Black SETS CUSHION FOAM_EPS_KAMA-20SV_ 7749105560P0A Black 720SETS_T&B CUSHION FOAM_EPS_KAMA-20SV_ 7749105560P0A Black 720SETS_T&B BAG_LDPE+EPE_ORDINARY_FOR 7749002100P0A Black HP_850(l)*650 PE BAG Black TAPE_PACKING_250Mx15mmx0.95mm_ALL 7749600650P0A Black MODEL TAPE_MASKING_PACKING_25mm(w)x45m_ 7749600200P0A Black LITEON WIRING TIE Black MANUAL ASSY_NEC-DS_U20BNL_ 7730302952P0A Black...
- Page 143 Revision History Revision Revision New Issue (1st Edition) 2006/03 12-1...