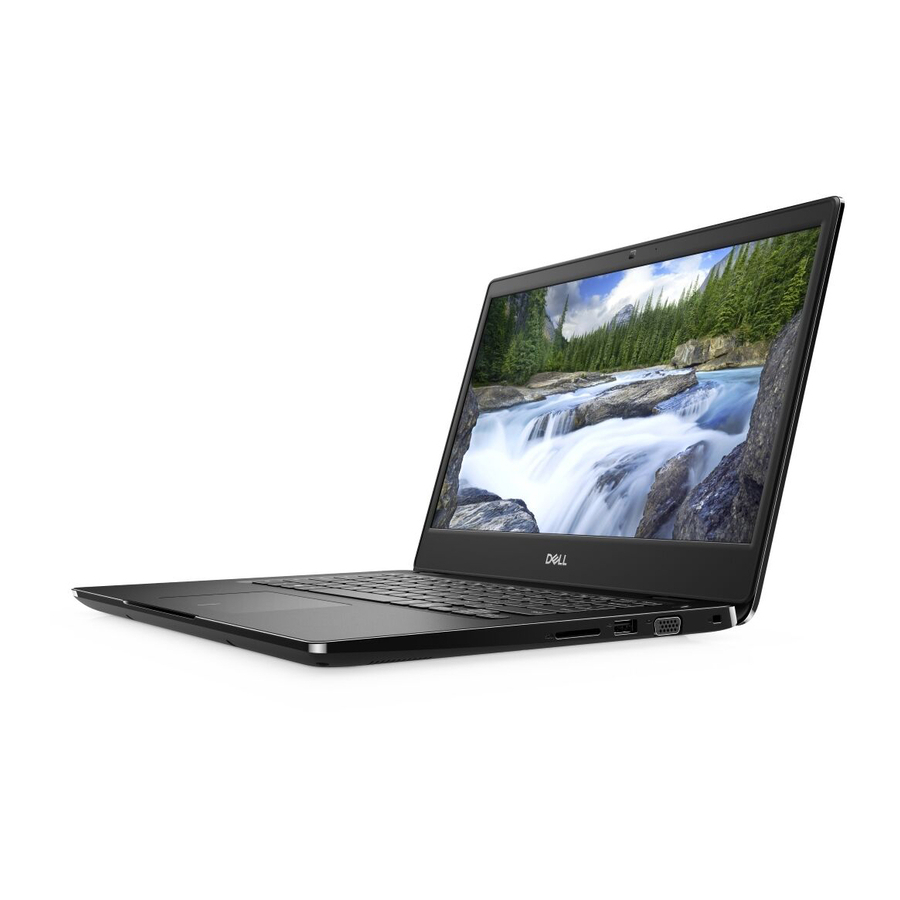
Dell Latitude 3400 Service Manual
Hide thumbs
Also See for Latitude 3400:
- Service manual (139 pages) ,
- Setup and specifications manual (39 pages) ,
- Setup and features information (12 pages)

Related Manuals for Dell Latitude 3400


Summary of Contents for Dell Latitude 3400
- Page 1 Dell Latitude 3400 Service Manual Regulatory Model: P111G Regulatory Type: P111G001...
- Page 2 Napis OSTRZEŻENIE informuje o sytuacjach, w których występuje ryzyko uszkodzenia sprzętu, obrażeń ciała lub śmierci. © 2019 Dell Inc. lub podmioty zależne. Wszelkie prawa zastrzeżone. Dell, EMC i inne znaki towarowe są znakami towarowymi firmy Dell Inc. lub jej spółek zależnych. Inne znaki towarowe mogą być znakami towarowymi ich właścicieli.
-
Page 3: Table Of Contents
Contents 1 Serwisowanie komputera......................5 Instrukcje dotyczące bezpieczeństwa..........................5 Wyłączanie komputera — Windows 10..........................5 Przed przystąpieniem do serwisowania komputera......................6 Po zakończeniu serwisowania komputera..........................6 2 Technologia i podzespoły......................7 DDR4....................................... 7 Funkcje USB................................... 8 USB Type-C..................................10 Intel Optane memory................................10 Włączanie pamięci Intel Optane............................ - Page 4 5 Troubleshooting........................104 Program diagnostyczny ePSA (Enhanced Pre-Boot System Assessment)...............104 Przeprowadzanie testu diagnostycznego ePSA...................... 104 Diagnostyka..................................105 M-BIST..................................105 L-BIST....................................105 Diagnostic LED................................... 105 Wskaźnik LED stanu akumulatora............................106 6 Uzyskiwanie pomocy......................... 108 Kontakt z firmą Dell................................108 Contents...
-
Page 5: Serwisowanie Komputera
Użytkownik może jedynie samodzielnie rozwiązywać problemy oraz przeprowadzać proste naprawy opisane odpowiednio w dokumentacji produktu lub na telefoniczne polecenie zespołu wsparcia technicznego. Uszkodzenia wynikające z napraw serwisowych nieautoryzowanych przez firmę Dell nie są objęte gwarancją. Należy zapoznać się z instrukcjami bezpieczeństwa dostarczonymi z produktem i przestrzegać ich. -
Page 6: Przed Przystąpieniem Do Serwisowania Komputera
Kroki 1. Kliknij lub stuknij przycisk 2. Kliknij lub stuknij przycisk , a następnie kliknij lub stuknij polecenie Wyłącz. UWAGA Sprawdź, czy komputer i wszystkie podłączone urządzenia są wyłączone. Jeśli komputer i podłączone do niego urządzenia nie wyłączyły się automatycznie po wyłączeniu systemu operacyjnego, naciśnij przycisk zasilania i przytrzymaj go przez około 6 sekund w celu ich wyłączenia. -
Page 7: Technologia I Podzespoły
Technologia i podzespoły DDR4 DDR4 (double data rate fourth generation) memory is a higher-speed successor to the DDR2 and DDR3 technologies and allows up to 512 GB in capacity, compared to the DDR3's maximum of 128 GB per DIMM. DDR4 synchronous dynamic random-access memory is keyed differently from both SDRAM and DDR to prevent the user from installing the wrong type of memory into the system. -
Page 8: Funkcje Usb
Figure 3. Curved edge Memory Errors Memory errors on the system display the new ON-FLASH-FLASH or ON-FLASH-ON failure code. If all memory fails, the LCD does not turn on. Troubleshoot for possible memory failure by trying known good memory modules in the memory connectors on the bottom of the system or under the keyboard, as in some portable systems. - Page 9 Szybkość Obecnie w najnowszej specyfikacji standardu USB 3.0/USB 3.1 pierwszej generacji zdefiniowane są 3 tryby szybkości. Są to tryby Super- Speed, Hi-Speed i Full-Speed. Nowy tryb SuperSpeed ma prędkość przesyłania danych 4,8 Gb/s. W specyfikacji nadal istnieją tryby USB Hi-Speed i Full-Speed, znane szerzej odpowiednio jako USB 2.0 i 1.1. Te wolniejsze tryby nadal działają z szybkością odpowiednio 480 Mb/s i 12 Mb/s.
-
Page 10: Usb Type-C
Zgodność Dobra wiadomość: standard USB 3.0/USB 3.1 pierwszej generacji został od podstaw zaplanowany z myślą o bezproblemowym współistnieniu ze standardem USB 2.0. Przede wszystkim mimo że w przypadku standardu USB 3.0/USB 3.1 pierwszej generacji zastosowano nowe fizyczne metody połączeń i kable zapewniające obsługę większych szybkości, samo złącze zachowało taki sam prostokątny kształt i cztery styki rozmieszczone identycznie jak w złączu standardu USB 2.0. -
Page 11: Włączanie Pamięci Intel Optane
Feature Specifications Connector M.2 card slot (2230/2280) Configurations supported • 7th Generation or higher Intel Core i3/i5/i7 processor • Windows 10 64-bit version or higher • Intel Rapid Storage Technology driver version 15.9.1.1018 or higher Capacity 32 GB or 64 GB Włączanie pamięci Intel Optane Kroki 1. -
Page 12: Odpowiednik Karty Nvidia Geforce Mx130
Intel UHD Graphics 620 Operating Systems Graphics/ Video API Support DirectX 12 (Windows 10), OpenGL 4.5 Maximum Vertical Refresh Rate Up to 85 Hz depending on resolution Multiple Display Support On System: eDP (internal), HDMI Via Optional USB Type-C Port: VGA, DisplayPort External Connectors HDMI 1.4b USB Type–C port... -
Page 13: Major Components Of Your System
Major components of your system 1. Base cover 2. Power adapter port Major components of your system... - Page 14 15. System fan 16. Heatsink NOTE: Dell provides a list of components and their part numbers for the original system configuration purchased. These parts are available according to warranty coverages purchased by the customer. Contact your Dell sales representative for purchase options.
-
Page 15: Wymontowywanie I Instalowanie Komponentów
Wymontowywanie i instalowanie komponentów Recommended tools The procedures in this document require the following tools: • Phillips #0 screwdriver • Phillips #1 screwdriver • Plastic scribe NOTE: The #0 screw driver is for screws 0-1 and the #1 screw driver is for screws 2-4. Karta Secure Digital Wymontowywanie karty Secure Digital Wymagania... - Page 16 Instalowanie karty Secure Digital Kroki 1. Wsuń kartę Secure Digital do gniazda, aż zatrzaśnie się w miejscu. 2. Wykonaj procedury przedstawione w rozdziale Po zakończeniu serwisowania komputera. Wymontowywanie i instalowanie komponentów...
-
Page 17: Pokrywa Dolna
pokrywa dolna Wymontowywanie pokrywy dolnej Wymagania 1. Wykonaj procedurę przedstawioną w sekcji Przed przystąpieniem do serwisowania komputera. 2. Wymontuj kartę pamięci Kroki 1. Poluzuj dziewięć śrub mocujących pokrywę dolną do zestawu podparcia dłoni i klawiatury. Wymontowywanie i instalowanie komponentów... - Page 18 2. Podważ pokrywę dolną, zaczynając od jej prawej strony. Wymontowywanie i instalowanie komponentów...
- Page 19 3. Unieś prawą stronę pokrywy dolnej [1] i zdejmij ją z zestawu podparcia dłoni i klawiatury [2]. Instalowanie pokrywy dolnej Kroki 1. Umieść pokrywę dolną na zestawie podparcia dłoni i klawiatury [1]. Wymontowywanie i instalowanie komponentów...
- Page 20 2. Dokręć dziewięć śrub mocujących pokrywę dolną do zestawu podparcia dłoni i klawiatury. Wymontowywanie i instalowanie komponentów...
-
Page 21: Akumulator
Aby uzyskać więcej informacji, skontaktuj się z pomocą techniczną firmy Dell. Zobacz www.dell.com/contactdell. • Należy kupować tylko oryginalne baterie dostępne na stronie www.dell.com lub u autoryzowanych partnerów i odsprzedawców produktów firmy Dell. Wymontowywanie akumulatora Wymagania 1. Wykonaj procedurę przedstawioną w sekcji Przed przystąpieniem do serwisowania komputera. - Page 22 2. Wykręć cztery śruby (M2x3) mocujące akumulator do zestawu podparcia dłoni i klawiatury [1]. 3. Wyjmij akumulator z zestawu podparcia dłoni i klawiatury [2]. Wymontowywanie i instalowanie komponentów...
- Page 23 Instalowanie akumulatora Kroki 1. Dopasuj otwory na śruby w akumulatorze do otworów w zestawie podparcia dłoni i klawiatury [1]. 2. Wkręć cztery śruby (M2x3) mocujące akumulator do zestawu podparcia dłoni i klawiatury [2]. Wymontowywanie i instalowanie komponentów...
- Page 24 3. Podłącz kabel akumulatora do płyty systemowej. Wymontowywanie i instalowanie komponentów...
-
Page 25: Dysk Twardy
Kolejne kroki 1. Zainstaluj pokrywę dolną. 2. Zainstaluj kartę pamięci 3. Wykonaj procedurę opisaną w części Po zakończeniu serwisowania komputera. Dysk twardy Removing the hard drive assembly Prerequisites 1. Follow the procedure in before working inside your computer 2. Remove the SD memory card 3. - Page 26 Installing the hard drive assembly Steps 1. Align the screw holes on the hard drive assembly with the screw holes on the palm rest and keyboard assembly [1]. 2. Replace the four (M2x4.5) screws that secure the hard drive assembly to the palm rest and keyboard assembly [2]. Wymontowywanie i instalowanie komponentów...
- Page 27 3. Adhere the tape that secures the hard drive cable to the system board [1]. 4. Connect the hard drive cable to the system board [2]. Wymontowywanie i instalowanie komponentów...
-
Page 28: Płyta Io
Next steps 1. Replace the battery cable. 2. Replace the base cover 3. Replace the SD memory card 4. Follow the procedure in after working inside your computer Płyta IO Removing the IO board Prerequisites 1. Follow the procedure in before working inside your computer. - Page 29 Installing the IO board Steps 1. Using the alignment posts, place the I/O board on the palm rest and keyboard assembly [1]. 2. Replace the two (M2x3) screws that secure the I/O board to the palm rest and keyboard assembly [2]. Wymontowywanie i instalowanie komponentów...
- Page 30 3. Adhere the I/O board cable to the palm rest and keyboard assembly [1]. 4. Connect the I/O board cable to the system board and close the latch to secure the cable [2]. Wymontowywanie i instalowanie komponentów...
-
Page 31: Tabliczka Dotykowa
Next steps 1. Replace the hard drive assembly. NOTE: Required for systems with 42 Whr battery 2. Replace the battery. 3. Replace the base cover. 4. Replace the SD memory card. 5. Follow the procedure in after working inside your computer. - Page 32 5. Remove the four (M2x2) screws that secure the touchpad to the palmrest and keyboard assembly [1]. 6. Lift the touchpad off the palmrest and keyboard assembly [2]. Wymontowywanie i instalowanie komponentów...
- Page 33 Instalowanie zestawu tabliczki dotykowej Informacje na temat zadania UWAGA Upewnij się, że tabliczka dotykowa jest dopasowana do prowadnic na zestawie podparciu dłoni i klawiatury, a odstęp po obu stronach tabliczki dotykowej jest taki sam. Kroki 1. Umieść tabliczkę dotykową w gnieździe zestawu podparcia dłoni i klawiatury [1]. 2.
- Page 34 5. Umieść wspornik tabliczki dotykowej w gnieździe w zestawie podparcia dłoni i klawiatury [1]. 6. Wkręć trzy śruby (M2x2) mocujące wspornik tabliczki dotykowej do zestawu podparcia dłoni i klawiatury [2] i przyklej taśmę mocującą wspornik do zestawu. Wymontowywanie i instalowanie komponentów...
-
Page 35: Moduły Pamięci
Kolejne kroki 1. Zainstaluj akumulator. 2. Zainstaluj pokrywę dolną. 3. Zainstaluj kartę pamięci 4. Wykonaj procedurę opisaną w części Po zakończeniu serwisowania komputera. Moduły pamięci Removing the memory module Prerequisites 1. Follow the procedure in before working inside your computer 2. -
Page 36: Sim Card
NOTE: If you do not hear the click, remove the memory module and reinstall it. Next steps 1. Replace the battery cable. 2. Replace the base cover 3. Replace the SD memory card 4. Follow the procedure in after working inside your computer SIM Card Removing the SIM card Prerequisites... - Page 37 Installing the SIM card Steps 1. Open the latch that covers the SIM card slot to release it from the system [1]. 2. Insert a needle in the slot and push it to eject the SIM card tray [2]. 3. Pull the SIM card try and place the SIM card on the SIM cad tray [3] and [4]. 4.
-
Page 38: Karta Sieci Wlan
5. Follow the procedures in After working inside your computer. Karta sieci WLAN Removing the WLAN card Prerequisites 1. Follow the procedure in before working inside your computer 2. Remove the SD memory card 3. Remove the base cover 4. Disconnect the battery cable. - Page 39 Installing the WLAN card About this task CAUTION: To avoid damage to the WLAN card, do not place any cables under it. Steps 1. Insert the WLAN card into the connector on the system board [1]. 2. Connect the WLAN cables to the connectors on the WLAN card [2]. 3.
-
Page 40: Dysk Ssd / Pamięć Intel Optane
Next steps 1. Disconnect the battery cable. 2. Replace the base cover. 3. Replace the SD memory card. 4. Follow the procedure in after working inside your computer. Dysk SSD / pamięć Intel Optane Removing the M.2 2280 Solid-state drive or Intel Optane memory— Optional Prerequisites NOTE:... - Page 41 3. Slide and remove the thermal plate from the solid-state drive/Intel Optane card slot [3]. 4. Remove the single (M2x2) screw that secures the solid-state drive/Intel Optane card to the palmrest and keyboard assembly [1]. 5. Slide and lift the solid-state drive/Intel Optane card off the palmrest and keyboard assembly [2]. Wymontowywanie i instalowanie komponentów...
- Page 42 Installing the M.2 2280 Solid-state drive or Intel Optane memory - Optional Steps 1. Slide and insert the tab solid-state drive/Intel Optane card into the solid-state drive/Intel Optane card slot [1]. 2. Replace the single (M2x2) screw that secures the solid-state drive/Intel Optane card to the palmrest and keyboard assembly [2]. Wymontowywanie i instalowanie komponentów...
- Page 43 Wymontowywanie i instalowanie komponentów...
- Page 44 3. Align and replace the thermal plate on the solid-state drive/Intel Optane card slot [1,2]. 4. Replace the single (M2x3) screw that secures the thermal plate to the palmrest and keyboard assembly [3]. Next steps 1. Replace the battery cable. 2.
- Page 45 Installing the Solid-state drive bracket Steps 1. Align and replace the solid-state drive bracket on the palmrest and keyboard assembly [1]. 2. Replace the single (M2x3) screw that secures the solid-state drive bracket to the palmrest and keyboard assembly [2]. Wymontowywanie i instalowanie komponentów...
- Page 46 Next steps 1. Replace the battery cable. 2. Replace the base cover 3. Replace the SD memory card 4. Follow the procedure in after working inside your computer Removing the M.2 2230 Solid-state drive Prerequisites 1. Follow the procedure in before working inside your computer 2.
- Page 47 4. Remove the single (M2x2) screw that secures the solid-state drive to the solid-state drive bracket [1]. 5. Slide and remove the solid-state drive off the solid-state drive slot [2]. Wymontowywanie i instalowanie komponentów...
- Page 48 Installing the M.2 2230 Solid-state drive Steps 1. Insert the solid-state drive into the solid-state drive slot on the system board [1]. 2. Replace the single (M2x3) screw that secures the solid-state drive to the solid-state drive bracket [2]. Wymontowywanie i instalowanie komponentów...
- Page 49 3. Align and replace the thermal plate on the solid-state drive [1,2]. 4. Replace the single (M2x3) screw that secures the thermal plate to the palmrest and keyboard assembly [3]. Wymontowywanie i instalowanie komponentów...
-
Page 50: Głośniki
Next steps 1. Replace the battery cable. 2. Replace the base cover 3. Replace the SD memory card 4. Follow the procedure in after working inside your computer Głośniki Removing the speakers Prerequisites 1. Follow the procedure in before working inside your computer 2. - Page 51 3. Lift the speakers, along with the cable, off the palm rest and keyboard assembly. Wymontowywanie i instalowanie komponentów...
- Page 52 Installing the speakers About this task NOTE: If the rubber grommets are pushed out when removing the speakers, push them back in before replacing the speakers. Steps 1. Using the alignment posts and rubber grommets, place the speakers in the slots on the palm rest and keyboard assembly. Wymontowywanie i instalowanie komponentów...
- Page 53 2. Route the speaker cable through the routing guides on the palm rest and keyboard assembly [1]. 3. Connect the speaker cable to the system board [2]. Wymontowywanie i instalowanie komponentów...
-
Page 54: Wentylator Systemowy
Next steps 1. Replace the battery cable. 2. Replace the base cover 3. Replace the SD memory card 4. Follow the procedure in after working inside your computer Wentylator systemowy Removing the system fan Prerequisites 1. Follow the procedure in before working inside your computer. - Page 55 2. Unroute the VGA board cable and the display cable from the routing guides on the fan [1]. 3. Disconnect the fan cable from the system board [2]. 4. Remove the two (M2x3) screws that secure the fan to the palmrest and keyboard board assembly [1]. Wymontowywanie i instalowanie komponentów...
- Page 56 5. Lift the fan off the palmrest and keyboard board assembly [2]. Installing the system fan Steps 1. Align the screw holes on the fan with the screw holes on to the palm rest and keyboard board assembly [1]. 2. Replace the two (M2x3) screws that secure the fan to the palm rest and keyboard board assembly [2]. Wymontowywanie i instalowanie komponentów...
- Page 57 3. Connect the fan cable to the system board [1]. 4. Route the VGA board cable and the display cable through the routing guides on the fan [2]. Wymontowywanie i instalowanie komponentów...
-
Page 58: Radiator
5. Connect the VGA board cable [1], and the display cable [2, 3] to the system board. Next steps 1. Replace the battery. 2. Replace the base cover. 3. Replace the SD memory card. 4. Follow the procedure in after working inside your computer. - Page 59 Instalowanie radiatora — konfiguracja UMA Kroki 1. Umieść radiator na płycie systemowej i dopasuj otwory na śruby w radiatorze do otworów w płycie systemowej [1]. 2. W kolejności wskazanej na radiatorze dokręć cztery śruby mocujące radiator do płyty systemowej [2]. Wymontowywanie i instalowanie komponentów...
- Page 60 Kolejne kroki 1. Zainstaluj akumulator. 2. Zainstaluj pokrywę dolną. 3. Zainstaluj kartę pamięci 4. Wykonaj procedurę opisaną w części Po zakończeniu serwisowania komputera. Wymontowywanie radiatora — konfiguracja z autonomiczną kartą graficzną Wymagania 1. Wykonaj procedurę przedstawioną w sekcji Przed przystąpieniem do serwisowania komputera.
- Page 61 Instalowanie radiatora — konfiguracja z autonomiczną kartą graficzną Kroki 1. Umieść radiator na płycie systemowej i dopasuj otwory na śruby w radiatorze do otworów w płycie systemowej [1]. 2. W kolejności wskazanej na radiatorze dokręć siedem śrub mocujących radiator do płyty systemowej [2]. Wymontowywanie i instalowanie komponentów...
-
Page 62: Karta Rozszerzeń Vga
Kolejne kroki 1. Zainstaluj akumulator. 2. Zainstaluj pokrywę dolną. 3. Zainstaluj kartę pamięci 4. Wykonaj procedurę opisaną w części Po zakończeniu serwisowania komputera. Karta rozszerzeń VGA Removing the VGA daughterboard Prerequisites 1. Follow the procedure in before working inside your computer. - Page 63 3. Remove the two (M2x3) screws that secure the VGA daughterboard to the palmrest and keyboard assembly [1]. 4. Lift the VGA daughterboard away from the system [2]. Wymontowywanie i instalowanie komponentów...
- Page 64 Instalowanie karty rozszerzeń VGA Kroki 1. Umieść kartę rozszerzeń VGA i wyrównaj otwory na śruby w karcie z otworami w zestawie podparcia dłoni i klawiatury [1]. 2. Wkręć dwie śruby (M2x3) mocujące kartę rozszerzeń VGA do zestawu podparcia dłoni i klawiatury [2]. 3.
-
Page 65: Płyta Przycisku Zasilania
Kolejne kroki 1. Zainstaluj akumulator. 2. Zainstaluj pokrywę dolną. 3. Zainstaluj kartę pamięci 4. Wykonaj procedurę opisaną w części Po zakończeniu serwisowania komputera. płyta przycisku zasilania Removing the power button board with optional fingerprint reader Prerequisites 1. Follow the procedure in before working inside your computer. - Page 66 4. Remove the single (M2x3) screw that secures the power button board to the palmrest and keyboard assembly [1]. 5. Lift the power button board, along with the cable off the palmrest and keyboard assembly [2]. Wymontowywanie i instalowanie komponentów...
- Page 67 Installing the power button board with optional fingerprint reader Steps 1. Place the power-button board into the slot on the palmrest and keyboard assembly [1]. 2. Replace the single (M2x3) screw that secures the power button board to the palmrest and keyboard assembly [2]. 3.
-
Page 68: Płyta Systemowa
Next steps 1. Replace the display assembly. 2. Replace the system fan. 3. Replace the battery. 4. Replace the base cover. 5. Replace the SD memory card. 6. Follow the procedure in after working inside your computer. Płyta systemowa Removing the system board Prerequisites 1. - Page 69 a) Power button board [1]. b) Fingerprint reader (optional) [2]. c) IO board [3]. d) Touchpad [4]. e) Keyboard [5]. 2. Disconnect the following cables from the system board: a) DC-in [1, 2]. b) Speaker [3]. Wymontowywanie i instalowanie komponentów...
- Page 70 3. Remove the three (M2x3) screws and two (M2x2) screws that secure the system board to the palmrest and keyboard assembly [1]. 4. Lift the system board off the palm-rest and keyboard assembly [2]. Wymontowywanie i instalowanie komponentów...
- Page 71 Installing the system board Steps 1. Align the screw hole on the system board with the screw hole on the palmrest and keyboard assembly [1]. 2. Replace the three (M2x3) screws and two (M2x2) screws that secure the system board to the palmrest and keyboard assembly [2]. Wymontowywanie i instalowanie komponentów...
- Page 72 3. Connect the following cables to the system board: a) DC-in [1, 2]. b) Speaker [3]. Wymontowywanie i instalowanie komponentów...
- Page 73 4. Connect the following cables to the system board: a) Power button board [1]. b) Fingerprint reader (optional) [2]. c) IO board [3]. d) Touchpad [4]. e) Keyboard [5]. Wymontowywanie i instalowanie komponentów...
-
Page 74: Zestaw Wyświetlacza
Next steps 1. Replace the display assembly. 2. Replace the heatsink. 3. Replace the system fan. 4. Replace the SSD. 5. Replace the Memory. 6. Replace the WLAN. 7. Replace the battery. 8. Replace the base cover. 9. Replace the SD memory card. - Page 75 3. Unroute the display cable from the routing guides on the palmrest and keyboard assembly [1]. 4. Remove the six (M2.5x5) screws that secure the left and right hinges to the system board, and palmrest and keyboard assembly [2]. Wymontowywanie i instalowanie komponentów...
- Page 76 5. Lift the palmrest and keyboard assembly at an angle [1]. 6. Continue to lift the palmrest and keyboard assembly until it separates from the hinges [2]. Wymontowywanie i instalowanie komponentów...
- Page 77 7. Slide and remove the palmrest and keyboard assembly off the display assembly. Wymontowywanie i instalowanie komponentów...
- Page 78 8. After performing all the preceding steps, you are left with display assembly. Installing the display assembly About this task NOTE: Ensure that the hinges are opened to the maximum before replacing the display assembly on the palmrest and keyboard assembly. Steps 1.
- Page 79 2. Press the hinges down on the system board, and palmrest and keyboard assembly [1]. 3. Seat the palmrest and keyboard assembly on the display assembly [2]. Wymontowywanie i instalowanie komponentów...
- Page 80 4. Replace the six (M2.5x5) screws that secure the left and right hinges to the system board, and palmrest and keyboard assembly [1]. 5. Route the display cable through the routing guides on the palmrest and keyboard assembly [2]. Wymontowywanie i instalowanie komponentów...
- Page 81 6. Affix the antenna cables to the system board [1]. 7. Connect the display cable to the connector on the system board [2]. Wymontowywanie i instalowanie komponentów...
-
Page 82: Osłona Wyświetlacza
Next steps 1. Replace the WLAN. 2. Replace the battery. 3. Replace the base cover. 4. Replace the SD memory card. 5. Follow the procedure in after working inside your computer. Osłona wyświetlacza Wymontowywanie oprawy wyświetlacza Wymagania 1. Wykonaj procedurę przedstawioną w sekcji Przed przystąpieniem do serwisowania komputera. - Page 83 3. Zdejmij osłonę z zestawu wyświetlacza. Wymontowywanie i instalowanie komponentów...
- Page 84 Instalowanie osłony wyświetlacza Kroki 1. Dopasuj osłonę wyświetlacza do tylnej pokrywy wyświetlacza. Wymontowywanie i instalowanie komponentów...
- Page 85 2. Delikatnie wciśnij osłonę wyświetlacza na miejsce. Wymontowywanie i instalowanie komponentów...
-
Page 86: Panel Wyświetlacza
Kolejne kroki 1. Zainstaluj zestaw wyświetlacza 2. Zainstaluj kartę sieci WLAN. 3. Zainstaluj akumulator. 4. Zainstaluj pokrywę dolną. 5. Zainstaluj kartę pamięci 6. Wykonaj procedurę opisaną w części Po zakończeniu serwisowania komputera. Panel wyświetlacza Wymontowywanie panelu wyświetlacza Wymagania 1. Wykonaj procedurę przedstawioną w sekcji Przed przystąpieniem do serwisowania komputera. - Page 87 3. Odklej taśmę mocującą kabel wyświetlacza do tyłu panelu wyświetlacza [1]. 4. Otwórz zatrzask i odłącz kabel wyświetlacza od złącza kabla panelu wyświetlacza [2]. 5. Wyjmij panel wyświetlacza z pokrywy tylnej wyświetlacza [3]. Wymontowywanie i instalowanie komponentów...
- Page 88 UWAGA Nie ciągnij ani nie odrywaj taśmy elastycznej od panelu wyświetlacza. Nie ma potrzeby oddzielać wsporników od panelu. 6. Po wykonaniu powyższych czynności pozostaje panel wyświetlacza. Wymontowywanie i instalowanie komponentów...
- Page 89 Instalowanie panelu wyświetlacza Kroki 1. Połóż panel wyświetlacza na płaskiej i czystej powierzchni. Wymontowywanie i instalowanie komponentów...
- Page 90 2. Podłącz kabel wyświetlacza do złącza z tyłu panelu wyświetlacza i zamknij zaczep, aby zamocować kabel [1]. 3. Przyklej taśmę mocującą kabel wyświetlacza do tyłu panelu wyświetlacza [2]. 4. Odwróć panel wyświetlacza i umieść go na tylnej pokrywie wyświetlacza [3]. Wymontowywanie i instalowanie komponentów...
- Page 91 5. Dopasuj otwory na śruby w panelu wyświetlacza do otworów w pokrywie tylnej wyświetlacza [1]. 6. Wkręć sześć śrub (M2x2) i dwie śruby (M2x3) mocujące panel wyświetlacza do pokrywy tylnej wyświetlacza [2]. Wymontowywanie i instalowanie komponentów...
-
Page 92: Kabel Wyświetlacza
Kolejne kroki 1. Zainstaluj osłonę wyświetlacza. 2. Zainstaluj zestaw wyświetlacza 3. Zainstaluj kartę sieci WLAN. 4. Zainstaluj akumulator. 5. Zainstaluj pokrywę dolną. 6. Zainstaluj kartę pamięci 7. Wykonaj procedurę opisaną w części Po zakończeniu serwisowania komputera. Kabel wyświetlacza Wymontowywanie kabla wyświetlacza Wymagania 1. - Page 93 Kroki 1. Wyjmij kabel kamery i kabel wyświetlacza z prowadnic w pokrywie tylnej wyświetlacza [1, 2]. 2. Odklej taśmę mocującą kabel kamery [3]. 3. Wyjmij kabel kamery i kabel wyświetlacza z zestawu tylnej pokrywy wyświetlacza. Wymontowywanie i instalowanie komponentów...
- Page 94 Instalowanie kabla wyświetlacza Kroki 1. Umieść kabel wyświetlacza i kabel kamery w tylnej pokrywie wyświetlacza. Wymontowywanie i instalowanie komponentów...
- Page 95 2. Umieść kabel wyświetlacza i kabel kamery w prowadnicach na zestawie pokrywy wyświetlacza i anteny [1, 2]. 3. Przyklej taśmę mocującą kabel kamery [3]. Wymontowywanie i instalowanie komponentów...
-
Page 96: Złącze Zasilacza
Kolejne kroki 1. Zainstaluj panel wyświetlacza. 2. Zainstaluj osłonę wyświetlacza. 3. Zainstaluj zestaw wyświetlacza 4. Zainstaluj kartę sieci WLAN. 5. Zainstaluj akumulator. 6. Zainstaluj pokrywę dolną. 7. Zainstaluj kartę pamięci 8. Wykonaj procedurę opisaną w części Po zakończeniu serwisowania komputera. Złącze zasilacza Removing the power adapter port Prerequisites... - Page 97 Instalowanie gniazda zasilacza Kroki 1. Umieść gniazdo zasilacza we wnęce w zestawie podparcia dłoni i klawiatury [1]. 2. Wkręć śrubę (M2x3) mocującą gniazdo zasilacza do zestawu podparcia dłoni i klawiatury [2]. 3. Podłącz kabel gniazda zasilacza do płyty systemowej [3, 4]. Wymontowywanie i instalowanie komponentów...
-
Page 98: Kamera
Kolejne kroki 1. Zainstaluj kartę sieci WLAN. 2. Zainstaluj akumulator. 3. Zainstaluj pokrywę dolną. 4. Zainstaluj kartę pamięci 5. Wykonaj procedurę opisaną w części Po zakończeniu serwisowania komputera. Kamera Removing the camera Prerequisites 1. Follow the procedure in before working inside your computer 2. - Page 99 Follow the below procedure to remove the camera in systems with the Touch functionality. 4. Peel the tape that secures the camera off the display back-cover [1]. 5. Lift the camera module from the display back-cover [2]. Wymontowywanie i instalowanie komponentów...
- Page 100 Installing the camera Steps 1. Connect the camera cable to the camera module [1]. 2. Route the camera cable through the routing channels [2]. 3. Using the alignment post, adhere the camera module on the display back-cover [3]. Wymontowywanie i instalowanie komponentów...
- Page 101 Following is the procedure to install the camera in systems with the Touch functionality. 4. Align and replace the camera module on the display back-cover [1]. 5. Adhere the tape that secures the camera off the display back-cover [2]. Wymontowywanie i instalowanie komponentów...
-
Page 102: Zestaw Podparcia Dłoni I Klawiatury
Next steps 1. Replace the display panel. 2. Replace the display bezel. 3. Replace the display assembly. 4. Replace the WLAN. 5. Replace the battery. 6. Replace the base cover. 7. Replace the SD memory card. 8. Follow the procedure in after working inside your computer. - Page 103 10. Remove the touch pad assembly 11. Remove the VGA daughter board 12. Remove the power button board 13. Remove the speakers 14. Remove the system fan 15. Remove the heatsink 16. Remove the system board 17. Remove the display assembly About this task After performing the preceding steps, you are left with the palmrest and keyboard assembly.
-
Page 104: Troubleshooting
Kroki 1. Włącz komputer. 2. Kiedy komputer zacznie się uruchamiać i zostanie wyświetlone logo Dell, naciśnij klawisz F12. 3. Na ekranie menu rozruchowego użyj przycisków strzałek w górę i w dół, aby wybrać opcję Diagnostics (Diagnostyka), a następnie naciśnij klawisz Enter. -
Page 105: Diagnostyka
Diagnostyka Tabela 5. Diagnostyka M-BIST L-BIST Przeznaczenie narzędzia Ocenia stan płyty systemowej w celu Sprawdza, czy płyta systemowa dostarcza zasilanie do diagnostycznego dokładniejszego ustalenia przyczyn wyświetlacza LCD, wykonując test szyny zasilania LCD, braku zasilania, braku testu POST lub co umożliwia izolację przyczyn braku sygnału wideo do braku obrazu, co pomaga uniknąć... -
Page 106: Wskaźnik Led Stanu Akumulatora
NOTE: The diagnostic pattern consists of a two-digit number being represented by a first group of LED blinks (1–9) in amber, followed by a 1.5 s pause with the LED off, and then a second group of LED blinks (1–9) in white. This is then followed by a three second pause, with the LED off, before repeating over again. - Page 107 • S0 (WŁĄCZONY) — system jest włączony. • S4 — system zużywa najmniej energii w porównaniu ze wszystkimi innymi stanami uśpienia. System jest prawie w stanie WYŁĄCZONY, spodziewaj się poboru prądu. Dane kontekstowe są zapisane na dysku twardym. • S5 (WYŁĄCZONY) — system jest w stanie wyłączenia. Troubleshooting...
-
Page 108: Uzyskiwanie Pomocy
Informacje na temat zadania Firma Dell oferuje kilka różnych form obsługi technicznej i serwisu, online oraz telefonicznych. Ich dostępność różni się w zależności od produktu i kraju, a niektóre z nich mogą być niedostępne w regionie użytkownika. Aby skontaktować się z działem sprzedaży, pomocy technicznej lub obsługi klienta firmy Dell:...