Table of Contents
Advertisement
Quick Links
Advertisement
Table of Contents

Related Manuals for Brother TJ-4420TN


Summary of Contents for Brother TJ-4420TN
- Page 1 U s e r ' s G u i d e T J - 4 4 2 0 T N / T J - 4 5 2 0 T N / T J - 4 6 2 0 T N / T J - 4 4 2 2 T N / T J - 4 5 2 2 T N TJ-4420TN/TJ-4520TN/TJ-4620TN User's Guide (English) TJ-4422TN/TJ-4522TN Version 02 © 2020 Brother Industries, Ltd. All rights reserved.
- Page 2 ® The Bluetooth word mark and logos are registered trademarks owned by the Bluetooth SIG, Inc. and any use of such marks by Brother Industries, Ltd. is under license. CG Triumvirate is a trademark of Agfa Corporation. CG Triumvirate Bold Condensed font is under license from the Monotype Corporation.
-
Page 3: Table Of Contents
Load Label Roll ..................23 3.4.2 Load External Media ................26 3.4.3 Load the Media in Peeler Mode (Optional for TJ-4420TN/TJ-4520TN/TJ-4620TN) ............29 3.4.4 Load Media in Cutter Mode (Optional for TJ-4420TN/TJ-4520TN/TJ-4620TN) ............33 3.4.5 Load Media in Rewind Mode (For TJ-4422TN/TJ-4522TN) ....36 Improve Print Quality .................. - Page 4 Bluetooth Settings .................. 72 Advanced Settings ..................73 File Manager ....................74 Diagnostic Functions ................... 75 Brother Printer Management Tool (BPM) ............76 Start the BPM ....................76 Auto-Calibrating the Media Sensor using the BPM ........77 Product Specifications ..................78 Recommended microSD Cards ..............
-
Page 5: Introduction
1.2 Additional Product Reference For information on how to write custom programs for your label printer, see the Command Reference on your model's Manuals page at support.brother.com. -
Page 6: Operations Overview
Note Keep the packaging materials in case you must ship the printer. The components included in the box: Label Printer a. TJ-4420TN/TJ-4520TN/TJ-4620TN b. TJ-4422TN/TJ-4522TN Power Cord USB Cable If any components are missing, contact the product manufacturer's customer service or your... -
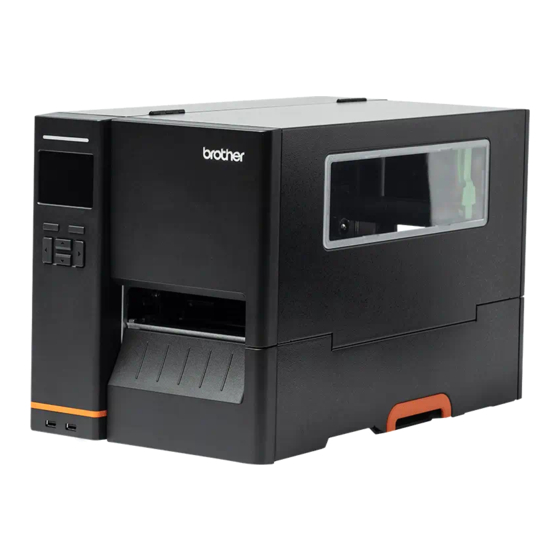
Page 7: Printer Overview
2.2 Printer Overview 2.2.1 Front View TJ-4420TN/TJ-4520TN/TJ-4620TN Power LED Selection Buttons Navigation Buttons USB Host Ports Media View Window Media Output Slot Media Cover Handle Media Cover... - Page 8 TJ-4422TN/TJ-4522TN Power LED Touchscreen Selection Buttons Navigation Buttons USB Host Ports Media View Window Media Output Slot Media Cover Handle Media Cover Base Cover...
-
Page 9: Interior View
2.2.2 Interior View TJ-4420TN/TJ-4520TN/TJ-4620TN Ribbon Rewind Spindle Print Head Tension Position Adjustment Slider Print Head Tension Adjustment Knob Print Head Release Lever Ribbon Supply Spindle Label Roll Guard Label Supply Spindle External Label Entry Slot Damper Print Head Platen Roller... - Page 10 TJ-4422TN/TJ-4522TN Ribbon Rewind Spindle Print Head Tension Position Adjustment Slider Print Head Tension Adjustment Knob Print Head Release Lever Base Cover Ribbon Supply Spindle Media Level Sensor Label Roll Guard Label Supply Spindle Media Guide Bar and Rear Label Guide Media Rewind Guide Media Rewind Spindle External Label Entry Slot...
-
Page 11: Rear View
2.2.3 Rear View TJ-4420TN/TJ-4520TN/TJ-4620TN External Label Entry Slot RS-232C Serial Port Ethernet Port USB Port (USB 2.0/Hi-Speed Mode) microSD Card Slot Wi-Fi and Bluetooth Interface Expansion Port Power Switch Power Cord Socket For the recommended microSD card types, see section 9.1 Recommended microSD... - Page 12 TJ-4422TN/TJ-4522TN External Label Entry Slot Wi-Fi and Bluetooth Interface Expansion Port RS-232C Serial Port Ethernet Port USB Port (USB 2.0/Hi-Speed Mode) microSD Card Slot Power Switch Power Cord Socket For the optional WLAN / BT Interface (PA-WB-001). For the recommended microSD card types, see section 9.1 Recommended microSD Cards.
-
Page 13: Control Panel
2.3 Control Panel TJ-4420TN/TJ-4520TN/TJ-4620TN TJ-4422TN/TJ-4522TN... -
Page 14: Led Indicators And Buttons
2.3.1 LED Indicators and Buttons LED Indications LED Color Description Green (Lit) The power is on and the printer is ready to use. Green (Flashing) The printer is downloading data from a computer. The printer is paused. Amber (Lit) The printer is removing data from memory. Red (Lit) The Print Head is open or there is a Cutter error. -
Page 15: Home Screen Icons
2.3.2 Home Screen Icons Printer Status Icons Icon Indication Wi-Fi device is ready (Available when the Wi-Fi Interface is installed) Bluetooth device is ready (Available when the Bluetooth Interface is installed) Ethernet is connected Media capacity Ribbon capacity (m) Security lock Option Icons Icon Function... -
Page 16: Screen Overview
2.3.3 Screen Overview Select the icons to access printer features and change settings. TJ-4420TN/TJ-4520TN/TJ-4620TN TJ-4422TN/TJ-4522TN... - Page 17 Access the Main Menu TJ-4420TN/TJ-4520TN/TJ-4620TN Make sure the printer’s LCD displays “Ready”. If not, press the left Selection button. To select an option on the Main Menu, use the Navigation buttons to browse the options and then press the button under the...
- Page 18 TJ-4422TN/TJ-4522TN Make sure the printer’s Touchscreen displays “Ready”. If not, tap the Menu icon Note You can also use the Control Panel buttons. Use the Navigation buttons to select the Menu icon, and then press the Selection button under the icon.
- Page 19 Main Menu Overview Use the Main Menu options to configure various printer settings without connecting the printer to a computer. Icon Option Description Setting Configure the printer's FBPL and ZPL2 settings. Sensor Calibrate the selected media sensor. We recommend calibrating the sensor every time you change the media. Interface Configure the printer interface settings.
- Page 20 Favorites (TJ-4422TN/TJ-4522TN) Add frequently used Main Menu options to "Favorites" for quick access. To display the "Favorites" list, tap the Favorites icon To add an option to the "Favorites" list: Tap and hold the option you want to add to favorites until “Join Favorites” appears. Tap “Yes”.
- Page 21 To remove an option from the "Favorites" list: Tap and hold the option you want to remove from favorites until “Delete Favorites” appears. Tap “Yes”.
-
Page 22: Set Up Your Printer
3. Set Up Your Printer 3.1 Connect the Power Cord 1. Place the printer on a flat, secure surface. 2. Make sure the Power Switch is in the OFF position. 3. Connect the printer to the computer using a USB cable. 4. -
Page 23: Load The Ribbon
3.2 Load the Ribbon Unless indicated otherwise, the illustrations in this User's Guide show the TJ-4422TN/TJ-4522TN. Ribbon loading path Ink coated inside Ink coated outside 1. Open the Media Cover. 2. Install the ribbon onto the Ribbon Supply Spindle. - Page 24 3. Push the Print Head Release Lever to open the Print Head. 4. Thread the ribbon under the ribbon guide bar and through the ribbon sensor slot following the loading path printed on the Media Cover. 5. Wind the Ribbon Rewind Spindle counterclockwise about three to five turns until the ribbon is smooth, flat, and without wrinkles.
- Page 25 6. Close the Print Head by pushing down on both sides of the Print Head Release Lever.
-
Page 26: Remove Used Ribbon
3.3 Remove Used Ribbon Unless indicated otherwise, the illustrations in this User's Guide show the TJ-4422TN/TJ-4522TN. 1. Cut the used ribbon with scissors along the dotted line. 2. While pushing the Ribbon Release Button (1), remove the ribbon from the Ribbon Rewind Spindle, and discard it. -
Page 27: Load The Media
3.4 Load the Media Unless indicated otherwise, the illustrations in this User's Guide show the TJ-4422TN/TJ-4522TN. 3.4.1 Load Label Roll Label Roll loading path 1. Open the Media Cover. 2. Slide the Label Roll Guard horizontally to the end of the Label Supply Spindle, and then flip down the Label Roll Guard. - Page 28 (TJ-4422TN/TJ-4522TN) To detect the remaining amount of the media in the label roll, slide the Media Level Sensor up. 4. (TJ-4420TN/TJ-4520TN/TJ-4620TN) (TJ-4420TN/TJ-4520TN/TJ-4620TN) Push the Print Head Release Lever and thread the label through the Damper, Media Sensor, and Front Label Guide to install the media.
- Page 29 5. Move the Media Sensor by adjusting the Media Sensor Position Adjustment Knob. Make sure the position of the Gap or Black Mark Sensor matches the position of the Gap/Black Mark on the label roll. Black Mark Sensor (shown as Gap Sensor (shown as 6.
-
Page 30: Load External Media
3.4.2 Load External Media Unless indicated otherwise, the illustrations in this User's Guide show the TJ-4422TN/TJ-4522TN. Fan-fold label loading path External media loading path 1. Open the Media Cover. - Page 31 2. Insert the media through the External Label Entry Slot. 3. (TJ-4420TN/TJ-4520TN/TJ-4620TN) (TJ-4420TN/TJ-4520TN/TJ-4620TN) Push the Print Head Release Lever and thread the label through the Damper, Media Sensor, and Front Label Guide to install the media. Align the Label Roll Guard with the label width.
- Page 32 4. Move the Media Sensor by adjusting the Media Sensor Position Adjustment Knob. Make sure the position of the Gap or Black Mark Sensor matches the position of the Gap/Black Mark on the label. Black Mark Sensor (shown as Gap Sensor (shown as 5.
-
Page 33: Load The Media In Peeler Mode (Optional For Tj-4420Tn/Tj-4520Tn/Tj-4620Tn)
3.4.3 Load the Media in Peeler Mode (Optional for TJ-4420TN/TJ-4520TN/TJ-4620TN) 1. Open the Media Cover. 2. Slide the Label Roll Guard horizontally to the end of the Label Supply Spindle, and then flip down the Label Roll Guard. 3. Place the label roll on the Label Supply Spindle and then flip the Label Roll Guard upwards to hold it in place. - Page 34 4. Push the Print Head Release Lever and thread the label through the Damper, Media Sensor, and Front Label Guide to install the media. 5. Move the Media Sensor by adjusting the Media Sensor Position Adjustment Knob. Make sure the position of the Gap or Black Mark Sensor matches the position of the Gap/Black Mark on the label roll.
- Page 35 7. Close the Print Head on both sides and make sure it locks into place. 8. Set the media sensor type and calibrate the selected sensor. 9. Perform the calibration using the BPM. For more information about sensor calibration, see section 8.2 Auto-Calibrating the Media Sensor using the BPM.
- Page 36 12. Thread the liner through the Label Peeler Cover Slot. 13. Adhere the liner to the Media Rewind Spindle. Wind the liner on the Media Rewind Spindle until the liner is fully stretched. 14. Lock the Print Head Release Lever and set the print mode to "Peel Off"...
-
Page 37: Load Media In Cutter Mode (Optional For Tj-4420Tn/Tj-4520Tn/Tj-4620Tn)
3.4.4 Load Media in Cutter Mode (Optional for TJ-4420TN/TJ-4520TN/TJ-4620TN) 1. Open the Media Cover. 2. Slide the Label Roll Guard horizontally to the end of the Label Supply Spindle, and then flip down the Label Roll Guard. 3. Place the label roll on the Label Supply Spindle and then flip the Label Roll Guard upwards to hold it in place. - Page 38 5. Feed the media through the Label Cutter Cover Slot. 6. Move the Media Sensor by adjusting the Media Sensor Position Adjustment Knob. Make sure the position of the Gap or Black Mark Sensor matches the position of the Gap/Black Mark on the label roll.
- Page 39 8. Close the Print Head on both sides and make sure it locks into place. 9. Set the media sensor type and calibrate the selected sensor. 10. Perform the calibration using the BPM. For more information about sensor calibration, see section 8.2 Auto-Calibrating the Media Sensor using the BPM.
-
Page 40: Load Media In Rewind Mode (For Tj-4422Tn/Tj-4522Tn)
3.4.5 Load Media in Rewind Mode (For TJ-4422TN/TJ-4522TN) 1. Open the Media Cover. 2. Slide the Label Roll Guard horizontally to the end of the Label Supply Spindle, and then flip down the Label Roll Guard. - Page 41 3. Place the label roll on the Label Supply Spindle and then flip the Label Roll Guard upwards to hold it in place. Note • Make sure the label print side is facing up. • To detect the remaining amount of the media in the label roll, slide the Media Level Sensor up.
- Page 42 6. Adjust the Front Label Guide to fix the media position. Note • Make sure you thread the media through the Media Sensor. • The sensor locations are marked by the triangle mark (Gap Sensor) and the arrow mark (Black Mark Sensor) at the sensor housing.
- Page 43 11. Install the Paper Core onto the Media Rewind Spindle. Note The paper core is not included in the box. Use the one you have. 12. Open the Print Head Release Lever and Label Guide Bar Release Lever, and pull approximately 650 mm of the label roll through the Media Output Slot.
- Page 44 15. Adjust the Media Rewind Guide to fit the label width. 16. Close the Print Head Release Lever and Base Cover.
-
Page 45: Improve Print Quality
4. Improve Print Quality 4.1 Adjust Print Head Tension to Improve Print Quality Unless indicated otherwise, the illustrations in this User's Guide show the TJ-4422TN/TJ-4522TN. For the best print quality, adjust the Print Head using the Print Head Tension Adjustment Knob. -
Page 46: Adjust Ribbon Tension To Avoid Wrinkled Labels
4.2 Adjust Ribbon Tension to Avoid Wrinkled Labels Wrinkles can occur due to many factors, including media width and thickness, Print Head pressure balance, ribbon film characteristics, and print density/darkness settings. 4.2.1 Adjust Ribbon Tension To avoid wrinkled labels, adjust the ribbon tension using the Ribbon Tension Adjustment Screw. - Page 47 The Ribbon Tension Adjustment Screw has five levels for adjustment. Use a flat blade screwdriver to change the ribbon tension level. Ribbon Tension Adjustment Scale Ribbon Tension Adjustment Screw The Print Head Tension Adjustment Knob has five setting levels. Turn the Print Head Tension Adjustment Knob and adjust the Print Head Tension Position Adjustment Slider to adjust the tension and position of the Print Head.
-
Page 48: Change The Print Density/Darkness Settings
1. Turn the Ribbon Tension 1. Turn the Ribbon Tension Adjustment Screw clockwise once Adjustment Screw per level on the Ribbon Tension counterclockwise once per level Adjustment Scale and print the on the Ribbon Tension label again to check if the wrinkle Adjustment Scale and print the is gone. -
Page 49: Try Different Media
4.2.3 Try Different Media Make sure you load the correct paper. Note For more information about the supported paper width and thickness, see section 9. Product Specifications. Note If the wrinkles continue to occur, contact the product manufacturer's customer service or your local dealer for service. -
Page 50: Printing
Note The model name and serial number are located on the back of the printer. Make sure you download the correct driver for your model: • TJ-4420TN/TJ-4422TN: Brother TJ-44 • TJ-4520TN/TJ-4522TN: Brother TJ-45 • TJ-4620TN: Brother TJ-46 The driver installation method depends on the connection type: USB Connection (Windows/Mac/Linux) ... -
Page 51: Usb Connection (Windows/Mac/Linux)
Connect your printer to the computer using a USB cable. Visit support.brother.com, go to your model's Downloads page, and download the latest printer driver and software. Run the Seagull Driver Wizard application and select Install printer drivers and USB. -
Page 52: Bluetooth Connection (Windows)
5.1.2 Bluetooth Connection (Windows) Note To use Bluetooth, an optional WLAN / BT Interface (PA-WB-001) is required. Check the Bluetooth Local Name: BPM: Connect the printer to the computer using a USB cable. Click Printer Configuration > Bluetooth. LCD: Select Interface > Bluetooth. ... -
Page 53: Wi-Fi Network Connection (Windows)
Specify SSID, Security, and Password. When finished, the Wi-Fi icon and printer's IP address appear on the screen. Visit support.brother.com, go to your model's Downloads page, and download the latest printer driver and software. Run the Seagull Driver Wizard application and select Install printer drivers and Network. -
Page 54: Wired Network Connection (Windows)
Connect both the printer and the computer to your router/access point using LAN cables. The printer automatically receives a default IP address and displays it on the screen. Visit support.brother.com, go to your model's Downloads page, and download the latest printer driver and software. -
Page 55: Create And Print Labels Using Bartender
5.2 Create and Print Labels Using BarTender BarTender is a label creation tool, which can be downloaded for free from the product's page at support.brother.com. 1. Launch BarTender. • For Windows 10, Windows Server 2016, or Windows Server 2019: Start > BarTender 2016 R7 UltraLite > click BarTender UltraLite, or double-click the BarTender UltraLite icon on the desktop. -
Page 56: Operation
6. Operation 6.1 Power-on Utilities There are various power-on utilities to set up and test the printer's functions. Use power-on utilities to set sensor calibration, self-test, and factory default functions. Turn off the label printer. Press and hold the right Selection button, and then turn on the Power Switch. Release the button when the function you want to set or test appears on the screen. -
Page 57: Ribbon And Gap/Black Mark Sensor Calibration
To select the sensor for calibration, send the correct command to the printer: For the Gap Sensor: send the GAP command For the Black Mark Sensor: send the BLINE command For more information about the available commands, see the FBPL Command Reference on your model's Manuals page at support.brother.com. -
Page 58: Gap/Black Mark Sensor Calibration, Self-Test, And Entering Dump Mode
To select the sensor for calibration, send the correct command to the printer: For the Gap Sensor: send the GAP command For the Black Mark Sensor: send the BLINE command For more information about the available commands, see the FBPL Command Reference on your model's Manuals page at support.brother.com. - Page 59 Self-test Print the printer configuration after you run Gap/Black Mark Sensor calibration. The self-test printout lists the printer's configuration and available memory, and can indicate if there is any dot damage on the heater component. Self-test printout Model name Firmware version Firmware checksum Printer serial number...
- Page 60 Self-test printout Bluetooth configuration Printer name Mac Address DHCP IP Address Subnet Mask Gateway RAW Port Wi-Fi configuration Number of downloaded files Total and available memory space Print Head check pattern...
- Page 61 Dump Mode Note Dump Mode requires 101.5 mm wide paper. To resume normal printing, turn the printer off and then on again. The printer enters Dump Mode after printing the printer configuration. Dump Mode allows users to verify and debug the printer's programs. The characters in the left column are received from the printer's system and those in the right column are their hexadecimal representation.
-
Page 62: Printer Initialization
6.1.3 Printer Initialization Printer initialization clears the printer's DRAM and restores its factory settings. Turn off the printer. Press and hold the right Selection button, and then turn on the Power Switch. Release the button when Factory Default appears on the screen. Note The LED color will change as follows: Amber (lit) ... -
Page 63: Media Sensor Calibration (For The Black Mark Sensor)
6.1.4 Media Sensor Calibration (for the Black Mark Sensor) Turn off the printer. Press and hold the right Selection button, and then turn on the Power Switch. Release the button when Bline Calibration appears on the screen. Note The LED color will change as follows: Amber (lit) ... -
Page 64: Skip The Auto.bas Program
6.1.6 Skip the AUTO.BAS Program You can upload the AUTO.BAS program to the printer's flash memory so that it runs automatically at startup, but if you do not want it to run automatically, follow these steps: Turn off the printer. Press and hold the right Selection button, and then turn on the Power Switch. -
Page 65: Change Printer Settings
7. Change Printer Settings 7.1 Setting Menu TJ-4420TN/TJ-4520TN/TJ-4620TN 1. From the Main Menu, select Setting. 2. Select the programming language you want in Command Set. 3. Press the button under the icon. TJ-4422TN/TJ-4522TN 1. In the Main Menu, tap Setting. -
Page 66: Fbpl Settings
Shift X Cutter Mode Shift Y Reference X Reference Y Code Page Country Available for TJ-4420TN, TJ-4520TN, and TJ-4620TN only. Setting Description Set up the print speed. Settings range from: 2 - 14 for 203 dpi (Default: 6) Speed ... - Page 67 Setting Description Set the Print Mode. Print Mode Description Batch Mode When the image is printed, the Gap/Black Mark is fed through the tear plate for tear away. None The top of the next label is aligned with the Print Print Mode Head burn line (Tear Off Mode).
-
Page 68: Zpl2 Settings
300 -> 600 Format Convert 200 -> 600 150 -> 600 150 -> 300 Available for TJ-4420TN, TJ-4520TN, and TJ-4620TN only. Setting Description Set up the print darkness. Settings range from 0 to 30. You may need Darkness to adjust the print density based on the selected media. - Page 69 Setting Description Set up the printer feed speed. Settings range from: 2 - 8 for 203 dpi Slew Speed 2 - 8 for 300 dpi 2 - 6 for 600 dpi Set up the printer backfeed speed. Settings range from: 2 - 3 for 203 dpi BackFeed Speed ...
- Page 70 Setting Description Set the media action when you close the Print Head. Action Description Feed The printer ejects one label. The printer calibrates the sensor levels, Calibration Head Close determines the label length, and feeds one label. The printer determines the label length and feeds Length the label.
-
Page 71: Sensor Settings
7.2 Sensor Settings We recommend calibrating the sensors every time you change the media. Black Mark Auto Calibration Continuous Preprint Manual Standard Black Mark Calibration Continuous Auto Threshold Menu Sensor Detect Fixed Maximum Length Back Side BMark Transmitter Print Side Min. -
Page 72: Interface Settings
7.3 Interface Settings Set the printer interface settings. Serial Ethernet Menu Interface Wi-Fi Bluetooth 7.3.1 Serial Communication Settings Set the printer RS-232 settings. 9600 bps 4800 bps 2400 bps 1200 bps Baud Rate 115200 bps 57600 bps 38400 bps 19200 bps None Menu Interface... -
Page 73: Ethernet Settings
7.3.2 Ethernet Settings Configure your printer's Ethernet (wired) connection and check its status. When the Ethernet is connected, the Ethernet icon and IP address appear on the screen as shown below. Status Menu Interface Ethernet Configure Item Description Status Check the Ethernet IP address and Mac address setting status. DHCP: Enable (On) or disable (Off) the Dynamic Host Configuration Configure... -
Page 74: Wi-Fi Settings
To use Wi-Fi, the optional WLAN / BT Interface (PA-WB-001) is required. Configure your printer's Wi-Fi connection and check its status. To use this feature, set up the Enterprise configuration using the Brother Printer Management Tool (BPM). For more information on setting Wi-Fi using the BPM, see the Brother Printer Management Tool Quick Start Guide on your model's Manuals page at support.brother.com. - Page 75 Item Description Status Check the Wi-Fi IP address and Mac address setting status. DHCP: Enable (On) or disable (Off) the Dynamic Host Configuration Configure Protocol (DHCP) network protocol. Static IP: Set the printer’s IP address, subnet mask, and gateway. SSID Set the SSID (Network Name).
-
Page 76: Bluetooth Settings
7.3.4 Bluetooth Settings Note To use Bluetooth, the optional WLAN / BT Interface (PA-WB-001) is required. Configure your printer's Bluetooth connection, check its status, and reset the local name. Enable the Bluetooth feature to allow your mobile device to discover and connect your printer. -
Page 77: Advanced Settings
7.4 Advanced Settings Language Printer Information Initialization Display Brightness Date Format Touchscreen Calibration Date Date & Time Time Format Time Menu Advanced Menu Lock Menu Password Security Favorites Lock Ribbon Low Warning Favorites Password Warning Print Head Maintn Reset Counter Interval Key Sound Contact Us... -
Page 78: File Manager
You must enable the “TPH warning lock” to use it. The default setting is 1 km. Key Sound Enable or disable the button press sound. Displays a QR code to access the Brother Support website at Contact Us support.brother.com using a mobile device. -
Page 79: Diagnostic Functions
7.6 Diagnostic Functions Print Config. Dump Mode Menu Diagnostic Print Head Diag Gap Display Sensor Diag Black Mark Diag Ribbon End Item Description Print the current printer configuration. On the configuration printout, there is a Print Head test pattern, which is useful for checking if there is dot damage Print Config. -
Page 80: Brother Printer Management Tool (Bpm)
The BPM's main screen allows you to access the following options: Printer Configuration File Manager Command Tool RTC Setup Printer Function Bitmap Font Manager For more information, see the Brother Printer Management Tool Quick Start Guide on your model's Manuals page at support.brother.com. -
Page 81: Auto-Calibrating The Media Sensor Using The Bpm
8.2 Auto-Calibrating the Media Sensor using the BPM Use the BPM to set the media sensor type (Gap Sensor or Black Mark Sensor) and calibrate the selected sensor. Gap Sensor Black Mark Sensor The Gap Sensor (transmissive sensor) detects the beginning of the label and the printer feeds the label to the correct position. -
Page 82: Product Specifications
9. Product Specifications Display (TJ-4420TN, TJ-4520TN, TJ-4620TN) 320 px × 240 px, 3.5" color TFT display (TJ-4422TN, TJ-4522TN) 16-bit color, 480 px × 272 px, with backlight, Resistive Touchscreen 1 power indicator (3 colors - Green, Red, Amber) Printing Print Method... - Page 83 Size (TJ-4420TN/TJ-4520TN/TJ-4620TN) 276 mm (W) × 326 mm (H) × 502 mm (D) Dimensions (TJ-4422TN/TJ-4522TN) 276 mm (W) × 412 mm (H) × 502 mm (D) (TJ-4420TN/TJ-4520TN/TJ-4620TN) Approximately 15.35 kg Weight (TJ-4422TN/TJ-4522TN) Approximately 18.93 kg Interface USB Ver. 2.0 (High Speed) (Type B)
- Page 84 FBPL-EZS (Compatible to FBPL II, EPL II, ZPL II, SBPL) 8 alphanumeric bitmap fonts ® Built-in Fonts Monotype Imaging TrueType font engine with one CG Triumvirate Bold Condensed scalable font Only authorized Brother Dealers should perform accessory replacements.
-
Page 85: Recommended Microsd Cards
9.1 Recommended microSD Cards microSD Card Class Capacity Approved Manufacturer 4 GB Transcend V2.0 Class 4 8 GB Transcend Transcend 16 GB V3.0 Class 10 UHS-I Sandisk 32 GB Transcend V3.0 Class 10 16 GB Kingston V2.0 Class 4 16 GB Sandisk Note Make sure your microSD card uses the DOS FAT file system. -
Page 86: Troubleshooting
10. Troubleshooting 10.1 Common Problems This chapter explains how to resolve typical problems you may encounter when using the printer. If you have any problems with the printer, first make sure you have performed the following tasks correctly. If you still have problems, contact the product manufacturer's customer service or your local dealer. Problem Possible Cause Solution... - Page 87 Problem Possible Cause Solution The ribbon/media is loaded Reload the media/ribbon. Poor Print Quality. incorrectly. Dust or adhesive has Clean the Print Head. accumulated on the Print Clean the Platen Roller. Head. The print density is set Adjust the print density and print speed. incorrectly.
- Page 88 Problem Possible Cause Solution The media is not fed Make sure the Front Label Guide touches correctly. the edge of the Media Guide Tips. RTC time is incorrect when The coin battery has Contact the product manufacturer's rebooting the printer. dislodged.
-
Page 89: Error Messages
10.2 Error Messages When an error occurs, the screen displays the appropriate error message. Error Message Possible Cause Solution The Print Head is open. Close the Print Head. Carriage Open No Ribbon The ribbon has finished. Install a new ribbon roll. To install a new ribbon roll, see section 3.2 Load the Ribbon. -
Page 90: Maintenance
11. Maintenance We recommend cleaning your printer on a regular basis to maintain its correct performance. Recommended cleaning materials: Cotton swab • • Lint-free cloth • Vacuum / Blower brush • Compressed air • Isopropyl alcohol or ethanol Printer Part Cleaning Method Interval 1. - Page 91 Note Do not touch the Print Head. If you have touched it, clean it as described above. Do not use medical alcohol as it may damage the Print Head. Use isopropyl alcohol or ethanol according to the manufacturer's safety guidelines, as applicable. To maintain correct performance, we recommend cleaning the Print Head and sensors every ...