
Related Manuals for Toro 22911


Summary of Contents for Toro 22911
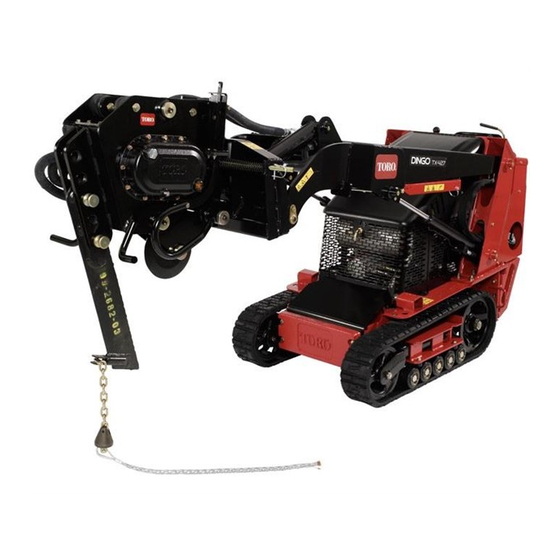
- Page 1 Form No. 3430-913 Rev A Vibratory Plow Compact Tool Carrier Model No. 22911—Serial No. 404320000 and Up *3430-913* A Register at www.Toro.com. Original Instructions (EN)
- Page 2 The vibratory plow is an attachment designed for use Model No. on Toro compact tool carriers to pull flexible pipe and cable into and through soil. It is designed to be used by trained operators primarily for routing irrigation and Serial No.
-
Page 3: Table Of Contents
Contents Safety Safety ............... 3 DANGER General Safety ........... 3 Slope Safety ............4 There may be buried utility lines in the work Vibratory Plow Safety ......... 4 area. Digging into them may cause a shock Maintenance and Storage Safety......4 or an explosion. -
Page 4: Slope Safety
Slope Safety Vibratory Plow Safety • Operate the machine up and down slopes with • The plow is very loud during operation. Wear the heavy end of the machine uphill. Weight hearing protection. distribution changes with attachments. This • Keep the plow low at all times. attachment makes the front of machine the heavy end. -
Page 5: Safety And Instructional Decals
1. Crushing hazard of hand—keep bystanders away. To ensure optimum performance and continued safety 2. Crushing hazard of foot—keep bystanders away. certification of the machine, use only genuine Toro replacement parts and accessories. Replacement parts and accessories made by other manufacturers could be dangerous, and such use could void the product warranty. -
Page 6: Operation
• Ensure that all hydraulic-fluid hoses Installing a Blade and lines are in good condition and all hydraulic connections and fittings are tight Toro offers several different blades and pullers. before applying pressure to the hydraulic Purchase a blade and puller from your Authorized system. -
Page 7: Plowing
Connect the material being installed to the plow. If your traction unit has a speed selector, move it to the S (turtle) position. Start the engine. Tilt the attachment plate completely back so that the top of the plow is parallel to the ground (Figure Lower the plow so that it is resting on the ground. -
Page 8: Transport Position
Transport Position to the ground (Figure 8). When you lift the plow, the indicator on the gauge moves down. Marks on the With the plow raised above the ground, shut off gauge show the number of inches lower or higher than the engine and remove the key. -
Page 9: Transporting The Plow
Transporting the Plow Operating Tips • Move the lynch pins to the inside holes on the Some older model traction units have holes spring rods to prevent side-to-side movement through the spring and quick-attach pins on the (Figure mount plate (Figure 10) to allow you to install 2 hairpin cotters when plowing long runs. -
Page 10: Maintenance
Maintenance Recommended Maintenance Schedule(s) Maintenance Service Maintenance Procedure Interval • Grease the plow. Before each use or daily • Check the gear-lube level. Every 25 hours • Change the gear lube. Every 200 hours • Grease the plow. • Check the gear-lube level. Before storage •... -
Page 11: Servicing The Gear Lube
Changing the Gear Lube Service Interval: Every 200 hours/Yearly (whichever comes first) Park the machine on a level surface, disengage the auxiliary hydraulics lever, and lower the attachment so that the plow is on the ground. Engage the parking brake (if equipped). Stop the engine and remove the key. -
Page 12: Replacing The Coulter
Replacing the Coulter Storage If the coulter becomes excessively worn or damaged, Before long-term storage, wash the attachment replace it. with mild detergent and water to remove dirt and Park the machine on a level surface, disengage grime. the auxiliary hydraulics lever, lower the Grease the plow. -
Page 13: Troubleshooting
Troubleshooting Problem Possible Cause Corrective Action The plow does not operate. 1. The hydraulic coupler is not completely 1. Check and tighten all couplers. connected. 2. A hydraulic coupler is damaged. 2. Check the couplers and replace any that are damaged. 3. - Page 14 The method of transmission shall be electronic transmittal. This machinery shall not be put into service until incorporated into approved Toro models as indicated on the associated Declaration of Conformity and in accordance with all instructions, whereby it can be declared in conformity with all relevant Directives.
- Page 15 The Way Toro Uses Information Toro may use your personal information to process warranty claims, to contact you in the event of a product recall and for any other purpose which we tell you about. Toro may share your information with Toro's affiliates, dealers or other business partners in connection with any of these activities. We will not sell your personal information to any other company.
- Page 16 While the exposure from Toro products may be negligible or well within the “no significant risk” range, out of an abundance of caution, Toro has elected to provide the Prop 65 warnings. Moreover, if Toro does not provide these warnings, it could be sued by the State of California or by private parties seeking to enforce Prop 65 and subject to substantial penalties.