Table of Contents
Advertisement
Quick Links
Advertisement
Table of Contents

Related Manuals for Samsung Galaxy Feel2


Summary of Contents for Samsung Galaxy Feel2
- Page 1 SC-02L INSTRUCTION MANUAL ’18.9...
- Page 2 Introduction Operation descriptions Thank you for purchasing "SC-02L" mobile terminal. In this manual, the operation steps such as the menu operations are simply Before and during use of your terminal, be sure to thoroughly read this described as follows. instruction manual to ensure you are able to correctly use your terminal. •...
-
Page 3: Accessories
Accessories ■ SC-02L Terminal ■ External TV antenna cable SC04 * The terminal supports only 1Seg. ■ SIM ejector tool (sample) ■ Sample for data transfer (Micro USB cable and USB conversion adapter for OTG) (sample) ■ クイックスタートガイド (Quick start guide) (In Japanese only) ■... -
Page 4: Table Of Contents
Contents docomo mail ���������������������������������������������������������������������������������������������65 Mail/Web +メッセージ (+Message) ����������������������������������������������������������������������65 browser SMS �������������������������������������������������������������������������������������������������������������68 Accessories �����������������������������������������������������������������������������������������������1 Contents/ Email ������������������������������������������������������������������������������������������������������������70 About usage of the terminal ������������������������������������������������������������������4 Precautions Gmail �����������������������������������������������������������������������������������������������������������72 Precautions (Always follow these directions) ���������������������������������5 Early Warning "Area Mail" ���������������������������������������������������������������������73 Handling precautions ����������������������������������������������������������������������������13 Web browser ���������������������������������������������������������������������������������������������75 Waterproofness/Dustproofness �������������������������������������������������������17 Camera ������������������������������������������������������������������������������������������������������78 Camera... - Page 5 File Storage folder structure ������������������������������������������������������������������� 128 management File operation ��������������������������������������������������������������������������������������� 128 Data Bluetooth communication ��������������������������������������������������������������� 130 communication NFC communication ��������������������������������������������������������������������������� 131 Connecting to a PC ��������������������������������������������������������������������������� 132 External device Connecting to printer ������������������������������������������������������������������������ 133 connection Smart View ��������������������������������������������������������������������������������������������� 133 Overview of international roaming (WORLD WING) ������������������������134 International Available overseas services ������������������������������������������������������������...
-
Page 6: About Usage Of The Terminal
• Depending on the applications or service you use, packet communication About usage of the terminal charge may be applied even in Wi-Fi communication. • If the microSD card or the terminal internal storage does not have • The terminal supports LTE, W-CDMA, GSM/GPRS, and wireless LAN. enough memory, running applications may not work normally. -
Page 7: Precautions (Always Follow These Directions)
■ The symbols below show specific directions. Precautions (Always follow these directions) ■ Before using your terminal, or when necessary, read the This symbol denotes that the action is prohibited. precautions below to ensure safe use and handling. Don’ t ■ These precautions are intended to protect you and others around you. - Page 8 Do not attempt to remove the internal battery from the 1. Handling the terminal, adapter, docomo nano UIM terminal. card and External TV antenna cable (common) Don’ t May cause fire, burns, injuries or electric shocks, etc. Do not disassemble or remodel the equipment. DANGER May cause fire, burns, injuries or electric shocks, etc. disassembly Do not use, store or leave the terminal in hot places (e.g.
- Page 9 If charging is not complete after the specified charging time Be careful when using the terminal continuously for a long has passed, stop charging. time or charging because temperature of the terminal may Not doing so may cause fire, burns, or injuries due to overcharge. rise.
- Page 10 Do not lighten or flash the light to drivers of cars, etc. When using the handsfree call, ringtone is ringing loud, or in the May disturb driving and cause an accident, etc. standby mode, be sure to keep this terminal off of the ears. Don’...
- Page 11 Prevent your pet, etc. from biting the terminal. To use the terminal in car, check with automobile The internal battery may damage and may result in fire, burns or manufacturer or dealer to determine how vehicle devices are injury. affected by radio waves before using. Using the phone in some vehicle models can cause the vehicle's electronic equipment to malfunction.
- Page 12 Do not short the charging jack while it is connected to the When you connect the adapter to an outlet or accessory outlet or accessory socket. Do not touch the charging jack socket, firmly connect it to the outlet. Don’ t with a part of your body such as your hand or finger.
- Page 13 4. Handling docomo nano UIM card 6. Material list Part Material Surface treatment CAUTION Display (touch screen) Hardened glass AF coating Be careful of the cut surface when handling a docomo nano Exterior case (side) Aluminum Anodic oxidation UIM card as it may damage a part of your body such as treatment fingers, etc.
- Page 14 WARNING Part Material Surface treatment Speaker Aluminum Anodic oxidation treatment Do not drop, trample, or throw the terminal or give a strong force or vibration to it. Slit Don’ t May cause fire, burns, injuries or electric shocks, etc. External TV Earphone microphone Brass Nickel plating and...
-
Page 15: Handling Precautions
Handling precautions The terminal ■ Do not press display surface forcibly, or not operate with a sharp General pointed objects. May cause a malfunction or damage of display. ■ SC-02L is waterproof/dustproof; however, do not allow water ■ Do not use the terminal in extremely hot or cold places. (drinking water, perspiration, seawater, urine of pet animals, etc.) Use the terminal within a temperature range of 0℃... - Page 16 ■ Do not decorate the terminal sensor with film or sticker. Instructions for using the adapter Functions using the proximity sensor may not work properly. For the position of the proximity sensor, refer to the following. ■ Charge the battery in an area within the proper ambient →...
- Page 17 docomo nano UIM card Bluetooth function ■ The terminal is equipped with the security features, that are ■ Do not put excessive force on the docomo nano UIM card when compliant with Bluetooth standards for communication via inserting into or removing from the terminal. Bluetooth.
- Page 18 3. If the device causes radio interference to specified low power radio Wireless LAN (WLAN) precautions stations or amateur radio stations, contact "docomo Information Center" described on the last page of this manual. ■ Wireless LAN (WLAN) uses radio waves to enable communications ...
-
Page 19: Waterproofness/Dustproofness
Waterproofness/Dustproofness Note SC-02L provides waterproofness of IPX5 , IPX8 ■ Do not use a remodeled terminal. Using a remodeled terminal dustproofness of IP6X with firmly attaching the docomo nano UIM violates the Radio Law/Telecommunications Business Act. card/microSD card slot. The terminal is compliant with rules on the technical standard conformance of specified wireless equipment based on the Radio Law/ IPX5 means that a communication device keeps functioning after Telecommunications Business Act. - Page 20 To ensure waterproofness/dustproofness Important precautions Do not perform actions shown in the illustrations below. ■ To avoid water/dust ingress, be sure to observe the following points. 〈Example〉 • The terminal can be washed with tap water at room temperature. • Do not poke the headphone connection jack, mouthpiece/microphone, earpiece, speaker, USB Type-C jack, etc.
- Page 21 Draining water Charging When the terminal is wet, water may flow out after wiping it off; drain the Check the following during and after charging. water in the following steps. • Never try to charge the battery when the terminal is wet. a Hold the terminal firmly and wipe off moisture on the terminal surface •...
-
Page 22: Part Names And Functions
l Mouthpiece/Microphone (lower) Before using the terminal m Headphone connection jack n GPS antenna o Rear camera (P.78) Part names and functions p Fingerprint sensor (P.117) mark (P.87) r Wi-Fi/Bluetooth antenna s Flash/Light t Volume UP key/Volume DOWN key • This key is used to adjust sound volume, set silent mode (Vibrate), shoot still image/video, etc. -
Page 23: Docomo Nano Uim Card
docomo nano UIM card Installing/Removing a docomo nano UIM card docomo nano UIM card is an IC card storing user information such • The included SIM ejector tool (sample) is required to attach/remove the as phone numbers. docomo nano UIM card. • Only the docomo nano UIM card is available for the terminal. If you have •... - Page 24 Pull out the docomo nano UIM card/microSD card tray in a Removing docomo nano UIM card straight line Insert the tip of the SIM ejector tool into the docomo nano UIM card/microSD card tray eject hole horizontally (P.21) The docomo nano UIM card/microSD card tray will slightly eject. •...
-
Page 25: Microsd Card
Insert the docomo nano UIM card/microSD card tray into microSD card the terminal You can attach microSD card (including microSDHC card and • Take care to insert the docomo nano UIM card/microSD memory tray in the correct direction. If the direction you insert the docomo microSDXC card) to the terminal and use it. - Page 26 Pull out the docomo nano UIM card/microSD card tray in a Installing/Removing a microSD card straight line • The included SIM ejector tool (sample) is required to install/remove a microSD card. • Turn off the terminal before installing/removing a microSD card. Installing microSD card Insert the tip of the SIM ejector tool into the docomo nano UIM card/microSD card tray eject hole horizontally The docomo nano UIM card/microSD card tray will slightly eject.
- Page 27 Insert the docomo nano UIM card/microSD card tray into Removing microSD card the terminal • Take care to insert the docomo nano UIM card/microSD memory Insert the tip of the SIM ejector tool into the docomo nano tray in the correct direction. If the direction you insert the docomo UIM card/microSD card tray eject hole horizontally (P.24) nano UIM card/microSD card tray is incorrect, it may be damaged.
-
Page 28: Charging
■ Estimate internal battery charging time Charging • For estimate of charging time, see "Main specifications" (P.148) ■ Internal battery life Charging with AC adapter • The internal battery is a consumable part. Each time it is charged, time available with each charging reduces. Charging using AC Adapter 07 (sold separately) is explained here. -
Page 29: Turning Power On/Off
Turning power ON/OFF Charging with USB cable A to C You can charge the terminal with a PC by connecting it to a PC using a USB cable A to C 01 (sold separately). Turning power ON • For connecting to a PC, refer to "Connecting with USB cable A to C" (P.132). -
Page 30: Basic Operation
Basic Operation Lock screen You can operate the terminal variously with touch screen and motions. • Do not contact the touch screen with electric materials or metallic materials. The terminal might not operate well due to static electricity. • The touch screen might not operate when you use the terminal while charging. - Page 31 ■ Drag Using navigation bar With touching with your finger, move a displayed The icons are displayed on the navigation bar in the bottom of the screen item or icon. to operate screens. The name and operation of each icon is as follows. Navigation bar ■...
- Page 32 Switching the orientation of the display automatically Enabling Emergency mode Motion sensor which detects the terminal orientation (vertical/horizontal) Enabling Emergency mode changes the following settings to reduce and tilt can switch the screen view automatically. battery consumption. Open the Notification panel (P.38) • Limit number of available apps. •...
-
Page 33: Convenient Features
Convenient features ■ Smart capture The menu ("Crop", "Share", etc.) is displayed after a screen is Using Advanced features captured and you can use the features. Moving the terminal performs the following operations. • This feature may not be available for some other apps. •... - Page 34 ■ Direct share Using Reminder Directly share contents with the specified other party from the share Create an event reminder to check the content later. You can check panel. reminders at specified time or set place. • To use Reminder, connect Wi-Fi or mobile network. Information •...
-
Page 35: Character Entry
Character entry Entering with Galaxy keyboard To enter characters, tap the character entry field to display the In Galaxy keyboard, you can use four types of keyboards: "QWERTY keyboard", "3x4 no flick keyboard", "3x4 flick keyboard", and "3x4 8Flick keyboard (Galaxy keyboard) for character entry, and then tap a key keyboard"... - Page 36 f Confirm entered characters. Selecting/Copying/Cutting/Pasting text • When entered characters are already fixed, perform feature (entering linefeed/ next/done/search/execute/move) of the entered text box. While the keyboard is displayed, touch and hold entered g Moves cursor left or right. character string • Tap to enter a character assigned to the same key in a row on 3x4 Keyboard.
- Page 37 Setting character entry/conversion function Setting Google voice typing Set the language, etc. for Google voice search. Setting Galaxy keyboard From the Home screen, "apps folder" → "Settings" → "General management" → "Language and input" → "On- You can set entry operations when entering characters using Galaxy screen keyboard" → "Google voice typing" keyboard, register to the user dictionary, etc.
-
Page 38: Initial Settings
Initial settings Notification LED When you turn the terminal ON for the first time after purchasing, When the screen is OFF, the Notification LED notifies you of missed follow the onscreen instructions to make settings for language, calls, status of charging/recording, etc. by lighting/flashing. Google/Galaxy account, etc. -
Page 39: Display And Icons
Display and icons Notification icon Page Alarm exists P.93 Viewing icons Alarm of Calendar exists P.94 In the status bar at the top of the display, icons which indicate the Playing/pausing music terminal status or notification information are displayed. Notification icons appear on the left side of status bar, and status icons appear on the right Error message exists side of status bar. - Page 40 Status icon Page Main status icons Charging P.26 Status icon Page Wi-Fi Direct connected P.102 Radio wave condition ⇔ NFC/Osaifu-Keitai lock is set on the terminal and P.87 (Weak ⇔ Strong) docomo nano UIM card Radio wave condition (roaming) ⇔ NFC/Osaifu-Keitai lock is set on the terminal or P.87 (Weak ⇔...
-
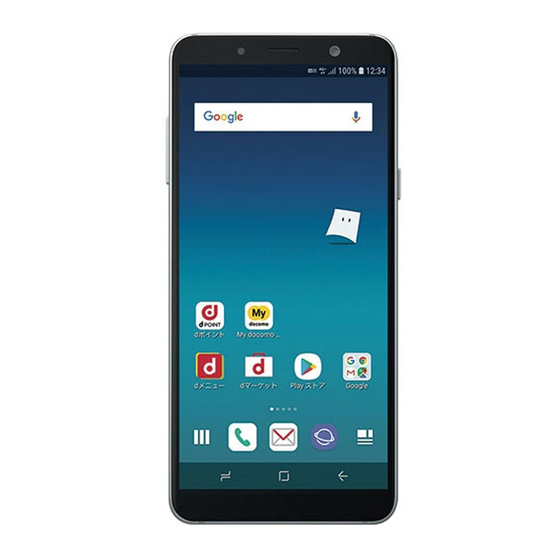
Page 41: Home Screen
a Display current date and time. Home screen b You can switch ON/OFF of each function such as Wi-Fi, Bluetooth, Flashlight, "docomo LIVE UX" and "Galaxy home" can be set as the screen Dolby Atmos, etc. using the Quick settings buttons. Scroll down the bar ( c ) on the center of the notification panel to display hidden icons. - Page 42 Information Changing theme • From the Home screen, flick the screen up or down to display the From the Home screen, touch and hold a wallpaper in which Apps screen (P.41). shortcuts or widgets are not displayed • From the Home screen, flick the screen right to activate "Bixby" (P.32).
-
Page 43: Apps Screen
Apps screen Apps list Apps screen when the Home screen is set to "Galaxy home" is Some apps require subscriptions (charged) to use. described. • You can check the functions and operation steps from Help for some apps. From the Home screen, flick the screen up or down •... - Page 44 Icon Apps Description Icon Apps Description my daiz A service with which you can search information Chrome Web browser app by Google. readily just by speak to the terminal or receive Gmail You can send/receive emails using Gmail. → P.72 necessary information at an optimum timing.
- Page 45 Icon Apps Description Icon Apps Description Data Copy An app to transfer data for model upgrades or d 払い (d This app is for using the smartphone payment service backup/restore data to "microSD card" or " データ保管 payment) provided by docomo called "d payment". By just BOX (Data saving BOX)".
- Page 46 Icon Apps Description Adding shortcuts to the Home screen dmarket Various services including selling digital contents From the Apps screen, touch and hold an app to add to the such as music, videos, books, shopping sites, travel reservation sites, etc. are provided. → P.84 Home screen dポイン...
-
Page 47: Using Quick Search Box
Using Quick search box Recently-used apps You can search information including entered word in the terminal or [History button] on the Internet. • Tap a thumbnail of app to activate the app. • Tap "CLOSE ALL" to remove the list. From the Home screen, tap Google Search widget •... -
Page 48: Using Split Screen View
Using Split screen view Information • When the display is landscape, the screen is divided into two You can display two windows or a pop-up window on the screen to sections, right and left. use different apps at the same time. • Drag on the dividing line displayed in the center of the screen up •... -
Page 49: Home Screen
b Machi-chara (example: my daiz) docomo LIVE UX • Notify you of information such as mail reception or incoming call. c App icon • Tap to activate apps. It is a home application which allows you to customize the Home • Touch and hold it to display the shortcut menu and you can perform specific operation or check the app information. -
Page 50: Managing Home Screen
Managing Home screen Setting the Home screen Touch and hold the Home screen in which icons, etc. are not Moving apps, etc. displayed Select an item From the Home screen, touch and hold an app icon, widget, etc. you want to move Item Description Drag it to any position you want to move to, or tap "Move" in Create folder Add a folder. -
Page 51: Using Osusume Apps
Using Osusume Apps Showing Machi-chara It is a service which recommends applications according to your Touch and hold the Home screen in which icons, etc. are not usage condition. displayed → "Home screens" → "Machi-chara setting" From the Home screen, of " キャラ表示 (Chara display)" "Recommends"... -
Page 52: Searching Apps
Searching apps Backing up and restoring the Home screen It is a function which allows you to search an app in a list sorted by You can restore the Home screen layout such as apps and widgets used or installed order, or by an app name. using docomo LIVE UX data backed up in docomo cloud. At this time, the docomo service page will be added to the end of your Home From the Home screen, screen. -
Page 53: My Magazine
My Magazine Home screen information My Magazine is a search service for displaying articles for You can check the docomo LIVE UX version information etc. categories you selected. By your tendency of read articles or profile From the Home screen, → information, the more you use, the more it comes close to your "About"... -
Page 54: Making A Call
f Delete key Calling Delete a number at the far right or a number to the left of the cursor. To delete all entered numbers, touch and hold the key. g Key for registering to phonebook Register entered phone numbers to phonebook. Making a call •... - Page 55 Information Emergency call • To show/hide the caller ID per call, enter prefix "186" (notify) / "184"(not notify) before the phone number. You can set to show/ Emergency call Phone number hide in "Caller ID notification" (P.58) in advance. Police call •...
-
Page 56: Receiving A Call
To answer a video call by a voice call Receiving a call Drag to outside of the circle • A voice call starts. A call is received When the call ends, • A reception screen appears. Information • To stop ringtone sounding or vibration, press [Power/Screen lock key] or Volume UP key/Volume DOWN key. -
Page 57: Operation During A Call
f The other party's image Operation during a call Depending on the other party's setting, a substitute image may be displayed. • When the other party's image cannot be received, appears. A call is received g Camera • A reception screen appears. Switch for whether to send your own image. h Switch Drag to outside of the circle... -
Page 58: Recent Calls
Recent calls Menu on calling screen on the calling screen to display the following items. On the Recent calls screen, you can check logs of dialed calls, received calls. Item Description • For number of items that can be displayed in Recent calls screen, see Hold call/Resume Hold/resume a call. -
Page 59: Answering Message
d Name, Phone number, Call date and time Answering message • Tap to display the call screen. Tap an item on the call screen to make a call, send SMS, etc. Set answering message which plays answering message and • Touch and hold to display the following menu. records caller's message when you cannot answer an incoming call. -
Page 60: Making An International Call (World Call)
Making an international call (WORLD CALL) Call settings WORLD CALL is an international telephone service that you can use You can set functions for calling from the Home screen, → → inside Japan with DOCOMO terminal. "Call settings". For using overseas, see P.134. Item Description • Depending on the network operator, the caller ID may not be shown/ Hide contacts without Set whether to display the contacts displayed properly. - Page 61 Item Description Item Description Block Blocked number Set category of the blocked numbers. Call alerts Vibrate when Set whether to vibrate the terminal when numbers categories answered the other party answers your call. Add phone Manage the numbers to block incoming calls Vibrate when call Set whether to vibrate the terminal when number...
- Page 62 Registering reason of decline for SMS to be sent Setting Suguden when declining call Set "Suguden" to answer just via motion and voice keywords. The terminal can decline an incoming call and inform the caller of the From the Home screen, → → "Call settings" → "Suguden reason of decline by SMS. Up to 6 decline messages can be registered. settings"...
- Page 63 Information About Mute (Hold), Disconnect (Voice command) • If Mute(Hold), voice call-ending is ON while talking on the phone, other • Suguden will not operate in the following cases. apps that use the microphone or audio during a call (such as a call - When using the speakerphone recording app) may not be available.
-
Page 64: Phonebook
Enter the required items Phonebook • When group (P.64) is set to a contact, tap "Set" in "Group" to group the contact. Registering to phonebook "Save" • If the contact is not displayed, on the contacts list screen, tap → Manage various contact information such as name, phone number or mail "Settings"... - Page 65 i Index character display area Checking/Editing a contact • Tap "Index" to display index characters by which you can search a name in the order of the Japanese syllabary, alphabet, etc. From the Home screen, "apps folder" → "docomo phonebook" j Index →...
- Page 66 Adding/Editing a group Registering My profile On the Contacts list screen, "Group" On the Contacts list screen, "My profile" • Profile screen appears. "Add group" "Edit" To edit saved group Enter the required items → "Save" Tap a group you want to edit → "Edit" → Edit and then tap "OK". To delete group Importing/Exporting contacts →...
-
Page 67: Docomo Mail
Mail/Web browser +メッセージ (+Message) You can send/receive images, videos, stamps, etc. as well as text message in chat format using a mobile phone number as a recipient. docomo mail Also, you can exchange messages not only on one-to-one, but also among multiple people as group messages. Send/receive mails using DOCOMO mail address (@docomo.ne.jp). - Page 68 c Favorite contact Sending a message Your favorite contacts are displayed in the upper part of contact list, below My profile. From the Home screen, "+メッセージ (+Message)" It is an icon indicating a user of +Message. You can exchange group → → "New message"/New group message" messages, photos, stamps, etc.
- Page 69 Reading messages Switch to the stamp selection screen Sent/received messages are displayed in thread by recipient/ Tap to activate the camera. Touch and hold to shoot a photo and then you sender. can send it consecutively. From the Home screen, "+メッセージ (+Message)" Display a sharing tray to send photos, stamps, location information, etc.
-
Page 70: Sms
Changing +Message settings You can send and receive text messages with a mobile phone From the Home screen, "+メッセージ (+Message)" number as the destination. → "MyPage" → "Settings" * For details on a number of characters that you can send/receive etc., refer to "Short Message Service (SMS)" on the NTT DOCOMO website. Select an item Creating and sending SMS Item... - Page 71 Information Item Description • SMS can be also sent to or received from the parties using overseas Settings Notifications ON Set notifications to ON. network operators. For countries and overseas network operators App icon Set whether to add a badge to the app available, refer to NTT DOCOMO website.
-
Page 72: Email
Email Menu on SMS list screen on the SMS list screen to display the following items. Follow the on- You can set a POP3- or IMAP-compatible Email account provided by screen instructions. a general service provider to send/receive email. Menu on message screen Setting up Email account Touch and hold an SMS message which is sent/received or scheduled to When you enter mail address and password, Email account settings are open the messaging options. - Page 73 Checking received emails Changing Email settings From the Home screen, "apps folder" → "Email" Account settings Slide Email list downward From the Home screen, "apps folder" → "Email" Tap an email you want to read → → Tap an account you want to set • A message screen appears. Tap an item to set Information •...
-
Page 74: Gmail
Information Gmail • When multiple Email accounts are set, tap on the Email list screen You can send/receive emails using Gmail. → Tap "All accounts" to check a list of received mails in all the • To use Gmail, set up an email address (P.121). When a setting registered accounts. -
Page 75: Early Warning "Area Mail
Early Warning "Area Mail" Receiving Early Warning "Area Mail" Area Mail is a service that you can receive Earthquake Early When Area Mail is received, a content notification screen appears and you are notified by dedicated buzzer sound or dedicated ringtone and vibration. Warning and Tsunami Warning provided by the Meteorological •... - Page 76 Item Description Setting Early Warning "Area Mail" やさしい日本語表 Set whether Earthquake Early Warning, Tsunami Set whether to receive Area Mail or set operation for reception, etc. 示 (Display easy- Warning are to be displayed in easy-to-comprehend From the Home screen, "apps folder" → "Disaster kit" to-understand Japanese.
-
Page 77: Web Browser
Web browser Information • When the address bar or icon is not displayed, flick/swipe the screen to display it. Using web browser Using web browser, you can view web pages as PCs. Exiting web browser On the terminal, web browser can be used via a packet transmission or Wi-Fi connection. - Page 78 Opening new secret tab Managing history and bookmarks View with the browser without history of browser or search remained. All of bookmarks and web pages saved in secret mode is not displayed Viewing web pages from the history when the secret mode is disabled. From the Home screen, From the Home screen, "Tabs"...
- Page 79 Bookmarks/History/Saved pages Touch and hold bookmarks/history/saved pages to display the selection screen. Follow the on-screen instructions. Setting web browser From the Home screen, → "Settings" Tap an item to set Item Description Homepage Set a homepage. Default search Set a search engine. engine Auto fill forms Set the text to be filled in automatically in the text field.
-
Page 80: Camera
• Using Camera consumes much power of battery. Note that if you shoot Camera with low battery, the screen may become dark or a shot image may be blurred. • If you use Camera for a long time such as continuous shooting of still Camera images and longtime shooting of videos, the terminal may become hot and Camera may be terminated automatically, but it is not a malfunction. - Page 81 a Switch camera mode Shooting still images • Flick left or right to switch the camera modes. • Set camera mode will appear in the horizontal center in yellow letter. → P.81 From the Home screen, "Camera" b Focus • Still image/video shooting screen appears. •...
- Page 82 Item Description Setting Camera COMMON Grid lines Display grid for shooting range on the shooting From the Home screen, "Camera" screen. • Still image/video shooting screen appears. Location Set whether to add location information. tags • To receive GPS signal correctly, do not use in a •...
- Page 83 Item Description Switching camera mode HIPERLAPSE Record in various speed and create an original time- From the Home screen, "Camera" lapse video. You can automatically adjust the speed according to scene or terminal movement. On the shooting screen, flick left or right •...
-
Page 84: Gallery
Gallery Using Bixby Vision With Bixby Vision, you can use the following features, etc. based on You can view or organize still images/videos saved to the terminal recognized image. or microSD card. From the Home screen, "Camera" Supported file formats for still image are as follows. However, some still images in the following file formats may not be displayable. - Page 85 Viewing still images On the data list screen, tap a still image to display • The still image appears. • To switch still images, scroll the screen to the left or right. Playing videos On the data list screen, tap a video to play •...
-
Page 86: Dmenu
Apps dmarket Various services including selling digital contents such as music, videos, books, shopping sites, travel reservation sites, etc. are dmenu provided. In dmenu, you can easily access sites recommended by DOCOMO or From the Home screen, "dmarket" convenient apps. Information From the Home screen, "dメニュー... -
Page 87: Play Store
Play Store Galaxy Apps You can easily download a lot of recommended apps using Galaxy • To use Google Play, you need to set a Google account (P.121). Apps. Installing an app Connecting to Galaxy Apps From the Home screen, "Play Store" From the Home screen, "apps folder" → "Galaxy Apps" Search for an app you want to download, then tap it →... -
Page 88: Osaifu-Keitai
Osaifu-Keitai Using "Osaifu-Keitai compatible service" The function allows you to use "Osaifu-Keitai compatible service" for To use Osaifu-Keitai services, set services from Osaifu-Keitai apps. payment or coupon by just holding over a store reader. From the Home screen, "Osaifu-Keitai" You can save electronic money and points to an IC card of the •... - Page 89 Information Notes on holding over the device • When using "NFC/Osaifu-Keitai Lock", appears on the status Please note the following when holding the terminal over an IC card reader bar. or NFC module equipped device. • Be careful about remaining battery level because "NFC/Osaifu-Keitai Lock settings" cannot be canceled if the battery runs out while using "NFC/Osaifu-Keitai Lock".
-
Page 90: Id アプリ (Id App)
iD アプリ (iD app) 1Seg "iD" is electric money provided by DOCOMO. You can enjoy shopping 1Seg is a digital terrestrial TV broadcasting service for mobile simply and conveniently only by holding Osaifu-Keitai set with "iD" devices that allows you to receive data programs along with video over the IC card reader in stores. - Page 91 External TV antenna cable SC04 Watching screen To watch 1Seg, connect the supplied External TV antenna cable SC04 to the terminal. Headphone connection jack Earphone microphone jack External TV antenna cable SC04 Connection plug Connect the connection plug of External TV antenna cable SC04 to the headphone connection jack of the terminal Watching 1Seg From the Home screen, "apps folder"...
- Page 92 Information Recording 1Seg • When the screen is turned to horizontal, it changes to full screen display. In horizontal screen, broadcast data is not displayed. Tap On the watching screen, the screen to display menu, channel information, and channel remote • While recording, appears.
- Page 93 Scheduling to record or watch 1Seg Setting 1Seg Tap a TV image → → "Reserve Recording/Viewing" Tap a TV image → → "Settings" Set required items → "New reservation" "From Program guide"/"Viewing reservation"/"Recording Item Description reservation" Data Broadcasting Make each setting when broadcast data is Set each item → "SAVE" → "YES" settings displayed (Use location info, User device info, Delete station memory).
-
Page 94: Gps/Navigation
GPS/Navigation Using the GPS function • DOCOMO is not liable for any damage caused by abnormality of the Enabling location information system. • Note that DOCOMO shall have no liabilities for any purely economic loss If you use an app that uses location information, you need to enable GPS including those due to missing a chance to check the measurement function in advance. -
Page 95: Clock
Clock Using Google Maps By using Google Maps, you can search for the current location or other You can use Alarm, World Clock, Stopwatch or Timer. locations, or obtain guide information to destination. From the Home screen, "apps folder" → "Clock" • To use Google Maps, enable data connection (4G/3G/GSM) or connect to Wi-Fi. -
Page 96: Calendar
Calendar Using Stopwatch Display Calendar to register event and task. Set up a Google On the "Stopwatch" screen, "START" account to synchronize with Google calendar. • Measurement starts. • To measure the lap time, tap "RESET". From the Home screen, "apps folder" → "Calendar" To stop the measurement, "STOP"... -
Page 97: Galaxy Notes
■ Display screen Galaxy Notes You can create notes by entering texts and drawing pictures. Add photos or pictures to notes, also save recorded sound in notes. Creating a note From the Home screen, "apps folder" → "Galaxy Notes" Create a note → "SAVE" ■... -
Page 98: Voice Recorder
■ List screen Voice Recorder Recording voice sound From the Home screen, "apps folder" → "Voice Recorder" • Recording starts. • When you select "SPEECH-TO-TEXT" tab and perform recording, speech-to-text conversion information appears. Up to 10 minutes of voice-recording can be converted to text. •... -
Page 99: Docomo Data Copy
• When available memory space of microSD card is not enough, backup docomo Data Copy may not be executed. In such case, delete unnecessary files from the microSD card to save the memory space. With "docomo Data Copy", you can copy the data saved in the terminal to another terminal, or back up/restore the data. -
Page 100: Youtube
YouTube Copying phonebook data to docomo account You can copy the contacts data in your Google account or terminal to the YouTube is a free online video streaming service. You can view or docomo account. post video. From the Home screen, "apps folder" → "Data Copy" → "Backup &... -
Page 101: S Health
S Health S Voice Support your health by recording the amount of calories you spend Operate each terminal function such as sending SMS, creating and you take, exercises to manage weight using items such as memo by voice input. "TRACK" of steps, "Target", "Programs" for warming up or running, etc. -
Page 102: Setting Menu
Settings Connections From the Home screen, "apps folder" → "Settings" → "Connections" → "Bluetooth" Setting menu Select an item and to set You can set various items such as screen brightness, screen view, ringtone, communication, etc. Item Description From the Home screen, "apps folder" → "Settings" Wi-Fi →... -
Page 103: From The Home Screen, "Apps Folder" → "Settings
■ Deleting connection of Wi-Fi network Information From the Home screen, "apps folder" → "Settings" → • You can use packet communication even when the Wi-Fi function is "Connections" → "Wi-Fi" ON. However, Wi-Fi connection takes precedence over the packet communication while the terminal is connected to WI-Fi network. - Page 104 ■ Managing network • When setting proxy is required, select "Manual"/"Auto-config" and follow the onscreen instructions. Display saved networks. "CONNECT" From the Home screen, "apps folder" → "Settings" → "Connections" → "Wi-Fi" ■ Using Wi-Fi Direct → "Advanced" You can exchange data by connecting Wi-Fi Direct compatible devices. From the Home screen, "apps folder"...
-
Page 105: Item Description
Data usage Airplane mode Enable/disable mobile data communication or set upper limit of data Disable all wireless connections. communication. Also set a period of time for measuring amount of From the Home screen, "apps folder" → "Settings" → communications. "Connections" → "Airplane mode" From the Home screen, "apps folder"... - Page 106 Information Using tethering • "WPA2 PSK" is set by default. Tethering is generally a function which uses a mobile device such as smart • While connected via Wi-Fi tethering, on the Wi-Fi tethering screen, phone, etc. as modem to connect wireless LAN devices, USB compatible →...
- Page 107 ■ Initializing an access point Information By initializing an access point, the default state is restored. • During USB tethering, you can't look inside this terminal and microSD From the Home screen, "apps folder" → "Settings" → card from connected PC. "Connections"...
-
Page 108: Sounds And Vibration
■ Connecting to a VPN Sounds and vibration From the Home screen, "apps folder" → "Settings" → "Connections" → "More connection settings" → "VPN" From the Home screen, "apps folder" → "Settings" → "Sounds and vibration" Tap a VPN you want to connect to Select an item and to set Enter necessary authentication information →... - Page 109 Setting Silent mode Notifying incoming call/notification by sound/vibration If Silent mode is set to "Vibrate"/"Mute", incoming call ringtones and Set melody, etc. of ringtone/notification sound for incoming call or notification sounds no longer ring. notification or whether to vibrate the terminal. From the Home screen, "apps folder" → "Settings" → ■...
-
Page 110: Notifications
Notifications Muting notification sounds Make settings so that you mute all calls and alarms and do not display Set apps you want to receive notifications from notifications, apart from any exceptions you have selected. From the Home screen, "apps folder" → "Settings" → From the Home screen, "apps folder"... -
Page 111: Display
Display Item Description Screen timeout Set time until screen display turns off. From the Home screen, "apps folder" → "Settings" → "Display" • The screen becomes a little dark before the set time comes close. Select an item and to set Block accidental Set whether not to detect touch operation of the display Item... -
Page 112: Wallpapers And Themes
Wallpapers and themes Device maintenance Set wallpapers and themes. Check maintenance status of the terminal, or set battery, storage, memory and device security. From the Home screen, "apps folder" → "Settings" → From the Home screen, "apps folder" → "Settings" → "Device "Wallpaper and themes" maintenance"... - Page 113 Item Description Item Description BATTERY Display the battery usage or check which apps are SD card* Display the data space of microSD card. USAGE consuming power. Also, you can optimize battery usage • Tap "Format" to format microSD card. of each app. •...
-
Page 114: Apps
Apps Setting the app's permission Set apps. When you access a app or function on the terminal for the first time, a confirmation screen will appear requesting you to permit the access From the Home screen, "apps folder" → "Settings" → "Apps" privileges. When you grant access privileges to permit to an app or function, you can Tap an app use applicable function or information. -
Page 115: Lock Screen
Lock screen Setting unlock method for the screen lock You can make settings so that you require to enter unlock pattern, PIN or From the Home screen, "apps folder" → "Settings" → Lock password in advance on the touch screen etc. for unlocking the screen screen" lock. Select an item and to set From the Home screen, "apps folder"... -
Page 116: Biometrics And Security
Biometrics and security Item Description Encrypt SD card Encrypt data saved in a microSD card From the Home screen, "apps folder" → "Settings" → not to be used on the other terminal or "Biometrics and security" a PC. After encrypting SD card, the item name is changed into "Decrypt SD card". - Page 117 Item Description Security codes used on the terminal Other Usage data access Set the apps whether or not to allow the Some functions provided for convenient use of the terminal require the security terminal's usage histories to be read. security code to use them. Besides a password for screen lock of the settings terminal, a network security code necessary for the network services etc.
- Page 118 ■ PIN code Changing PIN code You can set up a security code called a PIN code for your docomo nano UIM card. This code are set to "0000" at the time of subscription. They When "Lock SIM card" (P.116) is set, you can change the PIN code. can be changed by yourself.
- Page 119 ■ Deleting face data Fingerprint authentication From the Home screen, "apps folder" → "Settings" → Fingerprint authentication is an authentication sliding your finger over the "Biometrics and security" → "Face Recognition" fingerprint sensor. • Cancel the security to protect face recognition. ■...
- Page 120 ■ Usage precautions for fingerprint sensor ■ Removing fingerprints • The fingerprint sensor malfunction may occur if dirt adheres to the From the Home screen, "apps folder" → "Settings" → surface of the fingerprint sensor or your finger. Wipe any dirt with "Biometrics and security"...
- Page 121 Galaxy Pass Using Galaxy Pass You can login to the website or app, etc. easily using Galaxy Pass with ■ Using Galaxy Pass to sign in to Website biometrics authentication such as face recognition (P.116) or fingerprint Open a website that you want to sign in to on the "Internet" authentication (P.117).
-
Page 122: Cloud And Accounts
Open the web page of Find My Mobile on a PC account is required. • For details, refer to the following web page. Accounts → P.120 http://findmymobile.samsung.com/ Backup and → P.122 After signing in by the Galaxy account, follow the onscreen restore... - Page 123 Setting account Removing account When registered account is deleted, the account data saved to the From the Home screen, "apps folder" → "Settings" → "Cloud terminal (messages, contacts, settings, etc.) is also deleted. and accounts" → "Accounts" → "Add a account" • The data stored on the server is not deleted. Tap an account you want to add From the Home screen, "apps folder"...
-
Page 124: Docomo Service/Cloud
docomo service/cloud Backup and restore From the Home screen, "apps folder" → "Settings" → "Cloud From the Home screen, "apps folder" → "Settings" → "docomo service/cloud" and accounts" → "Backup and restore" Select an item and to set Item Description Back up data Use your Galaxy account to back up data. -
Page 125: Google
Google Accessibility Information and settings for Google account and services can be From the Home screen, "apps folder" → "Settings" → checked/changed/deleted. "Accessibility" • For details on Google settings, tap on the Google settings screen to Select an item and to set see Help. - Page 126 Item Description Item Description Vision Remove Remove specified screen effect if you mind Dexterity Interaction Set interactable or non-interactable areas animations animation or screen movement. control for touching operations. interaction • To enable this function and set the Negative colors Invert screen color.
-
Page 127: General Management
Item Description General management Single tap mode Set whether to answer or decline incoming From the Home screen, "apps folder" → "Settings" → calls, cancel notification of alarm or timer, "General management" etc. by single tapping instead of swiping. Accessibility settings Import/export: Save (export) the Select an item and to set backup... - Page 128 Date and time Reset From the Home screen, "apps folder" → "Settings" → From the Home screen, "apps folder" → "Settings" → "General management" → "Date and time" "General management" → "Reset" Item Description Item Description Automatic date Adjust date and time automatically according Reset settings Reset the terminal to the default state except for and time...
-
Page 129: Software Update
Software update About phone From the Home screen, "apps folder" → "Settings" → From the Home screen, "apps folder" → "Settings" → "About "Software update" phone" Select an item and to set Select an item and to set Item Description Item Description Download updates →... -
Page 130: File Storage Folder Structure
Save podcast data. Ringtones Save music data etc. to set as ringtone. From the Home screen, "apps folder" → "My Files" Samsung Save data obtained from Galaxy related site. → "Manage shortcuts" → Select shortcut you want to delete → "REMOVE"... - Page 131 Creating a folder Menu of My files The items appear by tapping on the folder/file list screen on the main From the Home screen, "apps folder" → "My Files" screen in My Files. Follow the onscreen instructions. Tap an item in PHONE → Tap a folder as required Information →...
-
Page 132: Data Bluetooth Communication
■ Bluetooth pass code Data communication Pass code is an authentication code to enter when accessing Bluetooth devices for the first time to recognize and permit them to connect with each other. Entering the same pass code (up to 16 half-width alphanumeric characters) on each sending/receiving device is required. -
Page 133: Nfc Communication
NFC communication When the other device requests for pairing When pairing request for Bluetooth communication screen appears, tap NFC is an abbreviation of Near Field Communication that is an "OK" as required. international standard proximity wireless communication method specified by ISO (International Organization for Standardization). By Canceling connection using reader/writer function (R/W) or device communication function On the Bluetooth device list, tap a connected device. -
Page 134: External Device
Open the Notification panel → "USB for file transfer" External device connection • "Use USB to" screen is displayed on the terminal. Item Description Connecting to a PC Transfer files The terminal is recognized as a media device (MTP) and you can transfer media files such as music or videos, etc. Connecting with USB cable A to C Transfer You can transfer still images and videos captured by the... -
Page 135: Connecting To Printer
You can only forward content that you own or have the rights to. settings for wireless LAN (Wi-Fi) and printer in advance. Samsung Electronics Co., Ltd. takes no responsibility for any infringements on the Copyright Law. • For compatible connection cables when using USB connection, refer to the instruction manual of the printer. -
Page 136: International Roaming
International roaming Available overseas services ( ○ : Available) Overview of international roaming (WORLD WING) Main Communication 3G850 services (GPRS) With the international roaming (WORLD WING), you can use the Call ○ ○ ○ ○ terminal without changing phone number or mail address in the service area of the overseas network operator affiliated with ○... -
Page 137: Before Using The Terminal Overseas
Before using the terminal overseas Settings for overseas use ■ Setting data roaming Before leaving Japan To perform packet communications overseas, set Data roaming settings to ON. Before using the terminal overseas, check the following information in From the Home screen, "apps folder" → "Settings" → Japan. "Connections" → "Mobile networks" ■... -
Page 138: Making/Receiving A Call In The Country You Stay
■ About inquiries Making/Receiving a call in the country you stay • For loss or theft of the terminal or docomo nano UIM card, immediately contact DOCOMO from the spot to take the necessary steps for suspending the use. Please see the last page of this manual for Making a call to outside country you stay (including contact information. -
Page 139: International Roaming Settings
International roaming settings Making a call to WORLD WING user overseas If you call to an overseas "WORLD WING" user, please make a call as an Make settings for international roaming service. international call to Japan even when he/she is in the country you stay. • Depending on the overseas network operator, roaming cannot be set up in •... -
Page 140: After Returning To Japan
■ Setting network service (overseas) After returning to Japan Set network services such as Voice mail from overseas. • Activate "Remote operation" (P.58) beforehand. After returning to Japan, restore to the settings which are made • If you make the settings overseas, you are charged a call fee from the before you traveled. -
Page 141: Appendix/Index
Charging ‡ Appendix/Index Trouble Check and remedy Cannot charge the • Is the adapters power plug inserted to the outlet Troubleshooting (FAQ) terminal or accessory socket correctly? • Are the adapter and terminal inserted correctly? • When using an AC adapter (sold separately), are Troubleshooting the Type-C plug of the AC adapter and terminal •... - Page 142 Operating terminal ‡ Trouble Check and remedy Trouble Check and remedy The clock is not on • When the terminal is turned ON for a long time, time the clock may go wrong. The terminal, etc. • While operating or charging, or if you operate Make sure that "Automatic date and time"...
- Page 143 Trouble Check and remedy Trouble Check and remedy App does not work • Are there any apps being disabled? Enable the Cannot connect to • Do you use the terminal at a place where signal is properly (cannot disabled apps and try again. → P.112 network weak? activate, errors...
- Page 144 Camera International roaming ‡ ‡ Trouble Check and remedy Trouble Check and remedy ■ If the signal mark is displayed Still images and • Check if clouds or dirt attach to the lens of Cannot use the videos shot with camera.
- Page 145 Bluetooth ‡ Trouble Check and remedy No caller ID is • Even though a caller notifies the caller ID, it is Trouble Check and remedy notified/A notified not displayed on the terminal if the network or Cannot connect to • Make the Bluetooth device (commercial item) caller ID is different network operator does not notify the ID.
- Page 146 Error messages Cause and remedy Page Error messages Camera failed. Appears when activating Camera fails. P.27 Wait for a while and retry the operation P.78 Error messages Cause and remedy Page or turn the power off then turn on the P.111 The application Appears when an error occurs in terminal.
-
Page 147: Anshin Enkaku Support
■ Contacting an operator with LINE Anshin Enkaku Support From the Home screen, "apps folder" → " 遠隔サポー ト (Enkaku By sharing screens of your terminal with an operator of Anshin Support)" Enkaku Support center, you can receive technical support to make "LINE で問い合わせる... -
Page 148: Warranty And After-Sales Service
3 This warranty is valid only in Japan. Warranty and After-Sales Service 4 This warranty is for free repairs in the stated period and conditions, and does not restrict lawful customer rights. 5 If there are multiple defects on the terminal, all the defects will be Warranty repaired as product quality cannot be guaranteed by just fixing some faults. -
Page 149: Updating Software
Updating software Notes • Do not modify the terminal or its accessories. Software update - Doing so may cause fire, injury or damage. - The modified terminal may be repaired only if the owner agrees on that Download update file for the terminal from the download site on the all the modified parts are restored to the original conditions. -
Page 150: Main Specifications
Main specifications Updating software only with the terminal You can update the software of the terminal by connecting network with Phone ‡ the terminal. Product name SC-02L From the Home screen, "apps folder" → "Settings" → "Software update" → "Download updates manually" Height: Approx. 149 mm Width: Approx. - Page 151 Version Bluetooth standard Ver. 5.0 Continuous 1Seg watching Approx. 810 min. time Output Bluetooth standard Power Class 1 Maximum Approx. 600 min. Vistaed Within approx. 10 m recording time 1Seg communication per one Bluetooth recording distance function time Recording time Approx.
-
Page 152: Specific Absorption Rate (Sar) Of Mobile Phones
External TV antenna cable SC04 ‡ Specific Absorption Rate (SAR) of Mobile Phones Length Approx. 130 mm Specific Absorption Rate (SAR) of Mobile Phones Weight Approx. 5 g This model [SC-02L] mobile phone complies with Japanese technical regulations and international guidelines regarding exposure to radio waves. This mobile phone was designed in observance of Japanese technical regulations regarding exposure to radio waves(*1) and limits to exposure to radio waves recommended by a set of equivalent international guidelines. - Page 153 • Changes or modifications not expressly approved by the manufacturer Galaxy Website: responsible for compliance could void the user's authority to operate the http://www.samsung.com/sar/sarMain.do equipment. → Select "JAPAN" from "LOCATION" → Type "SC-02L" in Phone Model field ■ Information to User →...
- Page 154 (Place and date of issue) (Name and signature of authorized person) * This is not the address of Samsung Service Centre. For the address or the phone number of Samsung Service Centre, see the warranty card or contact the retailer where you purchased your product.
-
Page 155: Export Administration Regulations
Export Administration Regulations Intellectual Property Right This product and its accessories may be under coverage of the Export Administration Regulations of Japan ("Foreign Copyrights Exchange and Foreign Trade Control Laws" and related laws and The works and copyright of music, video picture, computer program, regulations). -
Page 156: Sim Unlock
• iWnn© OMRON SOFTWARE Co., Ltd. 2008-2018 All Rights Reserved. SIM unlock • Rovi, G-GUIDE, G-GUIDE MOBILE and G-Guide related logos are This terminal supports SIM unlock. If you release SIM lock, you can trademarks or registered trademarks of Rovi Corporation and/or its use SIM by a carrier other than NTT DOCOMO. -
Page 157: Index
Call waiting ……………………………………………………………………… 58 Index Camera …………………………………………………………………………… 78 Camera mode ………………………………………………………………… 81 Settings ………………………………………………………………………… 80 Shooting screen ……………………………………………………………… 78 AC adapter………………………………………………………………………… 26 Shooting still images ………………………………………………………… 79 Charging ………………………………………………………………………… 26 Shooting videos ……………………………………………………………… 79 Access point Charging ………………………………………………………………………… 26 Initializing …………………………………………………………………… 105 Clock …………………………………………………………………………………... - Page 158 Early Warning “Area Mail” …………………………………………………… 73 Hold call …………………………………………………………………………… 56 Easy mode ……………………………………………………………………… 109 Home application information ……………………………………………… 51 Email ………………………………………………………………………………… 70 Home screen ……………………………………………………………………… 39 Creating and sending ……………………………………………………… 70 Receiving ……………………………………………………………………… 71 Settings ………………………………………………………………………… 71 iD app ……………………………………………………………………………… 88 Setting up account……………………………………………………………...
- Page 159 My Files ………………………………………………………………………… 128 Recently-used apps …………………………………………………………… 45 My Magazine ……………………………………………………………………… 51 Ringtone My phone number …………………………………………………………… 127 Setting ………………………………………………………………………… 107 My profile ………………………………………………………………………… 64 Screen capture ………………………………………………………………… 30 Navigation bar …………………………………………………………………… 29 Screen lock NFC/Osaifu-Keitai settings ……………………………………………… 121 Canceling ……………………………………………………………………… 27 Notification LED …………………………………………………………………...
- Page 160 Switching keyboard types (input method) ……………………………… 33 Numeric 1Seg ………………………………………………………………………………… 88 Tap …………………………………………………………………………………… 28 Symbol Tap & Pay ………………………………………………………………………… 87 Tethering ……………………………………………………………………… 104 +Message ………………………………………………………………………… 65 Touch and hold …………………………………………………………………… 28 Deleting a message ………………………………………………………… 67 Touch screen …………………………………………………………………… 28 Deleting thread ………………………………………………………………...
- Page 161 Use mobile phone with your manners! Functions designed for public use There are some advanced settings such as not answering incoming call or Remember to be courteous to others when you use your terminal. muting sound, etc. Always turn OFF your terminal in cases below ■ Public mode (turn off) (P.58) Tells the caller via a guidance message that receiver need to turn the power off, ■...
- Page 162 General Inquiries <docomo Information Center> Technical Inquiries & Repairs ■ From DOCOMO mobile phones ■ From land-line phones ■ From DOCOMO mobile phones ■ From land-line phones (In Japanese only) (In Japanese only) R0120-800-000 (toll free) R0120-800-000 (toll free) (No prefix) (toll free) (No prefix) (toll free) * Unavailable from land-line phones, etc. * Unavailable from part of IP phones.