Table of Contents
Advertisement
© Copyright 2014 LG Electronics U.S.A., Inc.
Commercial Mode Setup Guide
Note: Selected features shown within this guide may not be available on all models.
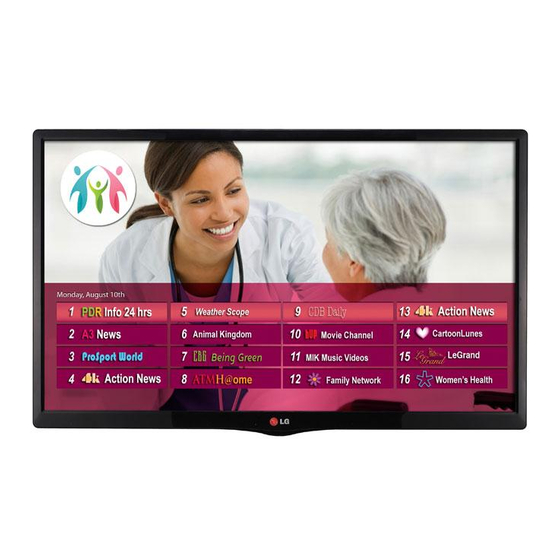
22LY560M
28LY560M
32LY560M
42LY560M
Hospital TVs
EXPERIENCED INSTALLER
Express Script Installer Menu Wizard
pages 12 – 17
Custom Master TV Setup
pages 31 – 35
FTG Mode of Operation
pages 46 – 52
P/N: 206-4261 (Rev A)
Advertisement
Table of Contents
Troubleshooting

Related Manuals for LG 22LY560M


Summary of Contents for LG 22LY560M
- Page 1 Note: Selected features shown within this guide may not be available on all models. EXPERIENCED INSTALLER Express Script Installer Menu Wizard pages 12 – 17 Custom Master TV Setup pages 31 – 35 FTG Mode of Operation pages 46 – 52 P/N: 206-4261 (Rev A) © Copyright 2014 LG Electronics U.S.A., Inc.
-
Page 2: Safety Warnings
• Consult the dealer or an experienced radio/TV technician for help. CAUTION: Do not attempt to modify this product in any way without written authorization from LG Electronics U.S.A., Inc. Unauthorized modification could void the user’s authority to operate this product. -
Page 3: Important Safety Instructions
IMPORTANT SAFETY INSTRUCTIONS Read these instructions. 17. Power Cord Caution: It is recommended that appliances be placed Keep these instructions. upon a dedicated circuit; that is, a single outlet circuit Heed all warnings. which powers only that appliance and has no additional outlets or branch circuits. - Page 4 IMPORTANT SAFETY INSTRUCTIONS (Continued from previous page) 26. Do not touch the ventilation openings, as they may become hot while the TV is operating. 22. Outdoor Antenna Grounding 27. If you smell smoke or other odors coming from the TV or If an outside antenna or cable system is connected to the hear strange sounds, unplug the power cord, and contact an product, follow the precautions below.
-
Page 5: Table Of Contents
Table of Contents Safety Warnings ........2 Learning FTG Configuration from a TV . -
Page 6: Commercial Mode Overview
TVs for Commercial Mode operation. LG commercial TV functionality is based on “ownership” of the Channel Map; that is, the Channel Map resides in the TV’s CPU or Protocol Translator Card (PTC) or it resides externally from the TV (i.e., in a device from the solution provider). -
Page 7: Ftg Mode
Commercial Mode Overview (Cont.) Installer Menu To create a customized Master TV Setup, you will need to know how to access the commercial controller (PTC) xxLY560M PTC INSTALLER MENU Installer Menu and make changes to the default values as CPU-CTV required. - Page 8 TV Zoning option for location-specific configuration. • LG’s FTG File Manager PC software enables you to create an FTG Configuration (.tlx) file, which may be used to configure the CPU for FTG Mode. FTG File Manager utilities enable you to create/edit an FTG Channel Map and configure Installer Menu settings.
-
Page 9: Determining The Tv Operating Mode
Commercial Mode Overview (Cont.) Determining the TV Operating Mode To determine the operating mode of the TV, press MENU on the Installer Remote. The menu displayed depends on the operating mode. See examples below. If the Function Menu appears, the TV is in a mode (FTG, PPV, etc.) that does not allow the end user to change the fundamental TV setup. -
Page 10: Pro:centric Operation
Pro:Centric Interactive Menu Navigation LG’s Pro:Centric pillow speaker provides access to both interactive menus and regular TV features. Press PORTAL on the Pro:Centric pillow speaker to access the interactive menus. Note: Interactive menu options may vary, depending on Pro:Centric features enabled for the site. The following are default interactive menus. -
Page 11: Pro:centric Setup
Pro:Centric Operation (Cont.) Pro:Centric Setup Administration and management options for the Pro:Centric server are described in detail in the Pro:Centric Server Admin Client User Guide. This document describes only those settings that must be specified on the TVs to enable the Pro:Centric remote management facilities and/or the Pro:Centric application. Remote management (TV E-Z Installation): The Pro:Centric server Admin Client provides remote •... -
Page 12: Express Script Installer Menu Wizard
Express Script Installer Menu Wizard The Express Script Installer Menu Wizard guides you through the process of setting up the essential items for most hospital TV viewing applications and also enables you to configure the Pro:Centric settings on the TV. The wizard will appear on the screen each time the TV is turned ON, until configuration is completed or the wizard is exited. -
Page 13: Configure Pro:centric Settings
Express Script Installer Menu Wizard (Cont.) Configure Pro:Centric Settings The next wizard screen enables you to set up the Pro:Centric feature of the TV. By default, the Data Channel is configured for Auto Search, which enables the TV’s Data Channel Auto Search feature to set the Data Channel value. -
Page 14: Complete The Tv Configuration
Express Script Installer Menu Wizard (Cont.) (Continued from previous page) 2. In the Pro:Centric Mode field, use the Left/Right arrow keys on the Installer Remote to select the appropriate Pro:Centric Application Mode—GEM, FLASH, or Configuration Only. 3. Once the fields are completed as required, you have two options: •... - Page 15 Next, and then press OK. Pillow Only 4. Select the pillow speaker code. If using a Pro:Centric pillow speaker (LG IR codes) or a pillow Back Next speaker with Zenith IR codes, you can simply select Next and...
- Page 16 Express Script Installer Menu Wizard (Cont.) (Continued from previous page) Note: You MUST select Execute Auto Search and press OK in order to run the channel scan. If you move on to the next step without running the Auto Search, there will be no analog or digital channels in the channel lineup (Channel Map).
- Page 17 Express Script Installer Menu Wizard (Cont.) (Continued from previous page) When you are finished, press MENU to close the pop-up window. Use the arrow keys to select Next, and then press OK. Installer Menu Wizard ► ► ► ► ► ►...
-
Page 18: Ez Download Utility
Ez Download Utility The Ez Download utilty, available from the TV Manager / USB Download Menu, enables you to select multiple files at one time from the files loaded on a USB memory device. You may use this utility to download any one or all of the following to a TV: a TLX file for configuration purposes, a TLL file for cloning purposes (legacy), a TV CPU or PTC software update, a splash screen image. - Page 19 [EPK] xxLY560M_V03_11_USB.epk The next time(s) you use this USB device for Ez Download, the files SPI Boot LG Boot Logo you selected for the previous download will be pre-selected by default. Apply 7. The fields at the right of the screen will change depending on the currently highlighted file.
- Page 20 Ez Download Utility (Cont.) (Continued from previous page) Note: There are no options available/applicable for TLL files. Note: Press on the Installer Remote, as necessary, to exit the Ez Download screen and/or the TV Manager / USB Download Menu and return to TV viewing. 8.
-
Page 21: Installer Menu
Installer Menu descriptions in this document if you are configuring the TV using an FTG Configuration (.tlx) file created using LG’s FTG File Manager software. Refer to the table on pages 23 and 24 for brief descriptions of Installer Menu items. More detailed descriptions follow the table listing. -
Page 22: Using The Installer Menu
Installer Menu (Cont.) As part of the Installer Menu header (in all modes), two 3-character acronyms are displayed to indicate the TV’s current configuration mode. The table below lists all possible mode identifiers for these TV models. Acronym Description CPU-CTV Pass-through Mode with Channel Map in CPU CPU-FTG FTG Mode via CPU... - Page 23 Installer Menu (Cont.) Installer Menu Items 000 through 047 Item Function Value Range Default Value Brief Description of Function INSTALLER SEQ 0 ~ 3 Leave default set to 0. POWER MANAGE 0 ~ 7 Sets number of hours of no activity before automatic shutoff. AC ON 0 / 1 Set to 1 to enable TV to turn ON when AC power is applied.
- Page 24 Installer Menu (Cont.) Installer Menu Items 053 through 122 Item Function Value Range Default Value Brief Description of Function DIS. CH-TIME 0 / 1 Set to 1 to disable Channel-Time display. EN. CH-T COL. 0 / 1 Set to 1 to enable custom color for the Channel-Time display. FOR.
- Page 25 Installer Menu (Cont.) Detailed Descriptions of Installer Menu Items 000 - INSTALLER SEQUENCE NOTE: For items 007, 008, and 009 Specifies entry sequence to the Installer Menu. For legacy reasons, the scale used is 0 - 63. The PTC software 0 = 9876 1 = 4321 will translate this to the 0 - 100 scale used by the TV.
- Page 26 Installer Menu (Cont.) 012 - IR BANKS EN (IR Banks Enable) 021 - V-CHIP (Parental Control) For direct access to a particular channel bank. When enabled, you Set to 1 to activate V-Chip (Parental Control) and have it available can access a channel bank by inputting the discrete IR code for to the end user to filter and control or otherwise restrict program- that bank.
- Page 27 Installer Menu (Cont.) When Hospital Mode is enabled and the TV is in Pass-through 035 - HDMI1 ENABLE Mode, channel banks are also available. Refer to channel banks Set to 1 to enable HDMI 1 input in DTV Mode. Set to 2 to enable information in this document for further details.
- Page 28 Installer Menu (Cont.) 069 - EN. CH-T COL. (Enable Channel-Time Custom Color) 080 - UPN MSB-2 (UPN Most Significant Byte-2) Set to 1 to enable custom color for the Channel-Time display. Set User programmable number, most significant byte-2 readable by MPI command.
- Page 29 Installer Menu (Cont.) 096 - DEF. ASP. RATIO (Default Aspect Ratio) 099 - BACK LIGHTING Selects default aspect ratio at power up: Sets the TV screen brightness at power up. Default setting is 255. 0 = Set By System 1 = 4:3 •...
- Page 30 Installer Menu (Cont.) 117 - FACT DEFAULT (Factory Default) 121 - UPDATE TIME HR Set to 1 and press OK to restore the factory default settings of all Based on the settings of this item and item 122 UPDATE TIME MN, Installer Menu items.
-
Page 31: Custom Master Tv Setup
Custom Master TV Setup This section describes how to create a customized Master TV Setup for cloning purposes when the TV is in Pass-through Mode. Note: Cloning requirements and procedures are described in detail on pages 41 to 45. Refer to FTG Mode information on pages 46 to 52 for details on entering FTG Mode and configuring/editing the FTG Channel Map and FTG Installer Menu settings. -
Page 32: Custom Master Tv Setup Procedure
Custom Master TV Setup (Cont.) Custom Master TV Setup Procedure 1. Turn ON the TV. If the Express Script Installer Menu Wizard appears on the screen when you turn ON the TV, exit the wizard. 2. Set Installer Menu items. This step provides specific instruction only on the Installer Menu items that should be set on a Master TV. - Page 33 Custom Master TV Setup (Cont.) (Continued from previous page) 3. Set up TV features. On-screen setup menus control the features of the TV. Press MENU on the Installer Remote to access the TV setup menus, and then set Channel, Picture, Audio, etc. options to the desired configurations. See “Clonable TV Setup Menu Features”...
- Page 34 Custom Master TV Setup (Cont.) (Continued from previous page) 5. (PTC cloning only) Transfer the auto-tuned/edited channel lineup (if applicable) and TV setup menu settings to the PTC: 2-5-5 + MENU Mode Note: This step is essential for successful cloning using a TLL file.
- Page 35 Custom Master TV Setup (Cont.) (Continued from previous page) 7. Verify the TV setup. Make sure the TV features are set per your requirements. Also, if cloning an auto-tuned/edited channel lineup, verify that the channel lineup, channel icons, and custom text labels (as applicable) are correct. 8.
-
Page 36: Channel Icons / Custom Text Labels (2-5-4 + Menu Mode)
Channel Icons / Custom Text Labels (2-5-4 + MENU Mode) Changing Channel Icons and/or Adding or Editing Changing icons and/or adding or editing custom text labels Custom Text Labels in the Channel-Time Display can only be done if there are channels that have been transferred to the TV’s PTC either during the Express If there is no pre-assigned icon for a channel, you can add Script/Custom Master TV Setup (see pages 12 to 17 or... -
Page 37: Channel Banks Setup
Channel Banks Setup Channel Banks Overview Channel Banks enable institution administrators to create tiered channel programming on patient in-room TVs. Each channel bank may offer a custom channel lineup for a pre-determined fee. LY560M TVs are configured with four channel banks, i.e., Channel Banks 1, 2, 3, and 4. The top tier generally contains the most programming (premium, etc.), 2nd tier = lesser programming, 3rd tier = basic programming, etc. - Page 38 Channel Banks Setup (Cont.) Channel Status Options for Channel Banks In the Channel Preview/Banks Setup Menu, use the Channel Up/Down arrows on the Installer Remote to navigate to a channel and the Left/Right arrows to select the channel status. IDs currently selected CHANNEL PREVIEW - BANK 1 channel bank.
- Page 39 Channel Banks Setup (Cont.) Inactive TV Setup There are two options for creating an inactive TV display on Channel Bank 4. Either: Select NORMAL-DELETED for each channel in Channel Bank 4, or • Press CH. BANK on the Installer Remote until Channel Bank 4 is selected, and then press CH. PREVIEW •...
-
Page 40: Channel Banks Worksheet
Channel Banks Worksheet Use this worksheet to plan your program packages. (Photocopy additional worksheets as needed.) Channel Number Channel Number Channel Number Channel Number Channel Number Date _____________ Installer _____________________________________ Page ___ of ____ Location ______________________________________________________________________ 206-4261... -
Page 41: Cloning Procedures
Cloning Procedures Cloning Overview Cloning refers to the process of capturing a Master TV Setup and transferring it to a Target TV that is to remain in Pass-through Mode. There are two different procedures for cloning a Master TV Setup, each with its own advantages and limitations (see also “Cloning Methods” on page 31): Using a USB memory device / TLX file •... - Page 42 Cloning Procedures (Cont.) Learn Setup from Master TV 1. Ensure the Master TV is set up completely and in Pass-through Mode. TV Manager 2. Insert the USB memory device into the USB port on the Master TV. 3. Press MENU on the Installer Remote to display the TV setup menus. Ez Download Use the arrow navigation keys to select/highlight the Option menu icon, Logo Image Download...
- Page 43 Cloning Procedures (Cont.) (Continued from previous page) 3. If the Master TV Setup contains a TV Zone # assignment, make sure to assign the same Zone designation in the Target TV at this time. TV Manager See Reference section, “Using the TV Zoning Feature,” for further Ez Download information.
-
Page 44: Learning / Teaching A Master Tv Setup Using A Tll File
Cloning Procedures (Cont.) Learning / Teaching a Master TV Setup using a TLL File This section describes how to Learn and/or Teach a Master TV Setup using a TLL file. Before You Begin Learning and Teaching is only possible between identical model TVs. •... - Page 45 Cloning Procedures (Cont.) Teach Master TV Setup to Target TV Note: You may also use the Ez Download utility to complete the Teaching process, if desired. See “Ez Download Utility” on pages 18 to 20 for further information. 1. Turn ON the Target TV. The next step depends on whether the Express Script Installer Menu Wizard appears on the screen: •...
-
Page 46: Ftg Mode Of Operation
FTG Mode of Operation This section describes how to create an FTG Configuration (.tlx) file using the FTG File Manager. It also describes how to locally configure a TV for FTG Mode operation. See also the FTG Mode overview on pages 7 to 8 for further information on FTG Mode. - Page 47 FTG Mode of Operation (Cont.) (Continued from previous page) Note: To clear the current TLX File Contents, click the New button in the TLX File command section of the FTG File Manager main screen (above the TLX File Contents window). 3.
-
Page 48: Teaching Ftg Configuration To A Tv
FTG Mode of Operation (Cont.) Teaching FTG Configuration to a TV This section describes how to transfer (Teach) an FTG Configuration file from a USB memory device to a TV, using the TV Manager / USB Download Menu “Teach To TV (TLX)” option. The FTG Configuration file may be created either in the FTG File Manager or from a Master TV Setup that was saved (Learned) from a Master TV. - Page 49 FTG Mode of Operation (Cont.) (Continued from previous page) Note: In order for the proper location-specific TV Zone profile data to be applied, the Zone designation must be assigned in the Target TV(s) BEFORE Teaching is performed. 3. Insert the USB memory device that contains the FTG Configuration file into the USB port.
-
Page 50: Learning Ftg Configuration From A Tv
FTG Mode of Operation (Cont.) Learning FTG Configuration from a TV To ensure that decryption of Pro:Idiom encrypted channels is enabled, it is recommended that you create an FTG Configuration file using the FTG File Manager as described on pages 46 to 47. However, if necessary, there is an option to save (Learn) an FTG Configuration file from an LY560M TV to a USB memory device. -
Page 51: Optional Manual Configuration / Tv Setup
FTG Mode of Operation (Cont.) (Continued from previous page) 6. In the Learn From TV (TLX) window, to differentiate this TLX file from others, you can use the Up/Down arrow keys to change the last five digits of the filename. Press OK when you are ready to initiate Learning. - Page 52 FTG Mode of Operation (Cont.) (Continued from previous page) 3. Set Installer Menu item 117 FACT DEFAULT to 1 and press OK on the Installer Remote. This clears all Installer Menu custom settings, the channel lineup, etc. and restores the factory default settings.
-
Page 53: Ftg File Manager Utilities Overview
FTG File Manager Utilities Overview FTG File Manager Main Screen The FTG File Manager main screen enables you to compile, modify, and save FTG Configuration (.tlx) files. It also allows you to change the Zone assignment for each Installer Menu profile, if desired (see Reference section, “Using the TV Zoning Feature,”... -
Page 54: Ftg Channel Map Configuration Utility
FTG File Manager Utilities Overview (Cont.) FTG Channel Map Configuration Utility The FTG Channel Map Configuration Utility enables you to create, view, edit, and print a Logical Channel Map. EDIT/ADD MAP PRINT MAP Click to display a printable Click to open the FTG Channel Map Editor to create FTG Channel Map Report. -
Page 55: Ftg Channel Map Editor
FTG File Manager Utilities Overview (Cont.) FTG Channel Map Editor The FTG Channel Map Editor shows a single Logical Channel’s data and the FTG Channel Map. LOGICAL CHANNEL MAPPING Select a Logical Channel number. Then, CUSTOM CHANNEL LABELS/ICONS SET CHANNEL ATTRIBUTES assign it the RF, Major, and Minor channel Enter custom labels and select icons Check/select Encrypted, OSD,... -
Page 56: Ftg Installer Menu Configuration Utility
FTG File Manager Utilities Overview (Cont.) FTG Installer Menu Configuration Utility CONFIGURATION SETTINGS Select tabs for categories of Installer Menu items to set up TV. Filename of opened FTG Configuration (.rml) file created using FTG Device Configuration Application. Notes: • The Pro:Centric tab enables you to set up Pro:Centric-specific parameters. Refer to the Free-To- Guest (FTG) File Manager User Guide for further information. -
Page 57: Ip Environment Setup
IP Environment Move IP Environment Setup The IP Environment Menu enables you to set up the network features of the TV. With the exception of Network Connection settings, the IP Environment settings are editable (with the Installer Remote) only if IP Environment the TV is in Pass-through Mode and read-only when the TV is not in Move... -
Page 58: Network Status
IP Environment Setup (Cont.) (Continued from previous page) The next Network Setting window will enable you to specify the IP and DNS configuration for this TV. Auto settings will Network Setting be selected by default. Use the arrow keys to select the Select the IP setting mode. -
Page 59: Pro:centric Setup
IP Environment Setup (Cont.) IP Environment Move Pro:Centric Setup Pro:Centric options enable you to configure the TV with the appropriate settings to connect to the Pro:Centric server. Use the Up/Down arrow keys on the Installer Remote to navigate between fields. 1. - Page 60 IP Environment Setup (Cont.) (Continued from previous page) IP Configuration a) In the Media Type field, use the Left/Right arrow keys to select IP. Note: If the Media Type has already been set in the Express Script Installer Menu Wizard, the specified value will be reflected in this field.
-
Page 61: Device
Reference: Upgrading TV/PTC Software using a USB Memory Device This section describes how to update TV (CPU) and/or PTC software using the TV Manager TV Manager / USB Download Menu “Upgrade TV Software” and/or “Update PTC Software” option(s), respectively, though you may also use the Ez Download utility Ez Download to upgrade software, if desired. -
Page 62: Device
Reference: Downloading a Splash Screen using a USB Memory Device This section describes how to download a splash screen image using the TV Manager / USB Download Menu “Logo Image Download” option, though you may also use the Ez Download utility to download the splash image, if desired. See “Ez Download Utility”... -
Page 63: Power Consumption Settings
Reference: Power Consumption Settings The following tables assume that Installer Menu item 099 BACK LIGHTING is set as shown below (default value is 255). 22LY560M 28LY560M 32LY560M 42LY560M Item 099 Power Power Power Power Back Lighting Percent Percent Percent Percent... -
Page 64: Tv Aux Input Configuration
Reference: TV Aux Input Configuration ENABLE MPI DATA MPI DATA DATA STATUS DATA STATUS DIRECT ACCESS Installer STATUS TYPE TYPE 0xD2 TYPE 0x0D Tuning Menu Item Installer Menu 0x41 SOURCES CURRENT AV 046 START ENABLED (R/W) SOURCE (R) SOURCE (R) AUX SRCE (Start Aux Installer... -
Page 65: Auto Input(S) Sensing Feature
Reference: Auto Input(s) Sensing Feature This section provides detailed settings information for Installer Menu item 042 AUTO INPUTS. To disable auto-sensing for all available Aux inputs, set item 042 to 0. To enable auto-sensing for all available Aux inputs, set item 042 to 255. For specifications on all other available settings (i.e., settings for individual inputs), refer to the table on the following page. - Page 66 Reference: Auto Input(s) Sensing Feature (Cont.) Inputs Item 042 Installer Menu Value Display HDMI 1 HDMI 2 Enabled Disabled Disabled Disabled DDXDXXX0 Disabled Enabled Disabled Disabled DDX4XXXD Enabled Enabled Disabled Disabled DDX4XXX0 Disabled Disabled Enabled Disabled D6XDXXXD Enabled Disabled Enabled Disabled D6XDXXX0 Disabled...
-
Page 67: Ly560M Hospital Operations
The following table identifies when and how the LY560M hospital features are supported in three different TV configurations. As indicated in the introduction to this document, LG commercial TV functionality is based on “ownership” of the Channel Map. For the purposes of this table, “CPU” indicates that the TV is in Pass-through Mode with the Channel Map in the CPU (i.e., auto-tuned/edited channel lineup) and “PTC”... - Page 68 Reference: LY560M Hospital Operations (Cont.) Speaker Selection The following table outlines speaker settings as determined by Installer Menu items 027 HOSPITAL MODE and 020 FEATURE LEVEL. Item 027 HOSPITAL Item 020 FEATURE Audio Menu Speaker MODE Value LEVEL Value TV Speaker None TV Only Pillow Only...
-
Page 69: Restoring Factory Defaults On The Tv(S)
Reference: Restoring Factory Defaults on the TV(s) This section describes how to restore all factory defaults or just the Installer Menu factory defaults either on a single TV that is currently in Pass-through or FTG Mode or on multiple TVs that are currently in FTG Mode. Note: If the TV(s) is/are currently in FTG Mode, restoring the factory defaults also resets the TV to Pass- through Mode. -
Page 70: Using The Tv Zoning Feature
Reference: Using the TV Zoning Feature This section describes the TV Zoning feature available with the LY560M model TVs. The TV Zoning feature enables you to create localized configurations for TVs in selected locations, or “Zones,” within the installation environment, for example, a hotel lobby, fitness center, restaurant, etc. This feature is primarily intended for use when the TV is configured for FTG Mode operation. - Page 71 Reference: Using the TV Zoning Feature (Cont.) Note: While a channel can be restricted from up to eight Zones, a TV can only ever be in (set for) one Zone. See also the FTG Channel Map Editor overview on page 55. At the same time, keep in mind that the TV Zone designations are not mutually exclusive.
-
Page 72: 22/28Ly560M Rear And Side Jack Panels
Reference: 22/28LY560M Rear and Side Jack Panels HDMI IN 1 Connection for HDMI output from external device. UPDATE Restricted to software updates. SPEAKER OUT / LINE OUT (3.5 mm jack) Connect external audio (fixed speaker, variable speaker, or fixed line level [amplifier]) RESET equipment. -
Page 73: 32/42Ly560M Rear And Side Jack Panels
Reference: 32/42LY560M Rear and Side Jack Panels HDMI IN 1 Connection for HDMI output from external device. RGB IN (PC) UPDATE Connection for RGB output from PC. Restricted to software updates. RESET When the TV is in Pass-through Mode, the MPI Initiates a hardware reset and function enables an external MPI control device turns the TV OFF. -
Page 74: External Stereo Speaker Setup
Reference: External Stereo Speaker Setup The three-contact (left, right, ground) SPEAKER OUT 3.5 mm jack on the LY560M rear panel provides stereo speaker signal outputs (fixed speaker, variable speaker, or fixed line level [amplifier]) for external audio equipment. Set Installer Menu item 097 AUDIO OUTPUT as required in accordance with external audio equipment connected to the TV. -
Page 75: Installer Remote Control Typical Key Functions
Reference: Installer Remote Control Typical Key Functions An LG Installer Remote is required to set up and operate the TV. The LG Installer Remote illustrated below shows typical remote control functions and is provided for reference only. POWER TV LG1/TV LG2 & TV Z1/TV Z2... -
Page 76: Pillow Speaker Setup
Controlling the TV with Serial Data These TV models are capable of being controlled by a single-wire, serial PREV MUTE data signal. This is an LG patented technology and is being implemented SLEEP OPTION PILLOW SPEAKER by certain brands of “smart” pillow speakers. -
Page 77: Usb Media Navigation Using Pro:centric Pillow Speaker
Reference: USB Media Navigation using Pro:Centric Pillow Speaker The Pro:Centric pillow speaker is currently the only pillow speaker that enables users to navigate and play/view USB media files (videos, music, photos, etc.). This section provides a brief overview of the Pro:Centric pillow speaker navigation tools. Note: Refer to the Owner’s Manual for detailed information on USB memory device requirements and the types of media supported by the LY560M TVs. -
Page 78: Vesa Standard Tv Mounts
Reference: VESA Standard TV Mounts General Guidelines: Choosing a Location for Installing a VESA Standard Mount To the right are some examples of VESA standard mounts. Since there are numerous types of stands and mounts available, only a few are shown here. Refer to the instruc- tions provided with the TV stand that will be used to mount the TV. -
Page 79: Troubleshooting
Too much light in room. Dim room light. Remote IR codes do not match Make sure the Installer Remote is compatible. Contact your LG setting(s) in TV. dealer, as necessary. Then, check settings both in the TV and on the remote. IR codes sent by the remote must match the setting(s) in the TV. -
Page 80: Commercial Mode Check
Troubleshooting (Cont.) Commercial Mode Check Use this flowchart to determine whether the TV is currently in Commercial Mode. Press POWER on Installer Remote. connected Plug into AC TV turned to AC Power outlet. Power? Leave the TV set ON, and press MENU on the Installer Remote. -
Page 81: Channel Banks Setup Troubleshooting
Troubleshooting (Cont.) Channel Banks Setup Troubleshooting CHANNEL PREVIEW - BANK 1 CH 011-001 NORMAL-ADDED Enter -> Change CC -> VCHIP Menu, Ch. Preview -> Exit Channel Preview/Banks Setup Menu Possible Cause Possible Solution Symptom Cannot change channel Channel Access was denied in Express Set CH. -
Page 82: Glossary Of Terms
Refers to a particular commercial mode of ment, weather, amenities, etc. information Commercial Mode operation within an LG TV. See also FTG for end users. (Powered by Pro:Centric A mode of operation that provides a broad Mode. -
Page 83: Document Revision History / Open Source Software Notice
In addition to the source code, all referenced license terms, warranty disclaimers and copyright notices are available for download. LG Electronics will also provide open source code to you on CD-ROM for a charge covering the cost of performing such distribution (such as the cost of media, shipping and handling) upon e-mail request to opensource@ lge.com. -
Page 84: Back Cover
For Customer Support/Service, please call: 1-888-865-3026 www.LGsolutions.com Pro:Idiom is a registered trademark of Zenith Electronics LLC. Pro:Centric is a registered trademark of LG Electronics Inc. All other trademarks or registered trademarks are the property of their respective owners. 206-4261 Revision A...