
Related Manuals for Zanussi ZCV69360WA


Summary of Contents for Zanussi ZCV69360WA
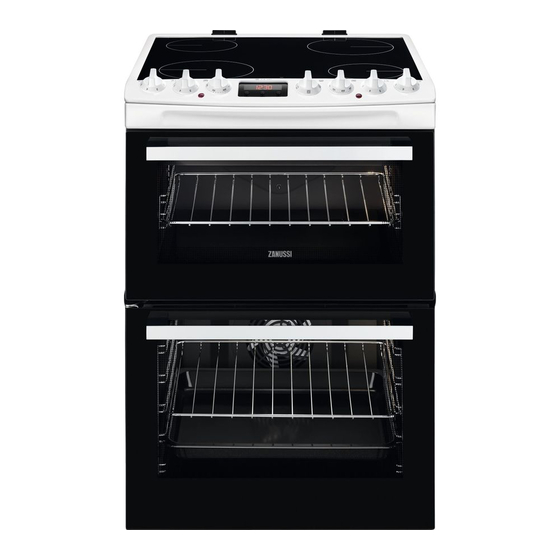
- Page 1 User Manual GETTING STARTED? EASY. ZCV69360WA ZCV69360BA ZCV69360XA EN User Manual Cooker...
-
Page 2: Safety Information
VISIT OUR WEBSITE FOR: Get usage advice, brochures, trouble shoot- er, service and repair information: www.zanussi.com/support SAFETY INFORMATION Before the installation and use of the appliance, carefully read the supplied instructions. The manufacturer is not responsible for any injuries or damage that are the result of incorrect installation or usage. -
Page 3: General Safety
GENERAL SAFETY Only a qualified person must install this appliance and replace • the cable. This appliance must be connected to the mains with a H05VV- • F type cable to withstand the temperature of the rear panel. This appliance is intended for use up to an altitude of 2000 m •... -
Page 4: Safety Instructions
WARNING: The appliance and its accessible parts become hot • during use. Care should be taken to avoid touching heating elements. Always use oven gloves to remove or put in accessories or • ovenware. Before maintenance, cut the power supply. •... -
Page 5: Care And Cleaning
• Make sure that the parameters on the rating • Fats and oil when heated can release flammable plate are compatible with the electrical ratings vapours. Keep flames or heated objects away of the mains power supply. from fats and oils when you cook with them. •... -
Page 6: Installation
Disconnect the mains plug from the mains • The type of light bulb or halogen lamp used for socket. this appliance is for household appliances only. • Make sure the appliance is cold. There is the Do not use it for house lighting. risk that the glass panels can break. -
Page 7: Levelling Of The Appliance
LEVELLING OF THE APPLIANCE COVERING TERMINAL BOARD • The recommended cross-section area is six Use small feet on the bottom of appliance to set the square millimetres (6 mm²). appliance top surface level with other surfaces. • When you refit the mains terminal cover, make sure that the lower tabs are located inside the ELECTRICAL INSTALLATION bottom edge of the aperture, before you fix the... -
Page 8: Product Description
PRODUCT DESCRIPTION GENERAL OVERVIEW Control panel and hob Air vents for the cooling fan Heating element Lamp Shelf support, removable Cavity embossment Shelf positions COOKING SURFACE LAYOUT Cooking zone 1200 W Steam outlet - number and position depends on the model Cooking zone 1700 W 145 mm 180 mm... -
Page 9: Before First Use
ACCESSORIES • Trivet For roasting and grilling. • Wire shelf For cookware, cake tins, roasts. Use the trivet only with the Grill- / • Grill- / Roasting pan roasting pan. To bake and roast or as pan to collect fat. •... -
Page 10: Hob - Hints And Tips
RESIDUAL HEAT INDICATOR Use the residual heat to decrease energy consumption. Deactivate the WARNING! There is a risk of burns cooking zone approximately 5 - 10 from residual heat. minutes before the cooking process is completed. The indicator comes on when a cooking zone is hot, but it does not function if mains power is Turn the knob for the selected cooking zone to a disconnected. -
Page 11: Oven - Daily Use
OVEN - DAILY USE WARNING! Refer to Safety chapters. TOP OVEN FUNCTIONS Symbol Oven function Application Off position The oven is off. Oven Lamp To turn on the lamp without a cooking function. 100 - 250 Conventional Cooking To bake and roast food on one shelf position. Dual Circuit Grill To grill flat food in medium quantities in the middle of the shelf. -
Page 12: Activating And Deactivating The Top / Main Oven
CAUTION! Do not refill the cavity You can defrost food by choosing embossment with water during Moist Fan Baking function without cooking or when the oven is hot. setting the temperature. 6. To deactivate the appliance, turn the knobs for the oven functions and temperature to the off ACTIVATING AND DEACTIVATING THE TOP / position. -
Page 13: Trivet And Grill- / Roasting Pan
2. Put the deep pan into the oven on the necessary shelf position. You can use the trivet to grill flat dishes in large quantities and to toast. 1. Put the trivet into the deep pan so that the supports of the wire shelf point down. •... - Page 14 A. Clock functions C. Clock function B. Timer BUTTONS Button Function Description MINUS To set the time. CLOCK To set a clock function. PLUS To set the time. CLOCK FUNCTIONS TABLE Clock function Application TIME OF DAY To set, change or check the time of day. DURATION To set how long the appliance operates.
-
Page 15: Oven - Hints And Tips
3. Press to set the time for DURATION. 2. Press to set the necessary time. The Minute Minder starts automatically after 5 4. Press seconds. 5. Press to set the time for END. 3. When the set time ends, an acoustic signal sounds. - Page 16 Baking results Possible cause Remedy The cake sinks and be- The oven temperature is too Next time set slightly lower oven comes soggy or streaky. high. temperature. The oven temperature is too Next time set a longer baking time high and the baking time is and lower oven temperature.
- Page 17 Food Temperature (°C) Time (min) Shelf position Pasta Lasagne etc. 170 - 180 40 - 50 Pastry: Choux 180 - 190 30 - 40 Pastry: Eclairs, Profiteroles 180 - 190 30 - 40 Pastry: Flaky / Puff Pies 210 - 220 30 - 40 Shortcrusts: Mince Pies 190 - 200...
- Page 18 Food Temperature (°C) Time (min) Shelf position Fish 160 - 180 30 - 40 Fruit Pies, Crumbles 170 - 180 30 - 50 Milk Puddings 140 - 160 60 - 90 Pastry: Choux 180 - 190 30 - 40 Pastry: Shortcrust 180 - 190 25 - 35 Pastry: Flaky...
- Page 19 Fish Food Temperature (°C) Time (min) Shelf position Fish in pouches 300 g 25 - 35 Whole fish 200 g 25 - 35 Fish fillet 300 g 25 - 35 Meat Food Temperature (°C) Time (min) Shelf position Meat in pouch 250 g 25 - 35 Meat skewers 500 g 30 - 40...
- Page 20 PLUS STEAM Bakery Water in the Temperature Preheating time Shelf po- Food cavity em- Time (min) (°C) (min) sition bossment (ml) White bread 35 - 45 Bread rolls 20 - 25 Focaccia 20 - 25 Homemade pizza 15 - 20 Cookies, scones, 10 - 20 croissant...
- Page 21 Roasting Water in the Temperature Preheating Shelf po- Food cavity emboss- Time (min) (°C) time (min) sition ment (ml) Chicken 65 - 75 Half chicken 35 - 50 Roast pork 65 - 70 Roast beef 1 - 1,5 1. 50 - 55 2.
- Page 22 GRILLING IN GENERAL • Grill only flat pieces of meat or fish. WARNING! Always grill with the oven door closed. • Always grill with the maximum temperature setting. • Set the shelf into the shelf position as recommended in the grilling table. The grilling area is set in centre of the shelf.
-
Page 23: Information For Test Institutes
Potato products Temperature Shelf posi- Food Quantity Time (min) (°C) tion French Fries, frozen approx. 650 g 180 - 220 20 - 30 French Fries thick, frozen approx. 600 g 180 - 220 20 - 30 Potato wedges, frozen approx. 650 g 180 - 220 15 - 25 Croquettes... - Page 24 Tempera- Shelf posi- Food Function Time (min) Accessories ture (°C) tion Apple pie, 2 tins (ø 20 Conventional 80 - 100 Grid cm) on the grid, diag- Cooking onally shifted Apple pie, 2 tins (ø 20 Thermaflow® 80 - 100 Grid cm) on the grid, diag- onally shifted...
-
Page 25: Oven - Care And Cleaning
Tempera- Shelf posi- Food Function Time (min) Accessories ture (°C) tion Toast Full Grill 3 - 8 Grid Beef burger Dual Circuit Grill 15 - 25 (first Grid / side) Roasting 10 - 20 (second side) OVEN - CARE AND CLEANING WARNING! Refer to Safety chapters. -
Page 26: Removing The Shelf Supports
WARNING! Keep children away when you clean the oven at a high temperature. The oven surface becomes very hot and there is a risk of burns. Spots or discolouration of the catalytic surface have no effect on catalytic properties. Before activating the catalytic cleaning 2. -
Page 27: Replacing The Lamp
2. Pull up the trim. 3. Remove the glass panels. To replace the glass panels, do the same steps in reverse. Before you lower the trim, attach the A trim part to the door. Refer to the image. REPLACING THE LAMP WARNING! Risk of electric shock. -
Page 28: Service Data
WHAT TO DO IF... Problem Possible cause Remedy You cannot activate the appli- The appliance is not connec- Check if the appliance is cor- ance. ted to an electrical supply or it rectly connected to the electri- is connected incorrectly. cal supply. -
Page 29: Energy Efficiency
......... Product number (PNC) ......... Serial number (S.N.) ......... ENERGY EFFICIENCY PRODUCT INFORMATION FOR HOB ACCORDING TO EU 66/2014 Model identification ZCV69360WA ZCV69360BA ZCV69360XA Type of hob Hob inside Freestanding Cooker Number of cooking zones Heating technology Radiant Heater Diameter of circular cooking Left front 18.0 cm... -
Page 30: Environmental Concerns
Heat source Electricity Top oven: 39 l Volume Main oven: 73 l Type of oven Oven inside Freestanding Cooker ZCV69360WA 59.5 kg Mass ZCV69360BA 59.5 kg ZCV69360XA 59.5 kg * For European Union according to EU Regulations 65/2014 and 66/2014. - Page 31 Return the product to your local recycling facility or contact your municipal office.
- Page 32 WWW.ZANUSSI.COM/SHOP...