Table of Contents
Advertisement
Available languages
Available languages
Quick Links
Advertisement
Chapters
Table of Contents

Related Manuals for Electrolux EMS30400


Summary of Contents for Electrolux EMS30400
- Page 1 ..................... EMS30400 DA MIKROBØLGEOVN BRUGSANVISNING EN MICROWAVE OVEN USER MANUAL FR FOUR À MICRO-ONDES NOTICE D'UTILISATION...
-
Page 2: Table Of Contents
12. INSTALLATION ............17 VI TÆNKER PÅ DIG Tak for dit køb af et Electrolux-apparat. Du har valgt et produkt, som giver dig årtiers professionel erfaring og innovation på én gang. Genialt og elegant. Det er designet med dig i tankerne. Så... -
Page 3: Om Sikkerhed
DANSK 1. OM SIKKERHED Læs brugsanvisningen grundigt, før apparatet installeres og tages i brug. Producenten kan ikke drages til ansvar, hvis apparatet installeres forkert og anvendelsen forårsa- ger skade. Opbevar altid brugsanvisningen sammen med apparatet til eventuel fremtidig brug. 1.1 Sikkerhed for børn og andre udsatte personer ADVARSEL Risiko for kvælning, personskade eller permanent in- validitet. - Page 4 – af kunder på hoteller, moteller og andre indkvarte- ringsmiljøer – miljøer af Bed and Breakfast-typen. • Apparatet bliver varmt indvendigt, når det er i brug. Undlad at røre ved apparatets indvendige varmelege- mer. Brug altid ovnhandsker til at tage ribber eller ovn- faste fade ud eller sætte dem i.
-
Page 5: Sikkerhedsanvisninger
DANSK • Opvarmning af drikkevarer i mikrobølgeovn kan resulte- re i forsinket eruptiv kogning. Pas på, når du håndterer beholderen. • Indholdet i sutteflasker og glas med babymad skal rø- res eller rystes, og for at undgå forbrænding skal tem- peraturen kontrolleres, inden barnet får det. - Page 6 (af hensyn til tilstrække- • Belast ikke døren, når den er åben. lig ventilation). • Brug ikke apparatet som en arbejdsfla- de, og brug ikke ovnrummet til opbeva- Tilslutning, el ring. ADVARSEL 2.3 Vedligeholdelse og Risiko for brand og elektrisk stød.
-
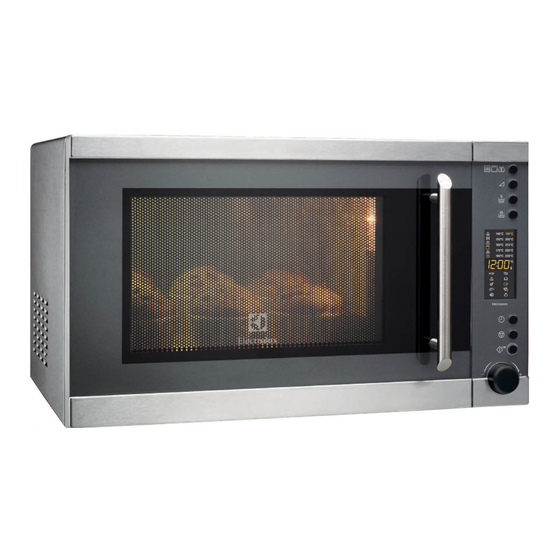
Page 7: Produktbeskrivelse
DANSK 3. PRODUKTBESKRIVELSE Pære 1 2 3 Sikkerhedslåsesystem Display Betjeningspanel Bølgeleder-dæksel Grill Aksel til drejetallerken 3.1 Tilbehør Drejetallerken-sæt Glasplade og rulleskinne. Brug altid drejetallerken-sættet til at tilberede fødevarer i apparatet. Grillrist Til grillstegning af mad og kombineret madlavning. 4. FØR IBRUGTAGNING ADVARSEL Tryk gentagne gange på... -
Page 8: Betjeningspanel
5. BETJENINGSPANEL Symbol Funktion Beskrivelse Indstilling af mikrobølge- / grill / Funktionsknap varmluftsfunktionen. Effektknap Indstilling af effektniveauet. Knap for automatisk Automatisk genopvarmning af mad. genopvarmning Optøning af mad efter vægt eller Optøningsknap tid. -
Page 9: Daglig Brug
DANSK Symbol Funktion Beskrivelse Viser indstillingerne og den aktuelle — Display tid. Urknap Indstilling af uret. Deaktivering af apparatet eller slet- Knappen Stop / Slet ning af madlavningsindstillingerne. Start af apparatet eller øgning af madlavningstiden i 30 sekunder ved Knappen Start / +30 fuld effekt. - Page 10 10 www.electrolux.com • I retter med sovs skal der med mellem- og fjern de stykker, der er begyndt af tø rum røres i retten. • Grøntsager, der har en fast struktur skal Optøning af smør, portioner af kage, koges i vand, f.eks. gulerødder, ærter kvark: eller blomkål.
- Page 11 DANSK Kogegrejsmateriale Mikrobølger Grill- steg- Optøning Tilbe- ning / varm- redning Varm- ning luft Stegefade, der er fremstillet af me- tal, f.eks. emalje, støbejern Bageforme, sort lak eller silikonebe- lagt Bageplade Kogegrej til bruning, f.eks. Crisp- el- ler Crunch-plade Færdigretter i emballage 1) Uden sølv, guld, platin eller metalforkromning/dekorationer 2) Uden kvarts- eller metaldele, eller glasurer, som indeholder metaller 3) Følg producentens instruktioner om de maksimale temperaturer.
- Page 12 12 www.electrolux.com 5. Læg maden ind. Tryk på for at bekræfte og starte apparatet. 6. Drej indstillingsknappen for at indtaste tiden. Tiden indstilles automatisk ved 7. Tryk på for at bekræfte og starte optøning efter vægt. Optøning ef- apparatet. ter vægt bør hverken anvendes til fødevarer, der har stået uden for...
-
Page 13: Automatiske Programmer
DANSK 7. AUTOMATISKE PROGRAMMER ADVARSEL 1. Drej indstillingsknappen for at vælge Se kapitlet om sikkerhed. den ønskede menu i standby-tilstand. 2. Tryk på for at bekræfte. 7.1 Automatisk tilberedning 3. Drej indstillingsknappen for at indstille menuens vægt. Du kan bruge den automatiske tilbered- 4. -
Page 14: Brug Af Tilbehøret
14 www.electrolux.com 7.2 Automatisk genopvarmning 7.3 Udskudt start 1. Tryk gentagne gange på Du kan programmere apparatet til maks. for at væl- 3 trin. ge genopvarmningstilstanden. 1. Tryk på 2. Drej indstillingsknappen for at vælge , og indstil effektniveauet. vægten. -
Page 15: Nyttige Oplysninger Og Råd
DANSK 8.2 Indsætning af grillristen Placér grillristen på drejetallerken-sættet. 9. NYTTIGE OPLYSNINGER OG RÅD 9.1 Tip til mikrobølge Problem Afhjælpning Du kan ikke finde oplysninger om Se efter en lignende madvare. Forøg eller mængden for den tilberedte mad- forkort længden af tilberedningstiden efter vare. -
Page 16: Vedligeholdelse Og Rengøring
16 www.electrolux.com 9.5 Lille grill 9.7 Kombineret tilberedning Til grillstegning af flade madvarer midt på Brug den kombinerede tilberedning til at grillristen. bevare visse fødevarers sprødhed. Vend maden halvvejs under den indstille- Halvvejs under tilberedningstiden skal du de tid og fortsæt grillstegningen. -
Page 17: Installation
DANSK Problem Mulig årsag Afhjælpning Der er gnister i ovn- Der er metalspyd eller alufo- Sørg for at spyddene og rummet. lie, som rør ved indersiden. folien ikke rør ved indersi- den. Drejetallerken-sæt- Der er en genstand eller Rengør området under glas- tet udsender en snavs under glaspladen. - Page 18 18 www.electrolux.com 13. MILJØHENSYN apparater. Kasser ikke apparater, der er Genbrug materialer med symbolet mærket med symbolet , sammen med Anbring emballagematerialet i passende beholdere til genbrug. husholdningsaffaldet. Lever produktet Hjælp med at beskytte miljøet og tilbage til din lokale genbrugsplads eller menneskelig sundhed samt at genbruge kontakt din kommune.
- Page 19 12. INSTALLATION ............34 WE’RE THINKING OF YOU Thank you for purchasing an Electrolux appliance. You’ve chosen a product that brings with it decades of professional experience and innovation. Ingenious and stylish, it has been designed with you in mind.
-
Page 20: Safety Information
20 www.electrolux.com 1. SAFETY INFORMATION Before the installation and use of the appliance, carefully read the supplied instructions. The manufacturer is not responsible if an incorrect installation and use causes in- juries and damages. Always keep the instructions with the appliance for future reference. - Page 21 ENGLISH – farm houses; – by clients in hotels, motels and other residential envi- ronments; – bed and breakfast type environments. • Internally the appliance becomes hot when in opera- tion. Do not touch the heating elements that are in the appliance.
-
Page 22: Safety Instructions
22 www.electrolux.com • Microwave heating of beverages can result in delayed eruptive boiling. Care must be taken when handling the container. • The contents of feeding bottles and baby food jars shall be stirred or shaken and the temperature checked be- fore consumption, in order to avoid burns. - Page 23 ENGLISH underneath the appliance are not • Do not apply pressure on the open blocked (for sufficient ventilation). door. • Do not use the appliance as a work Electrical connection surface and do not use the cavity for storage purposes. WARNING! Risk of fire and electrical shock.
-
Page 24: Product Description
24 www.electrolux.com 3. PRODUCT DESCRIPTION Lamp 1 2 3 Safety interlock system Display Control panel Waveguide cover Grill Turntable shaft 3.1 Accessories Turntable set Glass cooking tray and roller guide. Always use the turntable set to prepare food in the appliance. -
Page 25: Control Panel
ENGLISH 5. CONTROL PANEL Symbol Function Description To set the microwave / grill / con- Function button vection function. Power button To set the power level. Auto Reheating but- To reheat food automatically. Defrosting button To defrost food by weight or time. -
Page 26: Daily Use
26 www.electrolux.com Symbol Function Description Shows the settings and current — Display time. Clock button To set the clock. To deactivate the appliance or de- Stop / Clear button lete the cooking settings. To start the appliance or increase the cooking time for 30 seconds at Start / +30 sec but- full power. - Page 27 ENGLISH • Dishes which contain sauce must be Defrosting butter, portions of gateau, stirred from time to time. quark: • Vegetables that have a firm structure, • Do not fully defrost the food in the ap- such as carrots, peas or cauliflower, pliance, but let it defrost at room tem- must be cooked in water.
- Page 28 28 www.electrolux.com Cookware / Material Microwave Grill- ing / Defrost- Heat- Cook- Con- vection Roasting film with microwave safe closure Roasting dishes made of metal, e. g. enamel, cast iron Baking tins, black lacquer or silicon- coated Baking tray Browning cookware, e. g. Crisp pan...
- Page 29 ENGLISH 5. Put in the food. Press to confirm and start the appliance. 6. Turn the Setting knob to input the time. For weight defrosting the time is 7. Press to confirm and start the ap- set automatically. Weight defrost- pliance.
-
Page 30: Automatic Programmes
30 www.electrolux.com 7. AUTOMATIC PROGRAMMES WARNING! 2. Press to confirm. Refer to the Safety chapters. 3. Turn the Setting knob to set the weight of the menu. 7.1 Auto Cooking 4. Press to confirm and start the ap- pliance. You can use Auto Cooking function to easily cook food. -
Page 31: Using The Accessories
ENGLISH The Cakes menu needs preheat- Reheating mode Weight ing. h - 4 Muffins / 1 - 3 Rolls 7.2 Auto Reheating 1. Repeatedly press to select the re- 7.3 Delayed Start heating mode. 2. Turn the Setting knob to select the You can programme the appliance for 3 weight. -
Page 32: Helpful Hints And Tips
32 www.electrolux.com 8.2 Inserting the grill rack Place the grill rack on the turntable set. 9. HELPFUL HINTS AND TIPS 9.1 Tips for the microwave Problem Remedy You cannot find details for the Look for a similar food. Increase or shorten amount of food prepared. -
Page 33: Care And Cleaning
ENGLISH 9.5 Grilling 9.7 Combi Cooking Grill flat food items in the middle of the grill Use the Combi Cooking to keep the rack. crispness of certain foods. Turn the food over halfway through the At the half of the cooking time, turn over set time and continue grilling. -
Page 34: Installation
34 www.electrolux.com Problem Possible cause Remedy There is sparking in There are metal skewers or Make sure that the skewers the cavity. aluminium foil that touches and foil does not touch the the interior walls. interior walls. The turntable set... - Page 35 ENGLISH 13. ENVIRONMENT CONCERNS Recycle the materials with the symbol and electronic appliances. Do not dispose . Put the packaging in applicable appliances marked with the symbol containers to recycle it. with the household waste. Return the Help protect the environment and human product to your local recycling facility or health and to recycle waste of electrical contact your municipal office.
- Page 36 12. INSTALLATION ............53 NOUS PENSONS À VOUS Merci d'avoir choisi ce produit Electrolux. Avec ce produit, vous bénéficiez de dizaines d'années d'expérience professionnelle et d'innovation. Ingénieux et élégant, il a été conçu sur mesure pour vous.
-
Page 37: Consignes De Sécurité
FRANÇAIS 1. CONSIGNES DE SÉCURITÉ Avant d'installer et d'utiliser cet appareil, lisez soigneuse- ment les instructions fournies. Le fabricant ne peut être tenu pour responsable des dommages et blessures liés à une mauvaise installation ou utilisation. Conservez tou- jours cette notice avec votre appareil pour vous y référer ultérieurement. - Page 38 38 www.electrolux.com 1.2 Sécurité générale • Cet appareil est conçu uniquement pour un usage do- mestique et des situations telles que : – dans des cuisines réservées aux employés dans des magasins, bureaux et autres lieux de travail ; – dans des bâtiments de ferme ;...
- Page 39 FRANÇAIS • Lorsque vous faites chauffer des aliments dans des ré- cipients en plastique ou en papier, surveillez toujours l'appareil car ces matières peuvent s'enflammer. • Cet appareil est uniquement destiné à chauffer des ali- ments et des boissons. L'utiliser pour sécher des ali- ments ou des vêtements, ou pour faire chauffer des compresses chauffantes, des chaussons, des épon- ges, des tissus humides ou autres pourrait provoquer...
-
Page 40: Instructions De Sécurité
40 www.electrolux.com • Si le câble d'alimentation est endommagé, il ne doit être remplacé que par un professionnel qualifié afin d'éviter tout danger. INSTRUCTIONS DE SÉCURITÉ • Ne tirez jamais sur le câble d'alimenta- tion pour débrancher l'appareil. Tirez 2.1 Installation toujours sur la fiche. -
Page 41: Description De L'appareil
FRANÇAIS de produits abrasifs, de tampons à ré- • Débranchez l'appareil de l'alimentation curer, de solvants ni d'objets métalli- électrique. ques. • Coupez le câble d'alimentation et met- • Si vous utilisez un spray pour four, sui- tez-le au rebut. vez les consignes de sécurité... - Page 42 42 www.electrolux.com 4.1 Premier nettoyage Appuyez à plusieurs reprises sur pour choisir le format d'horloge • Retirez tous les accessoires de l'appa- 24 heures ou 12 heures. reil. Tournez la manette de réglage pour • Nettoyez l'appareil avant de l'utiliser entrer le nombre d'heures.
-
Page 43: Bandeau De Commande
FRANÇAIS 5. BANDEAU DE COMMANDE Symbole Fonction Description Pour régler la fonction micro-on- Touche de fonction des / grill / convection. Touche de réglage Pour régler le niveau de puissance. de la puissance Touche réchauffage Pour réchauffer des aliments auto- automatique matiquement. -
Page 44: Utilisation Quotidienne
44 www.electrolux.com Symbole Fonction Description — Affichage Affiche les réglages et l'heure. Touche horloge Pour régler l'heure. Touche Arrêter/Annu- Pour éteindre l'appareil ou suppri- mer les réglages de cuisson. Pour mettre l'appareil en marche ou augmenter le temps de cuisson de Touche Dé-... - Page 45 FRANÇAIS • Pour les aliments congelés ou les plats • Retournez les aliments à la moitié du surgelés, réglez un temps de cuisson temps de décongélation. Si possible, plus long. séparez puis retirez les morceaux ayant commencé à décongeler. • Les plats contenant de la sauce doivent être remués de temps en temps.
- Page 46 46 www.electrolux.com Ustensile de cuisine/matériaux Micro-ondes Gril / co nvec- Décongé- Ré- Cuisson tion lation chauf- fage Carton, papier Film étirable Sachet de cuisson avec fermeture de sûreté pour micro-ondes Plats à rôtis composés de métal, par exemple en émail ou en fonte Moules, laqués noirs ou revêtement...
- Page 47 FRANÇAIS Réglage de la puissan- Suggestion d'utilisation Appuyez sur Maintien au chaud : 5 fois 90 W Pour garder les aliments au chaud. 3. Appuyez à plusieurs reprises sur 6.4 Décongélation pour sélectionner le niveau de puis- Vous pouvez choisir 2 modes de décon- sance souhaité.
-
Page 48: Programmes Automatiques
48 www.electrolux.com 2. Tournez la manette de réglage pour Affi- Fonction sélectionner la durée souhaitée. chage 3. Appuyez sur pour confirmer. C - 4 Micro-ondes, gril, convection 4. Tournez la manette de réglage pour à 200° entrer la durée. 5. Appuyez sur pour confirmer et 6.8 Sécurité... - Page 49 FRANÇAIS Symbole Menu Poids Pourcentage ap- proximatif de puis- sance 200 g Pizza 300 g C - 4 400 g Préchauffage à Gâteaux 475 g 180 degrés 50 g (avec 450 g d'eau) Pâtes 100 g (avec 800 g d'eau) 80 % 150 g (avec 1 200 g d'eau) 500 g...
-
Page 50: Utilisation Des Accessoires
50 www.electrolux.com 8. UTILISATION DES ACCESSOIRES AVERTISSEMENT Reportez-vous aux chapitres con- cernant la sécurité. 8.1 Installation de l'ensemble du plateau tournant Placez le support à roulettes autour de l'axe du plateau tournant. Posez le plateau de cuisson en verre sur le support à roulettes... -
Page 51: Entretien Et Nettoyage
FRANÇAIS Problème Solution La nourriture a trop séché. Réduisez le temps de cuisson ou sélection- nez une puissance de micro-ondes plus basse. La nourriture n'est pas déconge- Rallongez le temps de cuisson ou sélection- lée, chaude ou cuite à la fin du nez une puissance plus élevée. -
Page 52: Cas D'anomalie De Fonctionnement
52 www.electrolux.com Remarques concernant le nettoyage : • Nettoyez régulièrement tous les acces- soires et laissez-les sécher. Utilisez un • Nettoyez la façade de l'appareil à l'aide chiffon doux additionné d'eau chaude d'une éponge humide additionnée savonneuse. d'eau savonneuse. • Pour ramollir les résidus alimentaires •... -
Page 53: Installation
FRANÇAIS Si vous ne trouvez pas de solution au pro- Les informations à fournir au service blème, veuillez contacter votre revendeur après-vente figurent sur la plaque signalé- ou le service après-vente. tique. Nous vous recommandons de noter ces informations ici : Modèle (MOD.) ......... - Page 54 54 www.electrolux.com votre centre local de recyclage ou portant le symbole avec les ordures contactez vos services municipaux. ménagères. Emmenez un tel produit dans...
- Page 55 FRANÇAIS...
- Page 56 www.electrolux.com/shop...