Table of Contents
Advertisement
Quick Links
Advertisement
Table of Contents

Related Manuals for Epson PowerLite 107


Summary of Contents for Epson PowerLite 107
- Page 1 PowerLite 107/108/109W/970/980W/990U User's Guide...
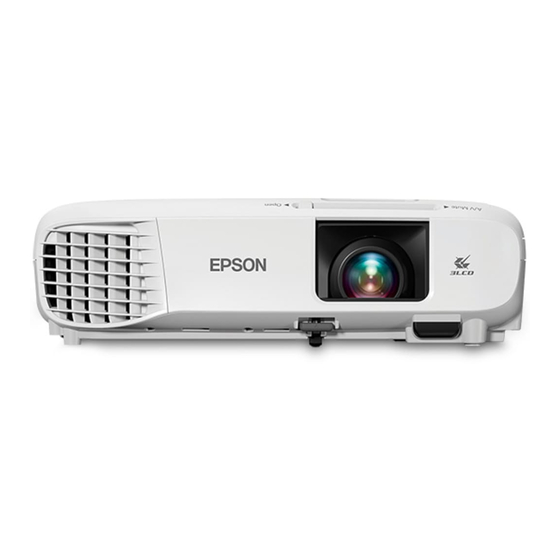
- Page 2 Projector Part Locations Projector Parts - Front/Top Exhaust vent A/V Mute slide lever Foot release lever Lens cover Front adjustable foot Lens Remote control receiver Horizontal keystone slider Air filter/intake vent Air filter cover Kensington security lock slot Control panel...
-
Page 3: Projector Parts - Rear
Zoom ring Focus ring Lamp cover Projector Parts - Rear AC input RS-232C port Video port Mic port L and R audio ports Monitor Out port Audio1 port Audio Out port Audio2 port Computer2 port Speaker HDMI1 and HDMI2/MHL ports... -
Page 4: Projector Parts - Base
Computer1 port Network (LAN) port USB-B port USB-A port Wireless LAN module cover screw Remote receiver Projector Parts - Base Ceiling mount holes (3) Security cable attachment point Rear feet... -
Page 5: Projector Parts - Control Panel
Front adjustable foot Projector Parts - Control Panel Source Search button (searches for connected video sources) Enter button (selects options) Vertical keystone adjustment buttons (displays the adjustment screen and adjusts screen shape) and arrow buttons Esc button (cancels/exits functions) Volume buttons (adjust speaker volume), horizontal keystone adjustment buttons, and arrow buttons Menu button (accesses projector menu system) Home button (displays Home screen) - Page 6 Projector Parts - Remote Control Power button...
- Page 7 Computer button (cycles through connected computer sources) HDMI/Video button (cycles through connected HDMI/video sources) Numeric buttons (enter numbers when you hold down the Num button) Auto button (automatically adjusts position, tracking, and sync settings when projecting from a computer using a VGA cable) Aspect button (selects the image aspect ratio) Num button (when held down, switches numeric buttons to number function) Menu button (accesses projector menu system)
-
Page 8: Projector Connections
3. Connect the other end to any available USB port on your computer. 4. Do one of the following: • Windows 10/Windows 8.x: Click EPSON_PJ_UD when it appears on the desktop, then select Run EMP_UDSE.EXE in the dialog box that appears to install the Epson USB Display software. - Page 9 • Mac: The USB Display setup folder appears on your screen. Select USB Display Installer and follow the on-screen instructions to install the Epson USB Display software. Follow any on-screen instructions. You need to install this software only the first time you connect the projector to the computer.
- Page 10 (Make sure the HDMI audio playback device on your computer's audio settings is set to EPSON PJ.) Note: If you have problems hearing audio through the HDMI connection, connect one end of an optional 3.5 mm stereo mini-jack audio cable to the projector's Audio port and the other end to your...
- Page 11 2. Connect the other end to any available USB port on your computer. 3. If necessary, configure your computer to work with an external USB mouse. See your computer documentation for details. Connecting to a Computer for Sound If your computer presentation includes sound and you did not connect it using the projector's USB-B or HDMI port, you can still play sound through the projector's speaker system.
-
Page 12: Connecting To Video Sources
Connecting to Video Sources Follow the instructions in these sections to connect video devices to the projector. Connecting to an HDMI Video Source If your video source has an HDMI port, you can connect it to the projector using an optional HDMI cable. - Page 13 Note: Some connected devices may not charge when using an MHL adapter. Connect the MHL cable or adapter to your device's Micro-USB port. If you are using an MHL adapter, connect it to an MHL-compatible HDMI cable. other end of the cable to the projector's HDMI2/MHL port. Note: The projector converts the digital audio signal sent from your video source into a mono analog signal for the internal speaker or a stereo analog signal if you are connecting to external speakers.
- Page 14 3. Tighten the screws on the VGA connector. If your image colors appear incorrect, you may need to change the Input Signal setting in the projector's Signal menu. Connecting to a Composite Video Source If your video source has a composite video port, you can connect it to the projector using an optional RCA-style video or A/V cable.
-
Page 15: Connecting External Output Devices
Note: If you connected your video source to the projector using an HDMI or MHL cable, the audio signal is transferred with the video signal; you do not need an additional cable for sound. audio cable to your video source's audio-out ports. Connect the other end of the cable to the projector's Audio port or ports. - Page 16 Connecting to External Speakers To enhance the sound from your presentation, you can connect the projector to external self-powered speakers. You can control the volume using the projector's remote control. You can also connect the projector to an amplifier with speakers. If you want to output audio from the external speakers when the projector is turned off, you need to select Always On as the A/V Output setting in the projector's Extended menu.
- Page 17 Connecting a Microphone You can connect a microphone to the projector's Mic port to provide audio support during presentations. Note: If you want to output audio from the microphone when the projector is off, select Always On as the A/V Output setting in the Extended menu. microphone cable to the projector's Mic port.
-
Page 18: Connecting To External Usb Devices
Connecting to External USB Devices Follow the instructions in these sections to connect external USB devices to the projector. USB Device Projection You can project images and other content without using a computer or video device by connecting any of these devices to your projector: • USB flash drive •... - Page 19 Note: Do not connect a USB hub or a USB cable longer than 10 feet (3 m), or the device may not operate correctly. 3. Connect the other end of the cable (if applicable) to your device. Selecting the Connected USB Source You can switch the projector's display to the source you connected to the USB-A port.
-
Page 20: Connecting To A Document Camera
Depending on your Epson document camera model, do one of the following to connect the document camera to your projector: • For the Epson DC-07 document camera, locate the USB cable that came with the camera and connect it to the projector's USB-A port and to the document camera's USB Type B port. -
Page 21: Opening The Lens Cover
Installing the Wireless LAN Module To use the projector over a wireless network, install the Epson 802.11b/g/n wireless LAN module in the projector. Do not install any other type of wireless module. Note: The wireless LAN module is not included with your projector and is optional. - Page 22 2. Insert the wireless LAN module into the USB-A port. 3. Attach the wireless LAN module cover and secure it using the screw you removed.
-
Page 23: Using A Qr Code To Connect A Mobile Device
Using a QR Code to Connect a Mobile Device After you select the wireless network settings for your projector, you can display a QR code on the screen and use it to connect a mobile device using the Epson iProjection app. 1. Press the Menu button. - Page 24 3. Select Network Configuration and press Enter. 4. Select the Basic menu and press Enter. 5. Set the Display LAN Info setting to Text & QR Code. 6. Select Complete and follow the on-screen instructions to save your settings and exit the menus. 7.
- Page 25 Then you can project your presentation and remove the key when you are done. Note: A USB flash drive is not included with your projector. 1. Create a Quick Wireless Connection USB Key with a USB flash drive and the Epson iProjection (Windows/Mac) software.
-
Page 26: Selecting Wireless Network Settings Manually
Note: In Windows Vista, if you see the AutoPlay window, select Run MPPLaunch.exe, then select Allow on the next screen. 8. Follow the on-screen instructions to install the Epson iProjection (Windows/Mac) software. Note: If you see a Windows Firewall message, click Yes to disable the firewall. You need administrator authority to install the software. - Page 27 4. Make sure the Wireless Mode setting is set to Wireless LAN On. 5. Select Network Configuration and press Enter. 6. Select Basic menu and press Enter. 7. Select the following basic options as necessary: • Projector Name lets you enter a name up to 16 alphanumeric characters long to identify the projector over the network.
- Page 28 PJLink protocol for projector control. • Remote Password lets you enter a password up to 8 alphanumeric characters long for accessing the Remote or Basic Control screen in the Epson Web Control. (Default user name is EPSONREMOTE; default password is guest.) •...
- Page 29 9. Select the settings on the Wireless LAN menu as necessary for your network. 10. When you finish selecting settings, select Complete and follow the on-screen instructions to save your settings and exit the menus. After you complete the wireless settings for your projector, you need to select the wireless network on your computer, or iOS or Android device.
- Page 30 Wireless LAN Menu Settings Setting Options Description Connection Mode Quick Selects the type of wireless connection: Advanced Quick: lets you directly connect to multiple devices and computers using the projector's wireless network; requires the optional wireless LAN module Advanced: lets you connect to multiple smartphones, tablets, or computers via a wireless network access point...
-
Page 31: Selecting Wireless Network Settings In Windows
Channel In Quick connection mode, selects the frequency band (channel) used by the wireless 11ch Setting Options Description IP Settings DHCP Turns on DHCP if your network assigns addresses IP Address automatically; set to Off to Subnet Mask manually enter the network's IP Gateway Address Address, Subnet Mask, and Gateway Address... -
Page 32: Selecting Wireless Network Settings On Mac
• If your projector is configured for Quick mode, select the projector's SSID. 3. Click Connect. Selecting Wireless Network Settings on Mac Before connecting to the projector, select the correct wireless network on your Mac. 1. Click the AirPort icon on the menu bar at the top of the screen. 2. -
Page 33: Turning On The Projector
Turning On the Projector Turn on the computer or video equipment you want to use before you turn on the projector so it can display the image source. 1. Connect the power cord to the projector's power inlet. 2. Plug the power cord into an electrical outlet. Note: With Direct Power On turned on, the projector turns on as soon as you plug it in. -
Page 34: Using The Home Screen
Warning: Never look into the projector lens when the lamp is on. This can damage your eyes and is especially dangerous for children. If you do not see a projected image right away, try the following: • Verify the lens cover is open all the way. •... - Page 35 Select the video source you want to project Display the Connection Guide Display the Help screen Display the projector's menus Select customizable menu options Select to project two images from different image sources simultaneously Correct the image shape Note: Your Home screen may look different from the illustration shown here. You can select the customizable menu options using the Custom Function 1 and Custom Function 2 settings in the Extended menu.
-
Page 36: Turning Off The Projector
2. Press the power button again. (To leave it on, press any other button.) The projector beeps twice, the lamp turns off, and the Status light turns off. Note: With Epson's Instant Off technology, there is no cool-down period so you can pack up the projector for transport right away (if necessary). -
Page 37: Resizing The Image With The Zoom Ring
Caution: To avoid damaging the projector or lamp, never unplug the power cord when the Status light is on or flashing. Resizing the Image with the Zoom Ring 1. Turn on the projector and display an image. Note: You can also display the pattern by pressing the User button on the remote control (if the test pattern is assigned to this button). -
Page 38: Focusing The Image Using The Focus Ring
Focusing the Image Using the Focus Ring You can correct the focus using the focus ring. 1. Turn on the projector and display an image. Note: You can display a pattern to aid in adjusting the projected image using the Settings menu. Note: You can also display the pattern by pressing the User button on the remote control (if the test pattern is assigned to this button). -
Page 39: Using The Remote Control As A Wireless Mouse
30° 19.7 feet (6 m) 15° Note: Avoid using the remote control in conditions with bright fluorescent lights or in direct sunlight, or the projector may not respond to commands. If you will not use the remote control for a long time, remove the batteries. -
Page 40: Using The Remote Control As A Pointer
2. If you connected your computer to a port other than the projector's USB-B port, also connect a USB cable to the projector's USB-B port and to a USB port on your computer (for wireless mouse support). 3. Start your presentation. 4. -
Page 41: Selecting An Image Source
3. Press the Esc or Pointer button to clear the pointer from the screen. Selecting an Image Source If you connected multiple image sources to the projector, such as a computer and DVD player, you may want to switch from one image source to the other. Note: If you turned on the Auto Source Search setting in the Extended menu, the projector automatically switches to another detected image source if the signal to the current image source is lost. - Page 42 • Press the button for the source you want on the remote control. If there is more than one port for that source, press the button again to cycle through the sources. Computer port sources Video, HDMI, and MHL sources USB port sources (computer display and external devices) Network source (LAN) •...
-
Page 43: Controlling The Volume With The Volume Buttons
Note: Your Home screen may look different from the illustration shown here. Controlling the Volume with the Volume Buttons You can use the Volume buttons on the remote control or projector to adjust the volume as you project a presentation with audio. The volume buttons control the projector’s internal speaker system or any external speakers you connected to the projector. - Page 44 3. To set the volume to a specific level for an input source, use the projector menus.
-
Page 45: Solving Problems
• The solutions in this manual can help you solve many problems. If none of these solutions help, you can contact Epson for technical support. Projector Light Status The lights on the projector indicate the projector status and let you know when a problem occurs. - Page 46 Power light Status light Lamp light Temp (temperature) light Projector status Power light Status light Lamp light Temp light Status and solution Blue Blue Normal operation Blue Flashing blue Warming up or cooling down Blue Standby or sleep mode Flashing blue Preparing for network monitoring Power light Status light...
- Page 47 • Clean or replace the air filter • If operating the projector at high altitude, turn on High Altitude Mode • If the problem persists, unplug the projector and contact Epson for help Power light Status light Lamp light Temp light...
-
Page 48: Using The Projector Help Displays
Epson for help Note: If the lights display a pattern not listed in the table above, turn the projector off, unplug it, and contact Epson for Using the Projector Help Displays You can display information to help you solve common problems using the projector's Help system. -
Page 49: Solving Image Or Sound Problems
• To select another problem to solve, press Esc. • To exit the help system, press Home. Solving Image or Sound Problems Check the solutions in these sections if you have any problems with projected images or sound. Solutions When No Image Appears If no image appears, try the following solutions: •... -
Page 50: Solutions When Image Is Incorrect Using The Usb Display Function
• If the mouse cursor flickers, select Make the movement of the mouse pointer smooth in the Epson USB Display Settings program on your computer. • Turn off the Transfer layered window setting in the Epson USB Display Settings program on your computer. - Page 51 Press Home button on the remote control to select from a list of available sources (shown in black text). • Turn on the connected computer or video source, and press its play button to begin your presentation, if necessary. • Check the connection from the projector to your video sources. •...
-
Page 52: Solutions When "Not Supported" Message Appears
If you see the "No Signal" message when you display from a Mac laptop, you need to set up the laptop for mirrored display. (See your laptop manual for details.) 1. Open the System Preferences utility and select Displays, Display, or Color LCD. 2. -
Page 53: Solutions When The Image Is Not Rectangular
• Check your computer display settings to disable dual display and set the resolution within the projector's limits. (See your computer manual for details.) • Check the resolution assigned to your presentation files to see if they are created for a different resolution than you are projecting in. -
Page 54: Solutions When The Image Is Fuzzy Or Blurry
• If you connected an extension power cable, try projecting without it to see if it caused interference in the signal. • If you are using the USB Display function, turn off the Transfer layered window setting in the Epson USB Display Settings program on your computer. -
Page 55: Solutions When The Image Brightness Or Colors Are Incorrect
HDMI source, set the connected device to PCM output. • Make sure any connected audio cables are labeled "No Resistance". • If you are using the USB Display function, turn on the Output audio from the projector setting in the Epson USB Display Settings program on your computer. -
Page 56: Solving Projector Or Remote Control Operation Problems
• If you are using a Mac and you do not hear sound from an HDMI source, make sure your Mac supports audio through the HDMI port. If not, you need to connect an audio cable. • If the volume for the computer is set to the minimum while the projector's volume is set to maximum, the noise may be mixed. -
Page 57: Solutions To Problems With The Remote Control
• If you assigned an ID number to the remote control to operate multiple projectors, you may need to check or change the ID setting (feature not available with all projectors). • If you lose the remote control, you can purchase another from an authorized Epson reseller. Solutions to Password Problems If you cannot enter or remember a password, try the following solutions: •... -
Page 58: Solving Network Problems
If you set a Epson Web Control password and forgot the user ID or password, try entering the following: • User ID: EPSONWEB • Default password: admin • If you set a Remote password (in Epson Web Control) and forgot the user ID or password, try entering the following: • User ID: EPSONREMOTE • Default password: guest •... -
Page 59: Solutions When The Image Contains Static During Network Projection
Note: You cannot change the user ID. • You may need to log in to access some options on the Web Control screen. If you see a log in window, enter EPSONWEB as the user ID and enter the password set in the projector's Network menu as the password.