Sanyo PLV-Z2 Service Manual
Hide thumbs
Also See for PLV-Z2:
- Service manual (80 pages) ,
- Owner's manual (56 pages) ,
- Service manual (76 pages)
Table of Contents
Advertisement
Quick Links
SERVICE MANUAL
TECHNICAL SPECIFICATIONS ------------------------------------------------------------- 2
SAFETY INSTRUCTIONS --------------------------------------------------------------------- 3
LAMP REPLACEMENT -------------------------------------------------------------------- 4 - 5
INDICATORS AND PROJECTOR CONDITION ----------------------------------------- 6
WARNING INDICATOR ------------------------------------------------------------------------ 7
CLEANING ------------------------------------------------------------------------------------ 8 - 9
DIMENSIONS ----------------------------------------------------------------------------------- 10
PROTECTIONS -------------------------------------------------------------------------------- 11
MECHANICAL DISASSEMBLIES --------------------------------------------------- 12 - 16
OPTICAL PARTS DISASSEMBLIES ----------------------------------------------- 17 - 20
LCD PANEL/PRISM ASS'Y REPLACEMENT------------------------------------------- 21
ADJUSTMENT AFTER PARTS REPLACEMENT-------------------------------------- 22
OPTICAL ADJUSTMENT--------------------------------------------------------------- 23 - 24
ELECTRICAL ADJUSTMENT --------------------------------------------------------- 25 - 32
TEST POINTS AND LOCATIONS --------------------------------------------------------- 32
LOCATIONS OF FAN AND BOARD------------------------------------------------------- 33
CIRCUIT BLOCK DIAGRAM ---------------------------------------------------------------- 34
POWER SUPPLY LINES -------------------------------------------------------------------- 35
POWER SOURCE LINES (IC) ------------------------------------------------------------- 36
TROUBLESHOOTING ------------------------------------------------------------------ 37 - 38
IC BLOCK DIAGRAMS ----------------------------------------------------------------- 39 - 42
ELECTRICAL PARTS LIST ------------------------------------------------------------ 43 - 57
MECHANICAL (OPTICAL) PARTS LIST & ACCESSORIES ----------------- 58 - 63
PARTS DESCRIPTION AND READING IN SCHEMATIC DIAGRAM ----------- A2
SCHEMATIC DIAGRAMS ------------------------------------------------------------- A3 - A6
PRINTED WIRING BOARD DIAGRAMS ---------------------------------------- A7 - A10
PIN DESCRIPTION OF DIODE, TRANSISTOR AND IC -------------------------- A11
PRODUCT CODE
1 122 125 00 PLV-Z2 (M4KA)
1 122 126 00 PLV-Z2 (P4KA)
1 122 126 02 PLV-Z2 (P4KC)
All manuals and user guides at all-guides.com
Multimedia Projector
CONTENTS
FILE NO.
Model No. PLV-Z2
(U.S.A., Canada, Europe
Asia, Africa, U.K. )
ORIGINAL VERSION
Chassis No. M4K-Z200
(PLV-Z2)
NOTE: Match the Chassis No. on the
unit's back cover with the Chassis
No. in the Service Manual.
If the Original Version Service
Manual Chassis No. does not
match the unit's, additional
Service Literature is required. You
must refer to "Notices" to the
Original Service Manual prior to
servicing the unit.
Pages
REFERENCE NO.
SM5110585-00
Advertisement
Table of Contents

Related Manuals for Sanyo PLV-Z2


Summary of Contents for Sanyo PLV-Z2
-
Page 1: Table Of Contents
SCHEMATIC DIAGRAMS ------------------------------------------------------------- A3 - A6 PRINTED WIRING BOARD DIAGRAMS ---------------------------------------- A7 - A10 PIN DESCRIPTION OF DIODE, TRANSISTOR AND IC -------------------------- A11 PRODUCT CODE 1 122 125 00 PLV-Z2 (M4KA) 1 122 126 00 PLV-Z2 (P4KA) SM5110585-00 REFERENCE NO. -
Page 2: Technical Specifications
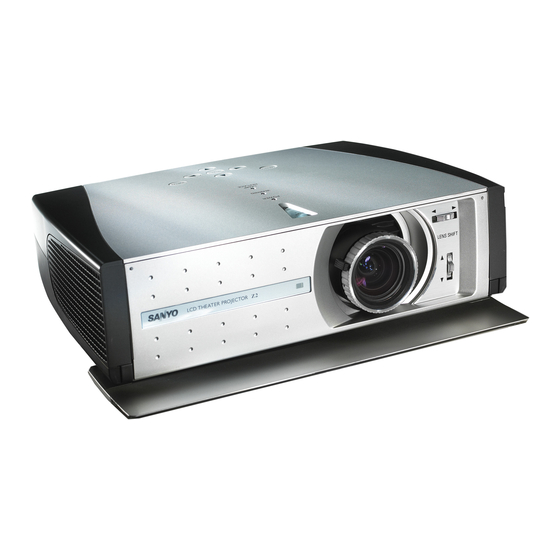
All manuals and user guides at all-guides.com ■ Technical Specifications Technical Specifications Projector Type Multimedia Projector Dimensions (W x H x D) 14.13" x 3.82" x 10.79" (359mm x 97mm x 274mm) (not including raised portions) Net Weight 9.0 lbs (4.1 kg) LCD Panel System 0.7”... -
Page 3: Safety Instructions
All manuals and user guides at all-guides.com ■ Safety Instructions ■ SAFETY PRECAUTIONS WARNING: The chassis of this projector is isolated (COLD) from AC line by using the converter transformer. Primary side of the converter and lamp power supply unit circuit is connected to the AC line and it is hot, which hot circuit is iden- tified with the line ( ) in the schematic diagram. -
Page 4: Lamp Replacement
ORDER REPLACEMENT LAMP Replacement lamp can be ordered through your dealer. When ordering a projection lamp, give the following information to the dealer. ● Model No. of your projector PLV-Z2 ● Replacement Lamp Type No. POA-LMP69 (Service Parts No. 610 309 7589) ■... - Page 5 All manuals and user guides at all-guides.com ■ Lamp Replacement The projector used time and lamp used time will be How to check lamp used time displayed on the screen briefly. The LAMP REPLACE indicator will light when the total Projector used time lamp used time reaches 3,000 hours.
-
Page 6: Indicators And Projector Condition
All manuals and user guides at all-guides.com ■ Indicators and Projector Condition ■ Indicators and Projector Condition Check the Indicators for projector condition. Indicators Projector Condition LAMP WARNING POWER REPLACE red/green yellow The Main On/Off switch is off or the AC power cord is unplugged. The projector is preparing for stand-by and the front cover is closed. -
Page 7: Warning Indicator
All manuals and user guides at all-guides.com ■ Warning Indicator ■ Warning Indicator The WARNING indicator shows the state of the function which protects the projector. Check the state of the WARNING indicator and the POWER indicator to take proper maintenance. The projector is shut down and the WARNING indicator is flashing red When the temperature inside the projector exceeds the normal TOP CONTROL... -
Page 8: Cleaning
All manuals and user guides at all-guides.com ■ Cleaning ■ Cleaning the Air Filter The air filter prevents dust from accumulating on the surface of the optical elements inside the projector. Should the air filter become clogged with dust particles, it will reduce cooling fans’ effectiveness and may result in internal heat build up and adversely affect the life of the projector. - Page 9 All manuals and user guides at all-guides.com ■ Cleaning ■ Cleaning the Projection Lens Follow these steps to clean the projection lens. Disconnect the AC power cord before cleaning. Softly wipe the projection lens with a cleaning cloth that contains a small amount of non-abrasive camera lens cleaner, or use lens cleaning paper or a commercially available air blower to clean the lens.
-
Page 10: Dimensions
All manuals and user guides at all-guides.com ■ Dimensions ■ Dimensions Unit : inch (mm) 4.52 (114.7) 14.13 (359) 2.68 (68) 11.8˚ (Max.) ON-OFF POWER WARNING LAMP 10.79 (274) REPLACE MENU INPUT SELECT 3.82 (97) -10-... -
Page 11: Protections
All manuals and user guides at all-guides.com ■ Protections This projector is equipped with the following protections to operate in safety. If the abnormality occurs inside the projector, it will turn off the projector by operating one of the following protections. ■... -
Page 12: Mechanical Disassemblies
All manuals and user guides at all-guides.com ■ Mechanical Disassemblies [Attention] This LCD projector is used the different kind of screw. The using correct screw is needed to prevent the damage. CABINET - TOP REMOVAL 1. Remove 6 screws to take the Cabinet Top upward off. Cabinet Top Note : For fixing the Cabinet Top, its... - Page 13 All manuals and user guides at all-guides.com ■ Mechanical Disassemblies 4. DOOR ASS'Y REMOVAL Door Ass'y 1. Remove 6 screws to take the Door Ass'y off. Note: Can be removed Door itself. See below. Fig. 4 5. DOOR LEG AND DOOR SWITCH BOARD REMOVAL 1.
- Page 14 All manuals and user guides at all-guides.com ■ Mechanical Disassemblies 7. LAMP BALLAST UNIT REMOVAL Filter Holder 1. Remove 4 screws to take the Filter Holder off. 2. Remove 3 screws to take the Filter Board off. 3. Remove 3 screws to take the Inlet Board off.
- Page 15 All manuals and user guides at all-guides.com ■ Mechanical Disassemblies 9. POWER BOARD REMOVAL 1. Remove 2 screws to take the Lamp SW Board off. 2. Remove a screw and 4 screws to open the Power Board Cover and take the R/C Board off. 3.
- Page 16 All manuals and user guides at all-guides.com ■ Mechanical Disassemblies 11. FANS REMOVAL 1. Remove 2 screws and 5 screws to take the Fan Cover off. 2. Remove a screw to take the Sensor Board off from Fan Cover tha Fan Cover. 3.
-
Page 17: Optical Parts Disassemblies
All manuals and user guides at all-guides.com ■ Optical Parts Disassemblies Before Taking this procedure, remove Cabinet Top and Main board following to the “Mechanical Disassemblies”. Disassembly requires a 2.0mm hex wrench and a screwdriver. PROJECTION LENS REMOVAL 1. Remove 2 screws to slide the Lens Spacer and Projection Lens remove 4 screws... - Page 18 All manuals and user guides at all-guides.com ■ Optical Parts Disassemblies RELAY LENS REMOVAL Relay Lens 1. Remove 2 screws and pull the Relay Lens Ass’y upward. 2. Remove 2 screws to take the Lens off from the Relay Lens Ass’y Holder.
- Page 19 All manuals and user guides at all-guides.com ■ Optical Parts Disassemblies POLARIZED GLASS-OUT AND WIDE VIEW PLATE REMOVAL 1. Remove 4 screw and take the LCD Panel/Prism Note 1 Ass’y upward from the Optical Unit. LCD Panel/Prism Ass’y 2. Remove each screw B and take the glass off upward. Polarized Grass-Out Note:...
- Page 20 All manuals and user guides at all-guides.com ■ Optical Parts Disassemblies LOCATIONS IN OPTICAL UNIT When mounting or assembling the optical parts in the optical unit, the parts must be mounted specified location as shown in figure below. Cut Face Cut Face Marking Marking...
-
Page 21: Lcd Panel/Prism Ass'y Replacement
All manuals and user guides at all-guides.com ■ LCD Panel/Prism Ass'y Replacement LCD PANEL/PRISM ASS'Y REMOVAL 1. Remove Cabinet Top and Main Board. 2. Remove 4 screws by a 2.0mm hex wrench to take the Panel/Prism Ass'y off from the Optical Unit. Note: Do not replace the LCD panel separately other- wise it can not obtain proper picture. -
Page 22: Adjustment After Parts Replacement
All manuals and user guides at all-guides.com ■ Adjustments After Parts Replacement ● ❍ : Adjustment necessary : Check necessary Disassembly / Replaced Parts LCD/ Wide View Polarized glass Power Main Condenser Relay Prism Lens Lens Board Board Ass’y ❍ ●... -
Page 23: Optical Adjustment
All manuals and user guides at all-guides.com ■ Optical Adjustment Before taking optical adjustments below, remove the Cabinet Top and Main Board following to the “Mechanical Disassemblies” Adjustments require a 2.0mm hex wrench and a slot screwdriver. When you adjust Integrator lens or Relay lens adjustment, you need to disconnect some connectors and FPC cables of LCD panels on the main board. - Page 24 All manuals and user guides at all-guides.com ■ Optical Adjustment INTEGRATOR ADJUSTMENT 1. Turn the projector on by a state of without FPC cables. 2. Project all of lights on the screen. 3. Adjust the adjustment base of integrator lens ass’y to make color uniformity in white.
-
Page 25: Electrical Adjustment
All manuals and user guides at all-guides.com ■ Electrical Adjustment ■ SERVICE ADJUSTMENT MENU OPERATION Normal Mode Service Mode "MENU" ■ To enter service mode "INPUT" Service Mode Computer To enter service mode press the "MENU" and "INPUT" "POWER ON/OFF" buttons on the projector simultaneously and hold for 2 seconds. - Page 26 All manuals and user guides at all-guides.com ■ Adjustment Caution : Other adjustment items are not related to service and a maintenance. Don't press the POINT (L) and (R) button at the time of those adjustment items. Otherwise it may cause loss of product safety. [Adjustment Condition] 16 steps gray scale pattern ●...
- Page 27 All manuals and user guides at all-guides.com ■ Adjustment 5. Gain Adjustment (9. Color Shading Correction) Equipment Oscilloscope For the color shading correction, the proper computer and Input Signal 16 step gray scale signal “ Color Shading Correction” software are needed. 5-1 Input mode Input 2 [RGB Analog] The software can be ordered as follows.
- Page 28 All manuals and user guides at all-guides.com ■ Adjustment ■ SERVICE ADJUSTMENT DATA TABLE These initial values are the reference data written from the CPU ROM to memory IC when replaced new memory IC. The adjustment items indi- ✻ cated with “ ”...
- Page 29 All manuals and user guides at all-guides.com ■ Adjustment Initial Detail No. Name Range AD9882 Micronas Video Note: 480i(+) = 480i + 575i HDCP YPbPr YCbCr SCART NTSC 480p(+) = 480p + HDTV 104 Fan1 Max Adjust 0-255 Fan Voltage: 14.5V Adjustment 105 Fan2 Max Adjust 0-255 106 Fan3 Max Adjust...
- Page 30 All manuals and user guides at all-guides.com ■ Adjustment Initial Detail No. Name Range AD9882 Micronas Video Note: 480i(+) = 480i + 575i HDCP YPbPr YCbCr SCART NTSC 480p(+) = 480p + HDTV ✻ 204 GRNOFST 0-127 ✻ 205 BLUOFST 0-127 209 RACLP 0-255 B Clamp Voltage Setting...
- Page 31 All manuals and user guides at all-guides.com ■ Adjustment Initial Detail No. Name Range AD9882 Micronas Video Note: 480i(+) = 480i + 575i HDCP YPbPr YCbCr SCART NTSC 480p(+) = 480p + HDTV 320 Expand Ratio (Vertical) 575p For Component 575p mode 321 Expand Ratio (Horizontal) 575p 322 Position (Horizontal) 575p 323 Position (Vertical) 575p...
-
Page 32: Test Points And Locations
All manuals and user guides at all-guides.com ■ Adjustment Initial Detail No. Name Range AD9882 Micronas Video Note: 480i(+) = 480i + 575i HDCP YPbPr YCbCr SCART NTSC 480p(+) = 480p + HDTV 388 Expand Ratio (Vertical) 1080i For RGB HDTV 1080i 389 Expand Ratio (Horizontal) 1080i 390 Position (Horizontal) 1080i 391 Position (Vertical) 1080i... -
Page 33: Locations Of Fan And Board
All manuals and user guides at all-guides.com ■ Locations of Fan and Board Door Switch Board Main Board LED Board R/C Board Filter Board Inlet Board Power Board F601 Fuse Lamp Ballast Unit Sensor Board Lamp SW Board AV Board FN902 Intake Fan FN901... -
Page 34: Circuit Block Diagram
All manuals and user guides at all-guides.com ■ Circuit Block Diagram -34-... -
Page 35: Power Supply Lines
All manuals and user guides at all-guides.com ■ Power Supply Lines FILTER INLET -35-... -
Page 36: Power Source Lines (Ic)
All manuals and user guides at all-guides.com ■ Power Source Lines (IC) -36-... -
Page 37: Troubleshooting
All manuals and user guides at all-guides.com ■ Troubleshooting No Power Refer to Schematic Diagram or Power Supply Line, find out the part of trouble. Before opening Cabinet Top, check the AC cord and power source. Does a indicator flash or light? fuse (F601) in Inlet Board broken? - Page 38 All manuals and user guides at all-guides.com ■ Troubleshooting No Picture Refer to Schematic Diagram or Block Diagram (P34), find out the part of trouble. In advance check the setting mode or connections according to Owner's Manual. See page 34 All Mode? for checking signal lines.
-
Page 39: Ic Block Diagrams
All manuals and user guides at all-guides.com ■ IC Block Diagrams ● BA7078AF <Sync-Separation, IC5321> ● BA9743AFV <IC371> -39-... - Page 40 All manuals and user guides at all-guides.com ■ IC Block Diagrams ● L3E07070K0A <Color Shading Correction, IC401> ● TA1370FG <Sync-Separation, IC5341> -40-...
- Page 41 All manuals and user guides at all-guides.com ■ IC Block Diagrams ● VPC3230D <Video Decoder, IC101> Adaptive Colour Mixer Y 2D Scaler Output Analog YOUT VIN1 Comb Decoder Formatter Front-end Cr,Cb Filter RIP VIN2 NTSC ITU-R 656 PAL VIN3 ITU-R 601 ...
- Page 42 All manuals and user guides at all-guides.com ■ IC Block Diagrams ● AN5870SB <PC/AV SW, IC5201> -42-...
-
Page 43: Electrical Parts List
All manuals and user guides at all-guides.com ■ Electrical Parts List Product safety should be considered when a component replacement is made in any area of a projector. Components indicated by a mark in this parts list and the circuit diagram show components whose value have special significance to product safety. - Page 44 All manuals and user guides at all-guides.com Electrical Parts List Key No. Part No. Description Key No. Part No. Description OUT OF CIRCUIT BOARD 405 002 6904 TR 2SA1179-M7-TB 405 163 1503 TR 2SA1179N-M6-TB LP901 610 309 7589 COMPL,OPTICAL LMP-M4KA 405 163 2708 TR 2SA1179N-M7-TB L901...
- Page 45 All manuals and user guides at all-guides.com Electrical Parts List Key No. Part No. Description Key No. Part No. Description 405 163 1602 TR 2SC2812N-L6-TB0 405 163 1701 TR 2SC2812N-L7-TB0 405 163 1701 TR 2SC2812N-L7-TB0 405 173 9803 TR 2SC3928A1R 405 173 9803 TR 2SC3928A1R 405 173 9902...
- Page 46 All manuals and user guides at all-guides.com Electrical Parts List Key No. Part No. Description Key No. Part No. Description IC491 409 555 6404 IC SI-3018KS-TL C144 403 155 1609 CERAMIC 33P J IC501 409 560 6604 IC L3E06110D0A C146 403 155 1609 CERAMIC 33P J...
- Page 47 All manuals and user guides at all-guides.com Electrical Parts List Key No. Part No. Description Key No. Part No. Description C2532 403 164 0204 CERAMIC 0.1U Z C381 403 215 2102 CERAMIC 8200P K C2533 403 164 0204 CERAMIC 0.1U Z C382 403 280 0805 ELECT...
- Page 48 All manuals and user guides at all-guides.com Electrical Parts List Key No. Part No. Description Key No. Part No. Description C507 403 164 0204 CERAMIC 0.1U Z C7218 403 304 1801 ELECT 100U M 6.3V C512 403 164 0204 CERAMIC 0.1U Z 403 373 7704 ELECT...
- Page 49 All manuals and user guides at all-guides.com Electrical Parts List Key No. Part No. Description Key No. Part No. Description RESISTOR RB9404 645 037 0663 R-NETWORK 22X4 0.063W 645 021 4943 R-NETWORK 22X4 1/16W RB101 645 037 0670 R-NETWORK 47X4 0.063W 645 018 8930 R-NETWORK 47X4 1/16W RB9406...
- Page 50 All manuals and user guides at all-guides.com Electrical Parts List Key No. Part No. Description Key No. Part No. Description R1427 401 105 0306 MT-GLAZE 10 JA 1/16W R1833 401 105 7909 MT-GLAZE 0.000 ZA 1/16W R1428 401 105 0306 MT-GLAZE 10 JA 1/16W R1834...
- Page 51 All manuals and user guides at all-guides.com Electrical Parts List Key No. Part No. Description Key No. Part No. Description R303 401 105 7909 MT-GLAZE 0.000 ZA 1/16W R413 401 105 7909 MT-GLAZE 0.000 ZA 1/16W R304 401 105 7909 MT-GLAZE 0.000 ZA 1/16W R414...
- Page 52 All manuals and user guides at all-guides.com Electrical Parts List Key No. Part No. Description Key No. Part No. Description R492 401 102 7407 MT-GLAZE 10 JA R5641 401 105 0603 MT-GLAZE 10K JA 1/16W R493 401 105 0405 MT-GLAZE 100 JA 1/16W R5642 401 105 4106...
- Page 53 All manuals and user guides at all-guides.com Electrical Parts List Key No. Part No. Description Key No. Part No. Description R8103 401 105 0603 MT-GLAZE 10K JA 1/16W R8852 401 105 7909 MT-GLAZE 0.000 ZA 1/16W R8104 401 105 7909 MT-GLAZE 0.000 ZA 1/16W R8853...
- Page 54 All manuals and user guides at all-guides.com Electrical Parts List Key No. Part No. Description Key No. Part No. Description D5631 407 149 0807 DIODE 1SS355-TE-17 610 307 8939 ASSY,PWB,AV M4KA 1AA0B10C4790A D6804 407 149 0807 DIODE 1SS355-TE-17 TRANSISTOR D6805 407 149 0807 DIODE 1SS355-TE-17 Q1051...
- Page 55 All manuals and user guides at all-guides.com Electrical Parts List Key No. Part No. Description Key No. Part No. Description 405 002 0308 TR 2SA1037K T146 R C5207 403 355 9900 CERAMIC 2.2U K 405 002 0407 TR 2SA1037K T146 S C5208 403 283 6309 CERAMIC...
- Page 56 All manuals and user guides at all-guides.com Electrical Parts List Key No. Part No. Description Key No. Part No. Description R5223 401 105 6001 MT-GLAZE 5.6K JA 1/16W D2041 407 209 1201 ZD UDZS-TE-176.2B R5224 401 105 0405 MT-GLAZE 100 JA 1/16W MISCELLANEOUS R5225 401 105 7909...
- Page 57 All manuals and user guides at all-guides.com Electrical Parts List Key No. Part No. Description Key No. Part No. Description R2862 401 105 0504 MT-GLAZE 1K JA 1/16W R2864 401 105 5301 MT-GLAZE 4.7K JA 1/16W R2866 401 105 0504 MT-GLAZE 1K JA 1/16W R2868...
-
Page 58: Mechanical (Optical) Parts List & Accessories
All manuals and user guides at all-guides.com Mechanical (Optical) Parts List & Accessories …47 -58-... - Page 59 All manuals and user guides at all-guides.com Mechanical (Optical) Parts List & Accessories 62-a (R) 76 (R) 62-b (B) 77 (B) 62-c (G) 78 (G) 62-d (B) 62-e (R,G) -59-...
- Page 60 All manuals and user guides at all-guides.com Mechanical (Optical) Parts List & Accessories -60-...
- Page 61 All manuals and user guides at all-guides.com Mechanical (Optical) Parts List & Accessories See Electrical Parts List. Door Switch Board Main Board LED Board R/C Board Filter Board Inlet Board Power Board F601 Fuse Lamp Ballast Unit Sensor Board Lamp SW Board AV Board FN902 Intake Fan...
- Page 62 645 041 5494 MIRROR(R) No.16 610 302 7647 STOPPER LID-M4JA No.73 645 041 5500 MIRROR(B) No.17 645 063 7414 BADGE,SANYO*26.2X5.7L26.0 No.74 645 044 0526 OPTICAL FILTER (RG) No.18 610 312 0249 COMPLE,FILTER-M4KA No.75 645 056 0453 OPTICAL FILTER(UV CUT) No.19...
- Page 63 All manuals and user guides at all-guides.com Mechanical (Optical) Parts List & Accessories Key No. Part No. Description Key No. Part No. Description ACCESSORIES AC CORD (FOR US) 645 058 7900 CORD,POWER-1.85MK,US (FOR UK) 645 051 6085 CORD,POWER-2.0MK (FOR EU, ASIA, AFRICA) 645 051 6092 CORD,POWER-2.0MK OWNER'S MANUAL...
- Page 64 All manuals and user guides at all-guides.com...
-
Page 65: Diagrams & Drawings
PLV-Z2 M4K-Z200 These schematic diagrams and printed wiring board drawings are part of the service manual original for chassis No. M4K-Z200, model PLV-Z2. File with the service manual No. SM5110585-00. Note: All the information of part numbers and values indicated on these diagrams are at the beginning of production. -
Page 66: Parts Description And Reading In Schematic Diagram
All manuals and user guides at all-guides.com ■ Parts description and reading in schematic diagram M4K-Z200 1. The parts specification of resistors, capacitors and Resistor Reading coils are expressed in designated code. Please check Example 1/2 D J 10K B the parts description by the following code table. -
Page 67: Schematic Diagrams
All manuals and user guides at all-guides.com Schematic Diagrams PLV-Z2 [Left] ■ Schematic Diagrams HOT SIDE COLD SIDE INLET FILTER SW8801 S10B5980N R8851 1/16GZ0C K8801_3 AC CORD K8801_2 AC100-120V K8801_1 K601 SW902 C611 C614 J11B5760N AC200-240V VA611 R611 L612 SW601... - Page 68 All manuals and user guides at all-guides.com Schematic Diagrams PLV-Z2 [Right] K28D J10EG040G A2811 R2801 C2801 C2804 U22B0030G J10EG040G 1/16GJ47C 6.3KZ47ME NT2801 10KZ1UGQFZ NT2802 VOUT NT2803 R2802 1/16GJ100C J10EZ030G D2802 D2801 C2802 C2803 PRE-AMP 6.3KZ47ME KK470GQ K48L K88A J10EG040G J10EG060G...
- Page 69 All manuals and user guides at all-guides.com Schematic Diagrams PLV-Z2 [Left] SC1001 Z30B0140G K10J K50A SC1002 Z30B0140G J11MD540G J10ML540G SC1003 Z30B0140G SC1004 K10J_3 K10A RX0- NTK50A_3 RX0- Z30B0140G K10A_1 J11B5600N K10J_5 RX0+ NTK50A_5 K10A_9 RX0+ SC1006 K10A_17 Z30B0140G RX1- K10J_9...
- Page 70 All manuals and user guides at all-guides.com Schematic Diagrams PLV-Z2 [Right] C7216 C7218 C7215 6.3EM100WM 6.3EM100WM L8201 C8201 6.3EM220WM :6.3EM100F1 :6.3EM100F1 L2PD2R2MG C7219 ;6.3EM220F1 3.3VA 25KZ C8202 0.1GQFZ L8202 C8226 25KZ R8224 1/10GZ0.0 16KK R8221 C8227 C8228 1/16GJ L8203 GQFZ 0.082...
- Page 71 All manuals and user guides at all-guides.com Schematic Diagrams PLV-Z2 [Left] IC401 IC9401 S3.3V_PW R337 R338 SCAN CONVERTER & TE301 J30A00102 SYSTEM CONTROL GB[0-7] (IC8201 AD9882) RB301 GB[1] DBO5 DBO1 DGO6 DGO3 DRO7 DRO5 DRO0 DBE6 DBE4 DGE6 DGE2 DGE0...
- Page 72 All manuals and user guides at all-guides.com Schematic Diagrams PLV-Z2 [Right] J10EG060G NTK8H_1 NTK8H_2 R8819 R8820 1/3GJ75 1/3GJ75 IC1841 NTK8H_3 P_SDA1 SENSOR S3.3V_PW P_SDA1 Q1841 24LC32AT-I/SN 2SK536P "K88A" NTK8H_5 R1844 P_SCLK1 P_SCLK1 R1847 C1841 1/16GJ 1/16GJ 25KZ0.1 3.3KC 4.7KC TEST...
- Page 73 All manuals and user guides at all-guides.com Schematic Diagrams PLV-Z2 [Left] IC301 IC1831 C4501 25KZ0.1GQFZ IC4501 M62399FP R4507 R4501 1/16GJ100C P_SCLK1 R4506 R4502 1/16GJ100C R4504 P_SDA1 FAN_CONT2 FAN_CONT2 C4504 25KZ0.1GQFZ (K8A 3P) 1/16GJ3.3KC R4516 C4503 25KZ0.1GQFZ 1/16GJ3.3KC R4517 FAN_CONT1 (K8A 2P) DR[0-9] 1/16GJ3.3KC...
- Page 74 All manuals and user guides at all-guides.com Schematic Diagrams PLV-Z2 [Right] TPV2B IC401 B_V2 NTV2B FROM TPV1B IC4501(DAC) J30A00102 TPV1B B_V1 NTV1B REF_B R548 R543 B-PANEL 1/16 1/16 R549 GZ0C GZ0C 1/16GZ0C C537 DIRXB R542 R4507 25KZ0.1 1/16 C536 GQFZ...
-
Page 75: Printed Wiring Board Diagrams
All manuals and user guides at all-guides.com ■ Printed Wiring Board Diagrams ! CAUTION This projector is isolated from AC line by using the internal converter transformer. Please pay attention to the following notes in servicing R/C (SIDE:A) R/C (SIDE:B) 1. - Page 76 All manuals and user guides at all-guides.com MAIN (SIDE:A) LAMP POWER POWER BALLAST “CN201” “CN202” “K68B” “K2811A” “MC101” K48K LAMP SW Q4601 X1895 R1898 “K8803” R7824 IC1882 Q4603 D7821 R5643 R4606 C391 R7823 IC392 R7821 R5642 IC5641 R5641 IC1891 R7801 FN901 D7802 C388 C387...
- Page 77 All manuals and user guides at all-guides.com MAIN (SIDE:B) R4814 D4812 C4812 D4814 C4651 C4652 C4653 C4654 C4601 C4814 C1892 C4502 R4817 Q1891 C4602 RB4531 RB4532 C5621 RB1402 C5642 C4603 C392 C417 RB1401 C3507 C376 R419 R418 D8851 C8806 R417 R1429 R1423 C8807...
- Page 78 All manuals and user guides at all-guides.com FILTER (SIDE:A) FILTER (SIDE:B) POWER “CN101” L612 L611 C614 C613 L611 L612 C614 C613 (LIVE) C617 C616 K611G C617 C616 INLET “K6A” F.G. K611G INLET (SIDE:A) INLET (SIDE:B) SENSOR (SIDE:A) SENSOR (SIDE:B) FILTER 1AA4B10C3770C “K6B”...
- Page 79 All manuals and user guides at all-guides.com ■ Pin description of diode, transistor and IC M4K-Z200 ● Diode ● Diode K: Cathode A: Anode ● Transistor/FET ● Transistor/FET C: Collector D: Drain B: Base G: Gate Index E: Emitter S: Source C1 C2 C1 C2 ●...
- Page 80 All manuals and user guides at all-guides.com Diagrams & Drawings (M4K-Z200)