Table of Contents
Advertisement
Advertisement
Table of Contents

Related Manuals for Brother X-3


Summary of Contents for Brother X-3
-
Page 3: Important Safety Instructions
Never operate this sewing machine if it has a damaged cord or plug, if it is not working properly, if it has been dropped or damaged, or dropped into water. Return the sewing machine to the nearest authorized dealer or service center for examination, repair, electri- cal or mechanical adjustment. - Page 4 “TÄRKEITÄ TURVALLISUUSOHJEITA” Perusturvatoimia, kuten seuraavia, on aina noudatettava ompelukonetta käytettäessä: VAARA – Sähköiskuvaaran välttämiseksi: Älä koskaan jätä ompelukonetta ilman valvontaa pistokkeen ollessa kytkettynä pistorasiaan. Irrota pistoke pistorasiasta aina välittömästi käytön jälkeen ja ennen kuin alat puhdistaa ompelukonetta. Ota pistoke aina irti pistorasiasta, kun vaihdat lampun. Vaihda lamppu samantyyppiseen 15 watin lamppuun. VAROITUS –...
- Page 5 “IMPORTANTES INSTRUCCIONES DE Cuando se usa una máquina de coser, debe seguirse unas precauciones básicas y que se detallan a continuación: PELIGRO – Para reducir el riesgo de una descarga eléctrica. La máquina no debe dejarse nunca desatendida mientras esté conectada. Desconectar la máquina de la red cuando se termine de usar y antes de limpiarla.
-
Page 7: Connecting Plugs And Main Power
FOR USERS IN THE UK, EIRE, MALTA AND CYPRUS ONLY. If your sewing machine is fitted with a 3 pin non-rewireable BS plug then please read the following. IMPORTANT If the available socket outlet is not suitable for the plug supplied with this equipment, it should be cut off and an appropriate three pin plug fitted. -
Page 8: Table Of Contents
KNOWING YOUR SEWING MACHINE PRINCIPAL PARTS OF YOUR MACHINE ... 1 PRINCIPAL PARTS ... 2 ACCESSORIES ... 3 OPERATING YOUR SEWING MACHINE ... 4 Connecting Plugs ... 4 Main Power and Sewing Light Switches ... 5 Foot Controller ... 5 Inserting the Needle ... - Page 9 OMPELUKONEESEEN TUTUSTUMINEN KONEEN TÄRKEIMMÄT OSAT ... 1 TÄRKEIMMÄT OSAT ... 2 LISÄVARUSTEET ... 3 OMPELUKONEEN KÄYTTÄMINEN ... 4 Pistokkeiden kytkeminen ... 4 Virta- ja valokytkin ... 5 Jalkasäädin ... 5 Neulan kiinnittäminen ... 6 Neulan tarkastaminen ... 6 Paininjalan vaihtaminen ... 7 Vapaavarren käyttäminen ...
- Page 10 CONOZCA SU MÁQUINA DE COSER ELEMENTOS PRINCIPALES DE LA MÁQUINA ... 1 ELEMENTOS PRINCIPALES ... 2 ACCESORIOS ... 3 FUNCIONAMIENTO DE LA MÁQUINA DE COSER ... 4 Conexión de los enchufes ... 4 Interruptor principal y de luz ... 5 Pedal ...
-
Page 12: Principal Parts Of Your Machine
PRINCIPAL PARTS OF YOUR MACHINE ELEMENTOS PRINCIPALES DE LA MÁQUINA KONEEN TÄRKEIMMÄT OSAT... -
Page 13: Principal Parts
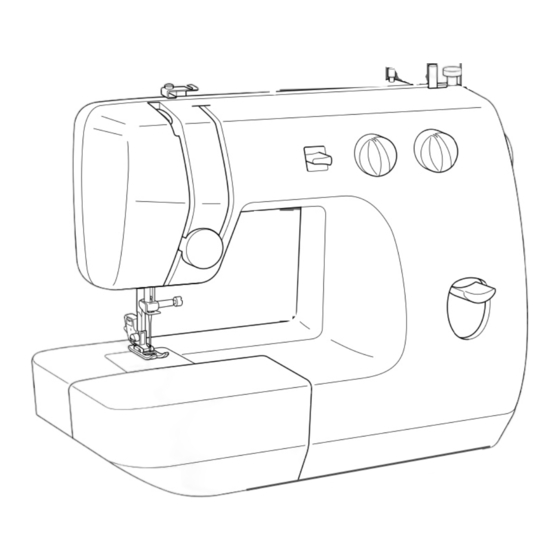
PRINCIPAL PARTS 1 Needle Position Selector 2 Stitch Width knob 3 Thread Take-up Lever 4 Extension Table with Accessory Storage 5 Upper Tension Control Dial 6 Stitch Length Knob 7 Reverse Sewing Lever 8 Thread Cutter 9 Presser Foot Screw 0 Presser Foot (Zigzag) A Needle Plate (Zigzag) B Shuttle Hook... -
Page 14: Accessories
ACCESSORIES 1 Zipper Foot (1 pc.) (See note.) 2 Bobbins (2 pcs.) 3 Needle Set (Regular #14) (3 pcs.) 4 Extra Spool Pin (1 pc.) (See note.) 5 Darning Plate (1 pc.) Parts Code for Zigzag Presser Foot: 138135-122 Foot Controller: XC7359-021 (110/120V Area) XC7438-321 (220/240V Area) XC7456-321 (U.K.) -
Page 15: Operating Your Sewing Machine
2. Insert the power supply plug into an electrical outlet. CAUTION: 1. When changing the light bulb or when the sewing machine is not in use, the power supply plug must be disconnected from the wall socket to avoid electrical hazards. -
Page 16: Main Power And Sewing Light Switches
1. Be sure that nothing is placed on the foot controller when the ma- chine is not being used. 2. A new sewing machine or one that has not been in use for a long period of time should be oiled as described on page 54. After oil- ing, be sure to wipe off any excess oil. -
Page 17: Inserting The Needle
Inserting the Needle Turn power switch to “O”. 1. Remove the power supply plug from the electrical outlet. 2. Raise the needle bar to its highest position. 3. Lower the presser foot. 4. If a needle is already installed, remove it by loosening the needle clamp with a coin and pulling the needle down. -
Page 18: Changing The Presser Foot
Changing the Presser Foot It may be necessary to change the presser foot according to your sew- ing needs. SNAP-ON TYPE Turn power switch to “O”. 1. Raise the needle to its highest position by turning the balance wheel toward you (counterclockwise), and raise the presser foot lever. 2. -
Page 19: Converting To Free-Arm Style
1 Extension table Steadying the Machine When the sewing machine is placed on an uneven surface, turn the rubber cushion on the front right-hand side of the base plate to adjust its height until the sewing machine is stable. (See fig. B.) Conversión en modalidad de brazo libre... -
Page 20: Various Controls
VARIOUS CONTROLS Stitch Length Knob The stitch length is regulated by turning this knob. The numbers above the knob represent the stitch length in millimeters (mm). The larger numbers set a longer stitch length. When the knob is set to 0, the fabric is not fed. This setting is used for sewing on a button. -
Page 21: Reverse Sewing Lever
Reverse Sewing Lever Reverse sewing is generally used for locking and reinforcing seams. To sew in reverse, hold down the reverse sewing lever while slowly sew- ing. To return to forward sewing simply release the lever. (See fig. A.) Palanca de retroceso La costura hacia atrás se usa para terminar y reforzar costuras. -
Page 22: Stitch Width Knob
Stitch Width Knob The width of the zigzag stitch is regulated by operating the stitch width knob. The numbers above the knob represent the stitch width in millimeters (mm). The larger numbers set a wider stitch width. When the knob is set at 0, a straight stitch is sewn. 1 Stitch width knob NOTE: 1. -
Page 23: Needle Position Selector
Needle Position Selector By shifting this lever to L (left), M (middle) or R (right), you can sew straight and zigzag stitches on the baseline. When you sew close to the edge of the fabric, select L or R so the fabric is fed more easily. -
Page 25: Threading The Machine
THREADING THE MACHINE Winding the Bobbin 1. Place the spool of thread on the spool pin and pass the thread around the bobbin winding tension disc. 1 Bobbin winding tension disc 2 Bobbin winder 2. Pass the end of the thread through the hole in the bobbin from the inside. -
Page 26: Lower (Bobbin) Threading
Lower (bobbin) Threading Turn power switch to “O”. 1. Raise the needle to its highest position by turning the balance wheel toward you (counterclockwise) and raise the presser foot lever. 2. Open the shuttle cover behind the extension table on the front of the machine and remove the bobbin case by pulling its latch to- ward you and pulling it out from the shuttle race. -
Page 27: Upper (Needle) Threading
Upper (Needle) Threading 1 Spool pin 2 Thread guide 3 Thread Take-up Lever 4 Upper (needle) Tension 5 Thread Check Spring 6 Lower Thread Guide 1. Raise the presser foot using the presser foot lever and turn the bal- ance wheel toward you (counterclockwise) to raise the thread take up lever to the highest position. -
Page 28: Enhebrado Superior (De La Aguja)
Enhebrado superior (de la aguja) 1 Portacarretes 2 Guía hilos 3 Palanca tirahilos 4 Disco de tensión superior (de aguja) 5 Resorte de verificación del hilo 6 Guía hilos inferior 1. Levante el prensatelas con la palanca y gire la ruedecilla hacia usted (en el sentido contrario al de las manecillas de un reloj) para subir la palanca tirahilos a su posición más alta. -
Page 29: Drawing Up The Bobbin Thread
Drawing Up The Bobbin Thread 1. Raise the presser foot and the needle to their highest positions. 2. With your left hand, hold the end of the upper thread. With your right hand, turn the balance wheel toward you (counterclockwise) until the needle moves down and back up again to its highest posi- tion. -
Page 30: Twin-Needle Sewing (Option)
Twin-Needle Sewing (Option) Your sewing machine is designed for twin needle sewing, which al- lows you to sew using two upper threads. You can use the same color or two different colors of thread for decorative stitches. Be sure that the two upper threads used for threading the twin needle have the same weight. -
Page 31: Costura Con Aguja Doble (Opción)
Costura con aguja doble (Opción) Su máquina de coser ha sido concebida para poder utilizar una agu- ja doble y permitir la costura con dos hilos superiores. Puede usar el mismo color de hilo o dos hilos de colores distintos para puntadas decorativas. -
Page 32: Thread Tension
Thread Tension Thread tension will affect the quality of your stitches. It may need to be adjusted when you change fabric or thread type. NOTE: It is recommended that a test sample be made on a fabric scrap before sewing on your project. The basic thread tension setting is “5”. - Page 33 NOTE: The bobbin thread tension has already been adjusted at the factory for general use. For most sewing applications, no adjustment is needed. When sewing with thin thread on thin fabrics, the thread tension may not be adjusted adequately with the upper tension control dial. There- fore, the thread tension must be adjusted according to the procedure described below.
-
Page 34: Chart Of Sewing Fabrics, Needles And Thread Combinations
CHART OF SEWING FABRICS, NEEDLES AND THREAD COMBINATIONS SEWING FABRICS VERY THIN Fine tricot, Fine lace, Thin linen, Silk, Organza, Chiffon LIGHTWEIGHT Voile, Taffeta, Synthetics, Silk, Batiste Cotton, Gingham, Poplin, Percale, Pique, Satin, Velvet, MEDIUM WEIGHT Lightweight wool, Fine corduroy, Suitings, Linen, Muslin HEAVYWEIGHT Denim, Gabardine, Tweed, Corduroy, Canvas, Duck... -
Page 35: Tabla De Combinaciones Entre Tejidos, Agujas E Hilos
TABLA DE COMBINACIONES ENTRE TEJIDOS, AGUJAS E HILOS TEJIDOS MUY FINO Punto fino, Encaje fino, Lino fino, Seda, Organza, Chifón LIGERO Velo, Tafetán, Sintéticos, Seda, Batista Algodón, Vichy, Popelín, Percal, Piqué, Satén, MEDIO Terciopelo, Lana ligera, Pana fina, Forros, Lino, Muselina PESADO Tejano, Gabardina, Tweed, Pana, Toldo, Dril Prendas de punto simple, Prendas de punto doble, Jer-... -
Page 36: Straight Stitching
Straight Stitching STITCH LENGTH STITCH WIDTH NEEDLE POSITION M, L, R (For twin needle sewing, always set at M.) PRESSER FOOT Zigzag NEEDLE Single or Twin Starting Sewing 1. Raise the needle to its highest position and lift the presser foot le- ver. - Page 37 Changing Sewing Directions (fig. A) 1. Stop the machine at the point where you wish to change directions with the needle still in the fabric. If the needle ends in the up position turn the balance wheel toward you (counterclockwise) until the needle enters the fabric.
-
Page 38: Sewing Fabric Edges
Sewing Fabric Edges For sewing thin fabric: While pulling both the needle and bobbin threads toward the back of the machine, start sewing at a slow speed. For sewing thick fabric: The fabric does not feed smoothly when the presser foot is slanted as shown in the illustration. -
Page 39: For Sewing Denim
If it is difficult for the sewing machine needle to enter four to six layers of denim, turn the balance wheel a half a turn toward you so that the needle is in the fabric before sewing. -
Page 40: Sewing On Very Thin Fabric
Removing the Fabric from the Machine 1. Stop the machine. 2. Turn the balance wheel toward you (counterclockwise) to bring the needle and thread take-up lever to their highest position. 3. Lift the presser foot and pull the fabric out gently to the left side. 4. -
Page 41: Guiding The Fabric
Guiding the Fabric Simply guide the fabric with your fingers in front of the presser foot as shown in fig.A. Do not pull the fabric; let the machine do the work. If you pull the fabric, the needle may either bend or break. However, when sewing on special fabrics, such as tricot, crepes, knits, etc., we recommend that you support the fabric both in front and in back of the presser foot with a little tension as shown in fig. -
Page 42: Zigzag Stitching
Zigzag Stitching STITCH LENGTH 1-4 (For the Satin Stitch, set at F.) STITCH WIDTH 1-5 (For twin needle sewing, always use a setting of less than 3.) NEEDLE POSITION M, L, R (For twin needle sewing, always set at M.) PRESSER FOOT Zigzag NEEDLE... -
Page 43: Puntada Zigzag
Puntada zigzag Larga de puntada 1-4 (para puntadas de realce, poner en F.) Ancho de puntada 1-5 (para coser con la aguja doble, utilice siempre un ajuste inferior a 3.) Posición de la aguja M, L, R (para coser con la aguja doble, ajuste siempre en M.) Prensatelas Zigzag... -
Page 44: Decorative Stitches
Decorative Stitches STITCH LENGTH Set between 0 and 1 (F) for the Satin Stitch. STITCH WIDTH See the table on the next page. NEEDLE POSITION M, L, R PRESSER FOOT Zigzag NEEDLE Single or Twin Various decorative stitches can be obtained by sewing with the Satin Stitch according to the instructions on the following page. - Page 45 Needle Needle position Single needle Twin needle Single needle Twin needle Single needle Twin needle Neula Neulan asento Tavallinen neula Kaksoisneula Tavallinen neula Kaksoisneula Tavallinen neula Kaksoisneula Pattern sewn Adjustment of the stitch width Repeatedly move the stitch width knob at an even speed from 0 to 5, then from 5 to 0 while depressing the foot control at an even speed.
- Page 46 Aguja Posición de la aguja Aguja simple Aguja doble Aguja simple Aguja doble Aguja simple Aguja doble Игла Положение иглы Patrón cosido Ajuste del ancho de puntada Mueva repetidamente el selector de ancho de puntada a una velocidad constante entre 0 y 5, y luego entre 5 y 0 mientras presiona el pedal a una velocidad constante.
-
Page 47: Buttonhole Sewing
Buttonhole Sewing STITCH LENGTH Set between 0 and 1 (F) for the Satin Stitch. STITCH WIDTH See the instructions below. NEEDLE POSITION R (right position) PRESSER FOOT Zigzag NEEDLE Single Making a buttonhole NOTE: 1. It is recommended to practice making a buttonhole on a scrap piece of fabric before attempting it on your project. -
Page 48: Para Coser Ojales
Para coser ojales Largo de puntada Ajustar entre 0 y 1 (F) para puntada de realce. Ancho de puntada Véanse las instrucciones a continuación. Posición de la aguja R (a la derecha) Prensatelas Zigzag Aguja Simple Para coser un ojal NOTA: 1. - Page 49 OPTIONAL PROCEDURE FOR BUTTONHOLES Step A: Bar Tack 1. Set the needle position at L, stitch width at 5 and stitch length at 0. 2. Lower the presser foot and sew 3 to 4 stitches. 3. Stop the machine when the needle is in the fabric and at the left side of the stitches.
- Page 50 Método alternativo para coser ojales. Paso A: Remate delantero 1. Ajuste la posición de la aguja en L, el ancho de puntada en 5 y el largo de puntada en 0. 2. Baje el prensatelas y cosa 3 ó 4 puntadas. 3.
-
Page 51: Button Sewing
Button Sewing STITCH LENGTH STITCH WIDTH Set according to the distance between the holes. NEEDLE POSITION L or R PRESSER FOOT Zigzag NEEDLE Single OTHER Darning Plate 1. Set the darning plate on the needle plate over the feed dogs as shown in the illustration and press down into place. -
Page 52: Costura De Botones
Costura de botones Largo de puntada Ancho de puntada Debe definirse de acuerdo con la distancia existente entre los distintos agujeros. Posición de la aguja L o R Prensatelas Zigzag Aguja Simple Otros Placa de zurcir 1. Instale la placa de zurcir en la placa de agujas, sobre los alimentadores, como se indica en la ilustración, y presione para que quede trabada. -
Page 53: Zipper Insertion
Zipper Insertion STITCH LENGTH STITCH WIDTH NEEDLE POSITION PRESSER FOOT Zipper Foot NEEDLE Single The zipper foot is used to sew on various types of zippers and can easily be positioned to the right or left side of the needle. When sewing the right side of the zipper, attach the shank to the left pin of the zipper foot. -
Page 54: Poner De Cremalleras
Poner de cremalleras Largo de puntada Ancho de puntada Posición de la aguja Prensatelas Pata de cremalleras Aguja Simple La pata de cremalleras sirve para coser varios tipos de cremalleras y puede colocarse fácilmente hacia la izquierda o derecha de la aguja. Cuando la cremallera se cose por el lado derecho, instale la pata deslizándola hacia la izquierda. -
Page 55: Gathering
Gathering STITCH LENGTH STITCH WIDTH NEEDLE POSITION PRESSER FOOT Zigzag NEEDLE Single 1. Loosen the tension of the upper thread (to about 2) so that the lower thread lies on the underside of the fabric. 2. Sew a single row or evenly-spaced multiple rows of Straight Stitches. 3. -
Page 56: Darning
Darning STITCH LENGTH STITCH WIDTH NEEDLE POSITION PRESSER FOOT None NEEDLE Single OTHER Darning plate 1. Place the darning plate on the needle plate and press down into place as shown in fig. A. 2. Place the portion to be darned under the presser foot together with a fabric underlay for reinforcement. -
Page 57: Attaching Lace
Attaching Lace STITCH LENGTH STITCH WIDTH NEEDLE POSITION PRESSER FOOT Zigzag NEEDLE Single 1. Place the lace under the fabric leaving a 5 mm (1/4") overlap at the edge. 2. Place the overlapping edges under the presser foot and sew. NOTE: A decorative touch can be added by using the Satin Stitch or a Decora- tive Stitch to attach the lace. -
Page 58: Appliques
Appliques STITCH LENGTH STITCH WIDTH NEEDLE POSITION PRESSER FOOT Zigzag NEEDLE Single An applique is created by cutting a contrasting piece of fabric into a shape to be used as a decoration on a garment or project. 1. Baste the cut design to the fabric in the location where desired. 2. -
Page 59: Blind Hem Stitch
Blind Hem Stitch STITCH LENGTH STITCH WIDTH NEEDLE POSITION PRESSER FOOT Zigzag NEEDLE Single The Blind Hem Stitch is used to finish the edge of a project, like the bottom of a pair of pants, without the stitch showing. 1. Both the upper and lower threads should be the same color as the fabric. -
Page 60: Over Edge Stitch
Over Edge Stitch STITCH LENGTH STITCH WIDTH NEEDLE POSITION PRESSER FOOT Zigzag NEEDLE Single The Overlock Stitch is used to prevent the edge of the fabric from fraying. Place the edge of the fabric under the presser foot so the needle enters the fabric when the left side of the zigzag stitch is sewn and misses the edge of the fabric with the right side of the stitch. -
Page 61: Cording
Cording STITCH LENGTH STITCH WIDTH Set according to the thickness of the cord being used. NEEDLE POSITION PRESSER FOOT Zigzag NEEDLE Single 1. Set the stitch width knob so the needle will just clear both sides of the cording. 2. Place the cord on the fabric in the position where it will be sewn. 3. -
Page 62: Monogramming And Embroidering
Monogramming and Embroidering STITCH LENGTH Set at any position. STITCH WIDTH NEEDLE POSITION PRESSER FOOT None NEEDLE Single OTHERS Darning plate Preparing for monogramming and embroidering 1. Place the darning plate on the needle plate. 2. Draw the lettering (for monogramming) or design (for embroider- ing) on the surface of the fabric with delible ink or tailor’s chalk. -
Page 63: Monogramas Y Bordados
Monogramas y bordados LARGO DE PUNTADA Cualquier posición. ANCHO DE PUNTADA POSICIÓN DE LA AGUJA PRENSATELAS Retirado AGUJA Simple OTROS Placa de zurcir Preparación para monogramas y bordados 1. Instale la placa de zurcir sobre la placa de agujas. 2. Con jaboncillo o tinta deleble, dibuje las letras (para monogra- mas) o el motivo (para bordados) en el derecho del tejido 3. -
Page 64: Changing The Bulb
Changing the Bulb 1. Remove the power supply plug from the outlet. 2. Loosen the face plate screw as shown in fig. A. 3. Remove the face plate from the machine as illustrated in fig. B. 4. Replace the sewing light bulb. See fig. C. 1 Bulb 2 Loosen 3 Tighten... -
Page 65: Oiling
The machine should be oiled once a week if it is used more than one hour a day. If the machine is used more often, oil every day. Sewing machine oil is available from your local sewing machine dealer or service center. -
Page 66: Cleaning
Cleaning Removing the Shuttle Hook 1. Raise the needle to its highest position. 2. Open the shuttle cover on the front of the free arm. 3. Take out the bobbin case by opening its latch and pulling it out from the shuttle race. 4. -
Page 67: Limpieza
Limpieza Para sacar el garfio de la lanzadera 1. Levante la aguja a su posición más alta. 2. Abra la cubierta de la lanzadera ubicada en la parte delantera del brazo libre. 3. Saque el portacanilla abriendo su pestillo y retirándolo de la pista de la lanzadera. -
Page 68: Performance Checklist
Whenever sewing difficulties are encountered, review the section in this instruction manual that details the operation you are performing to make sure you are correctly using the machine. If the problem continues, the following checklist may help you to improve the operation. If you still have difficulties, contact your nearest service center. - Page 69 FABRIC DOES NEEDLE NOT FEED BREAKS PROPERLY Stitch length Needle is not dial is set at no correctly inserted. feeding. Page 9 Page 6 The combination of needle size/ Damaged or worn thread size/fabric needle is used. is incorrect. Page 23 Page 6 The combination Damaged or worn...
-
Page 70: Vianetsinnän Tarkastusluettelo
Kun ompelussa ilmenee ongelmia, katso ensin näistä käyttöohjeista kohtaa, jossa kuvataan parhaillaan suorittamaasi toimintoa, ja tarkista, että olet käyttänyt konetta oikein. Jos ongelma ei ratkea ohjeiden avulla, ratkaisu voi löytyä alla olevasta tarkastusluettelosta. Jos tämäkään ei auta, ota yhteys lähimpään huoltopisteeseen. YLÄLANKA KATKEAA Ylälankaa ei ole... - Page 71 KANGAS EI SYÖTY NEULA KATKEAA KUNNOLLA Piston pituusnuppi on asetettu siten, Neula on että se ei syötä kiinnitetty väärin. kangasta. Sivu 9 Sivu 6 Neulakoon, langan paksuuden Neula on ja kankaan vahingoittunut tai yhdistelmä on liian kulunut. väärä. Sivu 23 Sivu 6 Neulakoon, Neula on...
-
Page 72: Listado De Posibles Incidencias
Cada vez que se encuentre con dificultades al coser, vuelva a consultar la parte de este manual de instrucciones que detalla la operación que está realizando, para comprobar que usa correctamente la máquina. Si el problema persiste, el siguiente listado puede ayudarle. Si a pesar de todo ello, el problema persiste, póngase en contacto con el servicio técnico más cercano. - Page 73 EL TEJIDO NO LA AGUJA SE ARRASTRA ROMPE BIEN El selector de largo de puntada está La aguja está mal puesto para que el colocada. tejido no arrastre. Pagina 9 Pagina 6 La combinación Se está usando tamaño de aguja/ una aguja dañada grueso de hilo/tejido o gastada.
-
Page 76: Repacking The Machine
Repacking the Machine Keep the carton and packing fabrics for future use. It may become necessary to reship the sewing machine. Improper packing or improper packing fabric could result in damage during shipping. Instructions for repacking the machine are illustrated. - Page 77 Accessories ... 3 Appliques ... 47 Attaching Lace ... 46 Blind Hem Stitch ... 48 Bobbin Threading ... 15, 16 Winding ... 14 Buttonhole Sewing ... 36 Button Sewing ... 40 Chart of Sewing Fabrics, Needles and Thread Combinations ... 23 Cleaning ...
- Page 78 Ala- eli puolalangan pujottaminen ... 15 Applikointi ... 47 Hyvin ohuen kankaan ompeleminen ... 29 Jalkasäädin Kytkeminen ... 5 Käyttäminen ... 5 Kaksoisneulalla ompeleminen ... 19 Kankaan ohjaaminen ... 30 Kankaan reunojen ompeleminen ... 27 Kirjonta ... 51 Koneen tukeminen ... 8 Lampun vaihtaminen ...
- Page 79 Accesorios ... 3 Aguja Cambio ... 6 Comprobación ... 6 Enhebrado ... 17 Selector de posición ... 12 Alimentador Limpieza ... 56 Aplicaciones ... 47 Bobinado de la canilla ... 14 Bombilla Cambio de la bombilla ... 53 Interruptor ... 5 Bordados ...
- Page 80 А Б Г З И Н О П Р С Т У Ч Ш...
- Page 84 ENGLISH FINNISH SPANISH RUSSIAN XE4683-001 Printed in China...