Table of Contents
Advertisement
Advertisement
Table of Contents

Related Manuals for Asus ProArt PA279CV Series


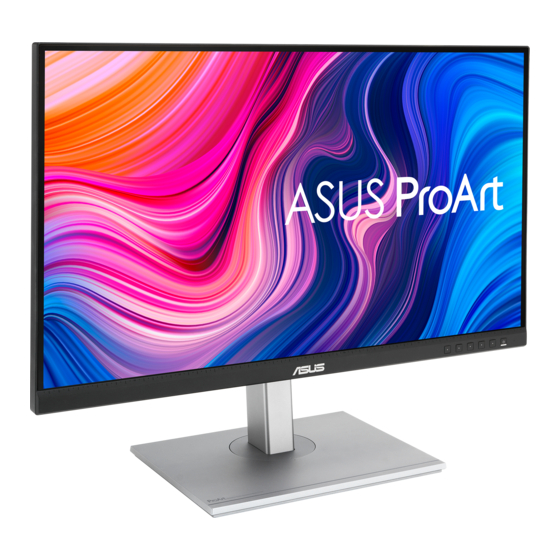
Summary of Contents for Asus ProArt PA279CV Series
- Page 1 PA279CV Series LCD Monitor User Guide...
-
Page 2: Table Of Contents
Product warranty or service will not be extended if: (1) the product is repaired, modified or altered, unless such repair, modification of alteration is authorized in writing by ASUS; or (2) the serial number of the product is defaced or missing. - Page 3 A third-party certification according to ISO 14024 Toward sustainable IT products Say hello to a more sustainable product IT products are associated with a wide range of sustainability risks throughout their life cycle. Human rights violations are common in the factories.
-
Page 4: Notices
Notices Federal Communications Commission Statement This device complies with Part 15 of the FCC Rules. Operation is subject to the following two conditions: • This device may not cause harmful interference, and • This device must accept any interference received including interference that may cause undesired operation. -
Page 5: Safety Information
Safety information • Before setting up the monitor, carefully read all the documentation that came with the package. • To prevent fire or shock hazard, never expose the monitor to rain or moisture. • Never try to open the monitor cabinet. The dangerous high voltages inside the monitor may result in serious physical injury. - Page 6 WARNING Usage of other than specified head- or earphones can result in hearing loss due to excessive sound pressures.
-
Page 7: Care & Cleaning
Care & Cleaning • Before you lift or reposition your monitor, it is better to disconnect the cables and power cord. Follow the correct lifting techniques when positioning the monitor. When lifting or carrying the monitor, grasp the edges of the monitor. Do not lift the display by the stand or the cord. • Cleaning. - Page 8 These documents are not part of the standard package. Takeback Services ASUS recycling and takeback programs come from our commitment to the highest standards for protecting our environment. We believe in providing solutions for our customers to be able to responsibly recycle our products, batteries and other components as well as the packaging materials.
-
Page 9: Welcome
® Thank you for purchasing the ASUS LCD monitor! The latest widescreen LCD monitor from ASUS provides a crisper, broader, and brighter display, plus a host of features that enhance your viewing experience. With these features, you can enjoy the convenience and delightful visual... -
Page 10: Assembling The Monitor
Assembling the monitor To assemble the monitor: Align the screw hole on the arm with the bundled screw on the base. Then insert the base into the arm. Fix the base to the arm by fastening the bundled screw. *Base screw size: M6 x 17mm Chapter 1: Product Introduction... -
Page 11: Connect Cables
15V/3A and 20V/3.25A. Connecting the USB Type-C cable can input the DisplayPort source, output power and enable the USB Type-A ports (downstream) on the monitor. Connecting the USB Type-C to Type-A cable only enables the USB Type-A ports (downstream) on the monitor. ASUS LCD Monitor PA279 Series... -
Page 12: Monitor Introduction
Monitor introduction 1.5.1 Using the Controls button Use the control button on the bottom of the monitor to adjust the image settings. Power button/power indicator: • Turns the monitor on/off. • The color definition of the power indicator is as the below table. Status Description White... - Page 13 Shortcut 2: • Press this button to display the OSD menu when the OSD is off. • Default: Blue light filter hotkey • To change the hotkey function, go to the Shortcut > Shortcut 2 menu. ASUS LCD Monitor PA279 Series...
-
Page 14: Adjusting The Monitor
• Hold the stand to prevent the monitor from falling when you change its angle. • You can adjust the monitor’s angle from +35˚ to -5˚ and it allows 45˚ swivel adjustment from either left or right. -5 ~ 35 +45° -45° 150mm 90° 90° ASUS LCD Monitor PA279 Series... -
Page 15: Detaching The Arm/Stand (For Vesa Wall Mount)
Detaching the arm/stand (for VESA wall mount) The detachable stand of this monitor is specially designed for VESA wall mount. To detach the arm/stand Disconnect power and signal cables. Carefully put the monitor facedown on its EPS packaging. Press the quick release button from rear cover. Detach the stand (arm and base) from the monitor. -
Page 16: Outline Dimension
Outline dimension Unit: mm ASUS LCD Monitor PA279 Series... -
Page 17: Osd (On-Screen Display) Menu
Press and to change the settings of the selected function. To exit and save the OSD menu, press repeatedly until the OSD menu disappears. To adjust other functions, repeat steps 1-4. ASUS LCD Monitor PA279 Series... -
Page 18: Osd Function Introduction
3.1.2 OSD Function Introduction ProArtPreset This function contains twelve sub-functions that you can select for your preference. ASUS PA279CV ProArtPreset ProArt Preset Standard Mode DisplayPort 3840x2160@60Hz Standard Mode sRGB Mode Rec. 709 Mode DCI-P3 Mode DICOM Mode Scenery Mode ProArtPreset... - Page 19 ProArt Palette/ Color Black Level Gamma V: adjustable NA: function disabled (*1) 6500K & P3-Theater(default) only (*2) 6500K(default) & 9300K only Blue Light Filter Adjust the energy level of blue light emitted from LED backlight. ASUS LCD Monitor PA279 Series...
- Page 20 ASUS PA279CV Blue Light Filter ProArt Preset Standard Mode DisplayPort 3840x2160@60Hz Level 0 Level 1 Level 2 Level 3 Level 4 • Level 0: No change • When Blue Light Filter is activated,the default settings of Standard Mode will be automatically imported.
- Page 21 • Black Level: To adjust the initialized 1st signal level of darkest gray level. • Color: * Six-axis Hue adjustment. * Six-axis Saturation adjustment. * Adjusts the gain levels for R, G, B. * Adjusts the black level offset values for R, G, B. ASUS LCD Monitor PA279 Series...
- Page 22 Resets the color settings of all color modes to the factory default value. Image You can adjust Sharpness, Trace Free, Aspect Control, Input Range and ASCR from this main function. ASUS PA279CV Image ProArt Preset Standard Mode DisplayPort 3840x2160@60Hz Sharpness...
- Page 23 • PIP/PBP Mode: Select PIP, PBP or turn it off. • PIP/PBP Source: Selects the video input source among, “HDMI-1”, “HDMI-2”, DisplayPort or USB Type-C. • PIP Size: Adjust the PIP size to “Small”, “Middle”, or “Large”. ASUS LCD Monitor PA279 Series...
- Page 24 HDMI-1 HDMI-2 Main Source DisplayPort USB Type-C Input Select Select the input source from HDMI-1, HDMI-2, DisplayPort, USB Type-C. Enable/Disable Auto Source Detection input signal. ASUS PA279CV Input Select ProArt Preset Standard Mode DisplayPort 3840x2160@60Hz HDMI-1 HDMI-2 DisplayPort USB Type-C...
- Page 25 USB Type C port. Due to the technological differences between USB 2.0 and USB 3.1, THE maximum USB data throughput (bandwidth and other related characteristics) varies and therefore influences the maximum output resolution. ASUS LCD Monitor PA279 Series...
- Page 26 * USB 3.1: The data transfer rate according to the 3.1 specification in USB Type C port can only output the maximum resolution of 4K2K 30Hz. * USB 2.0: The data transfer rate according to the 2.0 specification in USB Type C port can output the maximum resolution of 4K2K 60Hz. • The data transfer rate will remain USB 3.1 when using USB Type C to A cable.
- Page 27 German, Spanish, Italian, Dutch, , Russian, Poland, Czech, Croacia, Hungary, Romania, Portugal, Turkey, Simplified Chinese, Traditional Chinese, Japanese, Korean, Persian, Thai, Indonesian. • Information: Displays the monitor information. • All Reset: Selects “Yes” to revert all settings to the factory default mode. ASUS LCD Monitor PA279 Series 3-11...
- Page 28 Selecting this option allows you to set two shortcut keys. User can select from Blue Light Filter, Brightness, Contrast, PIP/PBP Setting, Color Temp., Volume, sRGB Mode, Rec. 709 Mode, DICOM Mode, User Mode 1, User Mode 2 and set as shortcut key. ASUS PA279CV Shortcut Standard Mode DisplayPort 3840x2160@60Hz Shortcut 1...
-
Page 29: Specifications
(WxHxD) (For VESA Wall Mount) Box Dimension (WxHxD) 680 x 161 x 516 mm Net Weight (Esti.) 8.6 kg(Net); 5.7 kg(without stand) Gross Weight (Esti.) 11.2 kg Voltage Rating AC 100~240V(Built-in) Operational temperature 0~40° ASUS LCD Monitor PA279 Series 3-13... -
Page 30: Troubleshooting (Faq)
Troubleshooting (FAQ) Problem Possible Solution Power LED is not ON • Press the button to check if the monitor is in the ON mode. • Check if the power cord is properly connected to the monitor and the power outlet. • Check Power Indicator function in main menu OSD. -
Page 31: Supported Timing List
3840x2160 @ 50Hz 3840x2160 @ 60Hz * The modes not listed in the above tables may not be supported. For optimal resolution, we recommend that you choose a mode listed in the above tables. ASUS LCD Monitor PA279 Series 3-15...