Table of Contents
Advertisement
Advertisement
Table of Contents

Related Manuals for Beko DL1243AP


Summary of Contents for Beko DL1243AP
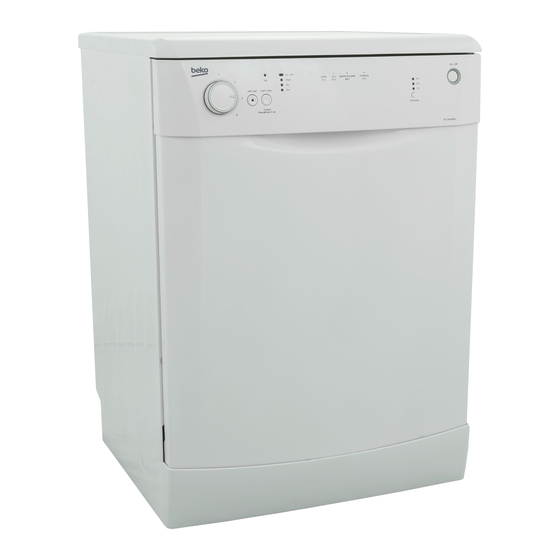
- Page 1 Dishwasher DL1243AP User’s Manual...
- Page 2 Welcome Dear customer Congratulations on your choice of a Beko quality dishwasher which has been designed to give you lasting service. Please read these instructions before installing the dishwasher and using it for the first time. The information contained herein is provided to avoid accidental risks and/or damage to your appliance Make sure you understand the controls prior to using your appliance.
- Page 3 Dishwasher DL1243AP User’s Manual...
- Page 4 Welcome Dear customer Congratulations on your choice of a Beko quality dishwasher which has been designed to give you lasting service. Please read these instructions before installing the dishwasher and using it for the first time. The information contained herein is provided to avoid accidental risks and/or damage to your appliance Make sure you understand the controls prior to using your appliance.
-
Page 5: Table Of Contents
TABLE OF CONTENTS 1 Know your dishwasher 6 Operating the dishwasher 20 / specification 7 How to clean your 2 Warning and safety machine information Hot Air Drying Upper spray arm Electrical Safety Lower spray arm Children’s Safety General 8 Before calling service Recycling What should not be washed in your / Trouble shooting... -
Page 6: Know Your Dishwasher / Specification
Know your dishwasher / specification Removable work top Hot Air Drying Upper Upper basket spray arm Upper basket track latch Heating element concealed behind the liner Dishwasher salt cap Lower Lower basket spray arm Cutlery basket Filters Detergent and Rinse aid dispenser Removable kick plate... - Page 7 Specification Load Capacity : 12 Place settings Height : 850 mm Width : 598 mm Depth : 598 mm Depth/Height : 570 mm / 820 mm (without worktop) Net weight : 42 kg Supply voltage : 220-240 V ~ 50 Hz Fuse currrent : 10 A Total power...
-
Page 8: Warning And Safety Information
Warning and safety information Electrical Safety machine when the front door is open. Never allow your children to play on or The dishwasher should only be sit onto the front door when the front operated on the voltage specified. door is open. For electrical safety, only earthed plugs and sockets should be used. -
Page 9: Recycling
What should not be washed when the lower basket is pulled all the way out. Never place any other load in your dishwasher on the door, otherwise the machine Do not wash items soiled with may tip over. cigarette ash, candle, paint wax, dyes, chemicals etc. -
Page 10: Before First Use
Before the first wash, add 1 lt of is damaged please do not replace water to the salt container of it yourself. The supply cord or the your machine. mains lead must be replaced by a Beko Authorised Service Agent or a similarly qualified person. 7 GB... -
Page 11: Warning
Warning 3. Connect the brown (live) wire to the terminal in the plug marked ‘L’ This appliance must be or coloured red. earthed If the fitted moulded plug is not With the alternative plugs a 13A fuse suitable for your socket, then the plug must be fitted either in the plug or should be cut off and an appropriate adaptor or in the main fuse box. -
Page 12: Water Inlet Hose Connection
Water inlet hose connection Drain Hose Connection Make sure your plumbing is suitable Fit the drainage hose of your machine to install your new dishwasher. If in to the drainage pipe without bending. doubt contact a qualified plumber. Secure your hose firmly to the waste The appliance must be connected pipe to avoid it coming off during the to the water mains using the new... - Page 13 Installation of dishwasher When inserting the machine, ensure Remove all packaging before that the water inlet and drain hoses positioning the machine. are not linked or squashed. See the following diagram. Ensure Care must be taken to ensure that there is a clearance each side of the the appliance does not stand on the machine to allow slight side ways electrical supply cable.
-
Page 14: How To Use
When the appliance is correctly levelled, the door will not catch on the inner liner on either side of the cabinet. If the door does not close correctly, loosen or tighten the adjustable feet, until the machine is perfectly level. How to use Water hardness &... -
Page 15: Water Hardness Level Adjustment Table
To Adjust the Water Hardness; 1. Move the programme selection key to position 1 when the machine is turned off. 2. Press Start/Pause/Cancel button. 3. Press On/Off button while keeping the Start/Pause/Cancel button pressed to turn the machine on. Do not release the Start/Pause/Cancel button until “Water Hardness Level”... -
Page 16: Adding Dishwasher Salt
Adding Dishwasher Salt Detergent use Only use special pelletized Any brand of powder, gel and tablet dishwasher salt in your machine to detergents that have been designed soften the hard water. Never use for household dishwashers, may be other types of salts including table used. - Page 17 temperature or using a detergent ensure economical use of salt with chlorine. and/or rinse aid. • If the detergent is in tablet form, Warning! never place these in the internal Two-in-one and three-in-one section or cutlery basket of detergents the dishwasher. Always place You will obtain the best results from the tablets in the detergent your dishwasher if you use separate...
-
Page 18: Filling Detergent Dispenser
there is rinse aid in the rinse • Put the water hardness setting at aid dispenser with every wash the highest level and run a wash and that you refill the rinse aid cycle with the appliance empty. dispenser with rinse aid every •... -
Page 19: Rinse Aid
If you are using tablet detergent read regulator (C). the manufacturer’s recommendations The dispenser regulator (C) may be on the packaging in order to set between levels 1 and 6 (6 being determine where the tablets should the maximum amount of rinse aid be placed inside the dishwasher usage). -
Page 20: Loading The Dishwasher
Loading the dishwasher Loading the dishwasher correctly will increase the washing, drying and energy performance of your machine. Examine the information given in this section and the information stated in the Programme chart and quick reference card given with the manual. Remove any large scraps of food from the dishes before placing in the dishwasher to avoid clogging the... -
Page 21: Folding Plate Support Rods
Folding plate support rods Movable Cutlery Basket There are four separate “folding plate Designed to allow free placement of support rods” in the lower basket of the dishes according to their size, the your dishwasher designed to allow movable cutlery basket can slide over you more space to accommodate the tines to the left (A) and right (B) saucepans and large bowls in the... -
Page 22: Folding Tines
Folding Tines There are “folding tines” in the upper rack to allow you more space to accommodate glasses or cups. To adjust the flexible tines, gently press the handgrip and lay the tines down toward the center of the rack. Pull tines up to fold them up again. -
Page 23: Operating The Dishwasher
Operating the dishwasher • Turn the water tap on. Open the door carefully. Care must be taken if door of the machine. opening the door, as steam and water • Check that the upper and lower will escape. Then after putting in the arms can rotate freely. -
Page 24: How To Clean Your Machine
How to clean your machine Cleaning your machine at regular intervals ensures longer product life and reduces the risk of recurring problems. Clean spray arms and in particular filters at least once a week ! Always unplug the appliance and turn off the water supply before Main filter cleaning. -
Page 25: Upper Spray Arm
Clean all three filters under running tap water with a brush. Reinsert the main filter in its place. Place the coarse filter into the micro filter. Ensure the marks align properly. Turn the coarse filter clockwise until you hear a clicking sound. It is important that you fit the filters correctly. -
Page 26: Before Calling Service / Trouble Shooting
Before calling service / Trouble shooting Before calling service check the following & Trouble shooting guide supplied on the following page. Is the dishwasher door closed firmly? Is the machine plugged in? Are the filters clogged? Does the fuse need replacing ? Is the detergent dosage and/or Is the water mains supply fully rinse aid sufficient? Is there... - Page 27 Remove spots with silver polish. Rewash. Wash Prolonged contact with salty Pitting of soon after use, or pre-wash items if they will not be or highly acidic foods or stainless steel washed right away. Do not overload cutlery basket. with undissolved or highly items Avoid spilling or pouring detergent directly on concentrated detergent.
- Page 28 Guarantee Dishwasher Your new Beko product is guaranteed against the cost of breakdown repairs for one year from the date of the original purchase. What is covered? • Repairs necessary as a result of faulty materials, defective components or manufacturing defect.
- Page 29 Should you experience any difficulty in obtaining service please contact the Beko Customer Help-Line. Tel: 0845 6004911 e-mail: service@beko.co.uk Beko plc, Beko House, 1 Greenhill Crescent, Watford Hertfordshire, WD18 8QU, UK www.beko.co.uk 17 9776 0100 Revision: EB-11/14...