
Related Manuals for LG LCV5100-BN

Summary of Contents for LG LCV5100-BN
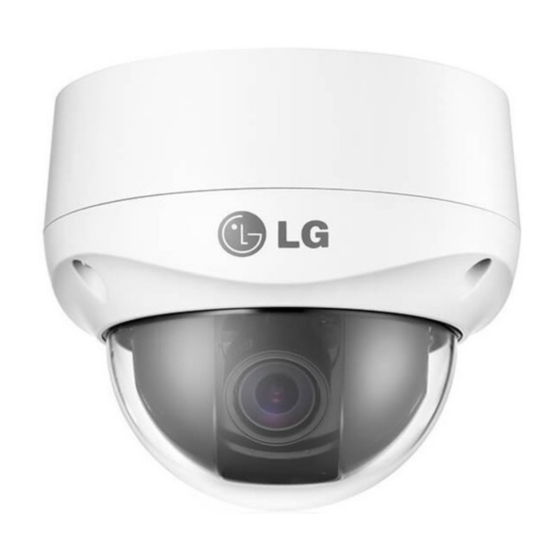
- Page 1 OWNER'S MANUAL Color Video Camera Please read this manual carefully before operating your set and retain it for future reference. MODEL LCV5100-BN LCV5100-BP 1205(V1.0)
- Page 2 WARNING: This product contains chemicals known to the CAUTION State of California to cause cancer and birth defects or reproductive harm. Wash hands after handling. RISK OF ELECTRIC SHOCK FCC WARNING: This equipment may generate or use DO NOT OPEN radio frequency energy.
- Page 3 Warning: The product has been dropped or the case is end user. broken, turn off the power and unplug the power cord. • Caution: Danger of explosion if battery is incorrectly (This may cause fire, electric shock, or injury.) replaced. Replaced only with the same or equivalent type recommended by the manufacturer.
- Page 4 LG Electronics hereby declares that this/ Disposal of your old appliance these product(s) is/are in compliance with the essential requirements and other When this crossed-out wheeled bin relevant provisions of Directive 2004/108/ symbol is attached to a product it EC, 2006/95/EC, and 2009/125/EC.
- Page 5 Important Safety Instructions Read these instructions. and the point where they exit from the apparatus. Keep these instructions. 11. Only use attachments/accessories specified by the manufacturer. Heed all warnings. 12. Use only with the cart, stand, tripod, bracket, or Follow all instructions. table specified by the manufacturer, or sold with the Do not use this apparatus near water.
- Page 6 Cautions for Safe Operation Power Supply Operating and storage location This camera must always be operated a AC 24 V or DC 12 V Avoid viewing a very bright object (such as light fittings) Certified/Listed, class 2 power supply only. during an extended period.
-
Page 7: Table Of Contents
Contents Features ................8 Specification ..............35 Accessories .................. 8 Part Names and Functions ..........9 Connections ..............10 Basic connection ..............10 Installation ..............11 Mounting the Camera ............11 Image Adjustment ..............14 Menu Operation.............. 17 General Operation ..............20 Exposure Settings ..............21 White Balance settings ............24 Day/Night Setting ..............25 Motion Detection Setting ............26... -
Page 8: Features
MEZ62687703 SELFTAPPING SCREW 4 Place PRODUCT CENTER POSITION Features CABLE HOLE (LCV5300) CABLE HOLE (LCD5300) Accessories This Color Video Camera is designed for installation in a video surveillance system. This manual contains instructions on how to install and FRONT manage the Color Video Camera in your video surveillance MEZ62687703 SELFTAPPING SCREW 4 Place... -
Page 9: Part Names And Functions
Part Names and Functions a Dome Cover b Lens Cover c Focus lock lever Fixes the focus position after adjusting. d Zoom lock lever Fixes the zoom position after adjusting. e Azimuth adjuster f Tilting lock screw Fixes the tilting position after adjusting. g Pan adjuster h Setup menu control buttons i Video Out connector... -
Page 10: Connections
Connections Basic connection Connect a external power source to the power input jack of the camera. The peripheral devices (DVR, monitor, etc.), AC/DC adapter and cables are not supplied. Make the video signal connection between the camera and the monitor or DVR. -
Page 11: Installation
Installation Mounting the Camera Pass the connection cable through the inner side of the ceiling. Note: Refer the manual of Dome bracket adaptor when you mount the camera on the wall, pendant and parapet. Surface mount Follow the instructions below to surface mount the camera with supplied camera mounting bracket. - Page 12 Installation Install the camera mounting bracket to the ceiling. Connect the cables to the cable jacks of the camera body.
- Page 13 Installation Assemble the camera and the housing. Make sure Use the supplied wrench to tighten the screws when you assemble the camera in the right direction. And then, assemble the dome cover and lens cover.
-
Page 14: Image Adjustment
Installation Image Adjustment Connect a portable monitor to the video jack. You can manually adjust the pan/tilt/azimuth angles, focus, and zoom while observing the connected monitor. Notes: • Do not hold the camera by lens unit to adjust panning, tilting, or azimuth. •... - Page 15 Installation Adjust the pan/tilt/rotate position of the camera. Adjust the zoom. 4-1. Unlock the zoom lever. 4-2. Move the lever to adjust the zoom. 4-3. Lock the lever. TILT TILT NEAR WIDE TELE ROTATE...
- Page 16 Installation Adjust the focus. This camera utilizes an on-screen user MENU. To set items on the menu, use the following buttons. After 5-1. Unlock the focus lever. then attach the lens cover and dome cover. 5-2. Move the lever to adjust the focus. 5-3.
-
Page 17: Menu Operation
Menu Operation • UP button: Used to move upper direction on the menu screen. Use this button to select an item or adjust the param- eters. • DOWN button: Used to move lower direction on the menu screen. Use this button to select an item or adjust the parameters. •... - Page 18 Menu Operation -The following table shows the list of menu items and Main Sub Menu Contents options. You can adapt the camera to your requirements by Menu setting up the respective items in these menus. BURST ON/OFF LEVEL LOW/ MIDDLE/ HIGH / USER Main Sub Menu Contents...
- Page 19 Menu Operation Main Main Contents Contents Menu Menu Menu Menu 3D-DNR 0 to 100 MASK 1 to 2 SELECTION OFF,MOZAIC, MASK 1 to 8 DISPLAY COLOR1 to SELECTION POLYGON PRIVACY COLOR 8 OFF,MOZAIC, MASK DISPLAY SHAPE COLOR1 to COLOR 8 POSITION POSITION ,/ 2 to 98...
-
Page 20: General Operation
Menu Operation General Operation Main Contents Menu Menu Press [SET] button. FACTORY RESET SYSTEM The setup menu screen appears on the monitor. EXIT TOP/RET/END EXIT Use [UP] or [DOWN] button to select an option then press [SET] button. Submenu appears on the monitor. Use [UP] or [DOWN] button to select a submenu option. -
Page 21: Exposure Settings
Menu Operation Exposure Settings Backlight setting Use Backlight option to view the object clearly in backlight You can set the exposure options using the EXPOSURE conditions. menu. Select [EXPOSURE] option on the [CAMERA SETTING] menu. Use [LEFT] or [RIGHT] button to select a mode. Press [SET] button and the EXPOSURE menu appears. - Page 22 Menu Operation BRIGHTNESS setting luminance scene. AREA SETTING: Use [LEFT] or [RIGHT] > You can increase the brightness of the darkened video. button to select a area then use [UP] or If you set the brightness to lower value, the image is [DOWN] button to select a [ON] or [OFF].
- Page 23 Menu Operation AGC (Automatic Gain Control) setting SHUTTER (Shutter Speed) setting If the images are too dark, change the maximum [AGC] Select the desired shutter speed for camera exposure. You value to make the images brighter. can change the shutter speed to higher speed to capture fast-moving subjects, though the image becomes darker.
-
Page 24: White Balance Settings
Menu Operation SENS-UP setting Note: • If you set to one of the SHUTTER options except AUTO If pictures are not clear due to darkness, this SENS-UP on the [SHUTTER] menu, the [SENS-UP] setting is not operation would increase the sensitivity of picture. available and [---] mark is displayed. -
Page 25: Day/Night Setting
Menu Operation Day/Night Setting • ATW (Auto-Tracing White Balance): Use [LEFT] or [RIGHT] button to select the ATW then press [SET] button. AUTO: Use [LEFT] or [RIGHT] button to select the • AUTO then press [SET] button. • AWC/SET KEY: If you select the AWC/SET KEY mode, you will be able to set up the White Balance automatically using [SET] button. -
Page 26: Motion Detection Setting
Menu Operation Motion Detection Setting select [ON] or [OFF]. > LEVEL: Use [LEFT] or [RIGHT] button to The motion detection detects the moving objects in the select a level. scene by monitoring changes in brightness level. You can DWELL TIME: Use [LEFT] or [RIGHT] button >... -
Page 27: 3D-Dnr Setting
Menu Operation 3D-DNR Setting OFF on the STATE. Use [UP] or [DOWN] to select an option then use • [LEFT] or [RIGHT] button to adjust the option. > POSITION,/: Moves horizontal position of the mask. > POSITION;.: Moves vertical position of the mask. -
Page 28: Privacy Mask Setting
Menu Operation Privacy Mask Setting > Use [UP] or [DOWN] to select an option then use [LEFT] or [RIGHT] button to adjust the option. This function is aiming at the protection of personal privacy, selecting a screen part black not to be displayed in POSITION,/: Moves horizontal the screen. - Page 29 Menu Operation of the mask. Notes: SIZE,/: Enlarge or decrease the • You can adjust the mask color manually except horizontal size of the mask. for COLOR 8. SIZE;.: Enlarge or decrease the • RED, GREEN, BLUE and TRANSPARENCY vertical size of the mask. adjustments are applied in common from COLOR RADIUS SIZE : You can adjust the 1 to COLOR 7, after mask setting.
-
Page 30: Special Menu Settings
Menu Operation Special Menu Settings Setting the D-ZOOM (Digital Zoom ) level You can select the digital zoom level. This menu lets you adjust and set up D-ZOOM, D-EFFECT, SHARPNESS, COLOR, SYNC, USER TITLE, LANGUAGE function by yourself in the SPECIAL menu. Select [D-ZOOM] option on the [SPECIAL] menu. - Page 31 Menu Operation Setting the SHARPNESS effect • TILT: Use [LEFT] or [RIGHT] button to move the screen. (up or down) The degree to which the boundary of the two portions is Setting the D-EFFECT (Digital effect) clearly distinguished. You can select the digital effect. Select [SHARPNESS] option on the [SPECIAL] menu.
- Page 32 Menu Operation Setting the COLOR SYNC Setting You can switch the displayed picture to gray scale or color. Select [SYNC] option on the [SPECIAL] menu. Select [COLOR] option on the [SPECIAL] menu. The [SYNC] option is set to [INT] automatically. Use [LEFT] or [RIGHT] button to change a color effect.
- Page 33 Menu Operation Setting the USER TITLE • A (Blank): Inserts a space at the cursor position. • : Moves cursor to left or right. You can use the camera identification to assign a number and character to the camera. LANGUAGE Setting The USER TITLE is displayed on the upper left of the screen.
-
Page 34: System Setting
Menu Operation SYSTEM Setting Select the [SYSTEM] menu. Press [SET] button and the [SYSTEM] menu appears. Use [UP] or [DOWN] button to select the option. • FACTORY RESET: To reset the camera setting to factory setting, select the [FACTORY RESET] option. - Page 35 Specification Item LCV5100-BN LCV5100-BP Signal System NTSC Total/Effective Pixels Number 520 000 Pixels / 480 000 Pixels 610 000 Pixels / 570 000 Pixels Image Device 6 mm (1/3 Type) Exview HAD CCD II XDI-V Lens 2.8 mm to 11 mm Vari-focal Lens, F1.2...
- Page 36 Specification Item LCV5100-BN LCV5100-BP 2D + 3D-DNR Electronic Shutter Speed 1/60 to 1/120 000 1/50 to 1/120 000 White Balance ATW / AUTO / AWC/SET KEY / MANUAL Motion Detection 8 Zones Privacy Zone Masking 14 Masks Digital Effect OFF / MIRROR / ROTATE / V-FILP...