
Related Manuals for NEC Express5800/B120b-d


Summary of Contents for NEC Express5800/B120b-d
- Page 1 NEC Express5800/BladeServer Series N8400-117F/121F NEC Express5800/B120b-d User's Guide 1st Edition 3-2010 ONL-540_001_09-B120bd-100-99-1003...
- Page 2 The NEC product(s) discussed in this document are warranted in accordance with the terms of the Warranty Statement accompanying each product. However, actual performance of each such product is dependent upon factors such as system configuration, customer data, and operator control.
- Page 3 Keep this User's Guide at hand for quick reference at anytime necessary. SAFETY INDICATIONS Follow the instructions in this User's Guide for your safety to use the server. The server contains components with possible danger, hazards that may cause by ignoring warnings, and preventive actions against such hazards.
- Page 4 Symbols used in this User's Guide and warning labels are listed below. Attentions Indicates that improper use may cause an electric shock. Indicates that improper use may cause fumes or fire. Indicates that improper use may cause fingers to be caught. Indicates that improper use may cause personal injury by the moving fan blades.
- Page 5 NOTE: This equipment has been tested and found to comply with the limits for a Class A digital device, pursuant to Part 15 of the FCC Rules. These limits are designed to provide reasonable protection against harmful interference when the equipment is operated in a commercial environment.
- Page 6 User's Guide, contact the service representative where you purchased this product. (5) NEC assumes no liability arising from the use of this product, nor any liability for incidental or consequential damages arising from the use of this User's Guide regardless of Item (4).
-
Page 7: Preface
PREFACE Welcome to the NEC Express5800/BladeServer series server. The NEC Express5800/BladeServer holds powerful performance and employs the latest technology to implement a computer for the next generation. With its potential capabilities, the server may be used as the workstation PC that configures a client-server system and provides high-speed processing and superior reliability. -
Page 8: About This User's Guide
Chapter 6 Installing and Using Utilities describes how to install the utilities for the server. It also includes a description on using the attached "NEC EXPRESSBUILDER" DVD. Chapter 7 Maintenance provides you with all the information necessary to maintain successful operation of the CPU blade. -
Page 9: In The Package
Text Conventions The following conventions are used throughout this User's Guide. For safety symbols, see "SAFETY INDICATIONS" provided earlier. IMPORTANT: Items that are mandatory or require attention when using the server Helpful and convenient piece of information NOTE: IN THE PACKAGE The carton contains various accessories, as well as the server itself. -
Page 10: Table Of Contents
CONTENTS Preface ..............................i About This User's Guide........................ii In the Package..........................iii Chapter 1 Notes on Using Your Server ................ 1-1 Safety Notes..........................1-2 For Proper Operation ........................1-5 Transfer to Third Party......................... 1-7 Disposal and Consumables ......................1-8 User Support ..........................1-9 Chapter 2 General Description .................. - Page 11 NEC ESMPRO ...........................6-20 Universal RAID Utility.......................6-22 Setup with Express Setup .......................6-22 Manual Setup .........................6-22 Using Universal RAID Utility via Network ................6-22 NEC Product Info Collection Utility ..................6-23 Installation..........................6-23 Using Utility...........................6-24 Uninstallation .........................6-24 Chapter 7 Maintenance....................7-1 Making Backup Copies ........................7-1 System Diagnostics........................7-2...
- Page 12 Lamps ............................8-7 Solving Problems ......................... 8-8 CPU Blade..........................8-8 Problems with Windows......................8-14 Problems with NEC EXPRESSBUILDER................8-19 Problems with Express Setup ....................8-20 Problems with Parameter File Creator................... 8-22 Problems with N8403-018 FibreChannel Controller............. 8-22 Collecting Event Log ......................... 8-23 Collecting Configuration Information..................
- Page 13 Appendix A Specifications....................A-1 Appendix B Installing the Operating System..............B-1 Setup and Re-setup of CPU Blade of Diskless Model..............B-1 Local Installation........................B-1 Remote Desktop for Management ..................... B-32 Windows Server 2008 ......................B-32 Windows Server 2003 x64 Editions ..................B-32 Windows Server 2003 ......................
- Page 14 viii (This page is intentionally left blank.)
-
Page 15: Chapter 1 Notes On Using Your Server
Chapter 1 Notes on Using Your Server This chapter includes information necessary for proper and safe operation of the server. -
Page 16: Safety Notes
NEC assumes no liability for any accident resulting in personal injury, death, or property damage if the server has been used in the above conditions. - Page 17 Do not use any unauthorized interface cable. Use only interface cables provided by NEC and locate a proper device and connector before connecting a cable. Using an authorized cable or connecting a cable to an improper destination may cause a short circuit, resulting in a fire.
- Page 18 1-4 Notes on Using Your Server CAUTION Avoid installation in extreme temperature conditions. Immediately after the server is powered off, its internal components are very hot. Leave the server until its internal components fully cool down before installing/removing any component. Avoid contact with the server during thunderstorms.
-
Page 19: For Proper Operation
Notes on Using Your Server 1-5 FOR PROPER OPERATION Observe the following notes for successful operation of the server. Use of the server ignoring the notes will cause malfunctions or failures of the server. CPU blade – N8400-117F/121F CPU blade assembly can be installed in the Blade Enclosure (SIGMABLADE). - Page 20 – It is recommended to use options provided by NEC. Some memory devices of other vendors are designed to be available for the server. If such an option causes the server to be defected or damaged, you will be charged for the repair within the warranty period.
-
Page 21: Transfer To Third Party
Notes on Using Your Server 1-7 TRANSFER TO THIRD PARTY The following must be observed when you transfer (or sell) the server or software provided with the server to a third party: Server Make sure to provide this manual along with the server to a third party. Provided Software To transfer or sell any software application that comes with the server to a third party, the following requirements must be satisfied:... -
Page 22: Disposal And Consumables
The server contains some components that are only good for a limited period of time and require replacement. For stable operation of the server, NEC recommends you replace these components on a regular basis. Consult with your service representative for replacement or the product lives. -
Page 23: User Support
Notes on Using Your Server 1-9 USER SUPPORT Before Asking for Repair, do the following when the server appears to fail: Check if the power cord and the cables to other devices are properly connected. See Chapter 8 to find if your problem fits the description. If it does, take the recommended measure for it. - Page 24 1-10 Notes on Using Your Server Advice for Health The longer you keep using the computer equipment, the more you become tired, which may cause disorders of your body. When you use a computer, observe the following to keep yourself from getting tired: Good Working Posture You have good posture if the following are satisfied when you use a computer:...
-
Page 25: Chapter 2 General Description
Chapter 2 General Description This chapter provides information that you should be familiar with before using the server. It includes names and functions of the components and features of the server. -
Page 26: Overview
2-2 General Description OVERVIEW BladeServer is a modular and multiprocessing system that includes processor, memory, network connections, optional add-in card slot, and associated electronics, all on a single mother board called a CPU blade. The CPU blade, Storage and I/O Blade, and other CPU blades are typically installed into a rack- mountable enclosure that houses multiple CPU blades that share common resources such as cabling, power supplies, and cooling fans. -
Page 27: Standard Features
(EXPRESSSCOPE engine 2) AC-Link feature ExpressUpdate feature Maintenance Features Self-diagnosis Off-line Maintenance Utility Power On Self-Test (POST) Memory dump feature using the DUMP Test and Diagnosis (T&D) switch Easy and Fine Setup NEC EXPRESSBUILDER (system management tools) SETUP (BIOS setup utility) -
Page 28: Part Names And Controls
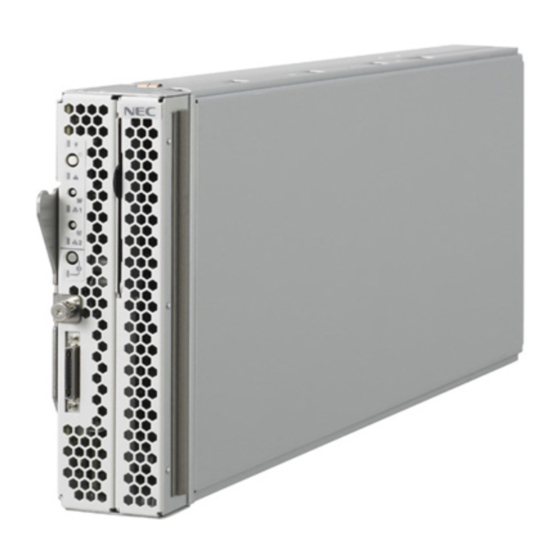
2-4 General Description PART NAMES AND CONTROLS This section describes the names and features of the sections in the device. CPU Blade This section describes the names, installation positions, and features of the sections on the CPU blade. Onboard Components DIMM socket (CPU #1) CPU1_DIMM1, CPU1_DIMM4, CPU1_DIMM2, CPU1_DIMM5, CPU1_DIMM3, and CPU1_DIMM6 from top... - Page 29 General Description 2-5 CPU Blade Access Side POWER lamp The lamp goes on green when the CPU blade is powered on. The lamp goes on amber when the CPU blade is powered off but the power is supplied from the power supply unit. POWER switch The switch is intended to turn on or off the power of the CPU blade itself.
- Page 30 2-6 General Description ID switch Press this switch to turn on or off the ID lamp. ID lamp (blue) The lamp is intended to identify the CPU blade in the system. The lamp is lit by a switch or software command. When the recognize command is received from software, the lamp blinks.
- Page 31 General Description 2-7 External View Top cover CPU blade with its cover installed Air duct cover CPU blade with its cover removed CPU blade with its air duct cover removed...
-
Page 32: Lamp Indications
2-8 General Description Lamp Indications This section describes the positions and display meanings of the lamps on the CPU blade. CPU Blade The CPU blade includes five lamps. POWER lamp STATUS lamp LAN1 Link/Access lamp LAN2 Link/Access lamp ID lamp POWER Lamp The POWER lamp lights green while the power of the CPU blade is on. - Page 33 In addition, you can view the detailed information on error message on virtual LCD when the STATUS lamp is flashing in amber or red. You can use the virtual LCD through the Web browser of EXPRESSSCOPE engine (BMC) or NEC ESMPRO Manager.
- Page 34 2-10 General Description Virtual LCD indications when STATUS lamp is flashing in red On-screen message Description Action Proc 1 IERR An error was detected in CPU#1. Turn of the power once and then on again. Proc 2 IERR An error was detected in CPU#2. If an error message appears on WDT Timeout Watchdog timer timeout error...
- Page 35 General Description 2-11 On-screen message Description Action AmbientTempAlm02 A low temperature error was Check if the ambient temperature detected in CPU blade. of installation location satisfies the operation guarantee condition. If the same error persists, contact your service representative. P1 VCCP Alm XX A voltage alarm was detected.
- Page 36 2-12 General Description On-screen message Description Action Location Error In the Blade Enclosure, the Refer to the User's Guide of Blade installation location of CPU blade Enclosure to check if the CPU blade is is incorrect, or the installation installed in correct location. locations of the fan and CPU Check the installation locations of the fan blade are incorrect.
- Page 37 If you press the ID switch, the lamp goes on. When the recognize command is received from management software such as NEC ESMPRO Manager, the lamp blinks. You may use the remote control feature of EXPRESSSCOPE Engine 2 (BMC) to perform the same...
-
Page 38: Using Your Server
2-14 General Description USING YOUR SERVER This section describes the basic operation of the blade server. Power-on of Blade Server There are the following two ways to turn on the power of the CPU blade. Turn on the power of the CPU blade in any of the two ways after turning on the powers of the display unit and peripherals connected to the CPU blade. - Page 39 Engine 2 (BMC). Operation after Power ON If the CPU blade is connected with a display unit, the NEC logo appears on the screen of the display unit after a while from the power-on. While the NEC logo appears, the CPU blade runs the self-diagnosis program (POST) to diagnose the CPU blade itself.
-
Page 40: Power-Off Of Blade Server
BIOS SETUP utility, such as the start-up message, while in progress. With the factory setup of the CPU blade, the NEC logo appears on the display unit (if connected) while POST is in progress. To display the POST check results, press Esc. - Page 41 General Description 2-17 POST Execution Flow The following describes the progress of POST in the chronological order. IMPORTANT: Do not make unnecessary key entries or perform mouse operations while POST is in progress. Some system configurations may display the message "Press Any Key"...
- Page 42 2-18 General Description If you have set the password using the BIOS SETUP utility, the password entry screen appears upon successful completion of POST. Up to three password entries will be accepted. Three incorrect password entries disable the system to boot. In such a case, turn off the power and wait about 30 seconds before turning on to boot the CPU blade.
-
Page 43: Device Identification
General Description 2-19 Device Identification To identify the device to be maintained among more than one device, ID lamp is used. The ID lamp is located on the CPU blade installed in the Blade Enclosure. The ID lamp allows you to identify the device subject to maintenance among more than one CPU blade installed in the Blade Enclosure. - Page 44 2-20 General Description (This page is intentionally left blank.)
-
Page 45: Chapter 3 Setting Up Your Server
Chapter 3 Setting Up Your Server This chapter describes how to set up the server appropriate for your system, on a step-by-step basis. -
Page 46: Before Installing Cpu Blade
3-2 Setting Up Your Server BEFORE INSTALLING CPU BLADE Be sure to check the MAC addresses before installing a CPU blade in the Blade Enclosure. Check of MAC Address A MAC address indicates the address specific for the network. It is expressed by 12-digit alphanumeric starting with "003013". -
Page 47: Installing The Cpu Blade
Setting Up Your Server 3-3 INSTALLING THE CPU BLADE Install the CPU blade in the dedicated Blade Enclosure. Refer to the User's Guide of Blade Enclosure for how to install the CPU blade. IMPORTANT: The CPU blade is extremely sensitive to static electricity. -
Page 48: Making Connections
3-4 Setting Up Your Server MAKING CONNECTIONS Connect peripheral devices to the CPU blade. IMPORTANT: Contact the maintenance engineer in your service representative if you have any requests on the system configuration including the connection to the uninterruptible power supply system or auto power controller and the time schedule operation. - Page 49 IMPORTANT: To connect a peripheral or interface cable provided by a vendor other than NEC (or third party) to the CPU blade, make sure that the device is available for the CPU blade. Some third party devices are not available for the CPU blade.
-
Page 50: Network
3-6 Setting Up Your Server USB Connection by K410-150(00) SUV Cable Connect the floppy disk drive, DVD-ROM drive, keyboard, and mouse according to the figure shown below. Display unit External floppy disk drive External DVD-ROM drive * Self-powered USB hub * CPU blade Mouse * Use the USB hub and external DVD-ROM... -
Page 51: Chapter 4 Configuring Your Server
Chapter 4 Configuring Your Server This chapter describes Basic Input Output System (BIOS) configuration. When you install the blade server for the first time or install/remove optional devices, thoroughly read this chapter for better understanding and correct setups. SYSTEM BIOS ~ SETUP ~ The SETUP utility is provided to make basic hardware configuration for the CPU blade. -
Page 52: Starting Setup Utility
Starting SETUP Utility Powering on the CPU blade starts POST (Power On Self-Test) and displays its check results. If the NEC logo is displayed, press Esc. After a while, the following message appears at bottom left on the screen. Press <F2> to enter SETUP Press F2 to start the SETUP utility and display its Main menu. -
Page 53: Description On On-Screen Items And Key Usage
Configuring Your Server 4-3 Description on On-Screen Items and Key Usage Use the following keyboard keys to work with the SETUP utility. (Key functions are also listed at the bottom of the screen.) Indicates the current menu. Indicates there are submenus. -
Page 54: Menu And Parameter Descriptions
4-4 Configuring Your Server Menu and Parameter Descriptions The SETUP utility has the following six major menus: Main Advanced Security Server Boot Exit To set minute functions, select a submenu from the above menus. The following describes available functions and parameters, as well as the factory-set, for each menu. - Page 55 Configuring Your Server 4-5 Main Option Parameter Description Your Setting System Time HH:MM:SS Set the system time. System Date MM/DD/YYYY Set the system date. Processor Settings Select submenu Shows the processor settings submenu. ]: Factory-set IMPORTANT: Check and adjust the system clock before the operation if any of the following conditions is applicable.
- Page 56 4-6 Configuring Your Server Processor Settings Option Parameter Description Your Setting Processor Speed Setting nnn GHz Displays clock speed for the processor. (View only) Processor 1 CPUID Numeral Displays CPU ID for processor, if Disabled present. Not Installed "Disabled" indicates that the Error processor is defected.
- Page 57 Displays Advanced Chipset Control submenu. Boot-time Diagnostic [Disabled] When disabled, the BIOS will display Screen the NEC logo during POST. Press Enabled Esc to switch to the POST execution screen. Reset Configuration Data [No] Select "Yes" if you want to clear the system configuration data during the next boot.
- Page 58 4-8 Configuring Your Server Memory Configuration Option Parameter Description Your Setting Installed memory nnn MB Indicates the total capacity of the basic memory. (View only) Available under nnnnnnn MB Indicates the capacity of memory available in the area under 4GB. (View only) CPU1_DIMM1 - Indicates the current memory status...
- Page 59 Configuring Your Server 4-9 PCI Configuration Option Parameter Description Your Setting Mezzanine Slot Enabled Indicates whether the expansion of #1-2 Option ROM BIOS of mezzanine card to be [Disabled] Scan installed is enabled or disabled. PXE/iSCSI Select [PXE] Specify PXE or iSCSI to boot the mezzanine card to be installed.
- Page 60 4-10 Configuring Your Server Peripheral Configuration IMPORTANT: Note that the interrupt and/or base I/O address are not overlapped with others. If the value set for the interrupt or base I/O address is used in another resource, the yellow asterisk (*) appears. Reset any item with the yellow asterisk properly.
- Page 61 Configuring Your Server 4-11 Advanced Chipset Control Option Parameter Description Your Setting Multimedia Timer Disabled Specify whether the system supports the multimedia timer feature. [Enabled] Intel(R) I/O AT Disabled Enables or disables the Intel(R) Acceleration technology. [Enabled] Intel(R) VT-d Disabled Specify whether the Intel(R) Virtualization Technology for Directed [Enabled]...
- Page 62 4-12 Configuring Your Server Security The Security menu appears if you move the cursor to the position of "Security." Press Enter on "Set Supervisor Password" or "Set User Password," to display the following screen. Enter the passwords on the dialog box. Passwords may have up to eight characters including alphanumerics and symbols.
- Page 63 Configuring Your Server 4-13 Option Parameter Description Your Setting Set User Up to eight Supervisor password controls Password alphanumerics access to the setup utility. When Enter is pressed, the user is prompted for a password; press Esc to abort. Once set, this can be disabled by setting it to a null string, or by clearing password jumper on system board (refer to Configuring...
- Page 64 4-14 Configuring Your Server IMPORTANT: If you select any parameter except for [No Change] to change TPM State, a confirmation screen as shown below appears at the end of POST after restarting the system. Select [Execute] on the confirmation screen to determine the change you have made. When [Enable &...
- Page 65 Specify whether to enable or disable the boot monitoring function on booting, or 5 Minutes select the time limit for timeout. 10 minutes To use this function, install NEC 15 minutes ESMPRO Agent. Set this item to 20 minutes "Disabled" if the system is booted from...
- Page 66 4-16 Configuring Your Server Option Parameter Description Your Setting Post Error Pause Disabled Specify whether to stop the POST once at the end of POST if an error occurs [Enabled] during the POST. AC-LINK Stay Off Specify the state of power when the AC power to the server is turn off once and [Last State] then on.
- Page 67 Configuring Your Server 4-17 System Management Submenu Option Parameter Description Your Setting BIOS Revision – Displays the current BIOS revision. (View only) Board Part Number – Displays the part number of mother board. (View only) Board Serial Number – Displays the serial number of mother board.
- Page 68 Reset resetting by Escape command (Esc R) Enabled sent from the remote console. If the server is connected with the management PC that uses NEC ESMPRO Manager, this option is always enabled even if "Disabled" is specified here. ]: Factory-set...
- Page 69 Configuring Your Server 4-19 BMC LAN Configuration Submenu Option Parameter Description Your Setting IP Address [192.168.001.129] Specify an IP address for management LAN. Subnet Mask [255.255.255.000] Specify a subnet mask for management LAN. Default Gateway [192.168.001.254] Specify a default gateway for management LAN.
- Page 70 It takes about several tens seconds until initialization completes after execution of Clear BMC Configuration. If you are using NEC ESMPRO Agent Extension, settings for remote management feature made in NEC ESMPRO Agent Extension is also cleared by executing Clear BMC Configuration.
- Page 71 Configuring Your Server 4-21 Boot The CPU blade searches for devices in the order set in this menu on booting. Finding the boot software, the CPU blade starts the software. The priority of the boot devices can be changed by using the ↑, ↓, +, and - keys. Move the cursor to the desired device with the ↑...
- Page 72 4-22 Configuring Your Server Exit The options on the menu are described below. IMPORTANT: The values of SETUP at the shipment may be different from their default values depending on the model of the CPU blade. It is necessary to set the values meeting the environment in which the CPU blade is used referring to the models.
-
Page 73: Chapter 5 Installing The Operating System With Express Setup
Chapter 5 Installing the Operating System with Express Setup This section describes information on using Express Setup to install and configure the following operating systems to server. Windows Server 2008 Standard 64-bit (x64) Edition / Windows Server 2008 Enterprise 64-bit (x64) Edition Windows Server 2008 Standard 32-bit (x86) Edition / Windows Server 2008 Enterprise 32-bit (x86) Edition Windows Server 2003 R2 Standard Edition / Windows Server 2003 R2 Enterprise Edition... -
Page 74: About Express Setup
If you want to use the drivers located on the "OEM-Disk for Mass Storage Device" that ships with optional boards, a parameters file is mandatory. You can create a parameters file in advance using "Parameter File Creator" included in NEC EXPRESSBUILDER. -
Page 75: Windows Server 2008
Confirm the BIOS settings described in Chapter 4 before installing Windows Server 2008. Service Pack Which EXPRESSBUILDER Supports The NEC EXPRESSBUILDER DVD attached to the server supports following combination of the OS installation media and Service Pack. Windows Server 2008... - Page 76 5-4 Installing the Operating System with Express Setup Supported Options by NEC EXPRESSBUILDER The NEC EXPRESSBUILDER DVD attached to your system supports the following options for installation. NOTE: If you want to install the other boards by using a driver floppy disk ("OEM-FD for Mass storage device"), except ones listed below,...
- Page 77 Installing the Operating System with Express Setup 5-5 Connecting Hard Disk Drive Do not connect the other hard disk drives except the drive that you want to create the Windows system drive. If you create multiple logical drives in your system, see "Re-installing the Operation System if Multiple Logical Drives Exist"...
- Page 78 5-6 Installing the Operating System with Express Setup About the System Partition Size The system partition size can be calculated from the following formula. When the system is Windows Server 2008 64-bit (x64) Edition: Required partition size = size required to install OS + paging file size + dump file size + application size Size required to install OS = 11,600MB (Full Installation)
- Page 79 Installing the Operating System with Express Setup 5-7 When the system is Windows Server 2008 32-bit (x86) Edition Required partition size = size required to install OS + paging file size + dump file size + application size Size required to install OS = 6,300MB (Full Installation) = 2,200MB (Server Core Installation) Paging file size (recommended) = Installed memory size x 1.5...
-
Page 80: Flow Of Setup
5-8 Installing the Operating System with Express Setup Flow of Setup Loading parameters (Step 2) Skip Next Select the operating system (Step 3) Next RAID configuration (Step 4) Next Windows Confirm Setting / Input (Steps 5 to 10) Next Save parameters (Step 11) Next Start Express Setup (Step 12) Perform... -
Page 81: Installing The Windows Server 2008
Insert the NEC EXPRESSBUILDER DVD into the optical disk drive of the server. Press the RESET switch or press Ctrl, Alt, and Delete to reboot from the NEC EXPRESSBUILDER. (You may also turn off and then on again to reboot the server.) The system will boot from the DVD and NEC EXPRESSBUILDER starts. - Page 82 5-10 Installing the Operating System with Express Setup Select [English] from the Select Language, click [OK]. Select [Perform the Express setup] from the Top Menu, click [Next].
- Page 83 Installing the Operating System with Express Setup 5-11 [Load parameters] steps are displayed. [Do not load parameters] (1) Select [Do not load parameters]. (2) Click [Next]. NOTE: If a floppy disk drive is not connected, select this item. [Load parameters] (1) Insert the floppy disk containing the parameters file.
- Page 84 5-12 Installing the Operating System with Express Setup Select the installing Operating System. Select [Install the Windows (32bit editions)] from the menu, click [Next]. Enter the setting of a logical drive. [Enter RAID settings] steps are displayed. Confirm the parameters, modify if necessary, and then click [Next].
- Page 85 If the process is not finished normally, the driver may not be stored in the EXPRESSBUILDER. Refer to "Optional Board Supported by NEC EXPRESSBUILDER" described earlier in this chapter. When you use RAID Controller, if [Skip the logical drive creation] is not selected at [Enter RAID settings] screen, refer to "RAID...
- Page 86 5-14 Installing the Operating System with Express Setup IMPORTANT: If you use iSCSI environment, "Server Core Installation" is not supported. In this case, select "Full Installation". About partition size – Specify the partition size larger than required minimum size for OS installation.
- Page 87 Installing the Operating System with Express Setup 5-15 Enter the user information and client license mode. [Enter basic parameters] steps are displayed. Confirm the parameters, modify if necessary, and then click [Next]. IMPORTANT: Computer name and Administrator password that satisfy the next condition, are required. –...
- Page 88 5-16 Installing the Operating System with Express Setup Enter the setting of the network protocol. [Enter Network Protocol] steps are displayed. Confirm the parameters, modify if necessary, and then click [Next]. Enter the domain or workgroup name to be used. [Enter domain account] steps are displayed.
- Page 89 Installing the Operating System with Express Setup 5-17 Select the installing components. [Select Windows components] steps are displayed. Confirm the parameters, modify if necessary, and then click [Next]. <Full Installation> <Server Core Installation>...
- Page 90 5-18 Installing the Operating System with Express Setup Select the installing applications. [Select applications] steps are displayed. Confirm the parameters, modify if necessary, and then click [Next]. Save the parameters. [Save parameters] steps are displayed. If you want to save the parameters , set the free formatted floppy disk. Select [Save parameters], enter the file path of the parameters files into the text box and click [Next].
- Page 91 Insert CD-ROM or floppy disk attached to the Mass Storage Driver and proceed operation according to the message. Remove NEC EXPRESSBUILDER DVD from the optical disk drive according to the message. If you proceed the setup by using setup parameter file, remove the floppy disk from the floppy disk drive.
- Page 92 5-20 Installing the Operating System with Express Setup [Agree Software License Agreement] screen appears. Read the license terms carefully. If you agree, select I accept the license terms, and then click [Next]. When the following message appears, click [Start].
- Page 93 Installing the Operating System with Express Setup 5-21 When the following message appears, press Ctrl + Alt + Del. Log on to the system. <Full Installation> When the following screen appears, enter your password into "Password", and click " ". <Server Core Installation>...
-
Page 94: Installing And Setting Device Drivers
5-22 Installing the Operating System with Express Setup In the following screen, enter "Administrator" into [UserName], your password into "Password", and click " ". Hereinafter, proceed operations according to the message. Now the Setup using Express Setup has completed. After Express Setup has completed, be sure to execute the tasks described in "Setup of Device Driver (Normally Install in Server)"... -
Page 95: The Procedure To Set Pae Option
Installing the Operating System with Express Setup 5-23 The procedure to set PAE option If your 32-bit system has a memory capacity in excess of 4GB, setting PAE option will enable the system to be installed with over 4GB of memory. IMPORTANT: "PAE option"... -
Page 96: Windows Server 2003
5-24 Installing the Operating System with Express Setup Windows Server 2003 This section explains how to install Microsoft® Windows Server® 2003 by using the Express Setup. NOTES: Express Setup does not support the installation of Windows Server x64 Editions. If you want to install it, see Appendix B. If you install Windows Server 2003 without using Express Setup, see Appendix B. - Page 97 Installing the Operating System with Express Setup 5-25 Service Pack Which EXPRESSBUILDER Supports The NEC EXPRESSBUILDER DVD attached to the server supports following combination of the OS installation media and Service Pack. Windows Server 2003 R2 x64 Edition – OS installation media (with Service Pack 2) –...
- Page 98 5-26 Installing the Operating System with Express Setup About the Hardware Components When you install the Windows Server 2003, Express Setup requires several preparations if this computer uses the following hardware components. Installing on the Mirrored Volume If you want to install the Windows Server 2003 on the volume that is mirrored using "Disk Management", invalidate the mirroring and set back to the basic disk before the installation, and validate the mirroring again after the installation.
- Page 99 Installing the Operating System with Express Setup 5-27 About the System Partition Size The system partition size can be calculated from the following formula. Size necessary to install the system + Paging File Size + Dump File Size + Application Size Size necessary to install the system = 3500MB (Windows Server 2003 R2) = 3500MB (Windows Server 2003 R2 with Service Pack2)
- Page 100 5-28 Installing the Operating System with Express Setup Dividing into the partition of the recommended size into multiple disks as written below will solve problem that it cannot be reserved in one disk. Set the "Size required for installation + Paging file size". See Chapter 5 and set that debugging information (equivalent to the dump file size) is to be written to a separate disk.
-
Page 101: Flow Of Setup
Installing the Operating System with Express Setup 5-29 Flow of Setup This section visually describes the flow of the setup operated by Express Setup. Loading parameters (Step 2) Skip Next Select the operating system (Step 3) Next RAID configuration (Step 4) Next Windows Confirm Setting / Input (Steps 5 to 10) -
Page 102: Installing The Windows Server 2003
Insert the NEC EXPRESSBUILDER DVD into the optical disk drive of the server. Press the RESET switch or press Ctrl, Alt, and Delete to reboot from the NEC EXPRESSBUILDER. (You may also turn off and then on again to reboot the server.) The system will boot from the DVD and NEC EXPRESSBUILDER starts. - Page 103 Installing the Operating System with Express Setup 5-31 Select [Perform the Express setup] from the Top Menu, click [Next].
- Page 104 5-32 Installing the Operating System with Express Setup [Load parameters] steps are displayed. [Do not load parameters] (1) Select [Do not load parameters]. (2) Click [Next]. NOTE: If a floppy disk drive is not connected, select this item. [Load parameters] (1) Insert the floppy disk containing the parameters file.
- Page 105 You can use only the physical devices that have same model number to configure logical drive. If the process is not finished normally, the driver may not be stored in the EXPRESSBUILDER. Refer to "Optional Board Supported by NEC EXPRESSBUILDER" described earlier in this chapter.
- Page 106 5-34 Installing the Operating System with Express Setup Specify the installing medium and the Windows system partition. [Specify medium / Partition] steps are displayed. Confirm the parameters, modify if necessary, and then click [Next]. IMPORTANT: If you install Windows Server 2003 R2, do not apply Service Pack by Express Setup.
- Page 107 Installing the Operating System with Express Setup 5-35 Enter the user information and client license mode. [Enter basic parameters] steps are displayed. Confirm the parameters, modify if necessary, and then click [Next]. NOTE: Even if you do not input value into "Administrator password", "Confirm password", "...
- Page 108 5-36 Installing the Operating System with Express Setup Enter the domain or workgroup name to be used. [Enter domain account] steps are displayed. Confirm the parameters, modify if necessary, and then click [Next]. Select the installing components. [Select Windows components] steps are displayed. Confirm the parameters, modify if necessary, and then click [Next].
- Page 109 Installing the Operating System with Express Setup 5-37 Select the installing applications. [Select applications] steps are displayed. Confirm the parameters, modify if necessary, and then click [Next]. Save the parameters. [Save parameters] steps are displayed. If you want to save the parameters , set the free formatted floppy disk. Select [Save parameters], enter the file path of the parameters files into the text box and click [Next].
- Page 110 Insert CD-ROM or floppy disk attached to the Mass Storage Driver and proceed operation according to the message. Remove NEC EXPRESSBUILDER DVD from the optical disk drive according to the message. If you proceed the setup by using setup parameter file, remove the floppy disk from the floppy disk drive.
-
Page 111: Installing And Setting Device Drivers
Installing the Operating System with Express Setup 5-39 Read the contents carefully and click [Yes] if you do agree. If you do not agree, click [No]. IMPORTANT: If you do not agree to this agreement, the setup terminates and Windows Server 2003 will not be installed. If "NetWare Gateway (and Client) Service"... -
Page 112: The Procedure To Set Pae Option
5-40 Installing the Operating System with Express Setup The procedure to set PAE option If your 32-bit system has a memory capacity in excess of 4GB, setting PAE option will enable the system to be installed with over 4GB of memory. IMPORTANT: However, the Microsoft operating system products which support /PAE switch option are limited. - Page 113 Installing the Operating System with Express Setup 5-41 Setting for Solving Problems Setup your computer in advance so that it can recover from any trouble precisely and as soon as possible when it should occur. For more information, refer to Page 5-42.
-
Page 114: Setting For Solving Problems
5-42 Installing the Operating System with Express Setup SETTING FOR SOLVING PROBLEMS Setup the following issue in advance so that your computer can recover from any trouble precisely and as soon as possible when it should occur. Memory Dump (Debug Information) This section describes the procedures for collecting memory dump (debug information) in the server. - Page 115 Installing the Operating System with Express Setup 5-43 Modify [Dump file:] in the [Write debugging information] group box. e.g. Write the debug information in D drive with the file name "MEMORY.DMP". D:\MEMORY.DMP IMPORTANT: Windows Server 2008 64-bit (x64) Edition To specify "Complete Memory Dump" to write the debug information is recommended.
- Page 116 5-44 Installing the Operating System with Express Setup On the [Paging file size for each drive] box, specify as follows: – A value larger than the recommended size shown in [Total paging file size for all drives] for [Initial size] –...
- Page 117 Installing the Operating System with Express Setup 5-45 When the system is Windows Server 2003 Follow the procedure below to specify. Select [Control Panel] and click [System]. The [System Properties] dialog box appears. Select [Advanced] tab. Click [Settings] on the [Startup and Recovery] group box. IMPORTANT: Windows Server 2003 x64 Editions To specify "Complete Memory Dump"...
- Page 118 5-46 Installing the Operating System with Express Setup Specify "Complete memory dump" and modify [Dump file:] in the [Write debugging information] group box. e.g. Write the debug information in D drive write the file name "MEMORY.DMP". D:\MEMORY.DMP Click [Settings] on the [Performance] group box. The [Performance Options] window appears.
- Page 119 Installing the Operating System with Express Setup 5-47 How to Create a User-mode Process Dump File When the system is Windows Server 2008 "User-mode Process Dump" is the file that records information when any application error occurs. When any application error occurs, do not close the pop-up window that notifies the error, and then collect a dump using following process.
- Page 120 5-48 Installing the Operating System with Express Setup When the system is Windows Server 2003 (Dr.Watson) Dr. Watson is a debugger for application errors. If any application error is detected, Dr. Watson diagnoses the server and logs diagnostic information (log). Follow the procedure below and specify Dr.
- Page 121 Installing the Operating System with Express Setup 5-49 Network Monitor Utilizing Network Monitor helps you to investigate and manage with network trouble. Network Monitor Setup (Windows Server 2008) Microsoft Network Monitor allows you to examine and troubleshoot network problems. NOTE: Windows Server 2008 does not provide Network Monitor. To use Network Monitor on Windows Server 2008, install Network Monitor by following the steps below.
- Page 122 5-50 Installing the Operating System with Express Setup Network Monitor (Windows Server 2003) To utilize Network Monitor, you need to restart the system after the installation has completed, so we recommend to install Network Monitor before any network trouble may occur. Point to [Settings] from Start menu and click [Control Panel].
- Page 123 Installing the Operating System with Express Setup 5-51 Re-installing the Operation System if Multiple Logical Drives Exist Before Re-installing the Operation System Be sure to make backup copies before re-installing the operation system just in case. Re-installing the Operation System Start the clean installation following the procedure described in this manual.
- Page 124 5-52 Installing the Operating System with Express Setup Procedure for Modifying the Drive Letter Be careful that the drive letter of the system or boot volume cannot modify with the following procedure. Click Start menu, right-click [My Computer], and specify [Manage] to start [Computer Management].
-
Page 125: Installing Maintenance Utilities
Installing the Operating System with Express Setup 5-53 INSTALLING MAINTENANCE UTILITIES Various maintenance utilities are contained in your NEC EXPRESSBUILDER DVD. See Chapter 6 for installing the utilities to your server or management workstations. UPDATING THE SYSTEM "Updating the System" is executed by Express Setup automatically. -
Page 126: Making Backup Copies Of System Information
Without the backup data, you will not be able to recover the information. You can save the information by the following process. Insert the "NEC EXPRESSBUILDER" DVD into the optical disk drive and reboot the system. Select [Tool menu (Normal mode)]. -
Page 127: Installing With The Oem-Fd For Mass Storage Device
Installing the Operating System with Express Setup 5-55 Installing with the OEM-FD for Mass Storage Device This section explains how to setup with the OEM-FD. You usually do not have to do as follows. If your system has any Mass storage devices, you have to set as follows depending on your system. The detailed information is provided by the manual of the Mass storage device. - Page 128 If you would like to install or re-install the OS when the system has new mass storage device not to be supported by NEC EXPRESSBUILDER, you have to set as follows. Read the manual supplied with the mass storage device before setting the server.
- Page 129 Chapter 6 Installing and Using Utilities This section describes how to use the NEC EXPRESSBUILDER DVD that comes with your server and to install the utilities stored on the NEC EXPRESSBUILDER.
- Page 130 6-2 Installing and Using Utilities NEC EXPRESSBUILDER The NEC EXPRESSBUILDER (referred to as "EXPRESSBUILDER" hereinafter) helps you install the Operating system/the Management software or use the maintenance utilities. When you insert the EXPRESSBUILDER DVD into the optical disk drive and reboot the system,...
- Page 131 Installing and Using Utilities 6-3 OS installation If you select this item, the Top menu appears. IMPORTANT: This tool is Configuration Tool that built on Windows PE 2.0 technology. Pay attention to the automatic reboot that occurs after 72 hours from start.
-
Page 132: Chapter 6 Installing And Using Utilities
6-4 Installing and Using Utilities Tool menu (Normal mode) If you select this item, the Tool menu appears. You can use the below functions for maintenance. – Maintenance Utility The Maintenance Utility is usually used by the service representative. (See Chapter –... - Page 133 Installing and Using Utilities 6-5 Tool menu (Redirection mode) If you want to operate this computer via the BIOS redirection (the console-less function), select this item. NOTE: If you operate this computer via the Remote KVM function, select the "Tool menu (Normal mode)". The menu's functions are the same as the "Tool menu (Normal mode)".
-
Page 134: Autorun Menu
6-6 Installing and Using Utilities Autorun Menu When the NEC EXPRESSBUILDER disk is inserted into the DVD drive, Windows automatically launches the menu as shown below. This menu is used to, Read the User's Guide or the other documents, Update the server system (Windows drivers), and Install the management software. -
Page 135: Parameter File Creator
Also, you can install the system with the same specification as before when re-installing the system. We recommend you to create [Parameter file] to setup the servers from NEC EXPRESSBUILDER. When using a floppy disk, a USB floppy disk drive is required. -
Page 136: Parameter File
IMPORTANT: Do not remove NEC EXPRESSBUILDER DVD from drive during a parameter file creation. Start the OS. Insert the NEC EXPRESSBUILDER DVD into the optical disk drive. The menu will appear. Right-click on the screen or left-click [Setup Windows]. The menu will appear. - Page 137 Installing and Using Utilities 6-9 Click [Parameter File Creator]. Parameter File Creator will appear.
- Page 138 6-10 Installing and Using Utilities [Load Parameters] step is displayed. Select [Do not load parameters] from the menu, click [Next]. Select the installing Operating System. Select [Install the Windows (32bit editions)] from the menu, click [Next].
- Page 139 Installing and Using Utilities 6-11 Enter the setting of a logical drive. [Enter RAID setting] steps are displayed. Confirm the parameters, modify if necessary, and then click [Next]. IMPORTANT: At "The number of the total physical devices", Parameter File Creator displays upper limit that the RAID controller can support.
- Page 140 6-12 Installing and Using Utilities Specify the installing medium and the Windows system partition. [Specify medium / Partition] steps are displayed. Confirm the parameters, modify if necessary, and then click [Next]. IMPORTANT: If you use iSCSI environment, "Windows Server 2008 Server Core Installation"...
- Page 141 Installing and Using Utilities 6-13 Enter the user information and client license mode. [Enter basic parameters] steps are displayed. Confirm the parameters, modify if necessary, and then click [Next]. – Windows Server 2008 – Windows Server 2003...
- Page 142 6-14 Installing and Using Utilities IMPORTANT: Windows Server 2003 Computer name and User name are required parameters. Windows Server 2008 Computer name, and Administrator password that satisfy the next condition, are required. – More than 6 characters – Contains characters from three of the following categories (numbers, uppercase letters, lowercase letters, and signs).
- Page 143 Installing and Using Utilities 6-15 Enter the setting of the network protocol. [Enter network protocol] steps are displayed. Confirm the parameters, modify if necessary, and then click [Next]. NOTE: The order of entry in custom setting may differ from the numbering of LAN port.
- Page 144 6-16 Installing and Using Utilities Select the installing components. [Select Windows components] steps are displayed. Confirm the parameters, modify if necessary, and then click [Next]. – Windows Server 2008 (Full Installation) – Windows Server 2008 (Server Core Installation)
- Page 145 Installing and Using Utilities 6-17 – Windows Server 2003 Select the installing applications. [Select applications] steps are displayed. Confirm the parameters, modify if necessary, and then click [Next].
- Page 146 6-18 Installing and Using Utilities Save the parameters. [Save parameters] steps are displayed. If you want to save the parameters, set the free formatted floppy disk. Select [Save parameters], enter the file path of the parameters files into the text box and click [Next].
- Page 147 Installing and Using Utilities 6-19 Now [the floppy disk containing the parameters file] has been created. Click [Yes] to exit Parameter File Creator. NOTES: If you modify existing information file (parameter file), click "Load Parameters" at [Load Parameters] screen. Refer to help to modify information file.
-
Page 148: Nec Esmpro
6-20 Installing and Using Utilities NEC ESMPRO The NEC ESMPRO lets a system administrator manage remote servers across a network. NEC ESMPRO monitors server hardware and software configurations, failures, and performance. With log data collected by NEC ESMPRO, a system administrator can track long-term and short-term performance, monitor server usage, and check server failure rates. - Page 149 Installing and Using Utilities 6-21 Supplement Note the following in addition to the NOTE that has been described in the online document for NEC ESMPRO. About the Monitoring of Chassis Sensors The fan and the power supply installed in Blade Enclosure (SIGMABLADE) are monitored by the EM card.
-
Page 150: Universal Raid Utility
Universal RAID Utility. Setup with Express Setup You can install Universal RAID Utility with Express Setup contained in NEC EXPRESSBUILDER DVD. When you start the Express Setup, a dialog to specify an application appears. Select [Universal RAID Utility] on the dialog. -
Page 151: Nec Product Info Collection Utility
Installing and Using Utilities 6-23 NEC PRODUCT INFO COLLECTION UTILITY The NEC Product Info Collection Utility is software installed in this server. Various information on the server can be collected at maintenance and the trouble, etc. This utility can be installed from NEC EXPRESSBUILDER DVD. -
Page 152: Using Utility
6-24 Installing and Using Utilities Using Utility Execute collect.exe in "System drive: \ezclct\stdclct" folder. The log folder is made in the above-mentioned folder, and various information on this device is stored in the data compressed file (zip form). Uninstallation Execute ez_uninst.bat in "System drive: \ezclct" folder. -
Page 153: Chapter 7 Maintenance
CPU blade. MAKING BACKUP COPIES NEC recommends you make backup copies of your valuable data stored in storage device of the CPU blade on a regular basis. For backup storage devices suitable for the CPU blade and backup tools, consult with your service representative. -
Page 154: System Diagnostics
7-2 Maintenance SYSTEM DIAGNOSTICS The System Diagnostics runs several tests on the CPU blade. Select [Tool menu] - [Test and diagnostics] in the NEC EXPRESSBUILDER to diagnose the system. Test Items The following items are tested in system diagnostics. Memory... -
Page 155: Startup And Exit Of System Diagnostics
Blade Enclosure, remove all the LAN cables from the switch module. Power on the CPU blade. Use the NEC EXPRESSBUILDER DVD to start the system. Select [Tool menu (Normal mode)] when local console of the CPU blade is used for, or select [Tool menu (Redirection mode)] when remote console is used for. - Page 156 7-4 Maintenance Select [Test and diagnostics]. Select [End-User Mode] and the system diagnostics starts. The diagnostics will be completed in approximately three minutes. When the diagnostics is completed, the screen of the display changes as shown below: Diagnostics tool title Test window title TeDoLi (TEst &...
- Page 157 Reboots the system. Select <Reboot> in the [Enduser Menu] above. The CPU blade restarts and the system is started from the NEC EXPRESSBUILDER. Exit the NEC EXPRESSBUILDER, and remove the DVD from the optical disk drive. Power off the CPU blade.
- Page 158 7-6 Maintenance (This page is intentionally left blank.)
-
Page 159: Chapter 8 Troubleshooting
Chapter 8 Troubleshooting If your CPU blade does not operate as expected, read this chapter before assuming a failure. NOTE: For provision against an unexpected failure, it is recommended to install NEC ESMPRO to your computer. -
Page 160: System Viewers
8-2 Troubleshooting SYSTEM VIEWERS Monitor the occurrence of fault by NEC ESMPRO during the system operation. Especially take note on whether any alert is reported to NEC ESMPRO Manager. Check whether any alert is reported on NEC ESMPRO Manager. [Example]... -
Page 161: Error Messages
Troubleshooting 8-3 ERROR MESSAGES If an error occurs in the CPU blade, an error message appears on the display unit connected to the CPU blade. POST Error Messages Powering on the CPU blade automatically starts the self-diagnostic program, POST (Power On Self- Test). - Page 162 8-4 Troubleshooting On-screen error message Action 0B60 DIMM group #1 has been disabled Contact your service representative. 0B61 DIMM group #2 has been disabled 0B62 DIMM group #3 has been disabled 0B63 DIMM group #4 has been disabled 0B64 DIMM group #5 has been disabled 0B65 DIMM group #6 has been disabled 0B66...
- Page 163 Troubleshooting 8-5 On-screen error message Action 0B93 BMC SDR Repository empty. Power off and reboot the CPU blade. If the error persists, contact your service representative. 0B94 IPMB signal lines do not respond. Access to SMC via IPMB is unavailable. This is not a fatal error, however, power- off and reboot the CPU blade.
- Page 164 8-6 Troubleshooting On-screen error message Action 8450 Can't Read FRU on CPU Unit Type I Mezzanine Power off and reboot the CPU blade. Also make sure the mezzanine card is correctly installed in Type I mezzanine card slot. If the error persists, contact your service representative.
-
Page 165: Lamps
Troubleshooting 8-7 LAMPS The CPU blade includes lamps to indicate the CPU blade states by a variety of colors and display patterns on the front panel. See "Indications of STATUS lamp, their meanings and actions against the indications" in Chapter 2 for details. -
Page 166: Solving Problems
8-8 Troubleshooting SOLVING PROBLEMS When the CPU blade fails to operate as expected, see the following to find out your problem and follow the instruction given before asking for repair. If the CPU blade still fails to operate successfully after solving your problem, take a note on the on- screen message and contact your service representative. - Page 167 Troubleshooting 8-9 Did you turn on the power of Blade Enclosure within 30 seconds after AC power is supplied to each power unit? → Initialization of BMC takes about 30 seconds after AC power is supplied to the CPU blade. After making sure that the AC power is supplied to the CPU blade (the POWER lamp lit amber), wait for about 30 seconds or longer, then turn on the power of Blade Enclosure by using the POWER switch.
- Page 168 BIOS start message appears. Are memory and PCI devices available for CPU blades installed? → NEC cannot secure the operation of any device other than those approved by NEC. "System Configuration Data Read Error" appears and POST pauses: Did you perform any of the following operation? –...
- Page 169 Troubleshooting 8-11 Fail to access to internal or external devices (or such devices fail to operate): Are cables properly connected? → Make sure that the interface cables and power cord are properly connected. Also make sure that the cables are connected in the correct order. Is the power-on order correct? →...
- Page 170 8-12 Troubleshooting Is the system used in the status that Windows Server 2003 and Linux are not started? → In the following states with the use of USB keyboard and USB floppy disk drive, conduct key entries when the access lamp on the USB floppy disk drive is off (or the floppy disk is not accessed).
- Page 171 Troubleshooting 8-13 Fail to start the OS: Is the BIOS configuration correct? → Run the BIOS SETUP utility to change the boot order (see Chapter 4). Is a floppy disk in the floppy disk drive? → Take out the floppy disk and restart the CPU blade. Is the OS broken? →...
-
Page 172: Problems With Windows
8-14 Troubleshooting Problems with Windows The following system events are logged when Windows Server 2008 is installed. Event ID: Source: Microsoft-Windows-Time-Service Level: Warning Description: NtpClient was unable to set a manual peer to use as a time source because of DNS resolution error on 'time.windows.com,0x9'. NtpClient will try again in 15 minutes and double the reattempt interval thereafter. - Page 173 Troubleshooting 8-15 The following application events are logged when Windows Server 2008 is installed. Event ID: Source: Microsoft-Windows-WMI Level: Warning Description: A provider, Ncs2, has been registered in the Windows Management Instrumentation namespace Root\cimv2 to use the LocalSystem account. This account is privileged and the provider may cause a security violation if it does not correctly impersonate user requests.
- Page 174 8-16 Troubleshooting The following system event is logged when Windows Server 2008 is installed. Event ID: Source: VDS Dynamic Provider Description: The provider failed while storing notifications from the driver. The Virtual Disk Service should be restarted. hr=80042505 → Go to the Microsoft website: http://support.microsoft.com/kb/948275/en-us/ The following application events are logged when Windows Server 2008 is installed.
- Page 175 Troubleshooting 8-17 There are some cases that an event log is registered as follows when you install Windows Server 2003 x64 Editions. Event Source: Service Control Manager Event Type: Error Event ID: 7011 Description: Timeout (30000 milliseconds) waiting for a transaction response from the Dfs service.
- Page 176 R2, above-shown event log will be registered. For more details, refer to "Enabling Microsoft Windows Server 2003 R2 Hardware Management" on the following site. [NEC Express5800 Web Site] http://www.nec.co.jp/express/download/W2K3_R2 The system time lags: → If you do not use the server that adjust time such as NTP (Network Time Protocol) Server, the system time may differ from actual time.
-
Page 177: Problems With Nec Expressbuilder
Troubleshooting 8-19 Problems with NEC EXPRESSBUILDER When the CPU blade is not booted from the NEC EXPRESSBUILDER DVD, check the following: Did you set the NEC EXPRESSBUILDER during POST and restart the CPU blade? → If you do not set the NEC EXPRESSBUILDER during POST and restart the CPU blade, an error message will appear or the OS will boot. -
Page 178: Problems With Express Setup
8-20 Troubleshooting Problems with Express Setup Following message appeared when you tried to install Express Setup to the hard disk drive that has smaller capacity than the specified partition size: The creating of the partition was failed. The process can not be continued. The process was stopped. O K ... - Page 179 Troubleshooting 8-21 Product key was not asked. Case of Windows Server 2008 → If you install using BackUp DVD-ROM, product key is not required. If you install using the DVD-ROM other than BackUp DVD-ROM, product key screen is displayed twice, at "during OS installation" and "before [MICROSOFT SOFTWARE LICENSE TERMS] dialog, which displayed after OS installation".
-
Page 180: Problems With Parameter File Creator
When N8403-018 is used, the names of the Fibre Channel controllers may appear with different names on Device Manager: → It is not a problem in operating the system. A directory that contains the driver software NEC EXPRESSBUILDER DVD is also displayed. [Windows Server 2008 64-bit (x64) Edition] <Drive Letter>:\003\win\winnt\oemfd\ws2008x64\fd1\elxstor\friendlyname.exe [Windows Server 2008 32-bit (x86) Edition] <Drive Letter>:\003\win\winnt\oemfd\ws2008\fd1\elxstor\friendlyname.exe... -
Page 181: Collecting Event Log
Troubleshooting 8-23 COLLECTING EVENT LOG This section describes on how to collect the log of various events that occurred on the CPU blade. IMPORTANT: If STOP error, system error, or stall occurred, follow the procedure below after restarting the system. Restarting the system due to an error may display a message indicating insufficient virtual memory. -
Page 182: Collecting Configuration Information
8-24 Troubleshooting COLLECTING CONFIGURATION INFORMATION This section describes on how to collect the information on hardware configuration and internal specification. In order to collect information, "Diagnostic Program" is used. IMPORTANT: If STOP error, system error, or stall occurred, follow the procedure below after restarting the system. Point to [Settings] in Start menu, and click [Control Panel]. -
Page 183: Memory Dump
Troubleshooting 8-25 MEMORY DUMP If an error occurs, the dump file should be saved to acquire necessary information. If you saved the dump to DAT, write down that it is saved as "NTBackup" or "ARCServe" on the label. You can specify the location to save the diagnostic information as you like. For more information, see Chapter 5 for detail. -
Page 184: Recovery For Windows System
8-26 Troubleshooting RECOVERY FOR Windows SYSTEM If any file necessary for running the OS is damaged, use the following procedures to recover the system. IMPORTANT: Make sure that the keyboard, display unit, optical disk drive, and floppy disk drive are connected to the CPU blade. After recovering the system, see "Updating the System"... -
Page 185: Maintenance Tools
The Maintenance Tools is started according to the following procedure. Turn on peripheral devices and the server in this order. Insert the NEC EXPRESSBUILDER DVD supplied with your server into the optical disk drive of your server. Press Ctrl, Alt, and Delete to reboot the server from the NEC EXPRESSBUILDER. - Page 186 8-28 Troubleshooting IMPORTANT: An initial selection of the menu is "Japanese". "Japanese" starts by the automatic operation when the operation is not done for five seconds after the Language selection menu is displayed. "English" is selected. The tool menu is displayed. When you use a local console When you use a remote console Each tool is selected, and it starts.
-
Page 187: Function Of Maintenance Tools
The Off-line Maintenance Utility is started in Maintenance Utility. The Off-line Maintenance Utility is an OS-independent maintenance program. When you are unable to start the OS-dependent NEC ESMPRO to troubleshoot a problem, the Off-line Maintenance Utility can be used. IMPORTANT: The Off-line Maintenance Utility is intended for use of your service representative. - Page 188 BIOS/FW Updating This menu allows you to update the software module such as BIOS and firmware of the server by using the update disk (3.5-inch floppy disk) that is distributed from NEC customer service representative. After rebooting the system, an update program is started automatically from floppy disk, and the various BIOS and firmware programs are updated.
-
Page 189: Maintenance Tools With Remote Console
IMPORTANT: Do not change the boot device order in BOOT menu in BIOS SETUP. NEC EXPRESSBUILDER cannot be used if the optical disk drive is not the first device to launch the system. Use the management LAN port for LAN connection. - Page 190 8-32 Troubleshooting NOTE: The following items of BIOS setup information will be set as shown below. LAN Controller: [Enabled] Serial Port A: [Enabled] Base I/O Address: [3F8] Interrupt: [IRQ 4] Serial Port B: [Enabled] Base I/O Address: [2F8] Interrupt: [IRQ 3] BIOS Redirection Port: [Serial Port B] Baud Rate:...
-
Page 191: Resetting The Cpu Blade
Troubleshooting 8-33 RESETTING THE CPU BLADE This section describes how to reset the CPU blade when the CPU blade halts or when you want to restore the factory-set BIOS configuration. IMPORTANT: Resetting the CPU blade clears the DIMM memory and the data in process. To reset the CPU blade when it is not frozen, make sure that no processing is in progress. -
Page 192: Forced Shutdown
8-34 Troubleshooting FORCED SHUTDOWN Use this function when an OS command does not shut down the CPU blade, the POWER switch does not turn off the CPU blade, or resetting does not work. Press and hold the POWER switch on the CPU blade for at least four seconds. The power is forcibly turned off. -
Page 193: Chapter 9 Upgrading Your Server
IMPORTANT: Optional devices described in this chapter may be installed or removed by any user. However, NEC does not assume any liability for damage to optional devices or the server or malfunctions of the server resulted from installation by the user. NEC recommends you ask your service representative for install or removing any optional devices. -
Page 194: Safety Notes
9-2 Upgrading Your Server SAFETY NOTES Observe the following notes to install or remove optional devices safely and properly. WARNING Observe the following instructions to use the server safely. Failure to follow these instructions may result in death or serious personal injury. See pages 1-2 to 1-5 for details. -
Page 195: Anti-Static Measures
Upgrading Your Server 9-3 ANTI-STATIC MEASURES The CPU blade contains electronic components sensitive to static electricity. Avoid failures caused by static electricity when installing or removing any optional devices. Wear a wrist strap (an arm belt or anti-static glove). Wear a wrist strap on your wrist. If no wrist strap is available, touch an unpainted metal part of the cabinet before touching a component to discharge static electricity from your body. -
Page 196: Preparation For Installation
9-4 Upgrading Your Server PREPARATION FOR INSTALLATION To install or remove an optional device installed in the CPU blade, you should first remove the CPU blade from the Blade Enclosure. IMPORTANT: Remove the target CPU blade only. Do not remove any other blank cover or CPU blade from another slot. -
Page 197: Installation/Removal Procedure
Do not operate the system until confirming that the additionally installed CPU is in normal state. Make sure to use the CPU authorized by NEC. Installing a third- party CPU may cause a failure of the CPU as well as the server. - Page 198 9-6 Upgrading Your Server NOTE: If the different revision of the processor is installed in the multiprocessor system, Windows logs the following information every startup. If this message is logged, it is no problem for operation. Installation Install the CPU in the following procedure. After the shutdown processing for the CPU blade to be removed, turn off the power of the CPU blade.
- Page 199 Upgrading Your Server 9-7 Firmly hold the cover, move it slightly toward the rear of the blade, then lift the cover to remove it from the CPU blade. IMPORTANT: Handle the cover carefully so as not to make it contact with any electronic devices on the CPU blade.
- Page 200 9-8 Upgrading Your Server Firmly hold the cover, and lift it to remove. IMPORTANT: Pay attention not to make the cover hit any electronic component on the CPU blade. Confirm the position of the CPU socket. Remove the four screws from the fixing plate, then lift the plate to move it from the chassis.
- Page 201 Upgrading Your Server 9-9 Lift the socket lever. IMPORTANT: Pay attention not to make the lever hit the mezzanine card. Lift the CPU socket holder. Remove the socket cover. IMPORTANT: Keep the removed socket cover for future use.
- Page 202 9-10 Upgrading Your Server Put the CPU on the socket carefully and slowly. NOTE: Note the direction of the CPU. To prevent the CPU from being inserted into the mating socket incorrectly, a pin mark is put on each of the CPU and the socket.
- Page 203 Upgrading Your Server 9-11 Put the heat sink on the CPU. Take care not to touch the cool sheet with your hand. NOTE: Install the heat sink in correct direction so that the arrow mark printed on the heat sink faces to the direction as shown in the figure below.
- Page 204 If the "Computer" driver is set to "ACPI uni-processor PC" or "ACPI single-processor PC," change it to "ACPI multi-processor PC," reboot the system according to the message, and run NEC EXPRESSBUILDER under the Windows operating system to update the system.
- Page 205 Upgrading Your Server 9-13 Removal To remove the CPU, provide the preparation of the removal following steps 1 to 8 in the installation procedure and perform steps 9 to 20 in the reverse order. To remove the heat sink, slide it a little on the level and remove it.
-
Page 206: Dimm
DIMM on a desk directly. See "Static Precautions" for details of the static electricity. Do not use any DIMM not approved by NEC. If an unapproved third party's DIMM is installed in the server, not only the DIMM but also the CPU blade may be defected. - Page 207 Upgrading Your Server 9-15 Adding Order and Precautions Adding order depends on the number of CPUs installed. – 1-CPU configuration: Install DIMMs starting from the smallest DIMM slot number. – 2-CPU configuration: Alternately install DIMMs starting from the smallest DIMM slot number of each CPU.
- Page 208 9-16 Upgrading Your Server Installation Install the DIMM on the CPU blade depending on the following procedure: After the shutdown processing for the CPU blade to be removed, turn off the power of the CPU blade. Pull out the CPU blade from the Blade Enclosure. Refer to the User's Guide of the Blade Enclosure.
- Page 209 Upgrading Your Server 9-17 Remove the four screws from the air duct cover. Firmly hold the cover, and lift it to remove. IMPORTANT: Pay attention not to make the cover hit any electronic component on the CPU blade. Open the levers at both ends of the DIMM socket.
- Page 210 9-18 Upgrading Your Server Push the DIMM into the socket straight. Key slot IMPORTANT: Use extreme care when installing a DIMM. Applying too much pressure can damage the socket. Keyed DIMMs insert only one way. NOTE: Make sure of the orientation of the DIMM. The connecting side of the DIMM has a cut-out to prevent an incorrect insertion.
- Page 211 NOTE: To remove the defected DIMM, check the error message appearing in POST or NEC ESMPRO to confirm the CPU blade on which the detected DIMM is installed. After providing the shutdown processing for the CPU blade to be removed, turn off the power of the CPU blade.
-
Page 212: Mezzanine Card
9-20 Upgrading Your Server Mezzanine Card The CPU blade can contain two mezzanine cards for blade which allows a network extension or a file device feature extension. To install a mezzanine card, use the mezzanine card slot installed on the CPU blade. The mezzanine card slot is factory-installed on the CPU blade. IMPORTANT: The mezzanine card is extremely sensitive to static electricity. - Page 213 Upgrading Your Server 9-21 Notes Note the followings in the installation or removal of the mezzanine card. Be careful not to make your hands touch the terminals of the mezzanine card slot directly. If you do not keep it, the oil and/or dirt on the hands may adhere to the terminals to result in contact failure.
- Page 214 9-22 Upgrading Your Server Remove the two screws fixing the top cover. Firmly hold the cover, move it slightly toward the rear of the blade, then lift the cover to remove it from the CPU blade. IMPORTANT: Handle the cover carefully so as not to make it contact with any electronic devices on the CPU blade.
- Page 215 Upgrading Your Server 9-23 Check the position of the slot to install the mezzanine card. From top of the CPU blade, position the connector of the mezzanine so that it aligns the connector of the mezzanine card slot, and insert the mezzanine card straight into the slot. Type I Type II IMPORTANT:...
- Page 216 9-24 Upgrading Your Server Removal To remove the board, follow the procedure below: Shutdown the CPU blade to be removed and turn off the power of the CPU blade. Take the CPU blade out from the Blade Enclosure. Refer to the User's Guide of the Blade Enclosure. Put the CPU blade on an anti-static sheet with little dust.
-
Page 217: Appendix A Specifications
Appendix A Specifications Express5800/B120b-d EXP410B Item N8400-117F N8400-121F Type Intel Xeon processor Intel Xeon processor (X5670) low-power model (L5640) Clock 2.93GHz 2.26GHz 6.4GT/s 5.86GT/s 3rd Cache 12MB 12MB Standard Maximum Chipset Intel 5500 chipset Memory Standard None (Required option) - Page 218 A-2 Specifications (This page is intentionally left blank.)
-
Page 219: Appendix B Installing The Operating System
Appendix B Installing the Operating System SETUP AND RE-SETUP OF CPU BLADE OF DISKLESS MODEL Local Installation Before the installation, make sure that the CPU blade is connected with the keyboard, display unit, DVD-ROM drive and floppy disk drive. If any device is not connected, always connect it to the CPU blade. - Page 220 B-2 Installing the Operating System System Update If the system configuration is modified, always provide the system update by using NEC EXPRESSBUILDER DVD shipped with the system. See Chapter 6 for details. Installing on the Mirrored Volume (Windows Server 2008) When re-installing the OS to a hard disk drive which has been upgraded to Dynamic Disk, only the simple dynamic volume is available for installation.
- Page 221 Installing the Operating System B-3 About the System Partition Size When the system is Windows Server 2008 64-bit (x64) Edition: Required partition size = size required to install OS + paging file size + dump file size + application size Size required to install OS = 11,600MB (Full Installation) = 4,100MB (Server Core Installation)
- Page 222 B-4 Installing the Operating System When the system is Windows Server 2008 32-bit (x86) Edition Required partition size = size required to install OS + paging file size + dump file size + application size Size required to install OS = 6,300MB (Full Installation) = 2,200MB (Server Core Installation) Paging file size (recommended) = Installed memory size x 1.5...
- Page 223 Installing the Operating System B-5 When the system is Windows Server 2003 x64 Editions: The size for the partition that the system is to be installed can be calculated from the following formula. Size necessary to install the system + Paging File Size + Dump File Size + Application Size Size necessary to install the system = 4100MB (Windows Server 2003 x64 Editions) = 4100MB (Windows Server 2003 x64 Editions with...
- Page 224 B-6 Installing the Operating System When the system is Windows Server 2003: The size for the partition that the system is to be installed can be calculated from the following formula. Size necessary to install the system + Paging File Size + Dump File Size + Application Size Size necessary to install the system = 3500MB = 3500MB (Windows Server 2003 R2 with Service...
- Page 225 Installing the Operating System B-7 Supported Options by NEC EXPRESSBUILDER The NEC EXPRESSBUILDER DVD attached to your system supports the following options for installation. NOTE: If you want to install the other boards by using a driver floppy disk ("OEM-FD for Mass storage device"), except ones listed below, see "Installing with the OEM-FD for Mass storage device"...
- Page 226 Items Required for Local Installation Before starting the job, prepare the following items including disks and manuals: DVD-ROM drive Floppy disk drive NEC EXPRESSBUILDER DVD For Windows Server 2008 – Microsoft Windows Server 2008 Standard (DVD-ROM) – Microsoft Windows Server 2008 Enterprise (DVD-ROM) For Windows Server 2003 R2 x64 Editions –...
- Page 227 If you have only NEC Express5800 Server to create Windows Server 2003 x64 Edition OEM-Disk for EXPRESSBUILDER, use this procedure. If Windows Server 2003 can be operated on NEC Express5800 Server, you can use the other procedure described later. Follow the steps below.
- Page 228 Follow the steps below. Prepare one 3.5-inch floppy disk. Start the Operating System. Insert the NEC EXPRESSBUILDER DVD into the optical disk drive of the server. The Menu will appear. Insert the floppy disk into the floppy disk drive. Click [Create drive disk] and select [OEM-Disk for Windows Server 2003 x64 Edition].
- Page 229 If you have only NEC Express5800 Server to create Windows Server 2003 OEM-Disk for EXPRESSBUILDER, use this procedure. If Windows Server 2003 or Windows can be operated on NEC Express5800 Server, you can use the other procedure described later. Follow the steps below.
- Page 230 Follow the steps below. Prepare one 3.5-inch floppy disk. Start the Operating System. Insert the NEC EXPRESSBUILDER DVD into the optical disk drive of the server. The Menu will appear. Insert the floppy disk into the floppy disk drive. Click [Create drive disk] and select [OEM-Disk for Windows Server 2003].
- Page 231 IMPORTANT: To install Windows Server 2008, you may need to update BIOS. To check if your system needs a BIOS update, go to: http://www.nec.com/express/. Insert the Windows Server 2008 DVD-ROM into your DVD-ROM drive. Restart the system. To restart the system, press Ctrl + Alt + Del or turn off the system once, and then turn it on again.
- Page 232 B-14 Installing the Operating System Click the [Install now ] button. The installation starts. Enter your product key, and then click [Next].
- Page 233 Installing the Operating System B-15 Select the edition of the Windows operating system that you purchased. Select [I have selected the edition of Windows that I purchased], and then click [Next]. You will see only possible editions that have been determined by Windows based on the key you entered in step 6.
- Page 234 You will be asked, "Where do you want to install Windows?". Select [Load Driver], and then click [Browse]. The folder reference dialog box appears. Select a path to the folder in the NEC EXPRESSBUILDER DVD, and then click [OK]. – Windows Server 2008 64-bit(x64)Edition : <drive letter>:\003\win\winnt\oemfd\ws2008x64\fd1\megasas...
- Page 235 You will be asked, "Where do you want to install Windows?". Select [Load Driver], and then click [Browse]. The folder reference dialog box appears. Select a path to the folder in the NEC EXPRESSBUILDER DVD, and then click [OK]. – Windows Server 2008 64-bit (x64) Edition : <drive letter>: \003\win\winnt\oemfd\ws2008x64\fd1\elxstor –...
- Page 236 When the following message appears, the installation starts automatically. NOTE: If the disk drive contains NEC EXPRESSBUILDER DVD, you will be prompted to replace a media with that for OS installation. Insert the install media according to the on-screen message.
- Page 237 Installing the Operating System B-19 Log on to the system. The steps vary depending on the edition you selected in step 7. If you have selected a full installation After a full installation of Windows Server 2008 is completed, the following dialog box will prompt you to set or change the password before you log on.
- Page 238 B-20 Installing the Operating System On the [Initial Configuration Tasks] window, enter user information. If you have selected a Server Core installation After a Server Core installation of Windows Server 2008 is completed, press Ctrl + Alt + Del.
- Page 239 Installing the Operating System B-21 Select [Other User]. Log on to the system as an administrator. You need not enter your password in this dialog box. Click the button. Before you log on, you will be prompted to change the password. Click [OK].
- Page 240 B-22 Installing the Operating System Change the password, and then click the button. NOTE: The Windows Server 2008 password must combine uppercase letters, lowercase letters, and numbers. When the following message appears, click [OK]. At the command prompt, enter user information. NOTE: For more detailed procedure, see the "Microsoft Windows Server 2008 Step-By-Step Guide."...
- Page 241 Installing the Operating System B-23 Procedure for License Authentication Product Key used in the procedure for license authentication should be matched with the COA label in which the product key contained in Windows Server 2008 is written. NOTES: Execute the activation within 60 days. COA label may be attached to the main unit.
- Page 242 B-24 Installing the Operating System Installation of Windows Server 2003 R2 x64 Editions This section explains how to perform a clean installation of Windows Server 2003 x64 Editions. Turn on the power to start the CPU blade. Insert the Windows Server 2003 x64 Edition CD-ROM into the USB DVD-ROM drive connected to the CPU blade.
- Page 243 Installing the Operating System B-25 Select the [LSI MegaRAID SAS RAID Controller Driver (Server 2003 for x64)] and press Enter. The screen of Step 5 is displayed. Go to Step 8. <If the N8403-018 FibreChannel Controller is connected> Press S. The screen of Step 6 is displayed.
- Page 244 B-26 Installing the Operating System The [Windows Setup] screen will be displayed after logged on to the system. IMPORTANT: In this case, the [Windows Setup] screen may not be displayed. Be sure to install Microsoft Windows Server 2003 R2 x64 Edition DISC 2 according to the following procedures.
- Page 245 Installing the Operating System B-27 Procedure for License Authentication Product Key used in the procedure for license authentication should be matched with the COA label in which the product key contained in Windows Server 2003 x64 Editions is written. NOTES: Execute the activation within 30 days.
- Page 246 B-28 Installing the Operating System Installation of Windows Server 2003 R2 This section explains how to perform a clean installation of Windows Server 2003. Turn on the power to start the CPU blade. Insert the Windows Server 2003 CD-ROM into the USB DVD-ROM drive. Press Ctrl + Alt + Delete to reset the system.
- Page 247 Installing the Operating System B-29 Select the [LSI MegaRAID SAS RAID Controller Driver (Server 2003 32-bit)] and press Enter. The screen of Step 5 is displayed. Go to Step 8. <If the N8403-018 FibreChannel Controller is connected> Press S. The screen of Step 6 is displayed. Press Enter, and go to Step 9. <If the N8403-018 FibreChannel Controller is not connected>...
- Page 248 B-30 Installing the Operating System When Windows Server 2003 R2 has been installed, the [Windows Setup] screen will be displayed after logged on to the system. IMPORTANT: In this case, the [Windows Setup] screen may not be displayed. Be sure to install Microsoft Windows Server 2003 R2 DISC 2 according to the following procedures.
- Page 249 Installing the Operating System B-31 Procedure for License Authentication Product Key used in the procedure for license authentication should be matched with the COA label in which the product key contained in Windows Server 2003 is written. NOTE: Execute the activation within 30 days. System may be locked after 30 days is passed.
-
Page 250: Remote Desktop For Management
B-32 Installing the Operating System REMOTE DESKTOP FOR MANAGEMENT This section describes the necessary setting of the Remote Desktop for Management to use Windows Server 2008, Windows Server 2003 x64 Editions, or Windows Server 2003. IMPORTANT: The license for Sever Client Access with fee is not needed to use the Remote Desktop for Management. -
Page 251: Windows Server 2003
Installing the Operating System B-33 Windows Server 2003 The setting process is as follows. IMPORTANT: Set password for the Administrator account in order to use the Remote Desktop for Management. Click [Start] Menu and point [Control Panel] and click [System]. Click [Remote] tab and check [Allow users to connect remotely to this computer] in the [Remote desktop] section, and click [OK]. -
Page 252: Setup Of Device Driver (Normally Installed In Server
B-34 Installing the Operating System SETUP OF DEVICE DRIVER (NORMALLY INSTALLED IN SERVER) For the installation and setup of each optional device driver, refer to the documentation shipped with the option. PROSet NOTES: All of the operation that related to Intel® PROSet is must be executed by administrator privileges. - Page 253 Click [Next]. Choose "I accept the terms in the license agreement" and click [Next]. Click [Next]. Click [Install]. When [InstallShield Wizard Completed] window is displayed, click [Finished]. Remove the NEC EXPRESSBUILDER DVD from the optical disk drive, restart the system.
-
Page 254: Network Driver
Choose "I accept the terms in the license agreement" and click [Next]. Click [Next]. Click [Install]. When [InstallShield Wizard Completed] window is displayed, click [Finished]. Remove the NEC EXPRESSBUILDER DVD from the optical disk drive, restart the system. Network Driver IMPORTANT: The setting change of the link speed is not supported. -
Page 255: Graphics Accelerator
It is automatically installed by Windows Plug-and-Play When the system is Windows Server 2003 x64 Editions / Windows Server 2003 If you use Fibre Channel Controller (N8403-018), update your system with NEC EXPRESSBUILDER DVD attached to your system. The Fibre Channel Controller driver will be installed automatically. -
Page 256: Storage And I/O Blade Ad106A Driver
When the system is Windows Server 2003 x64 Editions / Windows Server 2003 If you use the Storage and I/O Blade AD106a, update your system with NEC EXPRESSBUILDER DVD attached to your system. The Internal RAID Controller driver will be installed automatically. - Page 257 Installing the Operating System B-39 When the system is Windows Server 2003 x64 Editions / Windows Server 2003 Start Device Manager. Click [Network adapters] and double-click [(Network Adapter Name)]. [(Network Adapter Name) Properties] appears. NOTE: [(Intel(R) PRO/1000...)] is the name of On-Board adapter. All other names show the Optional Network Board.
-
Page 258: Setup Of Adapter Fault Tolerance (Aft)/Adaptive Load Balancing (Alb
B-40 Installing the Operating System Setup of Adapter Fault Tolerance (AFT)/Adaptive Load Balancing (ALB) Adapter Fault Tolerance (AFT) is a feature that creates a group containing more than one adapter. With this feature, when the working adapter gets any problem, the process on it is automatically transferred to the other adapter in the group. -
Page 259: Setup Teaming
Installing the Operating System B-41 Setup Teaming When the system is Windows Server 2008 64-bit (x64) Editions / 2008 32-bit (x86) Editions IMPORTANT: Teaming is not supported with Windows Server Core. SFT is not supported. Please confirm the port setting of switching hub (L2) matches the server network adapter Teaming mode. - Page 260 B-42 Installing the Operating System Click [Test Switch] → [Run test] to confirm the adapter team is properly setup. Confirm the result in [Test results] Even the system are normal, the following mismatch message will appear sometimes. Please recheck the switching hub (L2) port and nothing problem with the setting ignore the messages.
-
Page 261: Remove Team
Installing the Operating System B-43 Refer to the following procedure to set the team member adapter priority status. – Set Primary Point the adapter and click [Set Primary] button. – Set Secondary Point the adapter and click [Set Secondary] button. NOTE: Adapter priority config can be confirmed by the following procedure... -
Page 262: Setting Wol
B-44 Installing the Operating System SETTING WOL Refer to the following procedure to enable WOL. When the system is Windows Server 2008 64-bit (x64) Edition / Windows Server 2008 32-bit (x86) Edition Start Device Manager. Point to [Network adapters] and double click [Intel(R) 82576 Gigabit Dual Port Server Network Connection]/[Intel(R) 82576 Gigabit Dual Port Server Network Connection #2] to open the adapter [Properties]. - Page 263 Installing the Operating System B-45 When the system is Windows Server 2003 x64 Editions / Windows Server 2003 When PROSet is not installed Start Device Manager. Point to [Network adapters] and double click [Intel(R) 82576 Gigabit Dual Port Server Network Connection]/[Intel(R) 82576 Gigabit Dual Port Server Network Connection #2] to open the adapter [Properties].
- Page 264 B-46 Installing the Operating System When PROSet is installed Start Device Manager. Point to [Network adapters] and double click [Intel(R) 82576 Gigabit Dual Port Server Network Connection]/[Intel(R) 82576 Gigabit Dual Port Server Network Connection #2] to open the adapter [Properties]. Click [Power Management] tab and change setting in [Wake On LAN] according to the following list.
-
Page 265: Setting Receive Side Scaling
Installing the Operating System B-47 SETTING RECEIVE SIDE SCALING Two standard network adapter and optional network board need to change the Receive Side Scaling setting. Please execute the following procedures. NOTE: This is common procedure for all Windows OS. IMPORTANT: Set it in the following procedure before installing Intel®... -
Page 266: Re-Installation Of The Network Driver
B-48 Installing the Operating System RE-INSTALLATION OF THE NETWORK DRIVER When the system is Windows Server 2008 64-bit (x64) Edition / Windows Server 2008 32-bit (x86) Edition Please run the "System Update" to re-install the network driver. When the system is Windows Server 2003 x64 Editions After installing OS and deleting the network drivers, if you want to re-install the network drivers, follow the procedure below. - Page 267 Installing the Operating System B-49 When the system is Windows Server 2003 After installing OS and deleting the network drivers, if you want to re-install the network drivers, follow the procedure below. Restart OS and logon to your system. [Upgrade Device Driver Wizard] dialog box appears. Click [Next].
-
Page 268: The Procedure To Set Pae Option
B-50 Installing the Operating System The procedure to set PAE option If your 32-bit system has a memory capacity in excess of 4GB, setting PAE option will enable the system to be installed with over 4GB of memory. Windows Server 2008 IMPORTANT: "PAE option"... - Page 269 Installing the Operating System B-51 Windows Server 2003 IMPORTANT: However, the Microsoft operating system products which support /PAE switch option are limited. Refer to the following article in Microsoft Knowledge Base to check the supported products. Microsoft Knowledge Base - Article ID: 291988 "A description of the 4GB RAM tuning feature and the Physical Address Extension switch"...
-
Page 270: Setting For Solving Problems
B-52 Installing the Operating System SETTING FOR SOLVING PROBLEMS Setup the following issue in advance so that your computer can recover from any trouble precisely and as soon as possible when it should occur. Setting for Collecting Memory Dump (Debug Information) Set for collecting memory dump using the procedure described in Chapter 5. - Page 271 Installing the Operating System B-53 [Procedure for Modifying the Drive Letter] Be careful that the drive letter of the system or boot volume cannot be modified with the following procedure. <Windows Server 2008> Click Start menu, right-click [Computer], and specify [Manage] to start [Server Manager]. Specify the [Storage] - [Disk Management] in the left side of the window.
-
Page 272: Updating The System - Applying Service Pack
B-54 Installing the Operating System UPDATING THE SYSTEM - APPLYING SERVICE PACK - Update the system in the situation below: CPU is expanded (expanded to single processor to multi-processor). Modified system configuration. Recovered the system using recovery process. The system update brings the correction program provided by Microsoft to be applied to reinforce the system security. -
Page 273: Local Update
Installing the Operating System B-55 Local Update When the system is Windows Server 2008 "Updating the System" applies the drivers necessary for NEC Express5800 Series. Log on to the system using an administrator account. Insert the NEC EXPRESSBUILDER DVD into the optical disk drive. - Page 274 B-56 Installing the Operating System Read the message, and then click [OK]. The update starts. NOTE: The following box appears during the update if you have deployed a full installation of Windows Server 2008. Wait until the update completes. When the following message appears, click [Yes] to restart the system. The system has been updated.
- Page 275 Log on to the system by the account with administrator authority to the CPU blade (such as administrator). Insert the NEC EXPRESSBUILDER DVD into the USB DVD-ROM drive of the server. Click Start menu and [Run], and then execute the following command.
- Page 276 B-58 Installing the Operating System When the following message is displayed, click [Next]. After that, follow the message to continue the process. <Windows Server 2003 x64 Editions> <Windows Server 2003>...
- Page 277 Installing the Operating System B-59 When the following message is displayed, make sure to click [Finish] to restart the system <Windows Server 2003 x64 Editions> <Windows Server 2003> With that, application process of the Hotfix (KB921411) is finished.
- Page 278 Log on to the system with the account that has administrative privilege (e.g. administrator). Insert the NEC EXPRESSBUILDER DVD into the USB DVD-ROM drive of server. The Menu will be displayed Left-click on [Setup Windows], and then click [Update the system].
- Page 279 Do not click [Cancel] since it may be taken away after a few seconds Click [Yes] to restart the system. When the reboot is started, remove the NEC EXPRESSBUILDER DVD from the USB DVD-ROM drive immediately.
- Page 280 B-62 Installing the Operating System Recovery process If "Updating the System" is executed before the application of the "Hotfix for Windows x64 (KB921411)" or "Hotfix for Windows Server 2003 (KB921411)", "!" may be displayed on the USB root hub. If "!" is displayed on the USB root hub, perform application of the "Hotfix for Windows x64 (KB921411)"...
-
Page 281: Update From Ts Client (Windows Server 2008
Log on to the system by the account with administrator authority to TS client (such as administrator). Insert the NEC EXPRESSBUILDER DVD into the USB DVD-ROM drive of the TS client. If the menu appears on the TS client screen, terminate the menu. -
Page 282: Update From Ts Client (Windows Server 2003 X64 Editions
Log on to the system by the account with administrator authority to TS client (such as administrator). Insert the NEC EXPRESSBUILDER DVD into the USB DVD-ROM drive of the TS Client. If the menu appears on the TS client screen, terminate the menu. - Page 283 Installing the Operating System B-65 When the following message is displayed, make sure to click [Finish] to restart the system. With that, application process of the Hotfix for Windows x64 (KB921411) is finished.
- Page 284 Log on to the system by the account with administrator authority to TS client (such as administrator). Insert the NEC EXPRESSBUILDER DVD into the USB DVD-ROM drive of the TS client. If the menu appears on the TS client screen, terminate the menu.
-
Page 285: Update From Ts Client (Windows Server 2003
Log on to the system by the account with administrator authority to TS client (such as administrator). Insert the NEC EXPRESSBUILDER DVD into the USB DVD-ROM drive of the TS Client. If the menu appears on the TS client screen, terminate the menu. - Page 286 B-68 Installing the Operating System When the following message is displayed, make sure to click [Finish] to restart the system. With that, application process of the Hotfix for Windows Server 2003 (KB921411) is finished.
- Page 287 Log on to the system by the account with administrator authority to TS client (such as administrator). Insert the NEC EXPRESSBUILDER DVD into the USB DVD-ROM drive of the TS client. If the menu appears on the TS client screen, terminate the menu.
-
Page 288: About Windows Activation
B-70 Installing the Operating System About Windows Activation You have to agree to the license agreement to use Windows Server 2008, Windows Server 2003 x64 Edition or Windows Server 2003. Windows activation process is as follows. Windows Server 2008 For a server running a full installation Go to the Start menu, and in the Run dialog box, type slui, and press Enter. - Page 289 Installing the Operating System B-71 In the following screen, click [Type a different product key]. Type the product key shown on your COA label, and click [Next].
- Page 290 B-72 Installing the Operating System Activate Windows. The Windows activation is complete.
- Page 291 Installing the Operating System B-73 For a server running a Server Core installation At the command prompt, type Slmgr –dli, and press Enter. IMPORTANT: If the following message appears, Windows has already been activated on your system. Click to exit. Type slmgr –ipk <PID>, and press Enter.
- Page 292 B-74 Installing the Operating System At the command prompt, type slmgr –atp <CID>, and press Enter. * CID is the confirmation ID that you received from the call center. The Windows activation is complete.
- Page 293 Installing the Operating System B-75 Windows Server 2003 x64 Editions / Windows Server 2003 Click [Run] on [Start] menu. Type as follows in the [Open:] box, and click [OK]. oobe/msoobe /a When the screen as follows is displayed, click [Next]. The following screen is displayed.
- Page 294 B-76 Installing the Operating System Process "Windows activation" according to the following message.