
Related Manuals for Zanussi ZOCNX3WL


Summary of Contents for Zanussi ZOCNX3WL
- Page 1 User Manual GETTING STARTED? EASY. ZOCNX3WL ZOCNX3WR ZOCNX3XL ZOCNX3XR EN User Manual Oven...
-
Page 2: Safety Information
VISIT OUR WEBSITE FOR: Get usage advice, brochures, trouble shoot- er, service and repair information: www.zanussi.com/support SAFETY INFORMATION Before the installation and use of the appliance, carefully read the supplied instructions. The manufacturer is not responsible for any injuries or damage that are the result of incorrect installation or usage. -
Page 3: Safety Instructions
WARNING: The appliance and its accessible parts become hot • during use. Care should be taken to avoid touching heating elements. Always use oven gloves to remove or put in accessories or • ovenware. Before carrying out any maintenance, disconnect the appliance •... -
Page 4: Electrical Connection
removed from the holder), earth leakage trips Height of the back of 571 mm and contactors. the appliance • The electrical installation must have an isolation device which lets you disconnect the appliance Width of the front of 595 mm from the mains at all poles. -
Page 5: Internal Lighting
• Do not put flammable products or items that are • Replace immediately the door glass panels wet with flammable products in, near or on the when they are damaged. Contact the appliance. Authorised Service Centre. • Be careful when you remove the door from the WARNING! Risk of damage to the appliance. -
Page 6: Securing The Oven To The Cabinet
BUILDING IN min. 550 min. 560 ±1 min. 550 min. 560 ±1 SECURING THE OVEN TO THE CABINET... -
Page 7: Product Description
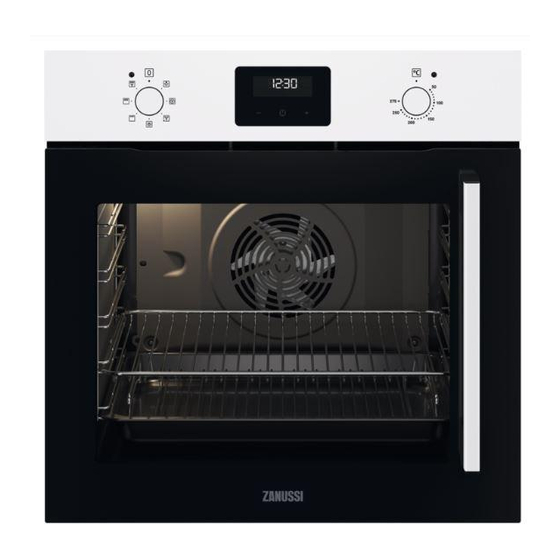
PRODUCT DESCRIPTION GENERAL OVERVIEW Control panel Knob for the heating functions Power lamp / symbol Display Control knob (for the temperature) Temperature indicator / symbol Heating element Lamp 10 Shelf support, removable 11 Shelf positions ACCESSORIES Use the trivet only with the Grill- / roasting pan. -
Page 8: Before First Use
BEFORE FIRST USE To set the Time of day refer to "Clock functions" WARNING! Refer to Safety chapters. chapter. INITIAL CLEANING Step 1 Step 2 Step 3 Remove all accessories and re- Clean the oven and the acces- Place the accessories and the movable shelf supports from sories with a soft cloth, warm removable shelf supports in... -
Page 9: Clock Functions
Oven function Application Oven function Application This function is designed to To roast large meat joints save energy during cook- or poultry with bones on ing. When you use this one shelf position. To make Moist Fan Bak- Turbo Grilling function, the temperature in gratins and to brown. - Page 10 HOW TO SET: CLOCK FUNCTIONS How to change: Time of Day - flashes when you connect the oven to the electrical supply, when there was a power cut or when the timer is not set. Step 1 - press repeatedly. - starts to flash.
-
Page 11: Using The Accessories
How to set: Time Delay Step 3 - press to set the time for: Duration. Step 4 Press: Step 5 - press to set the time for: End Time. Step 6 Press: At the set time the signal sounds and the oven turns off. Step 7 Press any button to stop the signal. - Page 12 Wire shelf: Push the shelf between the guide bars of the shelf support and make sure that the feet point down. Deep pan: Push the deep pan between the guide bars of the shelf support. Wire shelf and deep pan together: Push the deep pan between the guide bars of the shelf support and the wire shelf on the guide bars above.
-
Page 13: Additional Functions
TRIVET AND GRILL- / ROASTING PAN 2. Put the deep pan into the oven on the necessary shelf position. WARNING! Be careful when you You can use the trivet to grill flat dishes in large remove the accessories from a hot quantities and to toast. -
Page 14: Baking And Roasting
BAKING AND ROASTING Initially, monitor the performance when you cook. Find the best settings (heat setting, cooking time, Use the function: True Fan Cooking. etc.) for your cookware, recipes and quantities when you use this appliance. CAKES (°C) (min) Whisked recipes 3 (1 and 4) 45 - 60 Cake mould... - Page 15 BREAD AND PIZZA (°C) (min) White bread, 1 - 2 pieces, 0.5 kg each 60 - 70 Rye bread, preheating is not needed 30 - 45 Bread tin Bread rolls, 6 - 8 rolls 2 (2 and 25 - 40 Baking tray Pizza 200 - 210...
- Page 16 MEAT MEAT (°C) (min) (°C) (min) Pork shoulder, with rind 120 - Whole pheasant 90 - Pork shin, 2 pieces 100 - Use the second shelf position. Set the temperature to 175 °C. Leg of lamb 110 - Whole chicken 70 - 85 FISH Whole turkey...
-
Page 17: Turbo Grilling
GRILL (min) (min) (kg) 1st side 2nd side Pork chops, 4 pieces 12 - 16 12 - 14 Chicken, half, 2 30 - 35 25 - 30 Kebabs, 4 10 - 15 10 - 12 Chicken breast, 4 pieces 12 - 15 12 - 14 Burgers, 6 20 - 30... - Page 18 VEAL POULTRY (°C) (min) (°C) (min) Roast veal, 1 kg 160 - 90 - 120 Chicken, half, 0.4 - 190 - 35 - 50 0.5 kg each Veal knuckle, 1.5 - 160 - 120 - Chicken, poulard, 190 - 50 - 70 2 kg 1 - 1.5 kg Duck, 1.5 - 2 kg...
- Page 19 DEFROST Defrosting time Further defrosting (kg) (min) time (min) Chicken 100 - 140 20 - 30 Place chicken on an upturned saucer placed on a large plate. Turn halfway through. Meat 100 - 140 20 - 30 Turn halfway through. 90 - 120 Cream 2 x 0.2...
-
Page 20: Moist Fan Baking - Recommended Accessories
FRUIT FRUIT Plums 8 - 10 Pears 6 - 9 Apricots 8 - 10 MOIST FAN BAKING - RECOMMENDED Apple slices 6 - 8 ACCESSORIES Use the dark and non-reflective tins and containers. They have better heat absorption than the light colour and reflective dishes. -
Page 21: Information For Test Institutes
(°C) (min) Soufflè, 6 pieces ceramic ramekins on wire 45 - 55 shelf Sponge flan base flan base tin on wire shelf 35 - 45 Victoria sandwich baking dish on wire shelf 35 - 50 Poached fish, 0.3 baking tray or dripping 35 - 45 Whole fish, 0.2 baking tray or dripping... - Page 22 (°C) (min) Small True Fan Baking 150 - 20 - 35 cakes, Cooking tray 20 per tray Small True Fan Baking 150 - 20 - 35 cakes, Cooking tray 20 per tray Apple True Fan Wire 70 - 90 pie, 2 Cooking shelf tins Ø20...
-
Page 23: Care And Cleaning
CARE AND CLEANING WARNING! Refer to Safety chapters. NOTES ON CLEANING Clean the front of the oven with a soft cloth with warm water and a mild detergent. Clean and check the door gasket around the frame of the cavity. Use a cleaning solution to clean metal surfaces. - Page 24 CATALYTIC FAN COVER 5. When the oven is cold, clean it with a soft and wet sponge. CAUTION! Do not clean the catalytic Spots or discolouration of the catalytic surface surface with oven sprays, abrasive have no effect on catalytic properties. cleaning agents, soap or other cleaning agents.
-
Page 25: Troubleshooting
When the oven door is clean, install the glass panel in the opposite sequence. The screen-printing zone must face the inner side of the door. Make sure that after the installation the surface of the glass panel frame on the screen-printing zones is not rough when you touch it. Make sure that you put the glass panel in the rubber distance holders. -
Page 26: Service Data
Product number (PNC) ......... Serial number (S.N.) ......... ENERGY EFFICIENCY PRODUCT INFORMATION AND PRODUCT INFORMATION SHEET* Supplier's name Zanussi ZOCNX3WL 949495304 ZOCNX3WR 949495305 Model identification ZOCNX3XL 949495306 ZOCNX3XR 949495307 Energy Efficiency Index 95.3 Energy efficiency class Energy consumption with a standard load, fan-forced mode 0.81 kWh/cycle... -
Page 27: Energy Saving
ZOCNX3WL 27.8 kg ZOCNX3WR 27.8 kg Mass ZOCNX3XL 27.4 kg ZOCNX3XR 27.4 kg * For European Union according to EU Regulations 65/2014 and 66/2014. For Republic of Belarus according to STB 2478-2017, Appendix G; STB 2477-2017, Annexes A and For Ukraine according to 568/32020. - Page 28 WWW.ZANUSSI.COM/SHOP...