Dell 5100MP User Manual
Dell 5100mp: user guide
Hide thumbs
Also See for 5100MP:
- Owner's manual (426 pages) ,
- Mib definitions manual (12 pages) ,
- Setup manual (2 pages)

Related Manuals for Dell 5100MP


Summary of Contents for Dell 5100MP
- Page 1 Dell™ 5100MP Projector User’s Guide Model XXX w w w . d e l l . c o m | s u p p o r t . d e l l . c o m...
- Page 2 Reproduction in any manner whatsoever without the written permission of Dell Inc. is strictly forbidden. Trademarks used in this text: Dell and the DELL logo are trademarks of Dell Inc.; DLP and ® logo are trademarks of Texas Instruments; Microsoft and Windows are either registered trademarks or trademarks of Microsoft Corporation in the United States and/or other countries.
-
Page 3: Table Of Contents
Contents 1 Your Dell Projector ....6 About Your Projector 2 Connecting Your Projector ... . 8 Connecting to a Computer . - Page 4 3 Using Your Projector ....17 Turning Your Projector On Turning Your Projector Off Adjusting the Projected Image Raising the Projector Height Lowering the Projector Height...
-
Page 5: Contents
5 Specifications ..... 48 Contacting Dell .... -
Page 6: Your Dell Projector
Your Dell Projector Your projector comes with all the items shown below. Ensure that you have all the items, and contact Dell if anything is missing. Package Contents 1.8 m power cord (3.0 m in Americas) 1.8 m M1 to D-sub/USB cable 2.0 m S-video cable... -
Page 7: About Your Projector
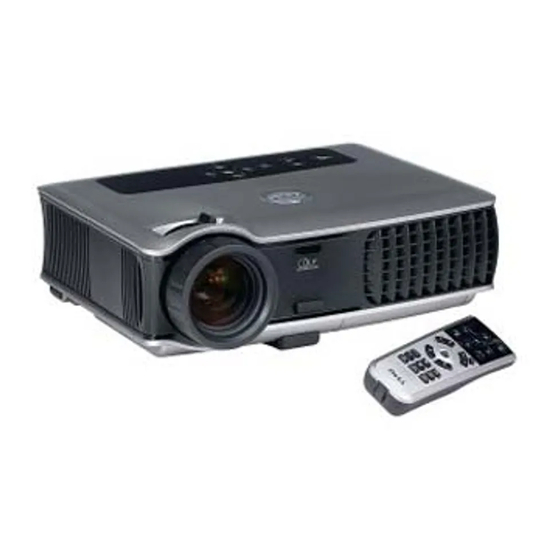
(continued) Package Contents Documentation About Your Projector Control panel Elevator button Remote control transceiver Lens Lens Cap Focus ring Zoom tab Batteries (2) Your Dell Projector... -
Page 8: Connecting Your Projector
Connecting Your Projector RJ45 network connector HDMI connector VGA input connector M1 signal in connector Video input connector S-video input connector VGA output connector RS232 connector IR receiver/ RF transceiver Kensington lock hole Power cord connector 12 Volt DC relay output... -
Page 9: Connecting To A Computer
Connecting a Computer with an M1 to D-sub/USB Cable Power cord M1A to D-sub/USB cable NOTE: The USB cable can not be connected if the USB Dongle is used, for the USB dongle connection refer to page 35. Connecting Your Projector... -
Page 10: Connecting A Computer With A D-Sub To D-Sub Cable
Connecting a Computer with a D-sub to D-sub Cable Power cord D-sub to D-sub cable NOTE: The USB cable can not be connected if the USB Dongle is used, for the USB dongle connection refer to page 35. Connecting Your Projector... -
Page 11: Connecting To A Dvd Player
M1 to HDTV cable Connecting a DVD Player with a D-sub to YPbPr Cable Power cord D-sub to YPbPr cable NOTE: The D-sub to YPbPr cable is not provided by Dell. Consult a professional installer for the cable. Connecting Your Projector... -
Page 12: Connecting A Dvd Player With A Rca To Rca Cable
Connecting a DVD Player with a RCA to RCA Cable Power cord RCA to RCA component cable NOTE: The RCA to RCA cable is not provided by Dell. Consult a professional installer for the cable. Connecting a DVD Player with an S-video Cable Power cord... -
Page 13: Connecting A Dvd Player With A Composite Cable
Composite video cable Connecting a DVD Player with a BNC to VGA cable Power cord BNC to VGA cable NOTE: The BNC to VGA cable is not provided by Dell. Consult a professional installer for the cable. Connecting Your Projector... -
Page 14: Professional Installation Options: Installation For Driving Automatic Screen
Professional Installation Options: Installation for Driving Automatic Screen Power cord 12V DC Plug Automatic screen NOTE: Use the dimension of 12V DC plug in 1.7mm(ID) x 4.00mm(OD) x 9.5mm (shaft) to connect the automatic screen with the projector. Connecting Your Projector 12V DC Plug... -
Page 15: Installation For Wired Rs232 Remote Control: Connection With Pc
Installation for wired RS232 remote control: Connection with PC Power cord RS232 cable NOTE: The RS232 cable is not provided by Dell. Consult a professional installer for the cable. Connecting Your Projector... -
Page 16: Connection With Commercial Rs232 Control Box
Connection with Commercial RS232 Control Box: Power cord RS232 cable Commercial RS232 control box NOTE: The RS232 cable is not provided by Dell. Consult a professional installer for the cable. Connecting Your Projector... -
Page 17: Using Your Projector
Connect the power cord and appropriate signal cables. For information about connecting the projector, see page 8. Press the power button (see page 21 to locate the power button). The Dell logo displays for 30 seconds. Turn on your source (computer, DVD player, etc.). The projector automatically detects your source. -
Page 18: Adjusting The Projected Image
Adjusting the Projected Image Raising the Projector Height Press the elevator button. Raise the projector to the desired display angle, and then release the button to lock the elevator foot into position. Use the tilt adjustment wheel to fine-tune the display angle. -
Page 19: Adjusting The Projector Zoom And Focus
Rotate the zoom tab to zoom in and out. Rotate the focus ring until the image is clear. The projector focuses at distances from 4.9 ft to 39.4 ft (1.5 m to 12 m). Zoom tab... -
Page 20: Adjusting Projection Image Size
Adjusting Projection Image Size Using Your Projector... -
Page 21: Using The Control Panel
171.9cm) 11.2' (3.4m) 18.0' (5.5m) 25.3' (7.7m) Turn the projector on and off. For more information, see page 17. Press to control the volume, then press buttons to decrease or increase the volume. Press to activate the OSD. Use the directional keys and Menu button to navigate through the OSD. - Page 22 Auto adjust does not operate if the on-screen display (OSD) is displayed. LCD display is for real time projector status. • If the TEMP light is solid orange, the projector has overheated. The display automatically shuts down. Turn the display on again after the projector cools down.
-
Page 23: Using The Remote Control
Volume Mute Volume Right click Turn the projector on and off. For more information, see page 17. Press to adjust the OSD setting. Aim the remote control at the screen, press and hold the laser button to activate the laser light. - Page 24 22 Source 23 Keystone correction 24 PIP Using Your Projector The Dell 5100MP Micro-projector has preset configurations that are optimized for displaying data (PC Graphics) or video (movies, games, etc.). Press Video Mode button to toggle between PC mode, Movie mode, Game Mode, sRGB, or User mode (for user to setup and save preferred settings).
- Page 25 Initiate the Learning Mode on the remote for switching the RF transmission channel by pressing Prgm button. Using Your Projector...
-
Page 26: Using The On-Screen Display
Remote cover Battery chamber Using the On-Screen Display The projector has a multi-language On-Screen Display (OSD) that can be displayed with or without an input source present. In the Main Menu, press button on the control panel or the remote control to select a submenu. - Page 27 —Select On to enable the auto correction for vertical image EYSTONE distortion due to tilting the projector. Select Off to disable the auto correction. —Select On and press Enter to activate the Semi-Auto EYSTONE keystone correction for image distortion. A specific image pattern will be present on the screen once it's been activated and then complete the settings by following below instructions.
-
Page 28: Audio Menu
—Select a mode to optimize the display image based on how the IDEO projector is being used: Movie, Game, PC, sRGB (provides more accurate color representation), and User (set your preferred settings). If you adjust the settings for White Intensity or Degamma, the projector automatically switches to User. -
Page 29: Management Menu
OWER AVING the amount of time you want the projector to wait without signal input. After that set time, the projector enters power saving mode and turns off the lamp. The projector turns back on when it detects an input signal or you press the power button. - Page 30 —Select On (the default) to autodetect the available input signals. OURCE When the projector is on and you press SOURCE, it automatically finds the next available input signal. Select Off to lock the current input signal. When Off is selected and you press SOURCE, you select which input signal you want to use.
-
Page 31: Language Menu
OSD. NOTE 1: PIP Image is enabled only when both the following types of signals are connected to the projector. Type 1: S-Video, Composite Video, M1-D, Type 2: D-sub, BNC, Component, HDMI, M1 signals. -
Page 32: Network Settings Menu
Press left or right button to select the number position, up or down button to change the number. —Select to set the default gateway of ATEWAY the network connected to the projector. Press left or right button to select the number... -
Page 33: Factory Reset Menu
—Press OSITION to adjust the vertical position of the image up. ACTORY ESET projector to its factory default settings. Reset items include both computer image and video image settings —Change the display data clock REQUENCY frequency to match the frequency of your computer graphics card. -
Page 34: Video Source Menu
Back to Factory Default for the RF Channel • Select Yes on RF Learning Setting menu and then enter the RF Reset to Default menu. Select Reset to Default Channel, the projector will back to the factory default channel. to increase the... - Page 35 • The successful reset back to the default channel on both ends can be confirmed when the remote control transmitter controls the projector. Auto Learning to Change RF Channel Between Remote Controller and USB Wireless Dongle Step 1 Open the cover of the remote control.
- Page 36 Using Your Projector...
-
Page 37: To Manage The Projector From Web Management
To Manage the Projector from Web Management Configuring the Network Setting If the projector is connected to a network, you can access the projector using a web browser by configuring the network setting (TCP/IP). When using the network function, the IP address should be unique. For configuring the network setting, refer to Network Setting Menu in page 32. - Page 38 Managing Properties Home Displays Group name, Projector name, Location, Contact, Lamp hours, Firmware version, IP address, MAC address and Admin password information. Using Your Projector...
- Page 39 Set up the Group Name, Projector Name, Location and Contact information in this tab, press Submit to confirm the settings. • Choose DHCP to assign an IP address to the projector from a DHCP server automatically, or Manual to assign an IP address manually.
- Page 40 Projector Status and Control The function is same as On Screen Display. Manage the projector status, image control and audio control using Projector Status and Control. Using Your Projector...
- Page 41 E-mail Alert Set E-mail address, Owner, Subject and Alert Condition to send automatic e-mail alerts to the preset administrator. Using Your Projector...
- Page 42 Use Password Setting to set up an administrator password to access the Web Management . When enabling password for the first time, set the password before enabling it. When the password function is enabled, the administrator password will be required for accessing the Web Management. Using Your Projector...
-
Page 43: Troubleshooting Your Projector
Possible Solution • Ensure that the lens cap is removed and the projector turned on. • Ensure the external graphics port is enabled. If you are using a Dell portable computer, press . For other computers, see your documentation. • Ensure that all the cables are securely connected. - Page 44 (continued) Possible Solution • Press the Resync button on the remote control or the control panel. If you are using a Dell portable computer, set • the resolution of the computer to XGA (1024 x 768): Right-lick the unused portion of your Windows desktop, click Properties and then select Settings tab.
- Page 45 When the lamp reaches its end of life, it may burn out and may make a loud popping sound. If this occurs, the projector does not turn back on, and displays Lamp Defective in the LCD display until the lamp is replaced. To replace the lamp, see "Changing the Lamp"...
-
Page 46: Self-Diagnostic For Video
While in Self-diagnostic mode, the screen will run a seven-color-cycle test as following: Red--> Green--> Blue--> White--> Watchet Blue--> Dark Green--> Yellow. Ensure that the colors of the test pattern are correct. Contact Dell if the colors are not displayed correctly. Changing the Lamp Replace the lamp when you see "Lamp is approaching the end of its useful life in... - Page 47 LAMP(S) INSIDE THIS PRODUCT CONTAIN MERCURY AND MUST BE RECYCLED OR DISPOSED OF ACCORDING TO LOCAL, STATE OR FEDERAL LAWS. FOR MORE INFORMATION, GO TO WWW.DELL.COM/HG OR CONTACT THE ELECTRONIC INDUSTRIES ALLIANCE AT WWW.EIAE.ORG. FOR LAMP SPECIFIC DISPOSAL INFORMATION CHECK WWW.LAMPRECYCLE.ORG.
-
Page 48: Specifications
Specifications Light Valve Brightness Contrast Ratio Uniformity Number of Pixels Displayable Color Color Wheel Speed Projection Lens Projection Screen Size Projection Distance Video Compatibility H. Frequency V. Frequency Power Supply Power Consumption Specifications Single-chip 0.95" SXGA+ DLP™ LVDS (low-voltage differential signaling) technology 3300 ANSI Lumens (Max.) 2500:1 Typical (Full On/Full Off) - Page 49 Audio Noise Level Weight Dimensions (W x H x D) Environmental Regulatory Networking Protocol I/O Connectors 2 speakers, 2 watts RMS 37dB(A) Full-on mode, 31dB(A) Eco- mode 8.2 lbs (3.73 kgs) External 13 x 10.3 x 4.5 ± 0.04 inches (329.8 x 261.4 x 115.2 ±...
- Page 50 The lamp life specified for Dell's projectors refers to the typical time under non-stressful operating conditions for more than 50% of a sampling population to reduce to approximately 50% of the lamp's rated brightness level.
- Page 51 Example: Power ON Command (Send low byte firstly) --> 0xBE, 0xEF, 0x10, 0x05, 0x00, 0xC6, 0xFF, 0x11, 0x11, 0x01, 0x00, 0x01 • Control Commands List Go to support.dell.com to view the latest RS232 code. PIP combination sources Source Component S-Video...
-
Page 52: Compatibility Modes
Compatibility Modes Mode Resolution 640X350 640X350 640X400 640X480 640X480 640X480 640X480 720X400 720X400 SVGA 800X600 SVGA 800X600 SVGA 800X600 SVGA 800X600 SVGA 800X600 1024X768 1024X768 1024X768 1024X768 1024X768 SXGA 1280X1024 SXGA 1280X1024 SXGA 1280x1024 *SXGA+ 1400x1050 *UXGA 1600x1200 MAC LC13* 640X480 MAC II 13* 640X480... - Page 53 MAC G4 640X480 MAC G4 640X480 IMAC DV 640X480 IMAC DV 800X600 IMAC DV 1024X768 IMAC DV 1152X870 IMAC DV 1280X960 IMAC DV 1280X1024 * Compressed computer image. NOTE: UXGA is not supported in the DVI (M1-to-DVI). 68.03 97.09 68.49 91.1 Specifications...
-
Page 54: Contacting Dell
NOTE: If you do not have an active Internet connection, you can find contact information on your purchase invoice, packing slip, bill, or Dell product catalog. Dell provides several online and telephone-based support and service options. Availability varies by country and product, and some services may not be available in your area. -
Page 55: Appendix: Glossary
4:3 aspect ratio, which means that the width of the image is 4/3 times the height. Backlit (Backlight)—Refers to a remote control, or a projector control panel, that has buttons and controls that are illuminated. - Page 56 Keystone Correction— Device that will correct an image of the distortion (usually a wide-top narrow-bottom effect) of a projected image caused by improper projector to screen angle. Laser Pointer— A small pen or cigar sized pointer that contains a small battery powered laser, which can project a small, red (typically), high intensity beam of light that is immediately very visible on the screen.
- Page 57 Maximum Distance— The distance from a screen the projector can be to cast an image that is useable (bright enough) in a fully darkened room. Maximum Image Size— The largest image a projector can throw in a darkened room. This is usually limited by focal range of the optics.
- Page 58 Zoom Lens Ratio— Is the ratio between the smallest and largest image a lens can projector from a fixed distance. For example, a 1.4:1 zoom lens ratio means that a 10 foot image without zoom would be a 14 foot image with full zoom.
- Page 59 Adjusting the Projector Height lower the projector Elevator button 18 Elevator foot 18 Tilt adjustment wheel 18 Lowering the Projector Height Adjusting the Projector Zoom and Focus 19 Focus ring 19 Zoom tab 19 Changing the Lamp 46 Connecting the Projector...
- Page 60 S-video input connector 8 VGA input connector 8 VGA output connector 8 Video input connector 8 Contacting Dell 54 Control Panel 21 Dell Contacting 54 Main Unit 7 Control panel 7 Elevator button 7 Focus ring 7 Lens 7 Lens Cap 7...
- Page 61 Projection Distance 48 Projection Lens 48 Projection Screen Size 48 Regulatory 49 RS232 Protocol 51 Uniformity 48 V. Frequency 48 Video Compatibility 48 Weight 49 Support Contacting Dell 54 Telephone numbers 54 Troubleshooting 43 contact Dell 43 Self-diagnostic 46 Index...