
Related Manuals for Kenwood KID60S18


Summary of Contents for Kenwood KID60S18
- Page 1 Integrated Dishwasher KID60S18 installation / instructions manual (Aesthetic door not included.) Kenwood Integrated Diswasher KID60S18 Manual.indd 1 07/12/2018 12:17...
- Page 2 Kenwood Integrated Diswasher KID60S18 Manual.indd 2 07/12/2018 12:17...
-
Page 3: Table Of Contents
....................... 29 using the dishwasher ....................... 30 changing the programme ....................30 at the end of the programme ................... 30 switching the dishwasher off ..................31 unloading the dishwasher ....................31 Kenwood Integrated Diswasher KID60S18 Manual.indd 3 07/12/2018 12:17... - Page 4 ........................36 technical problems ......................36 general problems ......................37 disposal of the dishwasher ..................... 38 disposal of packing material ................... 38 energy label........................38 product fiche and specifications ..................39 Kenwood Integrated Diswasher KID60S18 Manual.indd 4 07/12/2018 12:17...
-
Page 5: Safety Warnings
• Never modify the plug provided with the appliance. • The mains plug must remain accessible to allow disconnection or an all pole switch must be incorporated in the fixed wiring in accordance with the wiring rules. Kenwood Integrated Diswasher KID60S18 Manual.indd 5 07/12/2018 12:17... - Page 6 • Product dimensions - 820 mm - 870 mm (H) x 596 mm (W) x 550 mm (D) • Aperture dimensions - 820 mm - 870 mm (H) x 600 mm (W) x 620 mm (D) • For supporting and fixing the appliance see the Installation section. Kenwood Integrated Diswasher KID60S18 Manual.indd 6 07/12/2018 12:17...
- Page 7 • This appliance is equipped with a mains cable having an equipment-earthing conductor and an earthing plug. • The plug must be plugged into an appropriate mains socket that is installed and earthed in accordance with local standards and requirements. Kenwood Integrated Diswasher KID60S18 Manual.indd 7 07/12/2018 12:17...
-
Page 8: Unpacking
If items are missing or damaged please contact Partmaster (UK only). Tel: 0344 800 3456 for assistance. * All images are for reference only; please refer to your individual unit for actual item. Kenwood Integrated Diswasher KID60S18 Manual.indd 8 07/12/2018 12:17... -
Page 9: Location
* All images are for reference only; please refer to your individual unit for actual item. Kenwood Integrated Diswasher KID60S18 Manual.indd 9 07/12/2018 12:17... - Page 10 Failure to attach the condensation strip could result in damage to the underside of your worktop! * All images are for reference only; please refer to your individual unit for actual item. Kenwood Integrated Diswasher KID60S18 Manual.indd 10 07/12/2018 12:17...
- Page 11 The unit must not stand on the mains cable. * All images are for reference only; please refer to your individual unit for actual item. Kenwood Integrated Diswasher KID60S18 Manual.indd 11 07/12/2018 12:17...
- Page 12 12. Tighten the screws that secure the handle so they are flush with, or beneath, the surface of aesthetic door. * All images are for reference only; please refer to your individual unit for actual item. Kenwood Integrated Diswasher KID60S18 Manual.indd 12 07/12/2018 12:17...
- Page 13 For Synthetic/Ceramic Worktops Tighten the screw into the side bracket to fix it to the synthetic/ ceramic worktop. * All images are for reference only; please refer to your individual unit for actual item. Kenwood Integrated Diswasher KID60S18 Manual.indd 13 07/12/2018 12:17...
- Page 14 A Y-adaptor is available from most DIY stores. • Do not bend or kink your drain hose. * All images are for reference only; please refer to your individual unit for actual item. Kenwood Integrated Diswasher KID60S18 Manual.indd 14 07/12/2018 12:17...
- Page 15 * All images are for reference only; please refer to your individual unit for actual item. Kenwood Integrated Diswasher KID60S18 Manual.indd 15 07/12/2018 12:17...
-
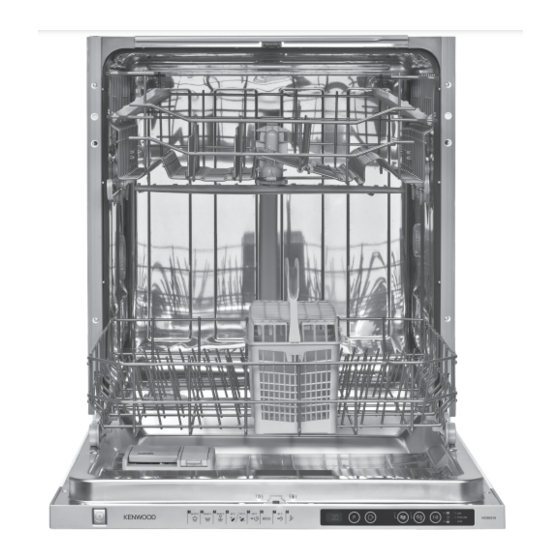
Page 16: Product Overview
* All images are for reference only; please refer to your individual unit for actual item. Kenwood Integrated Diswasher KID60S18 Manual.indd 16 07/12/2018 12:17... -
Page 17: Control Panel ﹠ Display Window
5 times when the program is completed. * All images are for reference only; please refer to your individual unit for actual item. Kenwood Integrated Diswasher KID60S18 Manual.indd 17 07/12/2018 12:17... -
Page 18: Before Operating
Therefore, please clean the residues from silver immediately after use. * All images are for reference only; please refer to your individual unit for actual item. Kenwood Integrated Diswasher KID60S18 Manual.indd 18 07/12/2018 12:17... -
Page 19: Adding Detergent
3. Slide the lid firmly so that it clicks into place. Slide to close * All images are for reference only; please refer to your individual unit for actual item. Kenwood Integrated Diswasher KID60S18 Manual.indd 19 07/12/2018 12:17... -
Page 20: Adding Rinse Aid
If you decide to use a detergent tablet, you may not need to add rinse aid into the rinse aid reservoir. * All images are for reference only; please refer to your individual unit for actual item. Kenwood Integrated Diswasher KID60S18 Manual.indd 20 07/12/2018 12:17... -
Page 21: Adjusting The Rinse Aid Setting
5. To save the setting press the Power button. rinse aid rinse aid rinse aid level indicator level dose No rinse aid released 1 dose is dispensed 2 doses are dispensed 3 doses are dispensed 4 doses are dispensed Kenwood Integrated Diswasher KID60S18 Manual.indd 21 07/12/2018 12:17... -
Page 22: Testing Your Water Hardness
Level 4 Medium lime content Level 5 Medium/High lime content Level 6 High lime content Now you have your water hardness result you can set your dishwashers salt consumption level to match. Kenwood Integrated Diswasher KID60S18 Manual.indd 22 07/12/2018 12:17... -
Page 23: Adjusting Salt Consumption
4. Press the P button to scroll through the levels. The level will change with each press. See the table above for details. 5. To save your setting switch the dishwasher off by pressing the POWER button. Kenwood Integrated Diswasher KID60S18 Manual.indd 23 07/12/2018 12:17... -
Page 24: Adding Salt
• Once refilled, the salt low warning indicator will cease to illuminate within a few days, depending on how quickly the salt dissolves. * All images are for reference only; please refer to your individual unit for actual item. Kenwood Integrated Diswasher KID60S18 Manual.indd 24 07/12/2018 12:17... -
Page 25: Loading The Dishwasher
Ash does not dissolve and can distribute in the dishwasher. Wax, sand, lubricating grease and paint can cause damage to the dishwasher. * All images are for reference only; please refer to your individual unit for actual item. Kenwood Integrated Diswasher KID60S18 Manual.indd 25 07/12/2018 12:17... -
Page 26: Upper Basket
For optimum loading of crockery in the upper basket, please refer to the below table and image. number item Cups Medium serving bowl Large serving bowl Glasses Saucers Small serving bowl * All images are for reference only; please refer to your individual unit for actual item. Kenwood Integrated Diswasher KID60S18 Manual.indd 26 07/12/2018 12:17... -
Page 27: Hinged Cup Rack
The spikes on the upper basket are used for holding plates and platters. They can be lowered to make more room for large items: fold down spikes * All images are for reference only; please refer to your individual unit for actual item. Kenwood Integrated Diswasher KID60S18 Manual.indd 27 07/12/2018 12:18... -
Page 28: Lower Basket
• To comply with Standards of Performance, all cutlery must be loaded according to the instructions in this manual. * All images are for reference only; please refer to your individual unit for actual item. Kenwood Integrated Diswasher KID60S18 Manual.indd 28 07/12/2018 12:18... -
Page 29: Wash Cycle Table
• Some wash programmes do not have a drying function, please refer to the Wash Cycle Table for more details. * All images are for reference only; please refer to your individual unit for actual item. Kenwood Integrated Diswasher KID60S18 Manual.indd 29 07/12/2018 12:18... -
Page 30: Using The Dishwasher
* All images are for reference only; please refer to your individual unit for actual item. Kenwood Integrated Diswasher KID60S18 Manual.indd 30 07/12/2018 12:18... -
Page 31: Switching The Dishwasher Off
5. Close the door. The unit will start the programme at the assigned time automatically. Each press of this button increases the delay start time in 1 hour increments. * All images are for reference only; please refer to your individual unit for actual item. Kenwood Integrated Diswasher KID60S18 Manual.indd 31 07/12/2018 12:18... -
Page 32: Half Load
• Never use abrasive cleaners or scouring pads on the outer surfaces because they may scratch the finish. Some paper towels may also scratch or leave marks on the surface. * All images are for reference only; please refer to your individual unit for actual item. Kenwood Integrated Diswasher KID60S18 Manual.indd 32 07/12/2018 12:18... -
Page 33: Filtering System
6. Gently turn the coarse filter in clockwise direction until the arrows align and it clicks into place. * All images are for reference only; please refer to your individual unit for actual item. Kenwood Integrated Diswasher KID60S18 Manual.indd 33 07/12/2018 12:18... -
Page 34: Spray Arms
3. The lower spray arm can be removed by pulling it upwards, while the upper spray arm nut can be removed by turning the nut anticlockwise. 4. Be sure that the nut is perfectly tightened when refitting the upper spray arm. Kenwood Integrated Diswasher KID60S18 Manual.indd 34 07/12/2018 12:18... -
Page 35: Frost Precaution
4. Ensure the washing compartment of the dishwasher is clean. Should you encounter difficulties to do the above steps, please ask a service technician for assistance. * Images are for reference only. Please refer to your individual model for details. Kenwood Integrated Diswasher KID60S18 Manual.indd 35 07/12/2018 12:18... -
Page 36: Hints And Tips
• Disconnect from the mains. working properly. has operated. • Disconnect the water inlet. • Call a qualified technician. * Images are for reference only. Please refer to your individual model for details. Kenwood Integrated Diswasher KID60S18 Manual.indd 36 07/12/2018 12:18... -
Page 37: General Problems
Forgot to pre-rinse or remove the Pre-rinse or remove the stains stains with napkin prior washing. with napkin prior washing. * All images are for reference only; please refer to your individual unit for actual item. Kenwood Integrated Diswasher KID60S18 Manual.indd 37 07/12/2018 12:18... -
Page 38: Disposal Of The Dishwasher
Please dispose of the plastic wrappings and bags safely and keep out of the reach of babies and young children. energy label * All images are for reference only; please refer to your individual unit for actual item. Kenwood Integrated Diswasher KID60S18 Manual.indd 38 07/12/2018 12:18... -
Page 39: Product Fiche And Specifications
The above values have been measured in accordance with standards under specified operating conditions. Results may vary greatly according to quantity and pollution of the dishes, water hardness, amount of detergent, etc.detergent, etc.amount of detergent, etc. Kenwood Integrated Diswasher KID60S18 Manual.indd 39 07/12/2018 12:18... - Page 40 DSG Retail Ltd. (co. no. 504877) 1 Portal Way, London, W3 6RS, UK Manufactured for DSG Retail Limited under Licence from Fisher ﹠ Paykel Appliances Italy SpA. DSG Retail Limited is responsible for after sales service. IB-KID60S18-1812107V2 Kenwood Integrated Diswasher KID60S18 Manual.indd 40 07/12/2018 12:18...