Table of Contents
Advertisement
Advertisement
Chapters
Table of Contents

Related Manuals for Kenwood DMX1025BT


Summary of Contents for Kenwood DMX1025BT
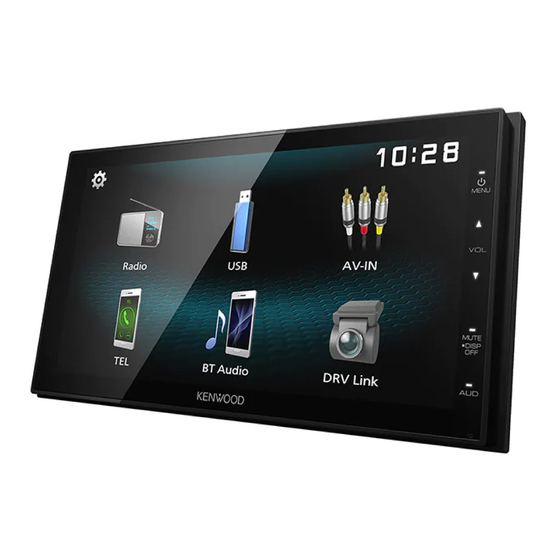
- Page 1 DMX1025BT MONITOR WITH RECEIVER Quick Start Guide 接收器显示器 快速入门指南 • For detailed operations and information, refer to the INSTRUCTION MANUAL on the following website: • 有关详细操作和信息, 请参阅以下网站上的使用使用说明书 : <https://www.kenwood.com/cs/ce/> © 2019 JVC KENWOOD Corporation B5K-0673-12 (M)
-
Page 2: Table Of Contents
Preparation ......................... 6 Playback operations ..................... 6 • When you purchase optional accessories, check iPod/iPhone ................7 with your KENWOOD dealer to make sure that Preparation ......................... 7 they work with your model and in your area. Playback operations ..................... 7 •... -
Page 3: Getting Started
Getting Started [Camera In] Turn the ignition key of your car to ACC. Set the camera to be displayed when you shift The unit is turned on. the gear to the reverse (R) position. Press the <8MENU> button. Rear Camera (Default): Select this when the rear Touch [ view camera is connected. -
Page 4: Basics
• Mutes/restores the sound. • When android device with “Mirroring OB for • Pressing for 1 second turns the screen off. KENWOOD” application installed is connected. When the screen is off, touch the display to turn 4 [AV-IN] on the screen. -
Page 5: Radio
Radio Radio Radio Basic Operation Radio Setup Press the <8MENU> button. Touch [ Touch [Radio]. Set each item as follows. Ñ Source control screen [Auto Store] Automatically searches and stores the 6 stations with the strongest signals for the selected band. 1 Displays the information of the current station: PS name, Frequency, PTY Genre, Indicator Items “Auto Store”... -
Page 6: Usb
Ñ For Video playback Preparation When the operation buttons are not displayed Ñ Connecting a USB device on the screen, touch the display. Remove the cap of the USB terminal. Connect the USB device with the USB cable. The unit reads the device and playback starts. ] : You can adjust image quality in video Ñ... -
Page 7: Ipod/Iphone
iPod/iPhone iPod/iPhone Preparation Playback operations Ñ Connecting iPod/iPhone Ñ Control the music you are listening to on the source control screen. • For Lightning connector models: Use USB Audio cable for iPod/iPhone—KCA-iP103 (optional accessory). • For details about connecting iPod/iPhone, see page 14 . -
Page 8: External Components
External Components External Components Using external audio/video players Rear view camera To use a rear view camera, the REVERSE lead ✎ NOTE connection is required. For connecting a rear view • To select the AV-IN source, it is necessary to set “AV- camera. -
Page 9: Bluetooth
Touch [TEL]. paired to this unit. See the table below for each operation method. Turn on the Bluetooth function on your smartphone/cell-phone. Search the unit (“DMX1025BT”) from your smartphone/cell-phone. If a PIN code is required, enter the PIN code (“0000”). •... -
Page 10: Controlling Audio
Controlling Audio Bluetooth Playing Bluetooth Audio Device You can adjust various settings such as audio balance or subwoofer level. Press the <8MENU> button. Press the <AUD> button. Touch [BT Audio]. See the below for each operation method. Ñ Source control screen Controlling General Audio Press the <AUD>... -
Page 11: Installation
Installation Installation Before Installation • Connect the speaker wires correctly to the terminals to which they correspond. The unit may be Before installation of this unit, please note the damaged or fail to work if you share the ¤ wires or following precautions. -
Page 12: Installing The Unit
Installation Ñ Supplied accessories for installation Installing the unit (2 m) (3 m) Ñ Japanese cars (North America, South America sales area only) 5 or 6 Car Bracket (M5 × 8 mm) (M5 × 6 mm) 5 or 6 Ñ Microphone unit Ñ... - Page 13 ST REMOTE Gray/Red INPUT 2 ST REMOTE Connect to vehicle’s steering remote harness. Contact your KENWOOD dealer for details. Accessory 2: Light Green (Parking sensor wire) Bluetooth Microphone Accessory 1: Extension cable For best safety, be sure to Connect to the vehicle’s connect the parking sensor.
- Page 14 Installation Ñ Connecting an iPod/iPhone/Android Android smartphone Micro USB to USB cable M4x6 REAR OUT FRONT OUT AV IN 1 3 5 7 iPod/iPhone 2 4 6 8 Lightning connector 1 3 5 7 2 4 6 8 KCA-iP103 (0.8m) CAM IN VIDEO OUT VIDEO IN Accessory 3 Accessory 4...
-
Page 15: About This Unit
About this Unit About this Unit More information Note for specifications Ñ Usable USB device Ñ Bluetooth section This unit can play MPEG1/ MPEG2/ MPEG4/ H.264/ Frequency MKV/ MP3/WMA/ AAC/ WAV/ FLAC/ OGG files stored : 2.402 – 2.480 GHz in a USB mass storage class device. - Page 16 属工具) 放入或遗留在本机内。 HOME ( 主页) 画面................. 18 信号源控制画面..................18 ・. 当 长时间驾驶时, 不要一直观看或一直盯着设备 收音机 ..................19 显示器看。 收音机的基本操作.................19 ・. 如 果在安装过程中出现问题, 请咨询.KENWOOD. 预设电台.....................19 经销商。 无线电设置....................19 USB ....................20 Ñ 本机的使用注意事项 准备......................20 ・. 在 购买选购附件时, 请与.KENWOOD.经销商...
-
Page 17: 时钟设置
入门 [Camera In] 将汽车的点火钥匙转至ACC。 本机电源接通。 设置在换挡至倒车位 (R) 时要显示的摄像机。 按< 8 MENU>按钮。 Rear Camera (初始值) : 连接了后视摄像机时选 择此项。 触按 [ ]。 DRV: 可选用途。 * [System Reset] 触按[System Reset]后触按[YES], 从而将所有设 置设为初始默认设置。 [Bluetooth] 显示蓝牙设置画面。. [Screen] [Dimmer] 触按相应的键并设置值。 选择调光器模式。 “High” (初始值) /.“Mid”./.“Low” [Demo] 选择演示模式。 初始值为 “ON” 。 *1.. -
Page 18: 面板上按钮的功能
播放.iPod/iPhone。 (第21页) 连接iPod/iPhone时。 ・. 调 节音量。 按住<R>时, 音量会一直提高至 20。 [Mirroring] 4 MUTE ( 静音) / DISP OFF ( 显示关闭) 显示镜像画面。 ・. 静 音/恢复声音。 当连接安装了 “Mirroring.OB.for.KENWOOD” 应 用程序的安卓装置时。 ・. 按 住.1.秒钟关闭画面。. 屏幕关闭时, 触摸显示屏以开启屏幕。. 4 [AV-IN] 切换至.AV-IN.输入端子上所连接的外部组件。. 5 AUD (第22页) ・. 显 示音频画面。 *. (第24页)... -
Page 19: 收音机
收音机 收音机 收音机的基本操作 无线电设置 按<8MENU>按钮。 触按 [ ]。 触按[Radio]。 设定下列各项目。 Ñ 信号源控制画面 [Auto Store] 自动搜索并存储具有所选波段最强信号的6个电 1 显示当前电台信息: 台。 PS名称、 频率、 PTY类型、 指示灯项目 出现 “Auto.Store” 。 2 [FM]: 切换FM波段。.. [Local Seek] “FM1” 、 “FM2” 、 “FM3” 仅调谐到具有足够信号强度的电台。 (LOC指示灯 [AM]: 切换AM波段。.. 亮起。 ) “AM1”... -
Page 20: Usb
Ñ 用于视频播放 准备 画面上未显示操作按钮时, 请触按显示屏。 Ñ 连接USB存储装置 取下USB端子的罩帽。 使用USB导线连接USB装置。 本机读取装置并开始播放。 ]: 您可以在视频画面中调整图像质量。 [INITIALIZE]: 要清除调整。 Ñ 要断开连接USB装置: 7 [U]、 [H]: 播放或暂停。 按<8MENU>按钮。 [E]、 [F]: 向后/向前搜索内容。.. 触按除 [USB]以外的信号源。 触按并按住进行快进或快退。 [1]: 搜索文件。 (第20页) 取下 USB 装置。 [NORMAL] / [16:9] / [4:3]: 选择画面模式。 Ñ 可使用的USB装置 Ñ... -
Page 21: Ipod/Iphone
iPod/iPhone iPod/iPhone 准备 播放操作 Ñ 连接 iPod/iPhone Ñ 在信号源控制画面上控制您正在收听的音 乐。 ・. 对 于Lightning (闪电) 连接器型号:.使用USB音 频导线连接iPod/iPhone—KCA-iP103 (选购附 件) 。 ・. 有 关连接iPod/iPhone的详细信息, 请参阅第 28页。 取下USB端子的罩帽。 连接 iPod/iPhone。 本机读取装置并开始播放。 Ñ 要断开iPod/iPhone的连接 1 封面 (如果曲目包含封面, 则显示) 按<8MENU>按钮。 2 显示当前文件的信息。 触按除[iPod]以外的信号源。 3 播放时间/文件编号 取下... -
Page 22: 外部组件
外部组件 外部组件 使用外部音频/视频播放器 后视摄像机 要使用后视摄像机, 需要进行反向引线连接。 用于 ✎ 备注 连接后视摄像机。 (第27页) ・. 要 选择AV-IN信号源, 需要将 “AV-IN” 设置为 “Rear.AV.In” 。 (第17页) ✎ 备注 ・. 在 “Camera.In” 设置为 “Rear.Camera” 时可用。 Ñ 开始播放 (第17页) 将外部组件连接至 AV-IN 输入端子。 (第27 Ñ 显示后视摄像机的图像 页) 换挡至倒车位 (R) 时显示后视画面。 按<... -
Page 23: 将您的智能手机注册到本机
蓝牙 蓝牙 将您的智能手机注册到本机 拨打电话 与本机配对时, 您可以使用蓝牙智能手机。 按<8MENU>按钮。 开启您的智能手机/手机上的蓝牙功能。 触按 [TEL]。 在您的智能手机/手机上搜索本机 关于各操作方法, 请参阅下表。 ( “DMX1025BT” ) 。 如果需要PIN码, 请输入PIN码 ( “0000” ) 。 . 。 ・. 连 接蓝牙智能手机时出现. Ñ 断开装置连接 ・. 开 启您的智能手机/手机上的蓝牙功能。 ・. 关 闭点火开关。 接到电话 输入电话号码拨打电话 触按[Û]。 1). 使用数字键输入电话号码。... -
Page 24: 控制音频
控制音频 蓝牙 播放蓝牙音频装置 可以调节音频平衡或重低音扬声器电平等各项设 置。 按<8MENU>按钮。 按<AUD>按钮。 触按[BT Audio]。 关于各操作方法, 请参阅以下内容。 Ñ 信号源控制画面 控制一般音频 按<AUD>按钮。 1 显示当前文件的信息。 触按 [Fader / Balance]。 2 播放时间/文件编号 播放时间条: 确认当前的播放位置。 设定下列各项目。 .]: 选择随机播放模式。 .]: 选择重复播放模式。. [U]、 [H]: 播放或暂停。 [E]、 [F]: 向后/向前搜索内容。.. 触按并按住进行快进或快退。 [1]: 搜索文件。 (第24页) ✎... -
Page 25: 安装之前
安装 安装 安装之前 ・. 在 向汽车安装本机时, 请不要用力按压面板表面。 否则可能导致划伤、 损坏或发生故障。 安装本机之前, 请注意下列事项。 ・. 如 果有金属物体靠近蓝牙天线, 接收可能发生中 #警告 断。 ・. 如 果将点火导线 (红色) 和蓄电池导线 (黄色) 与 汽车底盘 (接地) 连接, 将造成短路, 可能导致火 灾。 始终将这些导线通过保险丝盒与电源连接。 ・. 不 得拆除点火导线 (红色) 和蓄电池导线 (黄色) 蓝牙天线装置 中的保险丝。 电源必须通过保险丝与导线连接。 #小心... -
Page 26: 安装本机
安装 Ñ 用于安装的随机附件 安装本机 (2.m) (3.m) Ñ 日本车 (仅限北美、 南美销售区) 5或者6 汽车托架 5.或者.6 (M5.×.8.mm) x6 (M5.×.6.mm) x6 Ñ 麦克风装置 1). 检查麦克风 (附件2) 的安装位置。 Ñ 安装步骤 2). 清洁安装表面。 3). 揭下麦克风 (附件2) 的保护纸,然后将麦克风粘 1). 为了防止发生短路,请拔出点火钥匙,切断蓄电 贴在如下所示的位置。 池的¤.端子连接。 4). 连接麦克风导线至本机,使用胶带等在数个位置 2). 正确连接各装置的输入和输出连接线。 固定。 3). - Page 27 Ñ 将导线与端子连接 棕色 (仪表板摄像机接口) 鲜绿色/红色 ST REMOTE 紫色/红色 连接仪表板摄像机 。 INPUT 1 ST REMOTE 灰色/红色 INPUT 2 ST REMOTE 与汽车的方向盘遥控导线束连接。 有关详细内容, 请与KENWOOD经销商联 系。 附件2:.. 淡绿色 (停车传感器导线) 蓝牙麦克风 附件1: 延长导线 为了保证安全, 请务必连接停车 连接汽车的停车制动器检测 传感器。 开关导线束。 USB端子 (0.8.m) 5V = 1.0A USB装置...
- Page 28 安装 Ñ 连接iPod/iPhone/Android 安卓智能手机 Micro.USB至USB连接线 [2] M4x6 REAR OUT FRONT OUT AV IN iPod/iPhone [2] 1 3 5 7 2 4 6 8 Lightning (闪电) 连接器 1 3 5 7 2 4 6 8 KCA-iP103 (0.8m) CAM IN VIDEO OUT VIDEO IN 附件3 附件4 (0.8.m)...
-
Page 29: 关于本机
关于本机 关于本机 更多信息 规格注释 Ñ 可使用的USB装置 Ñ 蓝牙部分 本机可以播放存储在USB大容量存储类装置中的 频率 MPEG1/ MPEG2/ MPEG4/ H.264/ MKV/ MP3/WMA/ : 2.402.—.2.480.GHz AAC/ WAV/ FLAC/ OGG文件。 输出功率 ・. 文 件系统: FAT16/.FAT32 : +8.dBm (AVE) 、 功率等级1 备注 ✎ Ñ 总体 ・. 当 USB装置连接到本机时, 可以通过USB导线为 扬声器阻抗... - Page 30 Bluetooth SIG, Inc. and any other materials provided with the distribution. use of such marks by JVC KENWOOD Corporation is Neither the name of the Xiph.org Foundation nor the under license. Other trademarks and trade names are names of its contributors may be used to endorse or those of their respective owners.
- Page 31 English .)שמשתמשות במערכת איסוף אשפה מופרדת Hereby, JVC KENWOOD declares that the radio equipment DMX1025BT is in ) עליוX לא ניתן להשליך מוצרים וסוללות עם הסימון (פח אשפה עם compliance with Directive 2014/53/EU. The full text of the EU declaration of conformity is available at the following internet address: .כאשפה...