Table of Contents
Advertisement
Quick Links
As an ENERGY STAR
of America has determined that this product or product model
meets the ENERGY STAR
Please read these instructions carefully before attempting to connect, operate, or adjust this product.
Please save this manual.
Spanish Quick Use Guide is included.
(Guía para rápida consulta en español está incluida.)
TV/CABLE MODE SELECTION
When shipped from the factory, the TV/CABLE menu option is set to the "CABLE"
(Cable Television) mode. If not using Cable TV, set this menu option to the "TV" position.
For assistance, please call : 1-800-211-PANA(7262) or send e-mail to : consumerproducts@panasonic.com
2D81601A Cover
Operating Instructions
Model No.
*Ability to play back may depend on recording conditions.
®
Partner, Matsushita Electric Corporation
®
guidelines for energy efficiency.
1
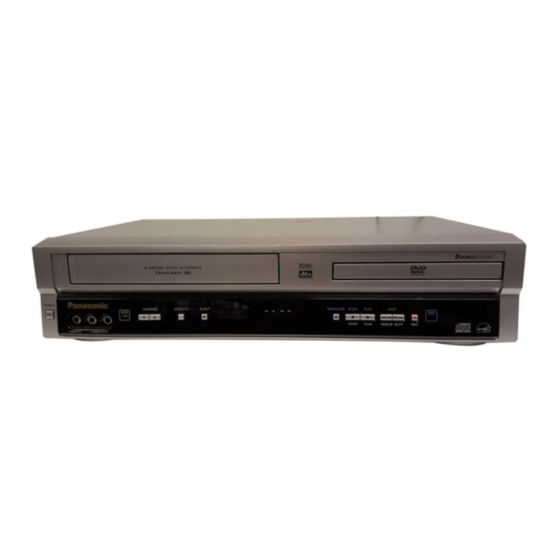
DVD/VCR DECK
PV-D744S-A
29/7/04, 15:38
Advertisement
Table of Contents

Related Manuals for Panasonic PV-D744S-A


Summary of Contents for Panasonic PV-D744S-A
- Page 1 When shipped from the factory, the TV/CABLE menu option is set to the “CABLE” (Cable Television) mode. If not using Cable TV, set this menu option to the “TV” position. For assistance, please call : 1-800-211-PANA(7262) or send e-mail to : consumerproducts@panasonic.com 2D81601A Cover...
- Page 2 The lightning flash with arrowhead symbol, within an equilateral triangle is CAUTION intended to alert the user to the presence of uninsulated dangerous voltage within RISK OF ELECTRIC SHOCK DO NOT OPEN the product's enclosure that may be of sufficient magnitude to constitute a risk of electric shock to persons.
-
Page 3: Important Safeguards
IMPORTANT SAFEGUARDS 1. READ INSTRUCTIONS All the safety and operating instructions should be read before the unit is operated. 2. RETAIN INSTRUCTIONS The safety and operating instructions should be retained for future reference. 3. HEED WARNINGS All warnings on the unit and in the operating instructions should be adhered to. 4. - Page 4 IMPORTANT SAFEGUARDS 13. LIGHTNING To protect your unit from a lightning storm, or when it is left unattended and unused for long periods of time, unplug it from the wall outlet and disconnect the antenna or cable system. This will prevent damage to the unit due to lightning and power line surges.
- Page 5 IMPORTANT SAFEGUARDS 25. LASER BEAM Do not look into the opening of the disc tray or ventilation opening of the product to see the source of the laser beam. It may cause sight damage. 26. DISC Do not use a cracked, deformed, or repaired disc. These discs are easily broken and may cause serious personal injury and product malfunction.
-
Page 6: Disc Information
Disc information Discs that can be played Discs that can be played Disc Handling Handling precautions Disc Disc formats supported by this • Do not attach sticker to discs. (Do not use Disc type Logo unit discs with exposed adhesive from tape or left over peeled-off stickers.) •... -
Page 7: Table Of Contents
Contents Before using your unit Disc playback operation IMPORTANT SAFEGUARDS ......3 Setting setup language ........35 Disc information ..........6 Progressive scan mode ........35 Contents ............7 Playback procedure ........36 Parts and functions .......... 8 Special playback ..........37 Display ............. -
Page 8: Parts And Functions
Parts and functions Front Discs that can be played VCR/DVD mode selector button STOP button Cassette Loading Slot OPEN/CLOSE button PLAY button Disc tray EJECT button POWER CHANNEL VCR/DVD EJECT OPEN/CLOSE STOP PLAY SKIP STOP PLAY VIDEO IN 2 L– AUDIO IN 2 – R Display window DVD indicator CHANNEL... -
Page 9: Display
Display Display window Display Description When this unit and the TV are only connected by a coaxial cable, pressing the TV/VCR button on the remote control makes this display appear. Playback (lights) / Auto resume (flashes) Still picture DVD disc is inserted. CD is inserted. -
Page 10: Remote Control
SPEED TV control buttons See pages 28, 30, 34 Notes: PROG TIMER Only Panasonic TVs can be See pages 31, 32 operated using this remote control. There may be some TV models that cannot JUMP be operated with this remote control. -
Page 11: Power Source
Inserting Batteries Open the battery compartment Install two “AAA” batteries paying Replace the compartment attention to the polarity diagram in cover. cover. the battery compartment. Battery precautions The precautions below should be followed when using batteries in this device: 1. Use only the size and type of batteries specified. 2. -
Page 12: Basic Connections
Basic connections If you are using an antenna system, follow these instructions. If you are a Cable TV subscriber, skip ahead to page 14 for the proper connections. ANTENNA TO DVD/VCR CONNECTION The DVD/VCR must be connected “between” the antenna and the TV. First, disconnect the antenna from the TV and connect it to the DVD/VCR. - Page 13 DVD/VCR TO TV CONNECTION After you have connected the antenna to the DVD/VCR, you must connect the DVD/VCR to the TV. Below are 3 common methods of connecting your DVD/VCR to a TV. Find the type of TV you are using and follow the connection diagram.
-
Page 14: Cable Tv Connections
Cable TV connections Many cable companies offer services permitting reception of extra channels including pay or subscription channels. This DVD/VCR has an extended tuning range and can be tuned to most cable channels without using a cable company supplied converter box, except for those channels which are intentionally scrambled. If you subscribe to a special channel which is scrambled, you must have a descrambler box for proper reception. - Page 15 IMPORTANT: Make sure the TV/CABLE menu option is set to the “CABLE” mode. This DVD/VCR cannot receive scrambled programs since it does not contain a descrambler. In order to receive scrambled programs, your existing descrambler must be used. Descrambler boxes are available from cable companies. Consult your local cable company for more information concerning connection to their descrambler equipment.
-
Page 16: Playback Connections
Playback connections The exact arrangement you use to interconnect various video and audio components to the DVD/VCR is dependent on the model and features of each component. Check the Owner's Manual provided with each component for the location of video and audio inputs and outputs. Connect to a TV with Audio/Video Output You can enjoy playback by connecting the unit to a TV. - Page 17 Connect to a Stereo Amplifier with Audio Output You can enjoy high quality audio by connecting the audio output to your amplifier. Connect the AUDIO OUT jacks to any line-level inputs (such as AUX, DVD, CD, etc.) of an audio amplifier. DVD/VCR Stereo Amplifier To Audio (L) Input...
-
Page 18: Auto Clock Setting
Auto clock setting The Auto Clock feature enables the automatic clock setting and updating, and also to set the Time Zone and Daylight Saving Time by receiving XDS (Extended Data Service) information carried on the channel signal. Preparation: You must set the antenna connection before the AC cord plug is inserted into the AC outlet. - Page 19 Daylight Saving Time setting You can set the Daylight Saving Time “ON” or “OFF”. Preparation: • Turn ON the TV and set to the video input mode. • Press VCR/DVD to select the VCR mode. (The VCR indicator will light.) Repeat the step 1 on page 18 and SYSTEM SETUP press SET + or –...
-
Page 20: Manual Clock Setting
Manual clock setting You must set the date and time for Preparation: timer recordings and Daylight • Turn ON the TV and set to the video input mode. Saving Time if the Auto Clock • Press VCR/DVD to select the VCR mode. (The VCR indicator process did not set them correctly. -
Page 21: Setting The Video Channel
Setting the video channel / Setting the language When a TV is connected with the 75 ohm coaxial cable only. Setting the video channel Press and hold 3 or 4 on the remote To view playback of a recorded tape or control for 3 seconds in the standby DVD disc, or to watch a program selected mode to select CH 3 or 4. -
Page 22: Tuner Setting
Tuner setting This DVD/VCR is equipped with a channel memory feature which allows channels to skip up or down to the next channel set into memory, skipping over unwanted channels. Before selecting channels, they must be programmed into the DVD/VCR’s memory. In addition to normal VHF and UHF channels, this DVD/ VCR can receive up to 113 Cable TV channels. -
Page 23: To Add/Delete Channels
To ADD/DELETE channels / Weak signal display Preparation: • Turn ON the TV and set to the video input mode. • Press VCR/DVD to select the VCR mode. (The VCR indicator will light.) To ADD/DELETE channels You can add the channels you want or delete the channels you do not want manually. -
Page 24: Loading And Unloading A Cassette Tape
Loading and Unloading a cassette tape Use only video cassette tapes marked Loading Push the center of the tape until it is automatically Insert the cassette tape with its labeled side facing up inserted. and the erase prevention tab positioned at your left. An inverted cassette tape cannot be inserted. -
Page 25: Cassette Tape Playback
Cassette tape playback Preparation: • Turn ON the TV and set to the video input mode. • Press VCR/DVD to select the VCR mode. (The VCR indicator will light.) • Load a prerecorded tape (When loading a cassette tape without the erase prevention tab, playback will start automatically). -
Page 26: Special Playback
Special playback Picture Search Repeat playback Reverse picture search function The entire video tape will be played until its end. The Press REW x 1 or x 2 during the playback. tape will then automatically rewind to the beginning and Forward picture search function the playback will be repeated. -
Page 27: Zero Search Function
ZERO SEARCH function / Video index search system Preparation: • Turn ON the TV and set it to the video input mode. • Press VCR/DVD to select the VCR mode. (The VCR indicator will light.) ZERO SEARCH function This function makes tape-rewinding stop at the counter 00:00:00 position automatically. -
Page 28: Recording A Tv Program
Recording a TV program Recording and viewing the same Preparation: TV program. • Turn ON the TV and set to the video input mode. • Press VCR/DVD to select the VCR mode. (The VCR indicator will light.) Load a cassette tape with the erase prevention tab intact. - Page 29 To stop recording Press STOP to stop recording. “ ” will appear on screen for about 4 seconds. To stop recording temporarily Press PAUSE/STILL to avoid recording unwanted material. “ ” will appear on screen for about 4 seconds. Press again to continue the recording. NOTES: •...
-
Page 30: One-Touch Timer Recording (Otr)
One-touch Timer Recording (OTR) The One-touch Timer Recording Preparation: feature provides a simple and • Turn ON the TV and set to the video input mode. convenient way to make a timed • Press VCR/DVD to select the VCR mode. (The VCR indicator recording. -
Page 31: Timer Recording
Timer recording Timer recording can be programmed Preparation: on-screen with the remote control. The • Press VCR/DVD to select the VCR mode. built-in timer allows automatic Load a cassette tape with the erase prevention tab intact. Press the DISPLAY button to verify that the time and date are •... - Page 32 Timer recording (continued) Weekly (e.g. WKL-TU: each Tuesday) Confirmation/Cancellation of the or daily (e.g. MO-SA: Monday to Sat- Timer recording urday) Timer recording If the Timer has been activated, press and hold Follow the procedure of timer recording on the previous PROG TIMER for more than 1 second to deactivate page.
-
Page 33: Stereo Recording And Playback
Stereo recording and playback / Second Audio Program (SAP) Stereo recording and playback The VHS Hi-Fi audio system permits high fidelity recording of MTS STEREO TV broadcasts. When a MTS STEREO broadcast is received, the word STEREO will appear on the screen and the program STEREO can be viewed or recorded in stereo. -
Page 34: Duplicating A Video Tape
Duplicating a video tape If you connect the VCR to another VCR or camcorder, you can duplicate a previously recorded tape. Make all connections before turning on the power. Load a blank cassette tape with the erase preven- Press REC/OTR on the recording VCR, then press tion tab intact into the recording VCR. -
Page 35: Setting Setup Language
Setting setup language/Progressive scan mode Preparation: • Turn ON the TV and set to the No Disc video input mode. • Press VCR/DVD to select the DVD mode. (The DVD indicator will light.) “No Disc” will appear on the screen. (If a DVD disc has already loaded, the playback will start automatically.) Setting setup language... -
Page 36: Playback Procedure
Playback procedure Preparation: • Turn ON the TV and set to the video input mode. • Press VCR/DVD to select the DVD mode. (The DVD indicator will light.) Press OPEN/CLOSE. The disc tray will open. Place a disc onto the tray. Hold the disc, position it with the printed label side up, align it with the guides, and place it in its... -
Page 37: Special Playback
Special playback Preparation: Note: There may be a slight delay between pressing the button and the • Turn ON the TV and set to the video input mode. function activation. • Press VCR/DVD to select the DVD mode. (The DVD indicator will light.) Fast Forward Playback Press FF... -
Page 38: Zooming
Zooming/Locating desired scene Preparation: • Turn ON the TV and set to the video input mode. • Press VCR/DVD to select the DVD mode. (The DVD indicator will light.) Zooming This unit will allow you to zoom in on the frame image. You can then make selections by switching the position of the frame. -
Page 39: Marking Desired Scenes
Marking desired scenes The unit stores the points that you Preparation: want to watch again up to 3 points. • Turn ON the TV and set to the video input mode. You can resume playback from • Press VCR/DVD to select the DVD mode. (The DVD indicator each scene. -
Page 40: Repeat Playback
Repeat playback Preparation: • Turn ON the TV and set to the video input mode. • Press VCR/DVD to select the DVD mode. (The DVD indicator will light.) Title, Chapter, Track Playback Press PLAY MODE during playback or stop mode. Repeat Play Mode /Enter/Play Mode... -
Page 41: Program Playback/Random Playback (Cd)
Program playback/Random playback (CD) Preparation: Turn ON the TV and set to the video input mode. • • Press VCR/DVD to select the DVD mode. (The DVD indicator will light.) Program playback You can arrange the order of tracks on the disc. Press PLAY MODE in the stop mode. -
Page 42: Changing Soundtrack Language
Changing soundtrack language / Subtitles / Karaoke playback Preparation: Turn ON the TV and set to the video input mode. • • Press VCR/DVD to select the DVD mode. (The DVD indicator will light.) Changing soundtrack language You can select the language when you play a multilingual disc. Press AUDIO during playback. -
Page 43: Changing Angles
Changing angles / Title selection / DVD menu Preparation: • Turn ON the TV and set to the video input mode. • Press VCR/DVD to select the DVD mode. (The DVD indicator will light.) Changing Angles When playing back a disc recorded with multi-angle facility, you can change the angle that you are viewing the scene from. -
Page 44: Mp3/Jpeg Playback
MP3/JPEG playback This unit can play back MP3/JPEG format CD-R Preparation: or CD-RW recorded for personal use on a PC, etc. Turn ON the TV and set it to the video input mode. • Some discs may not play back due to the Press VCR/DVD to select the DVD mode. - Page 45 Preparation: Turn ON the TV and set it to the video input mode. • Press VCR/DVD to select the DVD mode. (The DVD indicator will light.) • JPEG playback Repeat the steps 1~3 on page 44. Press or Number -/36 CD-R Collection keys to select the desired JPEG file.
- Page 46 MP3/JPEG playback (continued) Preparation: • Turn ON the TV and set it to the video input mode. • Press VCR/DVD to select the DVD mode. (The DVD indicator will light.) Setting the JPEG Slide-show You can continuously play back all JPEG files automatically as a slide-show.
-
Page 47: Parental Control
Parental control Some discs are specified not suitable for Preparation: children. Such discs can be prevented Turn ON the TV and set to the video input mode. • from play back with the unit. Press VCR/DVD to select the DVD mode. (The DVD indicator will light.) •... -
Page 48: Temporary Disabling Of Rating Level By Dvd Disc
Temporary disabling of rating level by DVD disc Depending on the DVD disc, the Preparation: disc may try to temporarily cancel • Turn ON the TV and set to the video input mode. the rating level that you have set. Press VCR/DVD to select the DVD mode. -
Page 49: Setting Menu Language
Setting menu language You can select the language of the Preparation: disc menu messages of DVDs. • Turn ON the TV and set to the video input mode. • Press VCR/DVD to select the DVD mode. (The DVD indicator will light.) Press SETUP in the stop mode. -
Page 50: Setting Subtitle Language
Setting subtitle language The same subtitle language can Preparation: always be selected even if you replace • Turn ON the TV and set to the video input mode. the disc or turn the power off. • Press VCR/DVD to select the DVD mode. (The DVD indicator will light.) Press SETUP in the stop mode. -
Page 51: Setting Audio Soundtrack Language
Setting audio soundtrack language The same audio soundtrack language Preparation: can always be selected by your unit • Turn ON the TV and set to the video input mode. even if you replace the disc or turn • Press VCR/DVD to select the DVD mode. (The DVD indicator the power off. -
Page 52: Setting The Aspect Ratio Of Tv Screen
Setting the aspect ratio of TV screen You can select the aspect ratio for Preparation: your TV. • Turn ON the TV and set to the video input mode. • Press VCR/DVD to select the DVD mode. (The DVD indicator will light.) Press SETUP in the stop mode. -
Page 53: Setting On Screen Display
Setting on screen display/Status display of disc Preparation: • Turn ON the TV and set to the video input mode. • Press VCR/DVD to select the DVD mode. (The DVD indicator will light.) Setting on screen display On screen display can be switched on or off when you press the DISPLAY button. -
Page 54: Dynamic Range Control
Dynamic Range Control Preparation: DRC (Dynamic Range Control) ena- • Turn ON the TV and set to the video input mode. bles you to control the dynamic range • Press VCR/DVD to select the DVD mode. (The DVD so as to achieve a suitable sound for indicator will light.) your equipment. -
Page 55: Language Code List
Language code list Enter the appropriate code number for the initial settings “Audio”, “Subtitle” and/or “Menu” (see pages 49-51). Language Name Code Language Name Code Language Name Code Language Name Code Abkhazian 1112 Fiji 1620 Lingala 2224 Singhalese 2919 Afar 1111 Finnish 1619 Lithuanian 2230 Slovak... -
Page 56: Problems And Troubleshooting
Problems and troubleshooting Use the following check list for troubleshooting when you have problems with your unit. Consult your local dealer or service outlet if problems persist. Be sure all connections are properly made when using with other units. SYMPTOMS POSSIBLE SOLUTIONS PAGE DVD/VCR... -
Page 57: Built-In Head Cleaner
If you cannot resolve the problem, please call the Customer Satisfaction Center for product assistance at 1-800-211-PANA(7262). To locate an authorized servicenter call toll free 1-800-211-PANA(7262) or send e-mail to : consumerproducts@panasonic.com. Built-in head cleaner A clean video head helps produce a clear picture. -
Page 58: Specifications
Specifications GENERAL AC 120V 60Hz Power supply: Operation: 18W Power consumption: Stand by: 2W Weight: 3.6 k (7.9 lbs) Dimensions: Width : 430 mm (16-15/16 inches) Height : 99 mm (3-7/8 inches) Depth : 250 mm (9-13/16 inches) Inputs/Outputs: Video: In: 1Vp-p/75 ohm Out: 1Vp-p/75 ohm Audio:... -
Page 59: Spanish Quick Use Guide (Guía Para Rápida Consulta)
Spanish Quick Use Guide (Guía para rápida consulta) Conexiones basicos El DVD/VCR debe conectarse “entre” la antena y el televisor. Primero, desconecte la antena del televisor y conéctela al DVD/VCR. Luego, conecte el DVD/VCR al televisor. Una vez que haya conectado la antena al DVD/VCR, usted tendrá que conectar el DVD/VCR al televisor. DVD/VCR (ANT) Cable coaxial de 75 ohmios... - Page 60 Spanish Quick Use Guide (Guía para rápida consulta) Presione el botón SET + Ajuste del reloj manual (continuacion) SYSTEM SETUP ó – para seleccionar el CLOCK SET LANGUAGE/IDIOMA/LANGUE modo LANGUAGE, WEAK SIGNAL DISPLAY Una vez ajustado el luego presione el botón 8 : 30 AUTO CLOCK reloj, la fecha y la hora...
- Page 61 Spanish Quick Use Guide (Guía para rápida consulta) COLOCACION Grabacion de un programa de TV Presione en el centro del videocassette hasta que se Coloque un cassette en retraiga automáticamente. el cual la lengüeta de protección contra EXTRACCION borrados accidentales esté...
- Page 62 Spanish Quick Use Guide (Guía para rápida consulta) Grebacion por temporizador de un Grabacion por temporizador solo toque (OTR) EJEMPLO: Programe una grabación con temporizador para el día 26, canal 125 (TV Cable), 11:00 - 11:30 hrs. EJEMPLO: Una grabación por temporizador de un solo toque para 30 minutos.
- Page 63 Spanish Quick Use Guide (Guía para rápida consulta) Presione STOP para terminar la reproducción. Ajuste de la selección de idioma • El aparato graba el punto de parada, según el disco. Aparece “ ” en la pantalla. Presione SETUP en el Language Picture Sound Parental...
-
Page 64: Limited Warranty
Panasonic DVD/VCR Deck Limited Warranty Limited Warranty Coverage If your product does not work properly because of a defect in materials or workmanship, Panasonic Consumer Electronics Company or Panasonic Sales Company (collectively referred to as Òthe warrantorÓ) will, for the length of the period indicated on the chart below, which starts with the date of original purchase (ÒLimited Warranty periodÓ), at its option either (a) repair your product with new or refurbished parts, or (b) -
Page 65: Customer Services Directory
For hearing or speech impaired TTY users, TTY : 1-866-605-1277 Service in Puerto Rico Matsushita Electric of Puerto Rico, Inc. Panasonic Sales Company/ Factory Servicenter: Ave. 65 de Infanter ía, Km. 9.5, San Gabriel Industrial Park, Carolina, Puerto Rico 00985... -
Page 66: Index
Index Frame advance ..........26,37 Accessory ............7 Add/Delete Channels ........23 Angle ..............43 Important Safeguards .......... 3 Aspect Ratio of TV Screen ........ 52 Audio CD ............6,41 Auto CH memory ..........22 JPEG ..............44 Auto Clock ............18 Jump .............. - Page 67 Remote Control ..........10 Repeat Playback ..........40 Review Playback .......... 26,37 Rewind .............. 25 Second Audio Program (SAP) ......33 Slide-show ............46 Slow Motion ..........26,37 Spanish Quick Use Guide ......... 59 Specifications ............ 58 Standard Time ........... 18 Stereo Recording and Playback ......
- Page 68 Panasonic Consumer Electronics Company, Division of Matsushita Electric Corporation of America One Panasonic Way Secaucus, New Jersey 07094 Panasonic Sales Company (“PSC”), Division of Matsushita Electric of Puerto Rico, Inc. Ave. 65 de Infanteria. Km. 9.5 San Gabriel Industrial Park, Carolina, Puerto Rico 00985...