Zanussi ZWI 71000 WA User Manual
Hide thumbs
Also See for ZWI 71000 WA:
- User manual (52 pages) ,
- User manual (48 pages) ,
- User manual (49 pages)

Related Manuals for Zanussi ZWI 71000 WA


Summary of Contents for Zanussi ZWI 71000 WA
- Page 1 User Manual GETTING STARTED? EASY. ZWI 71000 WA EN User Manual Washing Machine ES Manual de instrucciones Lavadora...
-
Page 2: Safety Information
SAFETY INFORMATION Before the installation and use of the appliance, carefully read the supplied instructions. The manufacturer is not responsible if an incorrect installation and use causes injuries and damages. Always keep the instructions with the appliance for future reference. CHILDREN AND VULNERABLE PEOPLE SAFETY This appliance can be used by children aged from 8 years and •... -
Page 3: Safety Instructions
Before maintenance, deactivate the appliance and disconnect • the mains plug from the mains socket. Do not use water spray and steam to clean the appliance. • Clean the appliance with a moist soft cloth. Only use neutral • detergents. Do not use abrasive products, abrasive cleaning pads, solvents or metal objects. -
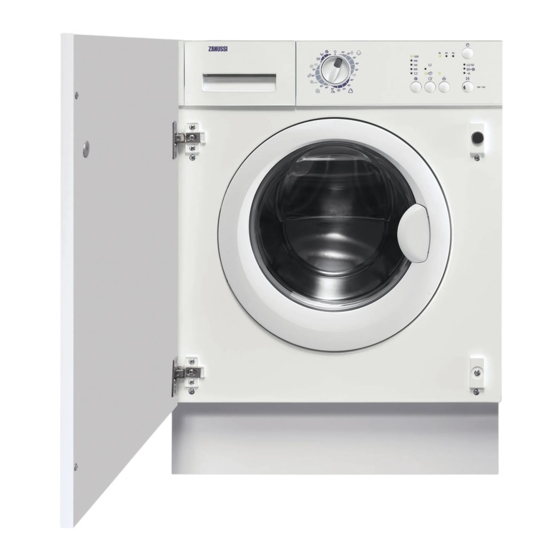
Page 4: Product Description
PRODUCT DESCRIPTION APPLIANCE OVERVIEW Detergent dispenser • Turn the device clockwise, until the Control panel groove is horizontal. Door handle You cannot close the Rating plate door. • To close the door, Drain pump filter turn the device Feet for the appliance level anticlockwise until the groove is vertical. -
Page 5: Control Panel Description
CONTROL PANEL CONTROL PANEL DESCRIPTION Programme knob Delay Start button (Inicio Diferido) Spin reduction (Centrifugar) Programme phase indicators: • Rinse Hold position • Washing phase (Prelava./Lava.) Functions button • Extra rinse phase (Aclarados/Enxag. • Super Quick button (Super Rapido) Centrifugar) •... - Page 6 Maximum load Programme Programme description Maximum spin Temperature range (Type of load and soil level) speed Algod. 7 kg White cotton and coloured cotton. Normal 60° 1000 rpm soil and light soil. 7 kg White cotton and colour-fast cotton. Nor- Algod.
- Page 7 Maximum load Programme Programme description Maximum spin Temperature range (Type of load and soil level) speed Lav.mano/mão 2 kg Machine washable wool, hand washable 1000 rpm wool and delicate fabrics with «hand wash- ing» care symbol. Frio Extra Aclarados/ 7 kg To rinse and spin the laundry.
-
Page 8: Consumption Values
Agua en Aclarado/ Centrifu- Super Inicio Di- Programme cuba/Cuba Prelava. Enxag.Ex- Rapido ferido cheia Lav.mano/mão ■ ■ ■ Aclarados/Enxag. ■ ■ ■ ■ Descarga ■ Centrifugar ■ ■ CONSUMPTION VALUES The data of this table are approximate. Different causes can change the data: the quantity and type of laundry, the water and ambient temperature. -
Page 9: Before First Use
OPTIONS The machine performs a prewash cycle before CENTRIFUGAR the main wash phase. With this option you can change the default spin The washing time will be prolonged. speed. This option is recommended for heavily soiled The indicator of the set speed comes on. laundry. - Page 10 The corresponding indicator stops to flash. The phase indicator Prelava./Lava. illuminates and CAUTION! stays on. Make sure The programme starts and the door locks. that no laundry stays The drain pump can operate for a between the short time at the beginning of the seal and the washing cycle.
-
Page 11: Hints And Tips
The indicator flashes. • Keep the door and the detergent drawer ajar, to 2. Change the options. prevent the mildew and odours. 3. Press the button Inicio/Pausa again. The washing programme is completed, but The programme continues. there is water in the drum: •... - Page 12 • For the maximum laundry load of the drying Special stain removers are available. Use the programmes, refer to the drying programmes special stain remover that is applicable to the type table. of stain and fabric. ITEMS TO DO NOT DRY DETERGENTS AND ADDITIVES Do no not set a drying programme for this •...
-
Page 13: Care And Cleaning
To avoid the static charge at the end of the drying When the drying programme is completed remove cycle: the laundry in a short time. 1. Use fabric conditioner in the washing cycle. 2. Use special fabric conditioner for tumble dryers. -
Page 14: Cleaning The Inlet Hose And The Valve Filter
• If it is necessary, wait until the water has cooled CAUTION! When the appliance is in down. use and depending on the set • Place a container programme there can be hot water in close to the pump (A) the pump. -
Page 15: Frost Precautions
• Screw the hose back WARNING! Make sure that the to the machine and temperature is more than 0 °C before make sure the you use the appliance again. connection is tight. The manufacturer is not responsible • Turn on the water tap. for damages caused by low temperatures. -
Page 16: Possible Failures
POSSIBLE FAILURES Problem Possible solution The programme does not • Make sure that the mains plug is connected to the mains socket. start. • Make sure that the appliance door is closed. • Make sure that there is not a damaged fuse in the fuse box. •... -
Page 17: Installation
Problem Possible solution The washing results are • Increase the detergent quantity or use a different detergent. not satisfactory. • Use special products to remove the stubborn stains before you wash the laundry. • Make sure that you set the correct temperature. •... -
Page 18: Water Drainage
• Fill the smaller upper • Connect the hose hole and the two large with the angled ones with the plastic connection to the plug caps supplied in machine. Do not place the bag with the User the inlet hose Manual. -
Page 19: Preparation And Assembly Of The Door
could be done by tying it to the tap with a piece of string or attaching it to the wall. • In a sink drain pipe branch. This branch must be above the trap so that the bend is at least 60 cm above the ground. •... - Page 20 16-22 mm Ø 35 mm 22±1,5 mm 14 mm 595-598 mm Hinges To align the door perfectly, loosen the screw, adjust the door and tighten the screw A again. To mount the hinges drill two holes (dia. 35 mm, depth 12.5-14 mm depending on the depth of door The appliance is prearranged for a magnetic furniture) on the inner side of the door.
-
Page 21: Technical Data
TECHNICAL DATA Dimension Width/ Height/ Depth/ To- 596 mm/ 820 mm/ 544 mm/ 560 mm tal depth Electrical connection Voltage 220-230 V Overall power 2000 W Fuse 10 A Frequency 50 Hz Level of protection against ingress of solid particles and IPX4 moisture ensured by the protective cover, except where the low voltage equipment has no protection against... -
Page 22: Información Sobre Seguridad
INFORMACIÓN SOBRE SEGURIDAD Antes de instalar y utilizar el aparato, lea atentamente las instrucciones facilitadas. El fabricante no se hace responsable de los daños y lesiones causados por una instalación y uso incorrectos. Guarde siempre las instrucciones junto con el aparato para futuras consultas. -
Page 23: Instrucciones De Seguridad
Si el cable eléctrico sufre algún daño, el fabricante, su servicio • técnico autorizado o un profesional cualificado tendrán que cambiarlo para evitar riesgos. Antes de proceder con el mantenimiento, apague el aparato y • desconecte el enchufe de la red. No utilice pulverizadores ni vapor de agua para limpiar el •... -
Page 24: Descripción Del Producto
• Siga las instrucciones de seguridad del envase DESECHO de detergente. ADVERTENCIA! Existe riesgo de • No coloque productos inflamables ni objetos lesiones o asfixia. mojados con productos inflamables dentro, cerca o encima del aparato. • Desconecte el aparato de la red. •... -
Page 25: Panel De Mandos
PANEL DE MANDOS DESCRIPCIÓN DEL PANEL DE CONTROL Selector de programas Tecla Inicio/Pausa (Inicio/Pausa) Reducción del centrifugado (Centrifugar) Tecla de inicio diferido (Inicio Diferido) • Posición Agua en la cuba Indicadores de la fase de programa: Tecla de funciones • Fase de lavado (Prelava./Lava.) •... - Page 26 Carga máxima Programa Velocidad Descripción del programa Margen de tempera- máxima de (Tipo de carga y nivel de suciedad) tura centrifugado Algod. 7 kg Algodón blanco y de color. Suciedad nor- 60° 1000 rpm mal y ligera. 7 kg Algodón blanco y de colores resistentes. Algod.
- Page 27 Carga máxima Programa Velocidad Descripción del programa Margen de tempera- máxima de (Tipo de carga y nivel de suciedad) tura centrifugado Lav.mano/mão 2 kg Lana lavable a máquina, lana lavable a 1000 rpm mano y prendas delicadas con el símbolo «lavado a mano».
-
Page 28: Valores De Consumo
Agua en Aclarado/ Centrifu- Super Inicio Di- Programa cuba/Cuba Prelava. Enxag.Ex- Rapido ferido cheia Delicados ■ ■ ■ Mix 20° ■ ■ ■ ■ Lav.mano/mão ■ ■ ■ Aclarados/Enxag. ■ ■ ■ ■ Descarga ■ Centrifugar ■ ■ VALORES DE CONSUMO Los datos de esta tabla son aproximados. -
Page 29: Antes Del Primer Uso
Modo apagado (W) Modo encendido (W) La información indicada en la tabla anterior se ofrece en cumplimiento de la normativa 1015/2010 de la Comisión de la UE que implementa la directiva 2009/125/CE. OPCIONES El aparato realiza un ciclo de prelavado antes CENTRIFUGAR del lavado principal. - Page 30 USO DIARIO - LAVADO SÓLO CARGA DE LA COLADA El indicador de la tecla Inicio/Pausa parpadea. 2. Si fuera necesario, cambie la velocidad de Abra la llave de paso. Conecte el enchufe a la toma centrifugado o añada opciones disponibles. de corriente.
- Page 31 CANCELACIÓN DE UN PROGRAMA EN • El indicador de la tecla Inicio/Pausa se apaga. CURSO Se enciende el indicador Fin/Fim y permanece encendido. 1. Gire el selector de programas hasta la posición • Gire el selector de programas hasta la posición para cancelar el programa y desactivar el para desactivar el aparato.
- Page 32 CONSEJOS INTRODUCIR COLADA • Para respetar el medio ambiente, no ponga más detergente del necesario. • Divida la colada en: ropa blanca, ropa de color, • Siga siempre las instrucciones que se ropa sintética, prendas delicadas y prendas de encuentran en el envase de estos productos. lana.
-
Page 33: Mantenimiento Y Limpieza
SECADO ADICIONAL • Medias de nailon. • Colchas. Si las prendas siguen húmedas al final del • Mantas. programa, vuelva a seleccionar un ciclo de secado • Edredones. corto. • Anoraks. • Sacos de dormir. ADVERTENCIA! Para evitar la • Tejidos con restos de lociones o lacas para el formación de arrugas o que la cabello, quitaesmaltes o similares. - Page 34 LIMPIEZA DEL DOSIFICADOR DE • Coloque un recipiente DETERGENTE cerca del filtro (A) Limpie con regularidad la cubeta del detergente en para recoger el líquido polvo y de los aditivos de lavado. que pueda derramarse. • Retire la cubeta • Extraiga la manguera presionando el tope de desagüe de...
- Page 35 • Vuelva a enroscar la PRECAUCIÓN! Cuando la lavadora manguera en la está en marcha, dependiendo del máquina y compruebe programa seleccionado, puede haber que la conexión esté agua caliente en el filtro. bien ajustada. • Abra la toma de agua. Nunca extraiga el filtro durante un ciclo de lavado;...
-
Page 36: Solución De Problemas
El agua debería verterse al recipiente por acción de la gravedad. 5. Cuando el recipiente se llene, vuelva a tapar la manguera de emergencia. 6. Vacíe el recipiente. Repita el procedimiento hasta que deje de salir agua. 7. Si es necesario, limpie el filtro como se ha descrito anteriormente. - Page 37 Problema Posible solución El aparato no carga agua • Compruebe que el grifo está abierto. correctamente. • Asegúrese de que la presión del agua no sea demasiado baja. So- licite información a la compañía local de suministro de agua. • Compruebe que el grifo no esté...
-
Page 38: Instalación
Problema Posible solución El aparato produce un rui- • Compruebe que el aparato está correctamente nivelado. Consulte do extraño. el apartado "Instalación". • Asegúrese de que se ha quitado el material de embalaje y los pa- sadores de transporte. Consulte el apartado "Instalación". •... - Page 39 • Deslice los • Apriete las tuercas de separadores de seguridad cuando plástico para haya terminado de quitarlos. nivelar el aparato. • Un nivelado correcto evita las vibraciones, el ruido y el desplazamiento del aparato durante el funcionamiento. • Extraiga el bloque de poliestireno fijado en No coloque cartón, madera ni otros la junta de...
-
Page 40: Descripción General
DESAGÜE • En un empalme de derivación para descarga en el fregadero. El extremo del tubo de descarga se puede instalar El empalme debe estar encima de la toma para de tres maneras distintas: que haya 60 cm como mínimo entre el codo y el suelo. - Page 41 Para poner las bisagras taladre dos orificios (diá. Se recomienda guardar el embalaje y 35 mm, fondo 12,5 - 14 mm dependiendo del los pasadores de transporte para fondo del mueble) por el lado interno de la puerta. cualquier movimiento del aparato. Para atornillar las bisagras a la puerta use los tornillos para madera 1 y 2 suministrados con el PREPARACIÓN Y MONTAJE DE LA PUERTA...
-
Page 42: Datos Técnicos
Su posición debe coincidir con el imán B del aparato. No quite el tornillo C. Si la puerta se va a abrir de izquierda a derecha, invierta la posición de las placas E, el imán D y la placa C. Monte el contraimán D y las bisagras A según se ha descrito previamente. -
Page 43: Aspectos Medioambientales
ASPECTOS MEDIOAMBIENTALES con el símbolo junto con los residuos Recicle los materiales con el símbolo . Coloque domésticos. Lleve el producto a su centro de el material de embalaje en los contenedores reciclaje local o póngase en contacto con su adecuados para su reciclaje. - Page 44 WWW.ZANUSSI.COM/SHOP...