Siemens NXPLUS C Installation And Operating Instructions Manual
Fixed-mounted circuit-breaker switchgear up to 38 kv, extendable single busbar, metal-enclosed, gas-insulated
Hide thumbs
Also See for NXPLUS C:
- Installation and operating instructions manual (172 pages) ,
- Installation and operating instructions manual (293 pages)
Table of Contents
Advertisement
Quick Links
Advertisement
Table of Contents

Related Manuals for Siemens NXPLUS C


Summary of Contents for Siemens NXPLUS C
- Page 1 Medium-Voltage Switchgear Fixed-mounted circuit-breaker switchgear type NXPLUS C up to 38 kV, Extendable Single busbar, metal-enclosed, gas-insulated M edium -Voltage S witchgear INSTALLATION AND OPERATING INSTRUCTIONS Order No.: 806-9004.9 Revision: 02 Issue: 02-11-2018...
- Page 2 All dimensions are given in mm. and only warranty provided. Any statements contained herein do not create new warranties or modify the existing warranty. 2/266 Revision 02 • INSTALLATION AND OPERATING INSTRUCTIONS • NXPLUS C • 806-9004.9...
-
Page 3: Table Of Contents
Installing the air-insulated metering panel ..128 IEC 62271-200 ..........45 16.1 Installing instrument transformers in 10.13 Standards, specifications, guidelines....46 the metering panel......... 128 10.14 Selection of HV HRC fuse-links ......47 806-9004.9 • INSTALLATION AND OPERATING INSTRUCTIONS • NXPLUS C • Revision 02 3/266... - Page 4 ........215 22.6 Locking device for pushbutton ....... 191 29.2 Switching on the feeder 22.7 Circuit-breaker locking device for voltage transformer ........216 "feeder earthed"..........191 4/266 Revision 02 • INSTALLATION AND OPERATING INSTRUCTIONS • NXPLUS C • 806-9004.9...
- Page 5 ......251 Siemens Service Hotline ......... 261 33.1 Checks on three-position switch operating mechanisms........... 252 Index............... 262 33.2 Visual check of circuit-breaker operating mechanism ............ 253 806-9004.9 • INSTALLATION AND OPERATING INSTRUCTIONS • NXPLUS C • Revision 02 5/266...
-
Page 6: Safety Instructions
➭ Observe the information. Symbols used ➭ Operation symbol: Identifies an operation. Asks the operator to perform an operation. ✔ Result symbol: Identifies the result of an operation. 6/266 Revision 02 • INSTALLATION AND OPERATING INSTRUCTIONS • NXPLUS C • 806-9004.9... -
Page 7: General Instructions
The switchgear operator or owner must keep the technical documents supplied with the switchgear throughout the entire service life, and keep them up-to-date in case of modifications of the switchgear. 806-9004.9 • INSTALLATION AND OPERATING INSTRUCTIONS • NXPLUS C • Revision 02 7/266... - Page 8 - Push the manual OFF pushbutton again. ➭ Check if the "spring charged" indicator shows "spring not charged". Fig. 2: "Spring charged" Fig. 1: "Spring not charged" indication indication 8/266 Revision 02 • INSTALLATION AND OPERATING INSTRUCTIONS • NXPLUS C • 806-9004.9...
-
Page 9: Security
Safety instructions IT security The Siemens software is regularly checked for safety. If weak points are identified in the process, which may allow third parties to access protection devices, information thereto is distributed through the SIPROTEC and SICAM Security Update Report Newsletter. -
Page 10: Description
• Minimum space requirement • Long service life Seismic withstand NXPLUS C switchgear can be upgraded for regions at risk from earthquakes. For this upgrade, capability (option) earthquake qualification testing has been carried out in accordance with the following standards: •... -
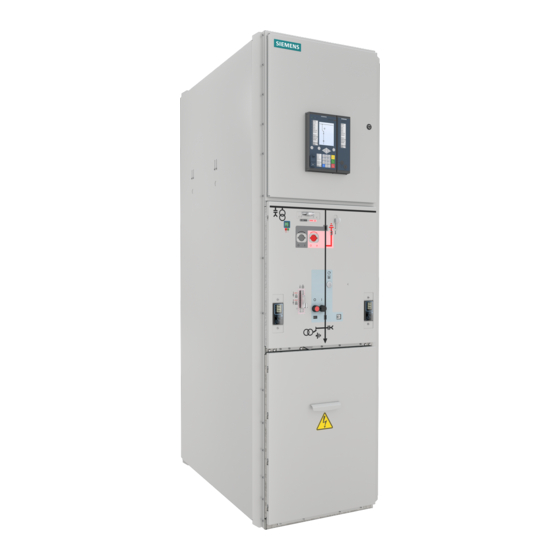
Page 11: Panel Versions
Feeder cables with cable plugs ⑨ Current transformer (option) ⑩ Cable compartment cover ⑪ Front cover with control board ⑫ Bay controller (option) ⑬ Low-voltage compartment Fig. 3: Circuit-breaker panel 806-9004.9 • INSTALLATION AND OPERATING INSTRUCTIONS • NXPLUS C • Revision 02 11/266... - Page 12 ⑤ Current transformer (option) ⑥ Cable compartment cover ⑦ Front cover with control board ⑧ Low-voltage compartment Fig. 6: Vacuum contactor panel with HV HRC fuse assembly 12/266 Revision 02 • INSTALLATION AND OPERATING INSTRUCTIONS • NXPLUS C • 806-9004.9...
- Page 13 Switching-device vessel with three-position disconnector ④ Feeder cables with cable plugs ⑤ Cable compartment cover ⑥ Front cover with control board ⑦ Low-voltage compartment Fig. 9: Disconnector panel 806-9004.9 • INSTALLATION AND OPERATING INSTRUCTIONS • NXPLUS C • Revision 02 13/266...
- Page 14 Fuse assembly with HV HRC fuses ⑤ Auxiliary transformer ⑥ Transformer compartment cover ⑦ HV HRC fuse assembly cover ⑧ Control board ⑨ Low-voltage compartment Fig. 11: Auxiliary transformer panel 14/266 Revision 02 • INSTALLATION AND OPERATING INSTRUCTIONS • NXPLUS C • 806-9004.9...
-
Page 15: Components
Type 3AX1104; 0.1 Ws Undervoltage release Type 3AX1103 – – – – X: 1 no. of each release. A maximum of 2 releases can be combined only. 806-9004.9 • INSTALLATION AND OPERATING INSTRUCTIONS • NXPLUS C • Revision 02 15/266... -
Page 16: Vacuum Contactor
Vacuum contactor Design The Siemens high-voltage vacuum contactor is a three-pole indoor contactor for the rated voltage range from 7.2 kV to 24 kV. The vacuum contactor can be controlled by remote and has an electromagnetic operating mechanism suitable for high switching rates and unlimited operating time. -
Page 17: Operating Mechanisms For Three-Position Switch
• Wiring - Auxiliary switches, motor operating mechanisms or shunt releases are wired to terminal strips in the low-voltage compartment. 806-9004.9 • INSTALLATION AND OPERATING INSTRUCTIONS • NXPLUS C • Revision 02 17/266... -
Page 18: Voltage Transformers
Description Voltage transformers Voltage transformers of the 4MT2, 4MT3, 4MT26, 4MU1 or 4MR type in the NXPLUS C switchgear can be installed as an option. Common features • According to VDE 0414-9-3 and IEC 61869-3 • Cast-resin insulated • Inductive type •... - Page 19 Secondary lead ② Connection of measuring equipment Fig. 12: Installing the test adapter on voltage transformer 4MT3 The test adapter can be procured from the regional Siemens representative. 806-9004.9 • INSTALLATION AND OPERATING INSTRUCTIONS • NXPLUS C • Revision 02 19/266...
-
Page 20: Current Transformers
Description Current transformers In NXPLUS C switchgear, the following current transformers can optionally be installed: • Type 4MC4 • Type 4MA7 • Type 4MC7 Common features • Safe-to-touch due to the metal enclosure of the switchgear • Insulation class E... -
Page 21: Hv Hrc Fuse Assembly
In order to keep the busbar stable, a busbar support must be installed starting from a specific busbar length (see page 99, "Installing the busbar support"). 806-9004.9 • INSTALLATION AND OPERATING INSTRUCTIONS • NXPLUS C • Revision 02 21/266... -
Page 22: Cable Connection
➭ Use the same makes for combining plug types, surge arresters and limiters. For gas-insulated switchgear NXPLUS C, only cable plugs shielded by means of an external conductive layer (also called screened cable T-plugs) can be used. This external semi- conductive layer must be earthed. - Page 23 25...500 EPDM 1x ELBC-810 1x ELBC-CC-810 IEC 105 35...400 1x ELBC-824 1x ELBC-CC-824 Observe the actual current and short-circuit carrying capacity of the cables and sealing ends. 806-9004.9 • INSTALLATION AND OPERATING INSTRUCTIONS • NXPLUS C • Revision 02 23/266...
- Page 24 1x M480TB/G 1x M800PB/G 1x P480TB/G 1x P800PB/G 50...630 EPDM 1x 484TB/G 1x 804PB/G IEC 110 1x K484TB/G 1x K804PB/G 1x M484TB/G 1x M804PB/G 1x P484TB/G 1x P804PB/G 24/266 Revision 02 • INSTALLATION AND OPERATING INSTRUCTIONS • NXPLUS C • 806-9004.9...
- Page 25 1x P480TB/G 50...630 EPDM 1x 484TB/G 800SA-10-xxx IEC - 1x K484TB/G 1x M484TB/G 1x P484TB/G 800...1200 EPDM 1x 489TB/G 800SA-10-xxx IEC - 1x K489TB/G 1x M489TB/G 1x P489TB/G 806-9004.9 • INSTALLATION AND OPERATING INSTRUCTIONS • NXPLUS C • Revision 02 25/266...
- Page 26 RSTI-CC-68SAxxxx 400...800 Silicon 1x RSTI-395x RSTI-CC-58SAxxxx RSTI-SA-PIN IEC - 1x RSTI-595x 1x RSTI-695x RSTI-CC-68SAxxxx 25...500 EPDM 1x ELBC-810 ELBC-CC-810-Saxxxx - IEC - 35...400 1x ELBC-824 ELBC-CC-824-Saxxxx - 26/266 Revision 02 • INSTALLATION AND OPERATING INSTRUCTIONS • NXPLUS C • 806-9004.9...
- Page 27 IEC 100 1x RSTI-595x 1x RSTI-CC-595x 1x RSTI-695x 1x RSTI-CC-695x RSTI-CC-68SAxxxx 25...500 EBDM 1x ELBC-810 1x ELBC-CC-810 ELBC-CC-810-Saxxxx - IEC 105 35...400 1x ELBC-824 1x ELBC-CC-824 ELBC-CC-824-Saxxxx - 806-9004.9 • INSTALLATION AND OPERATING INSTRUCTIONS • NXPLUS C • Revision 02 27/266...
- Page 28 1x RSTI-395x 2x RSTI-CC-395x IEC 100 1x RSTI-595x 2x RSTI-CC-595x 1x RSTI-695x 2x RSTI-CC-695x Observe the actual current and short-circuit carrying capacity of the cables and sealing ends. 28/266 Revision 02 • INSTALLATION AND OPERATING INSTRUCTIONS • NXPLUS C • 806-9004.9...
- Page 29 RSTI-CC-68SAxxxx 400...800 Silicon 1x RSTI-395x RSTI-CC-58SAxxxx RSTI-SA-PIN IEC - 1x RSTI-595x 1x RSTI-695x RSTI-CC-68SAxxxx 25...500 EPDM 1x ELBC-810 ELBC-CC-810-Saxxxx - IEC - 35...400 1x ELBC-824 ELBC-CC-824-Saxxxx - 806-9004.9 • INSTALLATION AND OPERATING INSTRUCTIONS • NXPLUS C • Revision 02 29/266...
- Page 30 IEC 100 1x RSTI-595x 1x RSTI-CC-595x 1x RSTI-695x 1x RSTI-CC-695x RSTI-CC-68SAxxxx 25...500 EPDM 1x ELBC-810 1x ELBC-CC-810 ELBC-CC-810-Saxxxx - IEC 105 35...400 1x ELBC-824 1x ELBC-CC-824 ELBC-Cc-824-Saxxxx 30/266 Revision 02 • INSTALLATION AND OPERATING INSTRUCTIONS • NXPLUS C • 806-9004.9...
- Page 31 IEC 110 1x K484TB/G 3x K804PB/G 1x M484TB/G 3x M804PB/G 1x P484TB/G 3x P804PB/G 800...1200 EPDM 1x 489TB/G 3x 809PB/G IEC 120 1x K489TB/G 1x M489TB/G 1x P489TB/G 806-9004.9 • INSTALLATION AND OPERATING INSTRUCTIONS • NXPLUS C • Revision 02 31/266...
- Page 32 IEC - Electronics Raychem 25...500 EPDM 1x ELBC-810 IEC - 35...400 1x ELBC-824 Observe the actual current and short-circuit carrying capacity of the cables and sealing ends. 32/266 Revision 02 • INSTALLATION AND OPERATING INSTRUCTIONS • NXPLUS C • 806-9004.9...
- Page 33 - the protection zone of the surge arrester at the end tower of the overhead line does not cover the switchgear Surge limiters • Pluggable on cable T-plug • Surge limiters recommended when motors with small starting currents (<600 A) are connected 806-9004.9 • INSTALLATION AND OPERATING INSTRUCTIONS • NXPLUS C • Revision 02 33/266...
-
Page 34: Ready-For-Service Indicator
• The control gate of the three-position switch can be padlocked in all three positions. Position of the control gate: Left: The three-position (switch-)disconnector can be operated. Center: No switching operation possible 34/266 Revision 02 • INSTALLATION AND OPERATING INSTRUCTIONS • NXPLUS C • 806-9004.9... -
Page 35: Voltage Detecting Systems
/ √ 3 during rated operation in the three-phase system • U = Voltage at the interface (plug-in sockets) of the plug-in voltage indicator or the test socket of the integrated voltage indicator 806-9004.9 • INSTALLATION AND OPERATING INSTRUCTIONS • NXPLUS C • Revision 02 35/266... -
Page 36: Accessories
(for slide lengths of 292 mm or 442 mm) • LRM voltage indicators • Units to test the capacitive interface and the voltage indicators • Unit to test the plug-in voltage indicators 36/266 Revision 02 • INSTALLATION AND OPERATING INSTRUCTIONS • NXPLUS C • 806-9004.9... - Page 37 Description • Phase comparison test units • Holder for operating tool ① Holder for the operating tool ② Handle for the cover on the panel 806-9004.9 • INSTALLATION AND OPERATING INSTRUCTIONS • NXPLUS C • Revision 02 37/266...
-
Page 38: Technical Data
High-voltage test equipment The following table shows the current draw per panel for dimensioning the high-voltage test equipment. The test voltage is supplied through a NXPLUS C feeder panel. Further panels to be tested are switched off during the test. -
Page 39: Circuit-Breaker Panel
Rated voltage Rated current 630/800/1000/1250 Rated short-time withstand current Rated normal current Operating 10000 cycles Short-circuit breaking Operating current cycles Also as 66 kA/26.3 kA at 50 Hz 806-9004.9 • INSTALLATION AND OPERATING INSTRUCTIONS • NXPLUS C • Revision 02 39/266... - Page 40 Minimum command duration CLOSED Closing solenoid (-Y9) OPEN Shunt release (-Y1) OPEN Additional release 3AX (-Y2), (-Y4), (-Y6), (-Y7) Shortest impulse duration of the circuit-breaker tripping signal 40/266 Revision 02 • INSTALLATION AND OPERATING INSTRUCTIONS • NXPLUS C • 806-9004.9...
- Page 41 – – – – – – – – – – The operating voltage may deviate from the rated voltage specified in the table by –20% to +10%. 806-9004.9 • INSTALLATION AND OPERATING INSTRUCTIONS • NXPLUS C • Revision 02 41/266...
- Page 42 It limits the overvoltage to approx. 500 V, and is available for rated operating voltages from 60 V (DC) up to 220 V (DC). The module contains two separate varistor circuits. 42/266 Revision 02 • INSTALLATION AND OPERATING INSTRUCTIONS • NXPLUS C • 806-9004.9...
-
Page 43: Switch-Disconnector Panel
500,000 operating cycles with mechanical closing latch 100,000 operating cycles Depending on the HV HRC fuse-link, observe the maximum permissible let-through current I of the HV HRC fuse-links 806-9004.9 • INSTALLATION AND OPERATING INSTRUCTIONS • NXPLUS C • Revision 02 43/266... -
Page 44: Bus Sectionalizer Panel
60 Hz kA 52/65/82 52/65 Rated short-circuit making current I 50 Hz kA 50/63/80 50/63 60 Hz kA 52/65/82 52/65 Endurance classes according to IEC 62271-103 M1, E3 44/266 Revision 02 • INSTALLATION AND OPERATING INSTRUCTIONS • NXPLUS C • 806-9004.9... -
Page 45: Metering Panel (Gas-Insulated)
Accessibility to Busbar compartment Tool-based compartments (enclosure) Switching-device compartment Non-accessible Instrument transformer Tool-based compartment / transformer compartment Fuse compartment Interlock-controlled and tool-based Low-voltage compartment Tool-based Cable compartment Tool-based 806-9004.9 • INSTALLATION AND OPERATING INSTRUCTIONS • NXPLUS C • Revision 02 45/266... -
Page 46: 10.13 Standards, Specifications, Guidelines
Vacuum interrupters featuring type approval may be operated by the owner of the switchgear without authorization or notification. A printout of the certificate shall be kept on hand at a suitable centralized location. 46/266 Revision 02 • INSTALLATION AND OPERATING INSTRUCTIONS • NXPLUS C • 806-9004.9... -
Page 47: 10.14 Selection Of Hv Hrc Fuse-Links
• IP65 for parts under high voltage in panels without HV HRC fuses Seismic withstand NXPLUS C switchgear can be upgraded for regions at risk from earthquakes. For this upgrade, capability (option) earthquake qualification testing has been carried out in accordance with the following standards: •... - Page 48 The HV HRC fuse-links have a thermal protection in form of a temperature-limiting striker tripping operating in case of defective HV HRC fuse-links or high overload currents. Please contact the Siemens Service Hotline if you want to use HV HRC fuse-links from other manufacturers.
- Page 49 30 098 13.50 30 099 13.63 45.5 3...7.2 30 099 13.63 30 099 13.80 57.8 3...7.2 30 099 13.80 30 099 13.100 72.2 3...7.2 30 099 13.100 806-9004.9 • INSTALLATION AND OPERATING INSTRUCTIONS • NXPLUS C • Revision 02 49/266...
- Page 50 30 004 13.16 30 101 13.16 3...7.2 30 098 13.16 6...12 30 004 13.16 30 101 13.16 3...7.2 30 098 13.20 6...12 30 004 13.20 30 101 13.20 50/266 Revision 02 • INSTALLATION AND OPERATING INSTRUCTIONS • NXPLUS C • 806-9004.9...
- Page 51 30 099 13.100 6...12 30 012 13.100 30 102 13.100 30 012 43.100 30 102 43.100 30 020 43.125 30 103 43.125 5...6 6...12 30 103 43.125 806-9004.9 • INSTALLATION AND OPERATING INSTRUCTIONS • NXPLUS C • Revision 02 51/266...
- Page 52 30 004 13.50 30 101 13.50 6...12 30 012 13.63 30 102 13.63 32.5 6...12 30 012 43.80 30 102 43.80 6...12 30 012 43.100 30 102 43.100 52/266 Revision 02 • INSTALLATION AND OPERATING INSTRUCTIONS • NXPLUS C • 806-9004.9...
- Page 53 30 221 13.25 30 231 13.25 10...24 30 006 13.25 31.5 6...12 30 004 13.31,5 30 101 13.31,5 10...17.5 30 221 13.31,5 30 231 13.31,5 10...24 30 006 13.31,5 806-9004.9 • INSTALLATION AND OPERATING INSTRUCTIONS • NXPLUS C • Revision 02 53/266...
- Page 54 30 020 43.125 30 103 43.125 12.4...13.4 0.94 10...24 30 006 13.4 10...24 30 006 13.6,3 30 231 13.6,3 10...17.5 30 231 13.10 10...24 30 006 13.10 54/266 Revision 02 • INSTALLATION AND OPERATING INSTRUCTIONS • NXPLUS C • 806-9004.9...
- Page 55 30 231 13.25 31.5 30 231 13.31,5 10...24 30 006 13.31,5 16.8 31.5 10...17.5 30 231 13.31,5 10...24 30 006 13.31,5 10...17.5 30 231 13.40 10...24 30 006 13.40 806-9004.9 • INSTALLATION AND OPERATING INSTRUCTIONS • NXPLUS C • Revision 02 55/266...
- Page 56 30 006 13.3 10...17.5 30 231 13.6,3 10...24 30 006 13.6,3 10...17.5 30 231 13.6,3 10...17.5 30 231 13.10 10...17.5 30 231 13.16 10...24 30 006 13.16 56/266 Revision 02 • INSTALLATION AND OPERATING INSTRUCTIONS • NXPLUS C • 806-9004.9...
- Page 57 30 006 13.3 10...24 30 006 13.6,3 10...24 30 006 13.6,3 10...24 30 006 13.6,3 10...24 30 006 13.10 10...24 30 006 13.10 10...24 30 006 13.16 806-9004.9 • INSTALLATION AND OPERATING INSTRUCTIONS • NXPLUS C • Revision 02 57/266...
- Page 58 30 006 13.3 10...24 30 006 13.6,3 10...24 30 006 13.6,3 10...24 30 006 13.6,3 10...24 30 006 13.10 10...24 30 006 13.10 10...24 30 006 13.16 58/266 Revision 02 • INSTALLATION AND OPERATING INSTRUCTIONS • NXPLUS C • 806-9004.9...
- Page 59 15.8...18.0 40 10...24 30 006 13.4 19.0...23.0 40 10...24 30 006 13.3 For the part numbers specified her, no extension tubes from SIBA or Siemens are available. 806-9004.9 • INSTALLATION AND OPERATING INSTRUCTIONS • NXPLUS C • Revision 02 59/266...
- Page 60 20; 25; 31.5 30 004 11.0,5 * 30 004 11.1 30 004 13.2 30 004 13.2,5 3.15 30 004 13.3,15 30 004 13.4 30 004 13.5 30 101 13.6,3 60/266 Revision 02 • INSTALLATION AND OPERATING INSTRUCTIONS • NXPLUS C • 806-9004.9...
-
Page 61: 10.15 Insulating Gas
Gas leakage rate The gas leakage rate is < 0.1% per year (relative to the absolute gas pressure). 806-9004.9 • INSTALLATION AND OPERATING INSTRUCTIONS • NXPLUS C • Revision 02 61/266... -
Page 62: 10.16 Rating Plates
The data ④ describes the internal arc classification of the panel according to IEC 62271-200. The data describes the areas classified for the corresponding panel (see page 45, "Classification of NXPLUS C according to IEC 62271-200"). 62/266 Revision 02 • INSTALLATION AND OPERATING INSTRUCTIONS • NXPLUS C • 806-9004.9... -
Page 63: End Of Life
Auxiliary devices such as short-circuit indicators have to be recycled as electronic scrap. Any existing batteries have to be recycled professionally. As delivered by Siemens, the switchgear does not contain hazardous materials as per the Hazardous Material Regulations applicable in the Federal Republic of Germany. For operation in other countries, the locally applicable laws and regulations must be observed. -
Page 64: Installation
For an auxiliary transformer panel with lateral cable connection as left end panel, the left and right wall spacing must be at least 500 mm. For all other panels, a lateral wall distance on the left or right ≥ 500 mm is recommended 64/266 Revision 02 • INSTALLATION AND OPERATING INSTRUCTIONS • NXPLUS C • 806-9004.9... - Page 65 Recommendation: In order to allow for straightforward panel replacement later on, use a framework construction with longitudinal and cross members. The dimensions are derived from the construction data from NXPLUS C (see page 66, "Construction data for the foundation").
-
Page 66: Construction Data For The Foundation
• Determine level differences between the installation surfaces of the panels using a measuring sheet, and compensate with shims (0.5 - 1.0 mm). Fig. 21: Measuring sheet for the foundation (example) 66/266 Revision 02 • INSTALLATION AND OPERATING INSTRUCTIONS • NXPLUS C • 806-9004.9... - Page 67 • Vacuum contactor panel with HV HRC fuses Panel width Panel types Panel width Panel types 2x600 mm • Bus sectionalizer panel 1000/1250 A 900 mm • Bus sectionalizer panel 1000/ 1250 A 806-9004.9 • INSTALLATION AND OPERATING INSTRUCTIONS • NXPLUS C • Revision 02 67/266...
- Page 68 900 mm (view from the rear) Floor bracing at the rear Fixing point ① ③ ② Floor bracing at the front ④ Bracing bar (only panel width of 900 mm) 68/266 Revision 02 • INSTALLATION AND OPERATING INSTRUCTIONS • NXPLUS C • 806-9004.9...
- Page 69 CB 36-630 CC 36-630 M12 CB 36-630(1250) CC 36-630(1250) Tyco Electronics Raychem RSTI-58xx RSTI-CC-58xx RSTI-68xx RSTI-CC-68xx RSTI-395x RSTI-CC-395xx RSTI-595x RSTI-CC-595xx RSTI-695x RSTI-CC-695xx Solid-insulated bar Moser-Glaser Preissinger Ritz 806-9004.9 • INSTALLATION AND OPERATING INSTRUCTIONS • NXPLUS C • Revision 02 69/266...
- Page 70 CC 42-2500/3 CC 42-2500/3 Tyco Electronics Raychem RSTI-58xx RSTI-CC-58xx RSTI-CC-58xx RSTI-68xx RSTI-CC-68xx RSTI-CC-68xx RSTI-395x RSTI-CC-395x RSTI-CC-395x RSTI-595x RSTI-CC-595x RSTI-CC-595x RSTI-695x RSTI-CC-695x RSTI-CC-695x Solid-insulated bar Moser-Glaser Preissinger Ritz 70/266 Revision 02 • INSTALLATION AND OPERATING INSTRUCTIONS • NXPLUS C • 806-9004.9...
- Page 71 CC 42-2500/3 Tyco Electronics Raychem RSTI-58xx RSTI-CC-58xx RSTI-CC-58xx RSTI-CC-58xx RSTI-68xx RSTI-CC-68xx RSTI-CC-68xx RSTI-CC-68xx RSTI-395x RSTI-CC-395x RSTI-CC-395x RSTI-595x RSTI-CC-595x RSTI-CC-595x RSTI-695x RSTI-CC-695x RSTI-CC-695x Solid-insulated bar Moser-Glaser Preissinger Ritz 806-9004.9 • INSTALLATION AND OPERATING INSTRUCTIONS • NXPLUS C • Revision 02 71/266...
- Page 72 Plug type Distance Plug type Distance [mm] [mm] [mm] Nexans Euromold (K)430TB/G (K)430TB/G (K)430TB/G nkt cables CB xx-630 CB xx-630 CB xx-630 Tyco Electronics Raychem RSTI-58xx RSTI-58xx RSTI-58xx 72/266 Revision 02 • INSTALLATION AND OPERATING INSTRUCTIONS • NXPLUS C • 806-9004.9...
- Page 73 CC 42-2500/3 Tyco Electronics Raychem RSTI-58xx RSTI-CC-58xx RSTI-CC-58xx RSTI-CC-58xx RSTI-68xx RSTI-CC-68xx RSTI-CC-68xx RSTI-CC-68xx RSTI-395x RSTI-CC-395x RSTI-CC-395x RSTI-595x RSTI-CC-595x RSTI-CC-595x RSTI-695x RSTI-CC-695x RSTI-CC-695x Solid-insulated bar Moser-Glaser Preissinger Ritz 806-9004.9 • INSTALLATION AND OPERATING INSTRUCTIONS • NXPLUS C • Revision 02 73/266...
-
Page 74: Transport Units
Dangerous Goods by Road (ADR)", Siemens gas-insulated medium-voltage switchgear does not belong to the category of dangerous goods with respect to transportation, and is exempted from special transport regulations according to ADR, Clause 1.1.3.1 b). 74/266 Revision 02 • INSTALLATION AND OPERATING INSTRUCTIONS • NXPLUS C • 806-9004.9... -
Page 75: Before Installation
Before installation 13.1 Preliminary clarifications In order to load the transport units in a suitable installation order, the regional Siemens representative requires the following information from you several weeks before delivering the switchgear: • Diagram of the installation room including the locations and numbers of the individual panels and the storage space for the accessories •... -
Page 76: Tools And Auxiliary Means
• Technical requirements for lifting rods: - Diameter: 20 mm - Loading capability (stretching limit): R ≧ 780 MPa (N/mm • Grinding sponge with corundum grit 100 • Abrasive fabric 76/266 Revision 02 • INSTALLATION AND OPERATING INSTRUCTIONS • NXPLUS C • 806-9004.9... -
Page 77: Cleaning Agents And Cleaning Aids
Suction of drilling chips, construction waste, dust Vacuum cleaner with plastic tip for sensitive components 13.5 Mounting paste Use mounting paste only according to the installation instructions. Use only the supplied or released mounting paste. 806-9004.9 • INSTALLATION AND OPERATING INSTRUCTIONS • NXPLUS C • Revision 02 77/266... -
Page 78: Tightening Torques
Cable shields must be electrically bonded to be able to carry high frequencies, and contacted concentrically at the cable ends. The shields of cables and wires are connected and earthed in the low-voltage compartment. 78/266 Revision 02 • INSTALLATION AND OPERATING INSTRUCTIONS • NXPLUS C • 806-9004.9... - Page 79 If shields are used as protective earth conductors at the same time, the connected plastic- insulated lead must be marked green/yellow over its entire length. Non-insulated connections are inadmissible. 806-9004.9 • INSTALLATION AND OPERATING INSTRUCTIONS • NXPLUS C • Revision 02 79/266...
-
Page 80: Unloading And Erecting The Switchgear
Report any defects or transport damage through the Siemens Service Hotline. ➭ Have the transport damage repaired; otherwise installation is not permitted to begin. ➭ Refit the packaging. 80/266 Revision 02 • INSTALLATION AND OPERATING INSTRUCTIONS • NXPLUS C • 806-9004.9... -
Page 81: Unloading And Transporting To The Place Of Installation
➭ Take out the transport bolts. Remove the metal plates placed underneath. ➭ In order to avoid damage to the panels, put the connection compartment cover back in place. 806-9004.9 • INSTALLATION AND OPERATING INSTRUCTIONS • NXPLUS C • Revision 02 81/266... - Page 82 ➭ Place the first (rearmost) transport unit into its final location as precisely as possible so that the units can still be aligned before bolting together. Place the second transport unit next to it with a small spacing in between. 82/266 Revision 02 • INSTALLATION AND OPERATING INSTRUCTIONS • NXPLUS C • 806-9004.9...
-
Page 83: Checking Service Readiness
✔ If the pointer is in the red area, check the signaling switch. If the problem cannot be resolved, contact the Siemens Service Hotline. For more information on the ready-for-service indicator, see page 34, "Ready-for-service indicator" or see page 190, "Ready-for-service indicator". 806-9004.9 • INSTALLATION AND OPERATING INSTRUCTIONS • NXPLUS C • Revision 02 83/266... -
Page 84: Assembling The Switchgear
➭ Do not remove the bolts sealed with wax. ➭ If the sealing wax is broken, contact the regional Siemens representative. Fig. 27: Bolts with sealing wax at the Siemens high-voltage vacuum contactor 84/266 Revision 02 • INSTALLATION AND OPERATING INSTRUCTIONS • NXPLUS C • 806-9004.9... -
Page 85: Aligning And Joining The Panels
If necessary, use shims to align the panel vertically and at the necessary height. Joining the panels ① Alignment bracket ② Fixing lug ③ Spacer Fig. 28: Joining the panels 806-9004.9 • INSTALLATION AND OPERATING INSTRUCTIONS • NXPLUS C • Revision 02 85/266... - Page 86 Torx bolts from the pressure relief duct. Take the other bolts from the supplementary equipment. Panel type EB and aME: M6x30 All other panel types M5x45 86/266 Revision 02 • INSTALLATION AND OPERATING INSTRUCTIONS • NXPLUS C • 806-9004.9...
-
Page 87: Fastening The Panel To The Foundation
68, "Resistance against earthquakes (option)". Bolt each panel to the foundation at 4 fixing points. Use 4 M8 or M10 fixing bolts (M8 tightening torque: 30 Nm, M10: 60 Nm). 806-9004.9 • INSTALLATION AND OPERATING INSTRUCTIONS • NXPLUS C • Revision 02 87/266... -
Page 88: Removing Transport Braces
➭ Tighten all bolted joints with correct torque. On all bolted joints, execute a torque test with the torque wrench. Afterwards, mark the bolted joints on the nut with a waterproof pen (perform this step only after consultation with the switchgear operator). 88/266 Revision 02 • INSTALLATION AND OPERATING INSTRUCTIONS • NXPLUS C • 806-9004.9... - Page 89 Installing the low-voltage compartment mounting plate Phase sequence ① Phase L1 ② Phase L2 ③ Phase L3 Fig. 30: Phase sequence of bushings (view from the right) 806-9004.9 • INSTALLATION AND OPERATING INSTRUCTIONS • NXPLUS C • Revision 02 89/266...
- Page 90 (+300 mm or +600 mm). The busbar lengths for the provided panels can be found in the order documentation. 90/266 Revision 02 • INSTALLATION AND OPERATING INSTRUCTIONS • NXPLUS C • 806-9004.9...
- Page 91 Auxiliary transformer panel Disconnector panel Air-insulated metering panel Vacuum contactor panel Bus sectionalizer LKLS Bus sectionalizer circuit-breaker panel LKTS Bus sectionalizer disconnector panel Switch-disconnector panel Ring-main panel 806-9004.9 • INSTALLATION AND OPERATING INSTRUCTIONS • NXPLUS C • Revision 02 91/266...
- Page 92 ➭ Apply mounting paste to the push-on surfaces (gray surfaces) of the busbars ③ . ➭ Lay the contact half-shells ③ on the ends of the busbar ② and hold them. 92/266 Revision 02 • INSTALLATION AND OPERATING INSTRUCTIONS • NXPLUS C • 806-9004.9...
- Page 93 ➭ Connect the busbar unit with the next end adapter or cross adapter. ➭ After installing the busbar unit, install the current transformer again. 806-9004.9 • INSTALLATION AND OPERATING INSTRUCTIONS • NXPLUS C • Revision 02 93/266...
- Page 94 ➭ Insert another busbar section into the first busbar section. ➭ Insert additional busbar sections until the complete busbar run is loosely plugged on the bushings. 94/266 Revision 02 • INSTALLATION AND OPERATING INSTRUCTIONS • NXPLUS C • 806-9004.9...
- Page 95 ⑰ and the hexagon nut M12 ⑬ (tightening torque: 50 Nm). Inserting the screw-type ➭ Apply mounting paste to the screw-type cone ⑭ and the upper push-on surface of the cross cone adapter or end adapter. 806-9004.9 • INSTALLATION AND OPERATING INSTRUCTIONS • NXPLUS C • Revision 02 95/266...
- Page 96 ➭ Connect all other panels and phases in the same way. ➭ Verify that all unused capacitive taps are earthed. ➭ Install the busbar support (only for 31.5 kA, see page 99, "Installing the busbar support"). 96/266 Revision 02 • INSTALLATION AND OPERATING INSTRUCTIONS • NXPLUS C • 806-9004.9...
- Page 97 ➭ Screw the threaded stud ⑪ into the connection stud as far as it will go (tightening torque: 10 Nm). Important: Check reference dimension K2 (79 +2/-6 mm). 806-9004.9 • INSTALLATION AND OPERATING INSTRUCTIONS • NXPLUS C • Revision 02 97/266...
- Page 98 Push the coupling adapter onto the adapters of the first busbar level ⑳ Adapter lip Final work ➭ Fasten the busbar run, see page 95, "Bolting the busbar run together" ✔ The installation of the busbar is completed. 98/266 Revision 02 • INSTALLATION AND OPERATING INSTRUCTIONS • NXPLUS C • 806-9004.9...
-
Page 99: Installing The Busbar Support
• On right-hand end panels • On panels with busbar current transformers ➭ Install the busbar support at the upper busbar level according to the enclosed installation instructions 806-9004.9 • INSTALLATION AND OPERATING INSTRUCTIONS • NXPLUS C • Revision 02 99/266... - Page 100 ⑫ Cable lug ⑦ Support ➭ Install the earthing cable at the earthing connection points of the busbar support and the switching-device vessel or transformer mounting plate. 100/266 Revision 02 • INSTALLATION AND OPERATING INSTRUCTIONS • NXPLUS C • 806-9004.9...
-
Page 101: Installing A Current Transformer On The Busbar
➭ Air-insulated metering panel only: Lead the connecting wires of the current transformers laterally into the operating mechanism compartment and into the low-voltage compartment through the right-hand wiring duct. 806-9004.9 • INSTALLATION AND OPERATING INSTRUCTIONS • NXPLUS C • Revision 02 101/266... -
Page 102: Installing A Voltage Transformer On The Busbar
End adapter or cross adapter ⑭ Cover frame Component pre-installed on end adapter or cross adapter Fig. 43: Detail view from the front: Connection of the busbar to the voltage transformer 102/266 Revision 02 • INSTALLATION AND OPERATING INSTRUCTIONS • NXPLUS C • 806-9004.9... - Page 103 ➭ Check whether the wholes in the feet of the frame match the holes in the cover frame. ✔ The frame is positioned correctly. ➭ Bolt the voltage transformer frame ③ to the cover frame ⑭ with bolts ④ . 806-9004.9 • INSTALLATION AND OPERATING INSTRUCTIONS • NXPLUS C • Revision 02 103/266...
- Page 104 Arcing frame ② Roof plate with arcing frame ③ Panel cover Fig. 47: As-delivered condition ➭ Pull out the roof plate. Fig. 48: Removing the roof plate 104/266 Revision 02 • INSTALLATION AND OPERATING INSTRUCTIONS • NXPLUS C • 806-9004.9...
- Page 105 The metal coating on the outside of voltage transformers is connected to earth potential. Touching a damages metal coating can lead to electric shock. ➭ Do not damage the metal coating of voltage transformers. ➭ Do not mount voltage transformers with damaged metal coating. Contact the Siemens Service Hotline. NOTICE Flashovers in the adapter due air inclusions Insufficient busbar insulation can damage the switchgear.
- Page 106 If parts of the cable strap are missing, remove the voltage transformer again and verify that no cable strap remnants remain in the end adapter or cross adapter. ➭ The voltage transformer must be correctly seated on its bolted joints. 106/266 Revision 02 • INSTALLATION AND OPERATING INSTRUCTIONS • NXPLUS C • 806-9004.9...
- Page 107 ➭ Mount the damping resistor on the holder. Repeat the work operation for 2 damping resistors. ➭ If applicable, lead the secondary leads into the low-voltage compartment, and connect. 806-9004.9 • INSTALLATION AND OPERATING INSTRUCTIONS • NXPLUS C • Revision 02 107/266...
- Page 108 (only for secondary leads with steel tube) ③ Cutout Fig. 55: Wire routing into the low-voltage compartment ➭ If necessary, connect the earthing cable of the end adapters or cross adapters. 108/266 Revision 02 • INSTALLATION AND OPERATING INSTRUCTIONS • NXPLUS C • 806-9004.9...
-
Page 109: Interconnecting The Earthing Busbars
➭ Bolt the link together with the adjacent unit of the earthing busbar (tightening torque: 50 Nm). ➭ Proceed in the same way with the other joints. 806-9004.9 • INSTALLATION AND OPERATING INSTRUCTIONS • NXPLUS C • Revision 02 109/266... -
Page 110: Earthing The Switchgear
➭ Lay the bus wires in wiring ducts. Connect them with the corresponding terminals according to the circuit diagram. ➭ Connect the cables of the current transformers and voltage transformers with the corresponding terminals according to the circuit diagram. 110/266 Revision 02 • INSTALLATION AND OPERATING INSTRUCTIONS • NXPLUS C • 806-9004.9... -
Page 111: 15.11 Installing The Horizontal Pressure Relief Duct
The individual elements can be combined at will in order to build an evacuation duct matching the switchgear arrangement in the substation. Fig. 60: Possible combinations of evacuation duct elements 806-9004.9 • INSTALLATION AND OPERATING INSTRUCTIONS • NXPLUS C • Revision 02 111/266... - Page 112 585 to 750 mm Evacuation duct, flap, exit 480 mm Evacuation duct termination, expanded 260 mm metal Angle Type designation Angle Dimensions Evacuation duct angle, vertical 45° 112/266 Revision 02 • INSTALLATION AND OPERATING INSTRUCTIONS • NXPLUS C • 806-9004.9...
- Page 113 Evacuation duct angle, horizontal 45° Brackets Type designation Illustration Fixing lugs for evacuation duct Fixing bracket, evacuation duct Bolting material Designation Size Illustration Bolt-and-washer assembly Setting nut 806-9004.9 • INSTALLATION AND OPERATING INSTRUCTIONS • NXPLUS C • Revision 02 113/266...
- Page 114 Rear wall Connecting element, rear evacuation (with pre-installed evacuation duct element) Rear wall Rear wall, closed Top cover Top cover with ventilation Top cover Top cover, closed 114/266 Revision 02 • INSTALLATION AND OPERATING INSTRUCTIONS • NXPLUS C • 806-9004.9...
- Page 115 ➭ Remove the low-voltage compartment and install from the front. ➭ Place the left-hand side plate ① onto the switchgear termination ③ . ① Side plate ② Pre-assembled evacuation ③ Switchgear termination 806-9004.9 • INSTALLATION AND OPERATING INSTRUCTIONS • NXPLUS C • Revision 02 115/266...
- Page 116 • 600 mm panel width • 450 mm panel width • 900 mm panel width • Air-insulated metering panel (aME) • Auxiliary transformer panel (EB) 116/266 Revision 02 • INSTALLATION AND OPERATING INSTRUCTIONS • NXPLUS C • 806-9004.9...
- Page 117 ➭ Open the ventilation flap after installation. ➭ Open and close the ventilation flap ② at the top cover of the pressure relief duct ① several times. 806-9004.9 • INSTALLATION AND OPERATING INSTRUCTIONS • NXPLUS C • Revision 02 117/266...
- Page 118 Number of bolted joints (rear wall): 600 mm panel width: 900 mm panel width: 450 mm panel width: aME: 4x EB: 4x ➭ Install any additional top covers. 118/266 Revision 02 • INSTALLATION AND OPERATING INSTRUCTIONS • NXPLUS C • 806-9004.9...
- Page 119 In order to guarantee its stability, the evacuation duct must be supported at regular intervals (recommended value: every 100 cm). Fixing lugs are available for this purpose. Possible installation positions of the fixing lugs 806-9004.9 • INSTALLATION AND OPERATING INSTRUCTIONS • NXPLUS C • Revision 02 119/266...
- Page 120 ➭ Push the duct element ② into the joining bracket ③ of the adjustable duct element ① . ➭ Fasten the duct elements at 12 connecting points using bolt-and-washer assemblies M8x20 (tightening torque: 20 Nm). 120/266 Revision 02 • INSTALLATION AND OPERATING INSTRUCTIONS • NXPLUS C • 806-9004.9...
-
Page 121: 15.12 Installing The Switchgear Termination
Installation 15.12 Installing the switchgear termination INFORMATION The end panel of the NXPLUS C switchgear is delivered as standard with pre-installed switchgear termination and termination bracket. If the customer ordered without pre-installed switchgear termination and termination bracket, perform the following work operations. -
Page 122: 15.13 Installing The Busbar Covers
123, "Component table 2" IP31D 1600 A see page 125, "Component table 4" IP32D 2000 A IP34D see page 123, "Component table 2" 2500 A 122/266 Revision 02 • INSTALLATION AND OPERATING INSTRUCTIONS • NXPLUS C • 806-9004.9... - Page 123 Installed only for end panels. Only to be installed in panels of 31.5 kA design. Cover consists of 2 components. Bus sectionalizer panel only, cover consists of 2 components 806-9004.9 • INSTALLATION AND OPERATING INSTRUCTIONS • NXPLUS C • Revision 02 123/266...
- Page 124 ➭ If the panel is the 31.5 kA design: Bolt the reinforcing plate ③ onto the covers. ➭ Repeat the installation of the busbar cover for all panels. ✔ The installation of the busbar cover has been completed. 124/266 Revision 02 • INSTALLATION AND OPERATING INSTRUCTIONS • NXPLUS C • 806-9004.9...
- Page 125 126: For voltage transformer at the busbar in the right-hand adjacent panel. 127: For panel with voltage transformer at the busbar or left-hand adjacent panel (450 mm wide) with voltage transformer. Cover consists of 2 components. 806-9004.9 • INSTALLATION AND OPERATING INSTRUCTIONS • NXPLUS C • Revision 02 125/266...
- Page 126 ➭ Install the reinforcing plate ⑦ onto the covers installed previously. ➭ Repeat the installation of the busbar cover for all panels. ✔ The installation of the busbar cover has been completed. 126/266 Revision 02 • INSTALLATION AND OPERATING INSTRUCTIONS • NXPLUS C • 806-9004.9...
-
Page 127: 15.14 Extension With Individual Panels
➭ Replace the end adapters of the former end panel with cross adapters. ➭ Grease new components with mounting paste. ➭ Do not forget to let excess air out (see page 95, "Bolting the busbar run together"). 806-9004.9 • INSTALLATION AND OPERATING INSTRUCTIONS • NXPLUS C • Revision 02 127/266... -
Page 128: Installing The Air-Insulated Metering Panel
➭ Cover or barrier adjacent live parts. NOTICE Damage to the switchgear due to inadequate instrument transformers! Mount only instrument transformers which have been released by Siemens and correspond to the following standards: ➭ Dimensions according to DIN 42600-8 for current transformers 4MA7 ➭... - Page 129 ➭ If the free space in front of the panel is not enough, leave the instrument transformer cassette in the panel and execute all assembly operations inside the panel. ➭ Undo the bolted joints of the instrument transformer cassette. 806-9004.9 • INSTALLATION AND OPERATING INSTRUCTIONS • NXPLUS C • Revision 02 129/266...
- Page 130 Mounting position of the C-rails and visible holes ① C-rails for current transformers ② C-rails for voltage transformers ➭ Adjust and bolt the C-rails at the corresponding positions according to the switchgear version. 130/266 Revision 02 • INSTALLATION AND OPERATING INSTRUCTIONS • NXPLUS C • 806-9004.9...
- Page 131 ➭ Then, fasten the instrument transformers for phase L1 and L3 on the left and on the right at a distance of 250 ±2 mm. ➭ For mounting the 1-pole voltage transformers, put the instrument transformer cassette back to vertical position. 806-9004.9 • INSTALLATION AND OPERATING INSTRUCTIONS • NXPLUS C • Revision 02 131/266...
- Page 132 ➭ Determining the bolted joints for the instrument transformers: - 12 kV switchgear version: 2 visible holes next to the through hole - 24 kV switchgear version: 1 visible hole next to the through hole 132/266 Revision 02 • INSTALLATION AND OPERATING INSTRUCTIONS • NXPLUS C • 806-9004.9...
- Page 133 ➭ In order to be able to compensate for tolerances after pushing the instrument transformer cassette into the panel, tighten the hexagon head bolts ⑤ hand-tight. 806-9004.9 • INSTALLATION AND OPERATING INSTRUCTIONS • NXPLUS C • Revision 02 133/266...
- Page 134 The 1-pole voltage transformers can be connected either at the lower or upper terminals of the current transformers, depending on the circuit diagrams. 134/266 Revision 02 • INSTALLATION AND OPERATING INSTRUCTIONS • NXPLUS C • 806-9004.9...
- Page 135 ⑤ Cable lug ⑥ Fixing bracket ⑦ Nut-and-washer assembly M10 ⑧ Plain washer ➭ Connect the connecting cable to the instrument transformers according to the circuit diagrams. 806-9004.9 • INSTALLATION AND OPERATING INSTRUCTIONS • NXPLUS C • Revision 02 135/266...
- Page 136 - Connect the outer pole to the connection bar of phase L2 of the current transformer. - Connect the inner pole to the inner pole of the other 2-pole voltage transformer. 136/266 Revision 02 • INSTALLATION AND OPERATING INSTRUCTIONS • NXPLUS C • 806-9004.9...
- Page 137 ➭ For earthing the steel tubes, fix the steel tubes with metallic cable straps at the marked points. ➭ Then, lead the secondary leads upwards into the low-voltage compartment through the wiring duct ③ . 806-9004.9 • INSTALLATION AND OPERATING INSTRUCTIONS • NXPLUS C • Revision 02 137/266...
- Page 138 Check the minimum distance from the spherical connection bolts to the instrument transformer compartment cover. The instrument transformer cassette must be completely inserted in the metering panel. 138/266 Revision 02 • INSTALLATION AND OPERATING INSTRUCTIONS • NXPLUS C • 806-9004.9...
- Page 139 Mounting the instrument ➭ Mount the instrument transformer compartment covers in the air-insulated metering panel, transformer compartment see page 185, "Removing and mounting the connection compartment covers". cover 806-9004.9 • INSTALLATION AND OPERATING INSTRUCTIONS • NXPLUS C • Revision 02 139/266...
-
Page 140: Replacing Instrument Transformers In The Air-Insulated Metering Panel
➭ Pull the instrument transformer cassette out of the panel and remove it (see page 128, "Installing instrument transformers in the metering panel "). ➭ Mount the instrument transformers (see page 128, "Installing instrument transformers in the metering panel "). 140/266 Revision 02 • INSTALLATION AND OPERATING INSTRUCTIONS • NXPLUS C • 806-9004.9... -
Page 141: Mounting Earthing Accessories In The Air-Insulated Metering Panel
➭ Earthing accessories with wing nuts can be bolted to the earthing point at position ④ ③ To do this, remove the nut M12 and the washer before. 806-9004.9 • INSTALLATION AND OPERATING INSTRUCTIONS • NXPLUS C • Revision 02 141/266... - Page 142 • With wing bolt (art. no. 775 626) Accessories ES SK 1500 Earthing rod (art. no. 761 015) • Length: 1500 mm • Spindle with hexagon (SW19) 142/266 Revision 02 • INSTALLATION AND OPERATING INSTRUCTIONS • NXPLUS C • 806-9004.9...
- Page 143 Earthing rod (art. no. 761 016) • Length: 1500 mm • Spindle with hexagon (SW19) Manufacturer: DEHN + SÖHNE GmbH + Co. KG, Hans Dehn-Str. 1, Postfach 1640, 92306 Neumarkt, Germany, www.dehn.de 806-9004.9 • INSTALLATION AND OPERATING INSTRUCTIONS • NXPLUS C • Revision 02 143/266...
-
Page 144: Installing The Auxiliary Transformer Panel
➭ If required, remove the transport angles of the connection cables, see page 149, "Installing the transformer in the auxiliary transformer panel". ➭ Remove the metal cover of the lateral cable compartment. 144/266 Revision 02 • INSTALLATION AND OPERATING INSTRUCTIONS • NXPLUS C • 806-9004.9... - Page 145 ➭ With a knife, cut an opening into the removed rubber sleeves that fits the diameter of the cable. INFORMATION The rings in the rubber sleeves are not adjusted to the cable diameters, but serve only as rough orientation. 806-9004.9 • INSTALLATION AND OPERATING INSTRUCTIONS • NXPLUS C • Revision 02 145/266...
- Page 146 ➭ If the panel has to be live without connected cables, close the outside-cone bushings in a surge-proof way. ➭ Mount surge-proof caps onto bushings type C (with bolted contact M16). 146/266 Revision 02 • INSTALLATION AND OPERATING INSTRUCTIONS • NXPLUS C • 806-9004.9...
- Page 147 NOTE: Excessive torque can cause damage to the bushing. Tighten the cable plug with a torque according to the manufacturer's specifications (max. 50 Nm). ➭ Remove the lower part of the arcing plate. 806-9004.9 • INSTALLATION AND OPERATING INSTRUCTIONS • NXPLUS C • Revision 02 147/266...
- Page 148 ➭ Install the switchgear termination. ➭ Install the cable compartment cover (see page 184, "Removing and mounting the front cover"). ✔ The installation of the lateral cable connection has been completed. 148/266 Revision 02 • INSTALLATION AND OPERATING INSTRUCTIONS • NXPLUS C • 806-9004.9...
-
Page 149: Installing The Transformer In The Auxiliary Transformer Panel
Connection point of phase L1 ⑤ Connection for secondary leads Fig. 93: Transformer ➭ Remove and dispose of the pre-assembled bolt on phase L1 ① at the transformer. 806-9004.9 • INSTALLATION AND OPERATING INSTRUCTIONS • NXPLUS C • Revision 02 149/266... - Page 150 Correct and exemplary incorrect cable arrangement ➭ Check the position of the connection cables. The black marking at the cables must be completely visible in front of the cable clamp. 150/266 Revision 02 • INSTALLATION AND OPERATING INSTRUCTIONS • NXPLUS C • 806-9004.9...
- Page 151 ➭ Set the transformer ① down on the rails ③ . Roll the transformer into the panel as far as it will go ② . ➭ Push the cross member between the base plate and the rails. After this, fasten the cross member with 4 bolts. 806-9004.9 • INSTALLATION AND OPERATING INSTRUCTIONS • NXPLUS C • Revision 02 151/266...
- Page 152 Removing the transport For panel transport, the connection cables for the transformer are fastened to transport angles angles. Fig. 97: As-delivered condition with removed transformer room cover 152/266 Revision 02 • INSTALLATION AND OPERATING INSTRUCTIONS • NXPLUS C • 806-9004.9...
- Page 153 The cable connection points of the cables must be screened for operation. ➭ Keep the specified minimum distances. ➭ Mount the control caps. Even if the minimum distances are fulfilled, without control caps there is risk of flashover. 806-9004.9 • INSTALLATION AND OPERATING INSTRUCTIONS • NXPLUS C • Revision 02 153/266...
- Page 154 For transport, the secondary leads for connection to the transformer are accommodated in leads the right-hand wiring duct. ➭ Remove the upper cover of the right-hand wiring duct ① . Undo the bolts and remove the cover. 154/266 Revision 02 • INSTALLATION AND OPERATING INSTRUCTIONS • NXPLUS C • 806-9004.9...
- Page 155 (option) to the transformer. ➭ Lead the secondary leads for the transformer through the cable holder. ➭ Connect the secondary leads for the transformer according to the phases. 806-9004.9 • INSTALLATION AND OPERATING INSTRUCTIONS • NXPLUS C • Revision 02 155/266...
- Page 156 ➭ Re-install the cover of the wiring duct. ✔ The installation of the transformer is completed. ➭ Mount the cable compartment cover (see page 185, "Removing and mounting the connection compartment covers"). 156/266 Revision 02 • INSTALLATION AND OPERATING INSTRUCTIONS • NXPLUS C • 806-9004.9...
-
Page 157: Electrical Connections
The rings in the rubber sleeves are not adjusted to the cable diameters, but serve only as rough orientation. ➭ With a knife, cut an opening into the rubber sleeve that fits the diameter of the cable. 806-9004.9 • INSTALLATION AND OPERATING INSTRUCTIONS • NXPLUS C • Revision 02 157/266... - Page 158 ➭ Insert the next floor plate in the notch of the rubber sleeve. The attached floor plate must always be positioned over the existing floor plate. ➭ Fasten the floor plates to each other. ➭ Install additional floor plates. 158/266 Revision 02 • INSTALLATION AND OPERATING INSTRUCTIONS • NXPLUS C • 806-9004.9...
-
Page 159: Connecting Cable T-Plugs
18.2 Connecting cable T-plugs For NXPLUS C switchgear, only cable T-plugs shielded by means of an external conductive layer may generally be used. The suitable cable plugs for outside-cone bushings of interface type C according to EN 50181 are listed in the section "Description" (see page 22, "Cable connection"... - Page 160 (tightening torque for the arcing plates: 20 Nm). The associated floor plate of the floor cover must be installed after installation of a row of cable T-plugs (see page 158, "Installing the floor plates"). 160/266 Revision 02 • INSTALLATION AND OPERATING INSTRUCTIONS • NXPLUS C • 806-9004.9...
- Page 161 ➭ Install the cable clamps. Use cable clamps made of non-magnetizable materials (plastic, aluminum) to fasten the high-voltage cables at the panel's cable bracket, e.g. plastic clamps from id-Technik (cable clamp K26-38 mm, cable clamp K36-52 mm). 806-9004.9 • INSTALLATION AND OPERATING INSTRUCTIONS • NXPLUS C • Revision 02 161/266...
- Page 162 ➭ Bolt the cable compartment cover together with the switchgear frame. Use the bolts with cutting ring supplied with the switchgear. ➭ Install the cable compartment cover (see page 185, "Removing and mounting the connection compartment covers"). 162/266 Revision 02 • INSTALLATION AND OPERATING INSTRUCTIONS • NXPLUS C • 806-9004.9...
- Page 163 ➭ Install the floor plate or termination plate of the floor cover (see page 158, "Installing the floor plates"). ➭ Install the third arcing plate in the same way as the second arcing plate. 806-9004.9 • INSTALLATION AND OPERATING INSTRUCTIONS • NXPLUS C • Revision 02 163/266...
-
Page 164: Installing The Surge Arresters
In combination with installation kit CC 17.5-630 26 500 33 CC 24-630 Tyco Electronics Raychem SMOE 63862 ➭ Install the surge limiters and cable T-plugs according to the manufacturer's specifications. 164/266 Revision 02 • INSTALLATION AND OPERATING INSTRUCTIONS • NXPLUS C • 806-9004.9... -
Page 165: Connecting Auxiliary Circuits
Installation 18.5 Connecting auxiliary circuits The NXPLUS C circuit-breaker switchgear is delivered with operating and control elements as ordered. The operating and control elements as well as the terminals in the switchgear are identified in the same way as in the associated circuit diagrams. - Page 166 Installation ➭ Lay the external cables in the left-hand wiring duct and fix them with cable straps. 166/266 Revision 02 • INSTALLATION AND OPERATING INSTRUCTIONS • NXPLUS C • 806-9004.9...
- Page 167 Fig. 112: Cable groups in right-hand wiring duct ① ③ Current transformer lead Lead of capacitive voltage detecting system ② Voltage transformer lead ④ Laying cable groups keeping the maximum possible distance between them 806-9004.9 • INSTALLATION AND OPERATING INSTRUCTIONS • NXPLUS C • Revision 02 167/266...
- Page 168 4-pole and 10-pole plugs. ➭ Plug the cables for the circuit-breaker and the three-position switch onto the associated terminals. ➭ If required, connect the cables for current and voltage transformers. 168/266 Revision 02 • INSTALLATION AND OPERATING INSTRUCTIONS • NXPLUS C • 806-9004.9...
- Page 169 ➭ Push the STG plug slightly to the screwing side until the latching noses come out of the latching slots of the modular terminal. ➭ Pull the STG plug horizontally out of the VBSTB4 modular terminal. ✔ The STG plug is removed. 806-9004.9 • INSTALLATION AND OPERATING INSTRUCTIONS • NXPLUS C • Revision 02 169/266...
-
Page 170: Installation Of The Ip31D, Ip32D And Ip34D Degree Of Protection Designs
➭ For 450 mm and 600 mm panel width: Install the angle plate on the low-voltage compartment using 4 M5x16 self-tapping bolts. For a 900 mm panel width: Use 5 M5x16 self-tapping bolts. Fig. 116: Installing the angle plate 170/266 Revision 02 • INSTALLATION AND OPERATING INSTRUCTIONS • NXPLUS C • 806-9004.9... - Page 171 Use 4 M5x16 self-tapping bolts for this. Fig. 118: Fastening the connecting plates (view from the rear) Fig. 119: Completed protection against vertically falling water drops 806-9004.9 • INSTALLATION AND OPERATING INSTRUCTIONS • NXPLUS C • Revision 02 171/266...
- Page 172 ⑤ Roof plate ⑥ Angle plate with sealing strap Fig. 121: Protection against vertically falling water drops on the left end panel (view form the rear) 172/266 Revision 02 • INSTALLATION AND OPERATING INSTRUCTIONS • NXPLUS C • 806-9004.9...
-
Page 173: Ip32D - Protection Against Vertically Falling Water Drops For Switchgear Inclined Up To 15
④ Edge protection ⑤ Angle plate Fig. 123: Roof plates with edge protection ④ Edge protection Fig. 124: Edge protection when the switchgear is inclined by 15° 806-9004.9 • INSTALLATION AND OPERATING INSTRUCTIONS • NXPLUS C • Revision 02 173/266... -
Page 174: Ip34D - Protection Against Splashing Water From Any Direction
⑤ Sealing bracket, right side ⑥ Low-voltage compartment ⑦ Angle plate ⑧ Sealing strap for connecting plate Fig. 126: Installing the sealing bracket (example: right end panel) 174/266 Revision 02 • INSTALLATION AND OPERATING INSTRUCTIONS • NXPLUS C • 806-9004.9... -
Page 175: Commissioning
➭ Bolt the cable compartment cover together with the switchgear frame. Use the bolts with cutting ring supplied with the switchgear. ➭ Install the cable compartment cover (see page 185, "Removing and mounting the connection compartment covers"). 806-9004.9 • INSTALLATION AND OPERATING INSTRUCTIONS • NXPLUS C • Revision 02 175/266... -
Page 176: Checking The Accessories
- Double-bit key, diameter of 5 mm (for the voltage transformer disconnector and the door of the low-voltage compartment) - Circuit diagrams - T25 Torx screwdriver 20.3 Instructing operating personnel ➭ Instruct operating personnel in theory and practice of switchgear operation. 176/266 Revision 02 • INSTALLATION AND OPERATING INSTRUCTIONS • NXPLUS C • 806-9004.9... -
Page 177: Functional Test/Test Operation
➭ Measure the idle stroke of both pushbuttons (e.g. by means of a tape measure or vernier caliper). ① Idle stroke (approx. 4...7 mm) ➭ Remove the front cover of the circuit-breaker panel. 806-9004.9 • INSTALLATION AND OPERATING INSTRUCTIONS • NXPLUS C • Revision 02 177/266... - Page 178 ➭ Remove the left-hand expanding rivet ① . Insert the screwdriver (Ø 3 mm) into the left- hand opening. Push the interlocking solenoid back. Push the control gate to the right. The left-hand interlocking solenoid is released again, blocking further movements. 178/266 Revision 02 • INSTALLATION AND OPERATING INSTRUCTIONS • NXPLUS C • 806-9004.9...
- Page 179 ➭ Check whether the mechanical and/or electrical interlocking conditions are fulfilled without using excessive force. ➭ Check the switch position indicators of the three-position switch. 806-9004.9 • INSTALLATION AND OPERATING INSTRUCTIONS • NXPLUS C • Revision 02 179/266...
-
Page 180: Performing The Power-Frequency Voltage Test
For detailed information about cable tests, see page 248, "Cable testing". 180/266 Revision 02 • INSTALLATION AND OPERATING INSTRUCTIONS • NXPLUS C • 806-9004.9... -
Page 181: Primary Injection Test
➭ Note any modifications which may have been made during installation or commissioning in the supplied circuit diagrams. ➭ To have the modifications in the circuit diagrams included, send the corrected circuit diagrams to the regional Siemens representative. 806-9004.9 • INSTALLATION AND OPERATING INSTRUCTIONS • NXPLUS C • Revision 02 181/266... -
Page 182: Applying Operating Voltage
➭ Close the three-position disconnector (the three-position disconnector must be operated in no-load condition, see page 187, "Operation"). ➭ Close the circuit-breaker or superior circuit-breaker. ✔ The busbar of the switchgear is live. 182/266 Revision 02 • INSTALLATION AND OPERATING INSTRUCTIONS • NXPLUS C • 806-9004.9... - Page 183 - Electricians and persons who have been properly instructed in electrical engineering - Persons under the supervision of electricians and persons who have been properly instructed in electrical engineering 806-9004.9 • INSTALLATION AND OPERATING INSTRUCTIONS • NXPLUS C • Revision 02 183/266...
-
Page 184: Recurring Activities
Fig. 130: Example illustration: Air-insulated metering panel Hooking the front cover in ➭ Hook the front cover in from above. ➭ Fasten all bolts down at the front cover. 184/266 Revision 02 • INSTALLATION AND OPERATING INSTRUCTIONS • NXPLUS C • 806-9004.9... -
Page 185: Removing And Mounting The Connection Compartment Covers
Auxiliary transformer panel Transformer Cable compartment cover Instrument transformer compartment cover compartment cover ① Cover ② Bolt M5 (tightening torque: 7 Nm) ➭ Mark the cover with the panel number. 806-9004.9 • INSTALLATION AND OPERATING INSTRUCTIONS • NXPLUS C • Revision 02 185/266... - Page 186 ➭ Fasten the cover at the panel using the bolts ② removed before. Air-insulated metering panel: Fasten each cover at the panel using the bolts ② removed before. 186/266 Revision 02 • INSTALLATION AND OPERATING INSTRUCTIONS • NXPLUS C • 806-9004.9...
-
Page 187: Operation
➭ If the pointer of the ready-for-service indicator is in the red area: - All panel types except circuit-breaker panels and bus sectionalizer panels: Do not operate the switchgear. - Contact the Siemens Service Hotline. 806-9004.9 • INSTALLATION AND OPERATING INSTRUCTIONS • NXPLUS C • Revision 02 187/266... -
Page 188: Control Elements And Indicators
Switch position indicator for the DISCONNECTING function ⑭ Ready-for-service indicator ⑮ Control gate/locking device for DISCONNECTING and EARTHING functions ⑯ Fuse trip indicator ⑰ Interlocking lever for HV HRC fuse compartment 188/266 Revision 02 • INSTALLATION AND OPERATING INSTRUCTIONS • NXPLUS C • 806-9004.9... -
Page 189: Position Indicators
Closing spring charged Closing spring not charged 22.3 Operations counter One operating cycle corresponds to one closing operation and one opening operation of the circuit-breaker. Number of operating cycles 806-9004.9 • INSTALLATION AND OPERATING INSTRUCTIONS • NXPLUS C • Revision 02 189/266... -
Page 190: Ready-For-Service Indicator
• Charging the spring No switching operations • EARTHING operations possible. Only possible if the switch- • DE-EARTHING Precondition: Spring energy disconnector is open. store not charged. 190/266 Revision 02 • INSTALLATION AND OPERATING INSTRUCTIONS • NXPLUS C • 806-9004.9... -
Page 191: Locking Device For Pushbutton
- Circuit-breaker switched to CLOSED position. Preconditions • Three-position disconnector in "READY-TO-EARTH" position • Circuit-breaker in CLOSED position • Shackle diameter of the padlock: Min. 6 mm. 806-9004.9 • INSTALLATION AND OPERATING INSTRUCTIONS • NXPLUS C • Revision 02 191/266... -
Page 192: Service Flap
➭ Carefully pull out the service flap ① by the handle ③ . ① Service flap ② Lock ③ Handle Fig. 137: Opening the service flap ✔ The service flap is open. The handle folds in automatically. 192/266 Revision 02 • INSTALLATION AND OPERATING INSTRUCTIONS • NXPLUS C • 806-9004.9... -
Page 193: Operating Tools
Use of incorrect operating levers Using incorrect operating levers can damage or deactivate the safety equipment of the switchgear. ➭ Use only the original Siemens operating levers corresponding to the switchgear type. Operating lever for slow motion mechanism Fig. 138: Operating lever for Fig. - Page 194 To retrofit, remove the setscrew ① from the standard operating lever. ① Setscrew Fig. 142: Retrofitting to an anti- reflex lever Hand crank The hand crank is used for charging the operating spring. Fig. 143: Hand crank 194/266 Revision 02 • INSTALLATION AND OPERATING INSTRUCTIONS • NXPLUS C • 806-9004.9...
-
Page 195: Operating The Circuit-Breaker
The hand crank supplied features a freewheel function. The freewheel function disconnects an inserted hand crank from the charging system if the motor charges the closing spring. Fig. 144: Hand crank 806-9004.9 • INSTALLATION AND OPERATING INSTRUCTIONS • NXPLUS C • Revision 02 195/266... -
Page 196: Circuit-Breaker Test Operation
✔ The closing spring is recharged automatically. ➭ Check whether the position indication "circuit-breaker CLOSED" appears. ➭ Open the circuit-breaker. ➭ Check whether the position indication "circuit-breaker OPEN" appears. 196/266 Revision 02 • INSTALLATION AND OPERATING INSTRUCTIONS • NXPLUS C • 806-9004.9... -
Page 197: Operating The Three-Position Disconnector
✔ The interrogation lever and the control gate return to their initial position. ➭ For air-insulated metering panel: Execute the same operations with the second three- position switch. 806-9004.9 • INSTALLATION AND OPERATING INSTRUCTIONS • NXPLUS C • Revision 02 197/266... -
Page 198: Switching The Three-Position Disconnector From Open To Ready-To-Earth Position
✔ The opening for the READY-TO-EARTH operation is free. ➭ Insert the operating lever for the READY-TO-EARTH operation (red handles) into the actuating opening and turn 180° counterclockwise. ✔ The three-position disconnector is open. 198/266 Revision 02 • INSTALLATION AND OPERATING INSTRUCTIONS • NXPLUS C • 806-9004.9... -
Page 199: Operating The Three-Position Switch With Motor-Operating Mechanism
➭ Attaching: Align the operating lever with the emergency adapter to the operating shaft based on the inner slot of the emergency adapter. ➭ Switching: Use the outer slots of the emergency adapter to identify the switching position. 806-9004.9 • INSTALLATION AND OPERATING INSTRUCTIONS • NXPLUS C • Revision 02 199/266... - Page 200 The earthing switch is in the OPEN position. ➭ DISCONNECTING function: Turn the operating lever with emergency adapter counterclockwise until the outer slots on the emergency adapter are both horizontal. 200/266 Revision 02 • INSTALLATION AND OPERATING INSTRUCTIONS • NXPLUS C • 806-9004.9...
- Page 201 ➭ Pull the emergency adapter off of the operating lever. Place the emergency adapter in the service flap. ✔ The three-position switch can be operated electrically again. Switching after Perform additional switching operations by hand without the emergency adapter. emergency operation 806-9004.9 • INSTALLATION AND OPERATING INSTRUCTIONS • NXPLUS C • Revision 02 201/266...
-
Page 202: Operating The Three-Position Switch-Disconnector
➭ Fit the padlock (optional) on the locking device in the desired position (see page 190, "Control gate with locking device"). ✔ The "spring charged" indicator still shows "spring charged". 202/266 Revision 02 • INSTALLATION AND OPERATING INSTRUCTIONS • NXPLUS C • 806-9004.9... -
Page 203: Switching The Three-Position Switch-Disconnector From Closed To Open Position
The DISCONNECTING operation of the three-position switch-disconnector can be performed by means of a motor operating mechanism (option). Three-position switch-disconnectors with motor operating mechanism can also be controlled from remote depending on their design. 806-9004.9 • INSTALLATION AND OPERATING INSTRUCTIONS • NXPLUS C • Revision 02 203/266... -
Page 204: Protection Tripping Of The Switch-Fuse Combination
➭ Switch the switching device to EARTHED position. readiness ➭ Replace all HV HRC fuse-links (see page 212, "Replacing HV HRC fuse-links"). The fuse-links may also be damaged if their striker was not tripped. 204/266 Revision 02 • INSTALLATION AND OPERATING INSTRUCTIONS • NXPLUS C • 806-9004.9... -
Page 205: Work-In-Progress Earth
31.5 kA for 3 s, is located behind the cover of the wiring duct on the right. To use the connection point, remove the cover of the wiring duct. 806-9004.9 • INSTALLATION AND OPERATING INSTRUCTIONS • NXPLUS C • Revision 02 205/266... - Page 206 20 mm / CB 36-630(1250); 25 mm CC 36-630(1250)CB 42-1250/3, CC 42-2500/3 Tyco Electronics Raychem RSTI-68EA20RSTI- 20 mm / RSTI-58xx; RSTI-CC-58xxRSTI-68xx; 68EA25 25 mm RSTI-CC-68xxRSTI-395x; RSTI-CC-395xRSTI-595x; RSTI-CC-595xRSTI-695x; RSTI-CC-695x 206/266 Revision 02 • INSTALLATION AND OPERATING INSTRUCTIONS • NXPLUS C • 806-9004.9...
-
Page 207: Verification Of Safe Isolation From Supply
➭ Insert the LRM voltage indicator consecutively into the plug-in sockets of the phases L1, L2 and L3. ✔ If the LRM voltage indicator does not flash or light up in any of the 3 phases, the phases are not live. 806-9004.9 • INSTALLATION AND OPERATING INSTRUCTIONS • NXPLUS C • Revision 02 207/266... - Page 208 The marking for documentation of the repeat test of the interface condition is located next to the LRM plug-in sockets: Fig. 149: Documentation to repeat test of interface condition 208/266 Revision 02 • INSTALLATION AND OPERATING INSTRUCTIONS • NXPLUS C • 806-9004.9...
-
Page 209: Vois And Capdis Indications
Cover closed Cover opened ① LC display ② Test socket L1 ③ Test socket L2 ④ Earth socket ⑤ Test socket L3 Fig. 153: VOIS+: Cover opened 806-9004.9 • INSTALLATION AND OPERATING INSTRUCTIONS • NXPLUS C • Revision 02 209/266... - Page 210 Overvoltage present (lights up permanently). U ≠ 0 U = 0 Indication: "ERROR" e.g. in case of missing auxiliary voltage. LED does not light up, LED lights up 210/266 Revision 02 • INSTALLATION AND OPERATING INSTRUCTIONS • NXPLUS C • 806-9004.9...
-
Page 211: Wega Indications
• Voltage present and integrated repeat test passed. • Voltage signal too high. U ≠ 0 U = 0 • Auxiliary voltage missing. LED does not light up, LED lights up 806-9004.9 • INSTALLATION AND OPERATING INSTRUCTIONS • NXPLUS C • Revision 02 211/266... -
Page 212: Replacing Hv Hrc Fuse-Links
Can damage the fuse box or the switchgear. ➭ Use only fuse-links tested by Siemens, which are listed in the transformer protection table. ➭ The use of other fuse-links must be checked by Siemens in advance. Contact the Siemens Service Hotline. - Page 213 ➭ Push the cover of the HV HRC fuse-link (on the opposite side of the housing cover) aside, and pull the HV HRC fuse-link out of the fuse slide. 806-9004.9 • INSTALLATION AND OPERATING INSTRUCTIONS • NXPLUS C • Revision 02 213/266...
- Page 214 ➭ Hook the HV HRC fuse compartment cover in, see page 185, "Removing and mounting the connection compartment covers". ➭ Release the interlocking lever. ✔ Replacing the HV HRC fuse-links is completed. 214/266 Revision 02 • INSTALLATION AND OPERATING INSTRUCTIONS • NXPLUS C • 806-9004.9...
-
Page 215: Operating The Feeder Voltage Transformer
✔ The position indicator shows the EARTHED position. ➭ Refit and lock the padlock. ➭ Remove the double-bit key. ✔ The voltage transformer is isolated from high-voltage, earthed, and secured against reclosing. 806-9004.9 • INSTALLATION AND OPERATING INSTRUCTIONS • NXPLUS C • Revision 02 215/266... -
Page 216: Switching On The Feeder Voltage Transformer
✔ The voltage transformer is connected to high voltage and secured against unauthorized opening. ➭ Re-install the connection compartment cover (see page 185, "Removing and mounting the connection compartment covers"). 216/266 Revision 02 • INSTALLATION AND OPERATING INSTRUCTIONS • NXPLUS C • 806-9004.9... -
Page 217: Short Instructions
The interrogation lever and the control gate ✔ The circuit-breaker is in the CLOSED position. The feeder is connected to the busbar. move to their initial position. 806-9004.9 • INSTALLATION AND OPERATING INSTRUCTIONS • NXPLUS C • Revision 02 217/266... - Page 218 Remove the operating lever. Turn it counterclockwise 180°. ✔ The interrogation lever and the control gate move to their initial position. ✔ The disconnector is in the OPEN position. 218/266 Revision 02 • INSTALLATION AND OPERATING INSTRUCTIONS • NXPLUS C • 806-9004.9...
- Page 219 Fit a padlock. ✔ The interrogation lever and the control gate move to their initial position. ✔ The circuit-breaker is in the CLOSED position. The feeder is earthed. 806-9004.9 • INSTALLATION AND OPERATING INSTRUCTIONS • NXPLUS C • Revision 02 219/266...
- Page 220 The interrogation lever and the control gate ✔ The actuating opening of the earthing ✔ The disconnector is in the OPEN position. move to their initial position. switch is open. 220/266 Revision 02 • INSTALLATION AND OPERATING INSTRUCTIONS • NXPLUS C • 806-9004.9...
- Page 221 ➭ Remove the operating lever. ➭ Push the locking device upwards. Fit a padlock. ✔ The interrogation lever and the control gate return to their initial position 806-9004.9 • INSTALLATION AND OPERATING INSTRUCTIONS • NXPLUS C • Revision 02 221/266...
- Page 222 The circuit-breaker opens automatically before the disconnector opens. ✔ The earthing switch is in the OPEN position. The circuit-breaker is in the OPEN position. The feeder is de-earthed. 222/266 Revision 02 • INSTALLATION AND OPERATING INSTRUCTIONS • NXPLUS C • 806-9004.9...
-
Page 223: Operating Vacuum Contactor Panels
The vacuum contactor is in the switch-disconnector opens ✔ The switch-disconnector is in the OPEN position The feeder is automatically. the OPEN position. disconnected from the busbar. 806-9004.9 • INSTALLATION AND OPERATING INSTRUCTIONS • NXPLUS C • Revision 02 223/266... - Page 224 The control gate moves to its initial position. ✔ The actuating opening of the earthing ✔ The switch-disconnector is in the OPEN switch opens automatically. position. The feeder is de-earthed. 224/266 Revision 02 • INSTALLATION AND OPERATING INSTRUCTIONS • NXPLUS C • 806-9004.9...
-
Page 225: Operating The Disconnector Panel
✔ The disconnector is in the OPEN the control gate return to their the disconnector is free. position. The feeder is initial position disconnected from the busbar. 806-9004.9 • INSTALLATION AND OPERATING INSTRUCTIONS • NXPLUS C • Revision 02 225/266... -
Page 226: Operating Ring-Main Panels And Metering Panels (Gas-Insulated)
This chapter describes the manual operation of the following panel types: • Ring-main panel • Metering panel (gas-insulated) The operations are shown using a ring-main panel as an example. 226/266 Revision 02 • INSTALLATION AND OPERATING INSTRUCTIONS • NXPLUS C • 806-9004.9... - Page 227 The actuating opening of the disconnector ✔ The control gate moves to its initial position. is free. ✔ The disconnector is in the OPEN position. The feeder is disconnected from the busbar. 806-9004.9 • INSTALLATION AND OPERATING INSTRUCTIONS • NXPLUS C • Revision 02 227/266...
- Page 228 The control gate moves to its initial position. ✔ The actuating opening of the earthing ✔ The disconnector is in the OPEN position. switch opens automatically. The feeder is de-earthed. 228/266 Revision 02 • INSTALLATION AND OPERATING INSTRUCTIONS • NXPLUS C • 806-9004.9...
-
Page 229: Operating The Bus Sectionalizer Panel With 2 Three-Position Disconnectors
The interrogation lever and the control gate ✔ The right-hand disconnector is in the move to their initial position. ✔ The circuit-breaker is in the CLOSED CLOSED position. position. The busbar is coupled. 806-9004.9 • INSTALLATION AND OPERATING INSTRUCTIONS • NXPLUS C • Revision 02 229/266... - Page 230 The interrogation lever and the control gate ✔ The actuating opening of the right-hand ✔ The right-hand disconnector is in the OPEN move to their initial position. disconnector is open. position. 230/266 Revision 02 • INSTALLATION AND OPERATING INSTRUCTIONS • NXPLUS C • 806-9004.9...
- Page 231 The right-hand disconnector is in the move to their initial position. ✔ The circuit-breaker is in the CLOSED READY-TO-EARTH position. position. The left-hand busbar system is earthed. 806-9004.9 • INSTALLATION AND OPERATING INSTRUCTIONS • NXPLUS C • Revision 02 231/266...
- Page 232 The interrogation lever and the control gate ✔ The actuating opening of the right-hand ✔ The right-hand disconnector is in the OPEN move to their initial position. earthing switch is open. position. 232/266 Revision 02 • INSTALLATION AND OPERATING INSTRUCTIONS • NXPLUS C • 806-9004.9...
- Page 233 Turn it clockwise 180°. ✔ The actuating opening of the right-hand ✔ The right-hand disconnector is in the disconnector is open. CLOSED position. 806-9004.9 • INSTALLATION AND OPERATING INSTRUCTIONS • NXPLUS C • Revision 02 233/266...
- Page 234 ✔ The circuit-breaker is in the CLOSED TO-EARTH position. position. The right-hand busbar system is earthed. ➭ Push the locking device upwards. Fit a padlock. 234/266 Revision 02 • INSTALLATION AND OPERATING INSTRUCTIONS • NXPLUS C • 806-9004.9...
- Page 235 180°. ✔ The actuating opening of the right-hand ✔ The right-hand disconnector is in the OPEN disconnector is open. position. 806-9004.9 • INSTALLATION AND OPERATING INSTRUCTIONS • NXPLUS C • Revision 02 235/266...
-
Page 236: Operating The Circuit-Breaker Panel With Busbar Earthing Switch
180°. ✔ The actuating opening of the left-hand ✔ The left-hand disconnector is in the READY- earthing switch is open. TO-EARTH position. 236/266 Revision 02 • INSTALLATION AND OPERATING INSTRUCTIONS • NXPLUS C • 806-9004.9... - Page 237 Turn it counterclockwise 180°. ✔ The actuating opening of the left-hand ✔ The left-hand disconnector is in the OPEN earthing switch is open. position. 806-9004.9 • INSTALLATION AND OPERATING INSTRUCTIONS • NXPLUS C • Revision 02 237/266...
- Page 238 ✔ The circuit-breaker is in the CLOSED position. position. The busbar system is earthed. ➭ Push the locking device upwards. Fit a padlock. 238/266 Revision 02 • INSTALLATION AND OPERATING INSTRUCTIONS • NXPLUS C • 806-9004.9...
- Page 239 The interrogation lever and the control gate ✔ The actuating opening of the left-hand ✔ The left-hand disconnector is in the OPEN move to their initial position. disconnector is open. position. 806-9004.9 • INSTALLATION AND OPERATING INSTRUCTIONS • NXPLUS C • Revision 02 239/266...
- Page 240 The control gate moves to its initial position. ✔ The left-hand disconnector is in the OPEN ✔ The circuit-breaker is in the OPEN position. position. The earthing of the feeder has been decoupled. 240/266 Revision 02 • INSTALLATION AND OPERATING INSTRUCTIONS • NXPLUS C • 806-9004.9...
- Page 241 The left-hand disconnector is in the OPEN earthing switch is open. position. ➭ Remove the operating lever. ✔ The interrogation lever and the control gate move to their initial position. 806-9004.9 • INSTALLATION AND OPERATING INSTRUCTIONS • NXPLUS C • Revision 02 241/266...
-
Page 242: Switching The Air-Insulated Metering Panel With Two Three-Position Disconnectors
The actuating and the actuating opening for the position disconnector shows the CLOSED opening is closed. DISCONNECTING function is open. position. The busbars are coupled. 242/266 Revision 02 • INSTALLATION AND OPERATING INSTRUCTIONS • NXPLUS C • 806-9004.9... - Page 243 The actuating and the actuating opening for the position disconnector shows the OPEN position. opening is closed. DISCONNECTING function is open. The busbars are decoupled. 806-9004.9 • INSTALLATION AND OPERATING INSTRUCTIONS • NXPLUS C • Revision 02 243/266...
- Page 244 The actuating position and the actuating opening for the position disconnector shows the EARTHED opening is closed. EARTHING function is open. position. The instrument transformer group is earthed. 244/266 Revision 02 • INSTALLATION AND OPERATING INSTRUCTIONS • NXPLUS C • 806-9004.9...
- Page 245 The actuating and the actuating opening for the EARTHING disconnector shows the OPEN position. opening is closed. function is open. The instrument transformer group is de-earthed. 806-9004.9 • INSTALLATION AND OPERATING INSTRUCTIONS • NXPLUS C • Revision 02 245/266...
-
Page 246: Operating The Auxiliary Transformer Panel And Switch-Disconnector Panel
Open the switch-disconnector to disconnect the feeder from the busbar. ✔ The switch-disconnector is in the OPEN position. "Spring charged" indicator shows "spring not charged". The feeder is disconnected from the busbar. 246/266 Revision 02 • INSTALLATION AND OPERATING INSTRUCTIONS • NXPLUS C • 806-9004.9... - Page 247 The control gate moves to its will go. ✔ The actuating opening for the initial position. earthing switch is open. ✔ The switch-disconnector is in the OPEN position. The feeder is de-earthed. 806-9004.9 • INSTALLATION AND OPERATING INSTRUCTIONS • NXPLUS C • Revision 02 247/266...
-
Page 248: Cable Testing
• Circuit-breaker in the OPEN position. • Three-position switch in the OPEN position. • Voltage transformer disconnector in the EARTHED position (see page 215, "Operating the feeder voltage transformer"). 248/266 Revision 02 • INSTALLATION AND OPERATING INSTRUCTIONS • NXPLUS C • 806-9004.9... - Page 249 ➭ Perform voltage test. Perform the test according to the recommendations of the cable manufacturers and the operator’s specifications. ➭ To return to the initial situation, proceed in reverse order. 806-9004.9 • INSTALLATION AND OPERATING INSTRUCTIONS • NXPLUS C • Revision 02 249/266...
-
Page 250: Service Information
Service information Service information Maintenance The NXPLUS C switchgear, the circuit-breakers in use and the vacuum contactors do not require maintenance under normal operating conditions. The switchgear vessel represents a hermetically sealed pressure system according to IEC 62271-200. Maintenance of the insulating gas is not required. -
Page 251: Checks And Maintenance Work In Case Of Special Operating Conditions
These special operating conditions can include factors such as severe or frequent condensation, dusty air or the like. If corrosion or similar problems are found during a check, contact the Siemens Service Hotline (see page 261, "Siemens Service Hotline"). DANGER Life-endangering voltage Will cause death, injury or considerable property damage. -
Page 252: Checks On Three-Position Switch Operating Mechanisms
• Switch-disconnector panel Panel types • Vacuum contactor panel • Bus sectionalizer panel • Auxiliary transformer panel • Metering panel (gas-insulated) • Disconnector panel • Air-insulated metering panel 252/266 Revision 02 • INSTALLATION AND OPERATING INSTRUCTIONS • NXPLUS C • 806-9004.9... -
Page 253: Visual Check Of Circuit-Breaker Operating Mechanism
➭ Perform electrical and mechanical functional test. ➭ Check the firm seating of all terminal connections (rectangular markings). ➭ Check the lubrication of all sliding surfaces (circular markings). Circuit-breaker 34E44 and 3AE43 806-9004.9 • INSTALLATION AND OPERATING INSTRUCTIONS • NXPLUS C • Revision 02 253/266... -
Page 254: Visual Check Of Vacuum Contactor Operating Mechanism
Lift the lever of the cable compartment interlock, and release it. The lever must move down again automatically. Connection compartment interlock Panels with circuit-breaker All other panels 254/266 Revision 02 • INSTALLATION AND OPERATING INSTRUCTIONS • NXPLUS C • 806-9004.9... -
Page 255: Fuse Tripping Check
• Vacuum contactor panel • Metering panel (gas-insulated) ① Terminal connections ② Auxiliary switches ③ Tripping rocker ➭ Check the firm seating of all terminal connections ① . 806-9004.9 • INSTALLATION AND OPERATING INSTRUCTIONS • NXPLUS C • Revision 02 255/266... -
Page 256: Cleaning, Greasing And Lubricating The Operating Mechanisms
Use the following aids for the spring-operated mechanism, the spring-operated/stored-energy operating mechanism mechanism and the slow motion mechanism of the three-position switch: • For bearings, sliding surfaces: Molykote (R) MKL-N Grease 256/266 Revision 02 • INSTALLATION AND OPERATING INSTRUCTIONS • NXPLUS C • 806-9004.9... -
Page 257: Test Operation Of The Operating Mechanisms
• The precise designation of the device or component, if applicable on the basis of the information and illustrations in the associated instructions, a drawing, sketch or circuit diagram. 806-9004.9 • INSTALLATION AND OPERATING INSTRUCTIONS • NXPLUS C • Revision 02 257/266... -
Page 258: Annex
③ LED status indicator ⑧ Lower module plug -X1.2 ④ Serial number in clear text ⑨ Lower module plug -X1.1 ⑤ Identification of terminals of lower plugs 258/266 Revision 02 • INSTALLATION AND OPERATING INSTRUCTIONS • NXPLUS C • 806-9004.9... -
Page 259: Technical Data
• A command is applied to one of the active command inputs (disconnector CLOSED / disconnector OPEN / earthing switch CLOSED / earthing switch OPEN) for more than 5 minutes, although the associated switching operation was completed successfully. 806-9004.9 • INSTALLATION AND OPERATING INSTRUCTIONS • NXPLUS C • Revision 02 259/266... -
Page 260: Terminal Assignment Of Motor Control Unit
Floating contact, reverse interlocking to circuit-breaker (NC contact) Depending on the panel type and the necessary motor direction of rotation, the assignment of the motor direction of rotation can vary. 260/266 Revision 02 • INSTALLATION AND OPERATING INSTRUCTIONS • NXPLUS C • 806-9004.9... -
Page 261: Siemens Service Hotline
- +55 11 4585 8040 - suporte.br@siemens.com - Local working hours • Customer Support India (for Indian market only) - +91 1 800 419 7477 - service.energy.in@siemens.com - Local working hours 806-9004.9 • INSTALLATION AND OPERATING INSTRUCTIONS • NXPLUS C • Revision 02 261/266... -
Page 262: Index
Circuit-breaker, closing ..........195 Floor cover ..............157 Circuit-breaker, design ............ 15 Floor openings, fixing points ........... 67 Circuit-breaker, locking device ........191 Floor, construction............65 Circuit-breaker, opening..........195 262/266 Revision 02 • INSTALLATION AND OPERATING INSTRUCTIONS • NXPLUS C • 806-9004.9... - Page 263 Insulating gas ..............61 PPE................... 8 Interlocking solenoids, unlocking ........178 Preparing the switchgear room for installation ....64 Interlocks ............... 34 Primary injection test ............ 181 806-9004.9 • INSTALLATION AND OPERATING INSTRUCTIONS • NXPLUS C • Revision 02 263/266...
- Page 264 Undervoltage release ............42 Unloading............... 81 Technical data ..............38 Unloading, switchgear ............ 80 Technical data, air-insulated metering panel....45 Technical data, auxiliary transformer panel .....44 Vacuum circuit-breaker ........... 39 264/266 Revision 02 • INSTALLATION AND OPERATING INSTRUCTIONS • NXPLUS C • 806-9004.9...
- Page 265 WEGA................211 HR/LRM plug-in sockets ..........207 Wooden pallets, removing ..........81 Visual check, operating mechanisms ......252 Work-in-progress earth ..........205 Visual check, three-position switch ....... 252 806-9004.9 • INSTALLATION AND OPERATING INSTRUCTIONS • NXPLUS C • Revision 02 265/266...
- Page 266 Imprint Siemens AG Energy Management Medium Voltage & Systems Switchgear Factory Frankfurt Carl-Benz-Str. 22 D-60386 Frankfurt © Siemens AG 2018 266/266 Revision 02 • INSTALLATION AND OPERATING INSTRUCTIONS • NXPLUS C • 806-9004.9...